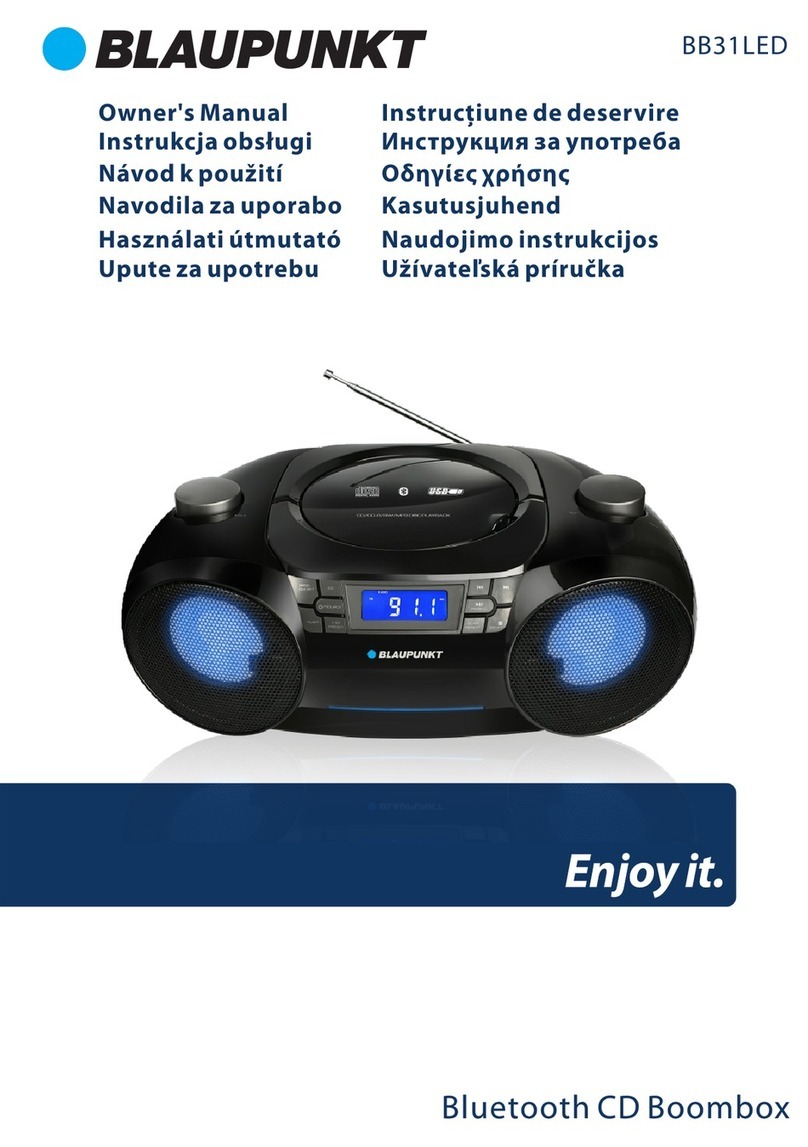
RIP TUNES CDB-237BT User manual

USER’S GUIDE
MANUAL DE USUARIO/ MODE D’EMPLOI
MODEL: CDB-237BT
CD MP3 Stereo Boombox with AM FM Radio
CD MP3 estéreo Boombox con radio AM FM
Boombox stéréo CD MP3 avec radio AM FM

–2–
ENGLISH ESPAÑOL FRANÇAIS
TABLE OF CONTENTS
Safety Precautions ........................................................... 3
FCC Warnings.................................................................... 4
Introduction..................................................................... 5
Product Diagram .............................................................. 5
Modes and Functions........................................................ 8
Care and Maintenance ...................................................... 9
Troubleshooting ............................................................. 10
Technical Specifications ................................................. 10
Technical Support........................................................... 10
Limited Warranty............................................................ 11
Español .......................................................................... 12
Français.......................................................................... 24

–3–
ENGLISHESPAÑOLFRANÇAIS
SAFETY PRECAUTIONS
READ THIS MANUAL CAREFULLY BEFORE OPERATING AND RESERVE IT FOR FU-
TURE REFERENCE. REFER TO IT WHEN ENCOUNTERING ANY OPERATING PROB-
LEM.
1. WARNING: To reduce the risk of electric shock or damage to the player’s main
speakers, do not disassemble the player. There are no user-serviceable parts
inside. Contact technical support for further assistance.
2. WARNING: To prevent fire or electric shock hazard, do not expose the player to
rain or moisture (including drips or splashes). Objects filled with liquids, such
as vases and water bottles, should not be placed on or near the player. Do
not touch the unit with wet hands.
3. WARNING: Do not expose the radio/cassette player or batteries to excessive
heat, such as direct sunlight, fire, or other heat sources.
4. WARNING: Use only the attachments/accessories provided by the manufac-
turer, except for a standard 3.5 mm (1/8”) auxiliary cable.
5. Do not place objects on top of the player.
6. Do not place the player on an unstable table, stand, tripod, bracket, or cart.
The player may fall, resulting in possible damage or injury.
7. Unplug the power from the outlet during lightning storms or when the player
is not in use.
8. Pay attention to the safety purpose of the polarized or grounding-type plug.
A polarized plug has two blades with one wider than the other. A grounding
type plug has two blades and a third grounding prong. The wide blade and/
or the third prong is provided for your safety. If the provided plug does not fit
into your outlet, consult an electrician to replace the obsolete outlet.
9. Protect the POWER cord from being walked on or pinched particularly at
plugs, convenience receptacles, and the point where they exit from the player.
10. Dispose of this player properly, respecting your local laws for electronics and
battery disposal.
11. DO NOT STARE INTO CD PLAYER LASER BEAM.
WARNING: THE POWER CORD ON THIS PRODUCT CONTAINS LEAD, A CHEM-
ICAL KNOWN TO THE STATE OF CALIFORNIA TO CAUSE CANCER AND BIRTH
DEFECTS OR OTHER REPRODUCTIVE HARM. WASH HANDS AFTER HANDLING.

–4–
ENGLISH ESPAÑOL FRANÇAIS
FCC WARNINGS
This device complies with part 15 of the FCC Rules. Operation is subject to the
following two conditions: (1) This device may not cause harmful interference,
and (2) this device must accept any interference received, including interfer-
ence that may cause undesired operation.
Any changes or modifications not expressly approved by the party responsible
for compliance could void the user’s authority to operate the equipment.
Note: This equipment has been tested and found to comply with the limits for
a Class B digital device, pursuant to part 15 of the FCC Rules. These limits are
designed to provide reasonable protection against harmful interference in a
residential installation. This equipment generates uses and can radiate radio
frequency energy and, if not installed and used in accordance with the instruc-
tions, may cause harmful interference to radio communications. However,
there is no guarantee that interference will not occur in a particular installa-
tion. If this equipment does cause harmful interference to radio or television
reception, which can be determined by turning the equipment off and on, the
user is encouraged to try to correct the interference by one or more of the fol-
lowing measures:
• Reorient or relocate the receiving antenna.
• Increase the separation between the equipment and receiver.
• Connect the equipment into an outlet on a circuit dierent from that to which
the receiver is connected.
• Consult the dealer or an experienced radio/TV technician for help.
RF WARNING FOR PORTABLE DEVICE:
The device has been evaluated to meet general RF exposure requirement.
The device can be used in portable exposure condition without restriction.
THE LIGHTNING FLASH WITH ARROWHEAD SYM-
BOL, WITHIN AN EQUILATERAL TRIANGLE, IS IN-
TENDED TO ALERT THE USER TO THE PRESENCE OF
NON-INSULATED “DANGEROUS VOLTAGE” WITHIN
THE PRODUCT’S ENCLOSURE THAT MAY BE OF
SUFFICIENT MAGNITUDE TO CONSTITUTE A RISK
OF ELECTRIC SHOCK TO PERSONS.
TO REDUCE THE RISK OF ELECTRIC
SHOCK, DO NOT REMOVE THE
FRONT OR REAR COVER. NO USER
SERVICEABLE PARTS ARE INSIDE.
REFER SERVICING TO QUALIFIED
SERVICE PERSONNEL.
THE EXCLAMATION POINT WITHIN
AN EQUILATERAL TRIANGLE IS IN-
TENDED TO ALERT THE USER TO THE
PRESENCE OF IMPORTANT OPERAT-
ING AND MAINTENANCE (SERVICING)
INSTRUCTIONS IN THE LITERATURE
ACCOMPANYING THE APPLIANCE.
do not open.
Risk of electric shock,
WARNING

–5–
ENGLISHESPAÑOLFRANÇAIS
INTRODUCTION
Congratulations on your purchase of this CD MP3 Stereo Boombox
with AM FM Radio! For your safety, and to get the most enjoyment from
your player, please completely read these instructions provided.
FEATURES
• CD MP3 Disc Playback (CD, CD-R/RW)
• AM/FM Radio
• Wireless Audio - Streaming from your Bluetooth® devices
• SD/USB/ Ports for MP3 Files Multimedia Player
• AUX in, 3.5 mm line in Jack - Connect your Devices
• Program 30 radio stations, 20 CD tracks or 99 MP3 tracks
• Stereo Speakers
• LED color Flashing Lights with the Music Beat (on/o option)
• Folding Carry Handle
• Telescopic Antenna
• 4 Digit LED Display
• Runs an AC Power 120V or 6x C batteries
• Remote Control
WHATS IN THE BOX
• Your boombox
• This user manual
• A remote control
• A power cable
BATTERY INSTALLATION (BATTERIES NOT INCLUDED)
• The remote takes 2 AAA Batteries. When using the remote, be sure to
point it at the front of the boombox.
• The boombox takes 6 C batteries but also plugs into the wall.
To install batteries into the remote or the boombox, open the battery cover
on the back of the remote, or on the bottom of the boombox). Then, match
the “+” and “–” signs with the batteries. Replace the battery cover. If the
boombox unit is not used for an extended period of time, remove the bat-
teries before storing it.

–6–
ENGLISH ESPAÑOL FRANÇAIS
PRODUCT DIAGRAM
MICRO
SD

–7–
ENGLISHESPAÑOLFRANÇAIS
1. Handle Collapsible carry handle.
2. CD Open/Eject: Press to open the lid and load/replace a CD.
3. Function /mode button: This selects the dierent modes of the boom-
box. The selected mode will appear on the screen (CD/USB/CARD/FM/
AUX/Bluetooth).
• Bluetooth: The “BT” Light will be
on when this mode is selected. This
mode plays back audio wirelessly
from Bluetooth devices. For example, you can play a song from your
phone over the speakers of the boombox.
• AUX: This is for using the 3.5mm (1/8”) audio input on the side of the
boombox.
• CD: Play a standard audio CD or MP3 CD.
• Card: Playback MP3s from a USB/Thumb drive or Micro SD Card
(also known as TF card).
4.
LED Display
5.
Repeat/Program: Press once to repeat the current song, twice to repeat
all songs and again to shule. In radio mode, this stores the current sta-
tion into memory.
6. Stop / Band: Stop Playback or (in radio mode) switch between AM/FM.
7. Play / Pause: Play or Pause in CD/USB/CARD/BT mode.
8. Prev Go to previous track; long press to fast reverse. In radio mode, this
changes stations.
9. Next Go to next track; long press for fast forward. In radio mode, this
changes stations.
10. Power Switch: Switches the unit on or o and toggles LED mode.
11. Volume control: Can be used to adjust the volume at all times.
12. USB / SD Card: Insert a thumb drive (USB) or TF / SD card for MP3
playback here, then enter USB / Card mode using the function button
(3).
13. Headphones ( ): You can connect headphones or earbuds here.
The main speakers will be disabled while headphones are connected.
14. AUX IN: You can connect an audio source that uses a 1/8” (3.5mm)
cable here, such as a mobile device or stand-alone MP3 player.
15. POWER: Connect the power cable here.

–8–
ENGLISH ESPAÑOL FRANÇAIS
MODES AND FUNCTIONS
PLAYING A CD
The radio powers on to “CD” mode by default. If the mode is switched,
you can get back to CD mode by pressing the FUNCTION button until
“CD” appears on the screen. Press the “Open/Close” on the CD lid to
insert a CD. Gently close the lid until it clicks in place. CDs will begin
playing automatically. Use the Play/Pause or Stop buttons as needed.
Prev/Next will switch tracks/songs. The Repeat/Program button will
cycle between these 3 modes:
1. Repeat the current song 2. Repeat all songs 3. Shuffle/random
LISTENING TO THE RADIO
Press the FUNCTION button until “FM” appears on the screen. For FM,
use the telescopic antenna to adjust signal reception. If using the radio
for the first time in your location, long press the PLAY/PAUSE/SCAN
button to automatically scan and store radio stations. You can now use
the Prev/Next buttons to move between radio stations.
To use AM radio, press the STOP/AM-FM button to switch to AM. Press
the PLAY/PAUSE/SCAN button to scan for radio stations just as you
would for FM. The antenna is not required for AM.
To save a radio station to memory, press the Program button. You
can then save the station as P01, P02, P03, etc. Select the “P” number
with Prev/Next and press Program again to save the station in that
slot. While listening to one of your programmed stations (like “P01”) the
Prev/Next buttons can be used to select any other stations that you
have saved in the other slots. You can save 30 stations.
SD CARD / USB PLAYBACK
Press the FUNCTION button until “CARD” appears on the screen. Insert
a USB or CD card in the slot if needed. The buttons on the unit will act
the same as CD mode for playback (see the CD section above). The unit
accepts cards/sticks with up to 32GB capacity.
PROGRAMMING A PLAYLIST
20 songs can be programmed for a standard audio CD, and 99 songs can
be programmed for MP3 playback. To program music, press and hold the
Program button while music is stopped. Then, use Prev/Next or enter the
desired song number and press Program to store it in the program playlist.
Repeat as desired to add more songs. When done, press play to hear the
playlist. Press Stop twice to reset/erase all programming.
REMOTE CONTROL
The buttons on the remote control work the same as they do on the boom
box, but the remote has number keys which make it easier to program a list
of songs for playback, including the 10+ and 10- buttons.

–9–
ENGLISHESPAÑOLFRANÇAIS
The screen will only display song times, but you may use the Dir+ and Dir-
buttons to enter and exit a directory/folder on the MP3 disc, USB, or SD card.
BLUETOOTH CONNECTION AND PLAYBACK
Press the function button on the front panel to select Bluetooth (BT)
mode. The BT button will light up on the front panel. Scan for Blue-
tooth devices on your phone. Connect to “CDB237”. After the connec-
tion is complete, play audio from your device. Also, the boombox has a
mic, and you can press play twice to dial the last dialed number on your
phone. Press play again to disconnect.
CARE AND MAINTENANCE
DISC HANDLING
• Do not expose discs to heat,
direct sunlight, or high hu-
midity environments. In
warmer weather, do not leave
discs inside a parked vehicle.
• Store discs in their cases
when not in use.
• Stacking discs or standing
them on end can cause them
to warp.
• Do not touch the disc surface
while handling the disc.
Instead, hold the edges.
• Fingerprints, dust, dirt, and
scratches can distort the pic-
ture or sound quality on your
disc, or cause playback to
skip. Beware of scratches on
the disc inhibiting the laser
beam system from reading
and playing the disc correctly.
Clean discs before use.
• Do not use paper, tape, or
adhesive labels on discs. Only
use permanent makers on
the top side of the disc.
• Clean discs with a soft cloth,
wiping from the center out-
wards. DO NOT wipe in a cir-
cular fashion
• Do not use solvents such as
benzene, household clean-
ing products (except those
designed for CD/DVD use),
or anti-static spray for vinyl
records, as this can damage
your device and discs.
• Ensure the label always faces
up when putting discs into
the player.
CLEANING THE BOOMBOX
• UNPLUG THE UNIT BEFORE CLEANING. Use a so, damp cloth to clean
the outside. Do not wipe any internal parts or get them wet. Soapy water
should be fine. Do not use any abrasive cleaning agents.
–10–
ENGLISH ESPAÑOL FRANÇAIS
TROUBLESHOOTING
PROBLEM SOLUTION
No power to unit • Connect the power cord or install batteries.
No sound from speakers • Make sure volume is up, and the unit has power.
• Make sure headphones are not connected.
• Make sure that the correct mode is selected for
the music source you are using. Use the mode
button and/or function selector (on the side and
the unit).
Disc does not play prop-
erly
• Ensure that the disc is an Audio or MP3 CD.
• Ensure the CD door is closed.
• Ensure the disc is not scratched or dirty (dusty,
soil, fingerprints, etc.) Try cleaning the disc.
TECHNICAL SPECIFICATIONS
Power: AC: 120V ~ 60Hz 15W
DC: 9V(UM2*6PCS)
Output: 1.0W+1.0W
Dimensions: 230 (length) x 222 (width) x 126 (height) mm
USB and SD Card capacity: 32 GB
CD Frequency response: 31.5Hz-16KHz+/-6dB
CD sample frequency: 44.1 kHz
Channel frequency response: 250Hz- 6.3KHz
FM: 88-108MHz AM: 520-1710kHz
TECHNICAL SUPPORT
For questions not answered in this manual, or for warranty service,
please contact Riptunes Technical Support:
By phone: 1-888-217-7688 (9:00 AM to 6:00 PM ET)
By e-mail: service@rip-tunes.com
Online: www.rip-tunes.com
© 2020 Riptunes by Impecca, a division of LT Inc., Wilkes Barre, PA.
Bluetooth is a registered trademark of Bluetooth SIG, Inc.

–11–
ENGLISHESPAÑOLFRANÇAIS
Riptunes™ warrants this product against defects in
material and workmanship to the original purchaser as
specified below provided product is registered online
within fourteen (14) days of purchase.
PARTS – if the product is determined to
have a manufacturing defect, within a
period of one (1) year from the date of the
original purchase, Riptunes™ will repair or
replace the product parts at no charge (for
parts) to you in the U.S.A. and Canada.
LABOR – if the product is determined to
have a manufacturing defect, within a
period of ninety (90) Days from the date of
the original purchase, Riptunes™ will repair
or replace the product at no charge to you
in the U.S.A. and Canada, After ninety (90)
days it will be the responsibility of the
consumer.
Shipping costs to and from our warranty service center
is the sole responsibility of the consumer.
To obtain warranty service by an authorized Riptunes™
service center, please email us at: support@rip-
tunes.com to obtain a Repair and Maintenance
Authorization (RMA) number and to locate the service
center nearest you. Once authorized, you must mail
the product, to the authorized Riptunes™ service
center in its original product packaging materials or
equivalent, to prevent damage while in transit.
Further, should Riptunes™ determine that the product
is outside of the Warranty term, Riptunes™ will return
the product to sender at sender’s expense without
being repaired or replaced, unless authorized by the
consumer to service the out of warranty product at
consumer’s expense. All handling or restocking charges
for returns and/or replacements shall be non-
refundable.
Riptunes™ specifically excludes from this warranty any
non-electric/mechanical attachments, accessories and
disposable parts including but not limited to outside
case, connecting cables, batteries and AC adaptors.
Riptunes™ reserves the right to repair or replace
defective products with the same, equivalent or newer
models.
We reserve the right to either repair or replace
product at our discretion. Replacement may be either
new or refurbished and while every endeavor will be
made to ensure it is the same model, if same model is
not available it will replaced with a model of equal or
higher specification.
Normal “Wear and Tear” is not covered by this
warranty. Further, Riptunes™ hereby reserves the right
to determine “Wear and Tear” on any and all products.
Tampering or opening the product casting or shell, will
void this warranty in its entirety.
ONE YEAR LIMITED WARRANTY / 90 Days
Important: Be Sure to Register Your Product at WWW.RIP-TUNES.COM within 14 Days
Riptunes™ USA
|
PA 18711
|
www.rip-
tunes.com
|
support@rip-tunes.com
*Do not send any returns to this address, as it might get lost and this will delay your repair and service process.
Also this warranty does not apply if the product has
been damaged by accident, abuse, misuse, or
misapplication; has been altered or modified without
the written permission of Riptunes™; has been
serviced by a non-authorized repair center of
Riptunes™; has not been properly maintained or
operated according to the operation manual; has
been used for commercial, non-household purposes;
cosmetically damaged; was not imported by
Riptunes™; was not manufactured according to
specification of the United States market; improper
installation or neglect; damaged due to improper
packaging in shipment; damaged due to natural
disasters; if the serial number for the product has
been removed or defaced; or for cosmetic damages.
ALL IMPLIED WARRANTIES, INCLUDING IMPLIED
WARRANTIES OF MERCHANTABILITY AND FITNESS FOR
A PARTICULAR PURPOSE ARE LIMITED IN DURATION
TO ONE (1) YEAR PARTS AND NINETY (90) DAYS
LABOR FROM THE DATE OF THE ORIGINAL RETAIL
PURCHASE OF THIS PRODUCT.
THESE WARRANTIES AND REMEDIES ARE THE SOLE
AND EXCLUSIVE WARRANTIES AND REMEDIES IN
CONNECTION WITH THE SALE AND USE OF THE
PRODUCT. NO OTHER WARRANTIES, ORAL OR
WRITTEN, EXPRESSED OR IMPLIED, ARE GIVEN.
RIPTUNES™ IS NOT RESPONSIBLE OR LIABLE FOR ANY
DAMAGE, WHETHER SPECIAL, INCIDENTAL,
CONSEQUENTIAL, DIRECT OR OTHERWISE, OR
WHETHER KNOWN OR SHOULD HAVE BEEN KNOWN TO
RIPTUNES™, INCLUDING LOST PROFITS, GOODWILL,
AND PROPERTY AND PERSONAL INJURY RESULTING
FROM ANY BREACH OF WARRANTY, THE INABILITY TO
USE THE PRODUCT OR UNDER ANY LEGAL THEORY IN
CONTRACT OR TORT. RIPTUNES LIABILITY IS LIMITED
TO THE ACTUAL PURCHASE PRICE PAID TO THE
RETAIL SELLER OF THE DEFECTIVE PRODUCT.
No Riptunes™ dealer, agent or employee is
authorized to make any modification, extension,
change or amendment to this warranty without the
written consent and authorization from Riptunes™.
Some states do not allow the exclusion or limitation
of implied warranties or liability for incidental or
consequential damages, or do not allow a limitation
on how long an implied warranty lasts, so the above
limitations or exclusions may not apply to you. This
warranty gives you specific legal rights, and you
have other rights, which vary from state to state.
Note: Our Warranty center ships only within Continental
U.S., excluding Alaska and Hawaii.
LIMITED WARRANTY

–12–
ENGLISH ESPAÑOL FRANÇAIS
TABLA DE CONTENIDO
Precauciones de Seguridad............................................. 13
Advertencias FCC............................................................ 14
Introducción................................................................... 15
Diagrama del Producto................................................... 16
Modos y Funciones Adicionales....................................... 18
Cuidado y Mantenimiento............................................... 19
Solución de Problemas................................................... 20
Especificaciones Técnicas ............................................... 21
Soporte Técnico.............................................................. 21
Garantia ......................................................................... 22
Français.......................................................................... 24
ESPAÑOL

–13–
ENGLISHESPAÑOLFRANÇAIS
PRECAUCIONES DE SEGURIDAD
LEA ESTE MANUAL CUIDADOSAMENTE ANTES DE OPERAR Y CONSÉRVELO
PARA REFERENCIA A FUTURO. REFIÉRASE A ÉL CUANDO SE ENCUENTRE CUAL-
QUIER PROBLEMA DE OPERACIÓN.
1. ADVERTENCIA: Para reducir el riesgo de descarga eléctrica o daño a los alta-
voces principales del reproductor, no desarme el reproductor. No hay partes
internas a las que el usuario pueda darles servicio.
2. ADVERTENCIA: Para evitar fuego o descargas eléctricas, no exponga el reproduc-
tor a la lluvia o humedad (incluyendo gotas o salpicaduras). No deben colocar-
se sobre el reproductor o cerca de él, objetos llenos con líquidos, como floreros
o botellas de agua.
3. ADVERTENCIA: No se exponga el reproductor de radio/casete o sus baterías al
calor excesivo, como la luz directa del sol, fuego, u otras fuentes de calor.
4. ADVERTENCIA: Utilice solamente los accesorios provistos por el fabricante, a
excepción del cable auxiliar estándar de 3.5mm.
5. No coloque objetos encima del reproductor.
6. No coloque el reproductor en una mesa inestable, trípode, soporte o carrito. El
reproductor puede caer, resultando en posibles lesiones o daños.
7. Desconecte del tomacorrientes durante las tormentas eléctricas o cuando el
reproductor no esté en uso.
8. Ponga atención a la medida de seguridad de la clavija polarizada o del tipo
aterrizado. Una clavija polarizada tiene dos patas siendo una de ellas más
ancha que la otra. Una clavija del tipo aterrizado tiene dos patas planas y una
redonda, siendo que la redonda es la conexión a tierra. Esta tercera pata es pro-
porcionada para su seguridad. Si la clavija proporcionada no puede enchufarse
al tomacorrientes, consulte con un electricista para reemplazar el tomacorrien-
tes obsoleto.
9. Proteja el cable de suministro eléctrico contra pisadas o pellizcos particular-
mente en los enchufes, receptáculos de conveniencia y el punto donde sale del
reproductor.
10. Disponga de este reproductor adecuadamente, respetando sus leyes locales
para el desecho de electrónicos y baterías.
11. NO SE LE QUEDE VIENDO AL RAYO LÁSER DEL REPRODUCTOR CD.
ADVERTENCIA: EL CABLE DE SUMINISTRO ELÉCTRICO DE ESTE PRODUCTO
CONTIENE PLOMO, UN QUÍMICO CONOCIDO EN EL ESTADO DE CALIFORNIA
POR CAUSAR CÁNCER Y DEFECTOS DE NACIMIENTO Y OTROS DAÑOS EN LA
REPRODUCCIÓN. LÁVESE LAS MANOS DESPUÉS DE MANIPULARLO.

–14–
ENGLISH ESPAÑOL FRANÇAIS
ADVERTENCIAS FCC
Este dispositivo cumple con la parte 15 de las Reglas de la FCC. El funcionamiento
está sujeto a las dos condiciones siguientes: (1) Este dispositivo no puede causar
interferencias perjudiciales, y (2) este dispositivo debe aceptar cualquier interfe-
rencia recibida, incluidas las interferencias que puedan causar un funcionamiento
no deseado.
Cualquier cambio o modificación no aprobada expresamente por la parte respon-
sable del cumplimiento puede anular la autoridad del usuario para operar el equi-
po.
Nota: Este equipo ha sido probado y cumple con los límites para un dispositivo
digital de Clase B, de conformidad con la parte 15 de las Reglas de la FCC. Estos
límites están diseñados para proporcionar una protección razonable contra in-
terferencias dañinas en una instalación residencial. Este equipo genera y puede
irradiar energía de radiofrecuencia y, si no se instala y utiliza de acuerdo con las
instrucciones, puede causar interferencias perjudiciales a las comunicaciones de
radio. Sin embargo, no hay garantía de que la interferencia no ocurra en una ins-
talación en particular. Si este equipo causa interferencia dañina a la recepción de
radio o televisión, lo que puede determinarse apagando y encendiendo el equipo,
se recomienda al usuario que intente corregir la interferencia mediante una o más
de las siguientes medidas:
• Reorientar o reubicar la antena receptora.
• Aumente la separación entre el equipo y el receptor.
• Conecte el equipo a una toma de corriente en un circuito diferente al que está
conectado el receptor.
• Solicite ayuda al distribuidor o a un técnico experimentado de radio / TV.
`
ADVERTENCIA DE RF PARA DISPOSITIVOS PORTÁTILES:
El dispositivo ha sido evaluado para cumplir con los requisitos generales de exposición
a RF. El dispositivo se puede usar en condiciones de exposición portátil sin restricciones.
EL SÍMBOLO DE RAYO CON PUNTA DE FLE-
CHA DENTRO DE UN TRIANGULO EQUILAT-
ERO TIENE EL PROPÓSITO DE ALERTAR AL
USUARIO SOBRE LA PRESENCIA DE ‘VOLTAJE
PELIGROSO’ NO-AISLADO DENTRO DE LA
CARCASA DEL PRODUCTO QUE PUEDE SER
DE LA MAGNITUD SUFICIENTE PARA CON-
STITUIR RIESGO DE DESCARGA ELECTRICA
PARA LAS PERSONAS.
PARA REDUCIR EL RIESGO DE
DESCARGA ELÉCTRICA, NO RE-
TIRE LA CUBIERTA DELANTERA
O POSTERIOR. NO HAY PARTES
ADENTRO A LAS QUE EL USU-
ARIO PUEDA DARLES SERVICIO.
SOLICITE SERVICIO A UNA PER-
SONA CALIFICADA.
EL SIGNO DE EXCLAMACIÓN
DENTRO DE UN TRIANGULO
EQUILÁTERO TIENE EL PROPÓSI-
TO DE ALERTAR AL USUARIO
SOBRE LA PRESENCIA DE IN-
STRUCCIONES IMPORTANTES DE
OPERACIÓN Y MANTENIMIENTO
(SERVICIO) EN LA LITERATURA
QUE ACOMPAÑA A ESTE APARA-
TO.
do not open.
Risk of electric shock,
WARNING

–15–
ENGLISHESPAÑOLFRANÇAIS
INTRODUCCIÓN
¡Felicidades por su compra de este CD MP3 estéreo Boombox con radio
AM FM! Por su seguridad y para que pueda disfrutar de la mejor forma
su reproductor, por favor, le pedimos que lea completamente estas
instrucciones.
CARACTERÍSTICAS
• Puede reproducir CD MP3 discos (CD, CD-R y CD-RW)
• Radio AM/FM, antena telescópica
• Audio inalámbrico: transmisión desde sus dispositivos Bluetooth®
• SD / USB / Puertos para archivos MP3 reproductor multimedia
• Entrada de cable Aux 3.5 mm - Conecte sus dispositivos
• 20 pistas Opciones de memoria / repetición
• Altavoces estéreo, toma de auriculares
• Luces intermitentes de color LED con Music Beat
• Asa de transporte plegable
• Pantalla LED de 4 dígitos
• Funciona con una alimentación de CA de 120 V o 6 baterías C)
• Control remoto
QUÉ HAY EN LA CAJA
• Su Boombox
• Este manual de usuario
• Un control remoto
• Un cable de suministro eléctrico
INSTALACIÓN DE BATERÍAS (LAS BATERÍAS NO SE INCLUYEN)
• El control remoto utiliza 2 baterías AAA. Cuando use el control remoto
asegúrese de apuntar al frente del Boombox.
• El Boombox necesita 6 baterías C pero también puede conectarse ala
corriente alterna (AC).
Para instalar las baterías en el control remoto o en el Boombox, abra la
tapa de las beterías en la parte posterior del control remoto o en la parte
inferior del Boombox. Luego haga coincidir los signos “+” y “-“ con las bat-
erías. Vuelva a colocar la tapa de las baterías. Si la unidad boombox no
se usa por un periodo de tiempo prolongado, retire las baterías antes de
almacenarlo.

–16–
ENGLISH ESPAÑOL FRANÇAIS
MICRO
SD
DIAGRAMA DEL PRODUCTO

–17–
ENGLISHESPAÑOLFRANÇAIS
1. Mango. Mango de transporte plegable
2. Abrir/Expulsar CD. Presione para abrir la tapa y cargar o reemplazar el
CD
3. Botón Función/Modo. Para seleccionar los diferentes modos del Boom-
box. El modo seleccionado se mostrará en la pantalla (CD/USB/CARD/FM/
AUX/Bluetooth)
• Bluetooth: La luz BT se encenderá
cuando este modo esté selecciona-
do. Este modo reproduce el audio de
forma inalámbrica desde un dispos-
itivo Bluetooth. Por ejemplo puede
reproducir una canción desde su teléfono hacia los altavoces del
Boombox.
• AUX: Para usar la entrada de audio de 3.5mm (1/8”) a un lado del
Boombox.
• CD: Para reproducir un audio de CD estándar y CD MP3
• CARD: Para reproducir MP3 desde un Drive USB o Tarjeta Micro USB
(también conocida como Tarjeta TF)
4. Pantalla LED
5. Repetir/Programar. Presione una vez para repetir la canción actual,
dos veces para repetir todas las canciones, una vez más para reproducir en
forma aleatoria. En modo radio, esto almacena la emisora de radio actual
en la memoria.
6. Parada/Banda. Detener la reproducción o cambiar entre AM/FM en el
modo radio
7. Reproducir/Pausa. Reproducir o Pausar en el modo CD/USB/CARD/BT
8. Prev. Ir a la pista anterior; Si presiona por más tiempo, retrocede más
rápido. En el modo radio, cambia las estaciones.
9. Next. Ir a la siguiente pista; Si presiona por más tiempo, avanza más
rápido. En el modo radio, cambia las estaciones.
10. Interruptor de Apagado/Encendido. Enciende y apaga la unidad y
cambia el modo LED.
11. Control de volumen. Puede usarse para ajustar el volumen.
12. USB / Tarjeta SD. Inserte aquí un drive USB o Tarjeta SD/TF para re-
producción MP3, después ingrese el modo USB/CARD usando el Botón de
Función (3)
13. Auriculares () Aquí puede conectar los auriculares o audífonos.
14. AUX IN. Aquí puede conectar una fuente de audio que use un cable de
1/8” (3.5mm) como un dispositivo móvil o un reproductor MP3.
15. SUMINISTRO DE ENERGÍA. Conecte aquí el cable de suministro de
energía.

–18–
ENGLISH ESPAÑOL FRANÇAIS
MODOS Y FUNCIONES ADICIONALES
REPRODUCIENDO UN CD
Por defecto, la radio se enciende en el modo “CD”. Si se cambia de modo,
puede regresar al modo CD pulsando el botón Función hasta que apa-
rezca “CD” en la pantalla. Pulse el botón “Abrir/Expulsar” de la tapa del
CD para introducir los CD. Cierre suavemente la tapa hasta que encaje en
su sitio. Los CD comenzarán a reproducirse automáticamente. Utilice los
botones de Reproducción/Pausa o Parada según sea necesario. El botón
Prev/Next cambiará las pistas/canciones. El botón Repetir/Programar
alternará entre estos 3 modos:
1. Repetir la canción actual 2. Repetir todas las canciones 3. Reproducción
aleatoria
ESCUCHANDO LA RADIO
Pulse el botón Función hasta que aparezca “FM” en la pantalla. Para FM,
utilice la antena telescópica para ajustar la recepción de la señal. Si utiliza la
radio por primera vez en su localidad, pulse prolongadamente el botón RE-
PRODUCIR/PAUSA/BUSCAR para buscar y almacenar automáticamente las
emisoras de radio. Ahora puede utilizar los botones Prev/Next para despla-
zarse entre las emisoras de radio.
Para utilizar la radio AM, pulse el botón PARADA/BANDA para cambiar a
AM. Pulse el botón REPRODUCIR/PAUSA/BUSCAR para buscar emisoras
de radio de la misma forma que lo haría con FM. La antena no es necesar-
ia para la AM. Para guardar una emisora de radio en la memoria, pulse el
botón Programar. Usted puede guardar la emisora como P01, P02, P03, etc.
Seleccione el número “P” con el que desea guardarla con Prev/Next y pulse
de nuevo Programar. Mientras escucha una de sus emisoras programadas
(como “P01”), los botones Prev/Next pueden utilizarse para seleccionar
cualquier otra emisora que haya guardado en las otras ranuras.
REPRODUCCIÓN USB/TARJETA SD
Pulse el botón Función hasta que aparezca “CARD” en la pantalla. Inserte
una tarjeta USB o CD en la ranura si es necesario. Los botones de la unidad
actuarán igual que en el modo CD para la reproducción (véase la sección
REPRODUCIENDO CD más arriba). La unidad acepta tarjetas/sticks con
una capacidad de hasta 32GB.
PROGRAMANDO UNA LISTA DE REPRODUCCIÓN
Se pueden programar 20 canciones para un CD de audio estándar y 99
canciones para la reproducción MP3. Para programar música, mantenga
pulsado el botón Programar mientras la música está detenida. A continu-

–19–
ENGLISHESPAÑOLFRANÇAIS
ación, utilice Prev/Next o introduzca el número de la canción deseada y
pulse el botón Programar para almacenarla en la lista de reproducción
programada. Repita la operación tanto como desee para añadir más
canciones. Cuando haya terminado, pulse el botón de reproducción para
escuchar la lista de reproducción. Pulse dos veces el botón Parada para
restablecer/borrar toda la programación.
CONTROL REMOTO
Los botones del control remoto funcionan igual que en el radiocasete,
pero el control tiene teclas numéricas que facilitan la programación de
una lista de canciones para su reproducción, incluidos los botones 10+
y 10-. La pantalla sólo mostrará el tiempo de las canciones, pero puede
utilizar los botones Dir+ y Dir- para entrar y salir de un directorio/carpe-
ta del disco MP3, USB o tarjeta SD.
CONEXIÓN Y REPRODUCCIÓN BLUETOOTH
Pulse el botón de Función del panel frontal para seleccionar el modo
Bluetooth (BT). El botón BT se iluminará en el panel frontal. Busque
dispositivos Bluetooth en su teléfono. Conéctese al “CDB237”. Una vez
completada la conexión, reproduzca el audio de su dispositivo. Además, el
Boombox tiene un micrófono, y puede pulsar dos veces el botón Reprodu-
cir para marcar el último número marcado en su teléfono. Vuelva a pulsar
el botón Reproducir para desconectarse.
CUIDADO Y MANTENIMIENTO
• No exponga los discos al calor,
luz directa del sol o ambientes
húmedos. En un clima más cáli-
do, no deje discos adentro de un
vehículo estacionado.
• Almacene los discos en sus es-
tuches cuando no se utilicen.
• Apilarlosdiscosodejarlosdelado
puede hacer que se deformen.
• No toque la supercie de los
discos cuando los manipule, en
lugar de eso tómelos de los bor-
des.
• Las huellas, el polvo, la suciedad
y los rayones pueden distorsion-
ar la calidad del sonido o imagen
de su disco o provocar saltos du-
rante la reproducción. Hay que
cuidar los rayones en los discos
ya que evitan que el sistema de
rayos láser lea y reproduzca cor-
rectamente los discos. Limpie
los discos antes de usarlos.
• No use papel, cinta o etiquetas
adhesivas en los discos. Única-
mente utilice marcadores per-
manentes en la parte superior
del disco.
• Limpie los discos con un paño
suave, limpiando del centro del

–20–
ENGLISH ESPAÑOL FRANÇAIS
disco hacia afuera. NO limpie de
forma circular.
• No utilice solventes como el
benceno, productos de limpieza
doméstica (a excepción de aquel-
los diseñados para el uso en CD/
DVD), o aerosol antiestático para
discos de vinilo, ya que estos
pueden dañar sus dispositivos y
discos.
• Asegúrese de que las etiquetas
siempre estén hacia arriba cuan-
do coloque los discos en el repro-
ductor.
LIMPIANDO EL BOOMBOX
• DESCONECTE LA UNIDAD ANTES DE LIMPIAR. Utilice un paño suave y
húmedo para limpiar el exterior. No limpie o moje las partes interiores.
Puede usarse agua jabonosa. No use ningún agente de limpieza abrasivo.
SOLUCIÓN DE PROBLEMAS
PROBLEMA SOLUCIÓN
La unidad no tiene
suministro de energía
• Conecte el cable de suministro de energía o
instale baterías.
No sale sonido de los
altavoces
• Asegúrese de que el volumen está en alto
y que la unidad está conectada o con bat-
erías útiles
• Asegúrese de que los auriculares no estén
conectados
• Asegúrese de que está seleccionado el
modo correcto para el tipo de música que
está queriendo reproducir. Use el botón de
modo y/o selector de funciones (a un lado
de la unidad).
El disco no se repro-
duce adecuadamente
• Asegúrese de que el disco está en Audio o
CD MP3
• Asegúrese de que la tapa del CD está cerrada
• Asegúrese de que el disco no está rayado o
sucio (polvoso, con tierra, huellas, etc.). Trate
de limpiar el disco
Table of contents
Languages:
Other RIP TUNES Portable Stereo System manuals

RIP TUNES
RIP TUNES CDB-204 User manual

RIP TUNES
RIP TUNES CDB-490BT User manual

RIP TUNES
RIP TUNES CDB300 User manual

RIP TUNES
RIP TUNES RACR-400 User manual

RIP TUNES
RIP TUNES RACR-510BT User manual

RIP TUNES
RIP TUNES CDB200 User manual

RIP TUNES
RIP TUNES CDB-232BT User manual

RIP TUNES
RIP TUNES RACR-510BT User manual