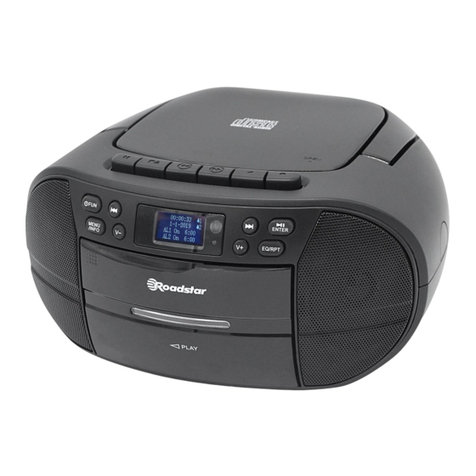
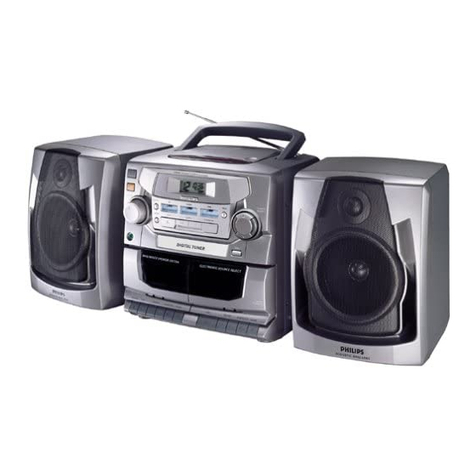
Roadstar RCR-3750UMP User manual

is a registered Trademark of Roadstar S.A. - Switzerland All rights reserved www.roadstar.com
RCR-3750UMP
Instruction manual
Bedienungsanleitung
Manuel d’instructions

INDEX
Your new unit was manufactured and assembled under strict
ROADSTAR quality control. Thank-you for purchasing our pro-
duct for your music enjoyment. Before operating the unit, please
read this instruction manual carefully. Keep it also handy for fur-
ther future references.
Votre nouvel appareil a été fabriqué et monté en étant soumis
aux nombreaux tests ROADSTAR. Nous espérons que cet appa-
reil vous donnera entière satisfaction. Avant de vous adonner à
ces activités, veuillez lire attentivement ce manuel d’instructions.
Conservez-le à portée de main à fin de référence ultérieure.
Ihr neues Gerät wurde unter Beachtung der strengen ROAD-
STAR-Qualitätsvorschriften gefertigt. Wir danken Ihnen für den
Kauf unseres Produktes und wünschen Ihnen optimalen Hörge-
nuss. Bitte lesen Sie diese Bedienungsanleitung durch, und he-
ben Sie sie auf, um jederzeit darin nachschlagen zu können.
English Page 1
Deutsch Seite 11
Francais Page 21
4
5
6
1
2
3
789
10 11
12
13
14
15
16
17
18
19
20 21 22 23 24

EnglishEnglish 1 2
LOCATION OF CONTROLS
1. SKIP + BUTTON
2. SKIP - BUTTON
3. MODE BUTTON
4. PLAY / PAUSE BUTTON
5. STOP BUTTON
6. ALBUM BUTTON
7. POWER INDICATOR
8. LCD DISPLAY
9. FM STEREO INDICATOR
10. CASSETTE DOOR
11. FM ANTENNA
12. FUNCTION SELECTOR
13. VOLUME CONTROL
14. USB SLOT
15. BAND SELECTOR
16. CD DOOR
17. DIAL POINTER
18. TUNING CONTROL
19. CD OPEN / CLOSE
20. TAPE PAUSE BUTTON
21. TAPE STOP / EJECT BUTTON
22. TAPE FAST FORWARD BUTTON
23. TAPE REWIND BUTTON
24. TAPE PLAY BUTTON
AC POWER
You can power your portable system by plugging the detachable AC power
cord into the AC inlet at the back of the unit and into a wall AC power outlet.
Check that the rated voltage of your appliance matches your local voltage.
Make sure that the AC power cord is fully inserted into the appliance.
WARNINGS
The exclamation point within the triangle is a warning sign alerting
the user of important instructions accompanying the product.
The lightening flash with arrowhead symbol within the triangle is a
warning sign alerting the user of “dangerous voltage” inside the unit.
To reduce the risk of electric shock, do not remove the cover. No
user serviceable parts inside the unit. Refer all servicing to quali-
fied personnel.
This unit operates on 230V ~ 50Hz. If the unit is not used for a
long period of time, remove the plug from the AC mains.
Ensure all connections are properly made before operating the
unit.
This unit must not be exposed to moisture or rain.
This unit should be positioned so that it is properly ventilated.
Avoid placing it, for example, close to curtains, on the carpet or in
a built-in installation such as a bookcase.
Do not expose this unit to direct sunlight or heat radiating sources.

EnglishEnglish 3 4
BATTERY POWER
Insert 8 x UM2 size batteries into the battery compartment. Be sure that the
batteries are inserted correctly to avoid damage to the appliance. Always
remove the batteries when appliance will not be used for a long period of
time, as this will cause leakage to the batteries and subsequently damage
to your set.
Notes:
Use batteries of the same type. Never use different types of batteries
together.
To use the appliance with batteries, disconnect the AC power cord from
it.
IMPORTANT: this unit is equipped with ErP circuit (Stand-By power
Management) when not operative for some time it switch OFF automathical-
ly. To re-activate the unit, move the Function Selector to TAPE/OFF then
move it again to CD / Radio mode.
RADIO OPERATIONS
1. Set the FUNCTION SELECTOR (12) to “RADIO” mode.
2. Select desired band by using the BAND SELECTOR (15).
3. Adjust radio frequency to your desired station by using the TUNING
CONTROL (18).
4. Adjust the VOLUME CONTROL (13) to the desired level.
FM / FM-STEREO RECEPTION
Set the BAND SELECTOR (15) to FM mode for MONO reception.
Set the BAND SELECTOR (15) to FM ST. mode for FM STEREO recep-
tion. The Stereo indicator light up to show FM ST. mode.
FOR BETTER RECEPTION
Reorient the FM ANTENNA (11) for better reception.
Reorient the appliance to get better AM reception.
TAPE OPERATIONS
1. Set the FUNCTION SELECTOR (12) to “TAPE” mode.
2. Press the TAPE STOP/EJ BUTTON (21) to open the cassette door and
insert your tape.
3. Close the CASSETTE DOOR (10).
4. Press the TAPE PLAY BUTTON (24) to start playing tape.
5. Adjust the VOLUME CONTROL (13) to the desired level.
6. Press TAPE FFW BUTTON (22)/TAPE RW BUTTON (23) to start rapid
tape winding either forward or reverse direction. Press TAPE PLAY
BUTTON (24) to start playing tape.
7. Press the TAPE PAUSE BUTTON (20) when you want to stop playing
tape operation temporarily.
8. Press the TAPE STOP/EJ BUTTON (21) when finished. Press again to
open the cassette door after the tape spools stop turning.
CD PLAYBACK
1. Set the FUNCTION SELECTOR (12) to “CD/MP3/USB” mode.
2. Open the CD DOOR (16) and place a CD/MP3 disc with the label up on
the CD compartment.
3. Close the CD DOOR (16).
4. Focus search is performed if disc is inside. Total number of tracks is
read and appears on the display.
5. Playback will start automatically from the first track.
6. Press SKIP +/- BUTTON (3) to go to the next track or back to the pre-
vious track. Press and hold while playing until you find the point of the
sound.
7. Adjust the VOLUME CONTROL (13) to the desired level.
8. Press the PLAY/PAUSE BUTTON (4) again when you want to stop play-
back temporarily.
9. Press the STOP BUTTON (5) when finished.

EnglishEnglish 5 6
CD PROGRAMMING
Up to 20 tracks fo CD disc, 99 tracks of MP3 disc can be programmed for
disc play in any order. Be sure to press the STOP BUTTON (5) before use.
1. Press the MODE BUTTON (3), the display will show “P01” and flash.
2. Select desired track by using the SKIP +/- BUTTON (3). (You may se-
lect a desired album by pressing the ALBUM BUTTON (6)).
3. Press the MODE BUTTON (3) again to confirm desired track into the
program memory.
4. Repeat step 2 and 3 to enter additional tracks into the program memory.
5. When all the desired tracks have been programmed, press the PLAY/
PAUSE BUTTON (4) to play the disc in the order you have program-
med.
6. Press the STOP BUTTON (5) twice to terminate programmed playback.
REPEAT / RANDOM MODE
Press the MODE BUTTON (3) before or during playing CD / MP3 disc, each
press switches the mode function as follows:
1. REPEAT 1: the current track will be played over an over again till you
press STOP BUTTON (5).
2. REPEAT ALBUM (*MP3 ONLY): all tracks of the album will be played
over and over again till you press STOP BUTTON (5).
3. REPEAT ALL: all tracks on the disc will be played over and over again
till you press STOP BUTTON (5).
4. RANDOM: the random play will start from next track automatically.
5. NORMAL MODE.
USB PLAYBACK
1. Plug or slot in USB device to the USB SLOT (14).
2. Set the FUNCTION SELECTOR (12) to “CD/MP3/USB” mode.
3. It will read and automatic playing USB, if no disc on disc tray.
4. It will read and automatic playing DISC, if have disc on disc tray.
5. Press and hold the PLAY/PAUSE BUTTON (4) for a few seconds to
entry USB mode.
6. Playback will start automatically from the first track.
7. Press the STOP BUTTON (5) when finished.
The operation of PROGRAM, MODE are as the same as that of CD/MP3.
Please refer to CD/MP3 OPERATION.
SPECIFICATIONS
FM Band: 87.5 to 108 MHz
MW Band: 520 to 1620 kHz
Power Supply: AC 230V 50Hz
Battery: 8x UM2 SIZE
Design and specifications are subject to change without notice.
This marking shown on the product or its literature, indicates that it should not
be disposed with other household wastes at the end of its working life. To
prevent possible harm to the environment or human health from uncontrolled
waste disposal, please separate this from other types of wastes and recycle it
responsibly to promote the sustainable reuse of material resources. Househol
d users shoul d contact ei ther the retai l er where they purchased this product,
or their local government office, for details of where and how they can take this
item for environmentally safe recycling. Business users should contact their
supplier and check the terms and conditions of the purchase contract. This
product should not be mixed with other commercial wastes for disposal.
Correct Disposal of This Product
(Waste Electrical & Electronic Equipment)

DeutschDeutsch 13 14
LAGE DER BEDIENUNGSELEMENTE
1. TASTE SKIP +
2. TASTE SKIP -
3. MODE-TASTE
4. TASTE PLAY / PAUSE
5. STOP-TASTE
6. ALBUM-TASTE
7. BETRIEBSANZEIGE
8. LCD-ANZEIGE
9. UKW STEREO-ANZEIGE
10. KASSETTE
11. UKW TELESKOP ANTENNE
12. FUNKTIONSWECHSEL
13. LAUTSTÄRKEREGELUNG
14. USB SLOT
15. MW / UKW WÄHLER
16. CD DOOR
17. SKALENZEIGER
18. TUNING KONTROL
19. CD ÖFFNEN / SCHLIEßEN
20. KASSETTE PAUSE BUTTON
21. KASSETTE STOP / EJECT TASTE
22. KASSETTE FAST FORWARD TASTE
23. KASSETTE REWIND TASTE
24. KASSETTE PLAY TASTE
STROMVERSORGUNG ÜBER DAS STROMNETZ
Schließen Sie dazu das Kabel an die entsprechende Buchse Ihres tragba-
ren Radio‐CD‐Spielers an und dann an die Netzsteckdose. Vergewissern
Sie sich, dass das Kabel keine blanken Stellen hat.
SICHERHEITSHINWEISE
Das Ausrufszeichen im Dreieck weist den Benutzer auf
wichtige Bedienungs- und Wartungsanweisungen (Service)
in diesem Handbuch hin, die unbedingt zu befolgen sind.
Um die Gefahr elektrischer Schläge auszuschliessen,
Gehäuse auf keinen Fall abnehmen.
Im Innem befinden sich keine vom Benutzer selbst instand-
setz-baren Teile. Reparaturen dürfen nur von einer autori-
sierten Fachwerkstatt durchgeführt werden.
Dieses Gerät ist für 230V ~ 50Hz Netzspannung ausgelegt.
Bei längerer Nichtbenutzung des Geräts ziehen Sie den
Stecker aus der Steckdose.
Setzen Sie das Gerät weder Feuchtigkeit noch Regen aus.
Schalten Sie das System erst dann ein, wenn Sie alle Ver-
bindungen genau geprüft haben.
Stellen Sie das Gerät so auf, dass immer eine ungestörte
Frischluftzufuhr sichergestellt ist. Es ist zum beispiel kei-
nesfalls auf Teppiche und in der Nähe von Gardinen zu stel-
len oder in Bücherregale einzubauen.
Setzen Sie das Gerät weder direkter Sonneneinstrahlung
noch Wärmequellen aus.

DeutschDeutsch 15 16
STROMVERSORGUNG ÜBER BATTERIEN:
Legen Sie 8 Batterien der Größe „C“ (LR14/Baby) in das Batteriefach ein.
Zur Vermeidung von Schäden achten Sie bitte darauf, dass die Batterien
richtig eingelegt sind. Entnehmen Sie die Batterien, wenn Sie das Gerät
über einen längeren Zeitraum nicht verwenden.
HINWEIS:
Verwenden Sie immer Batterien der gleichen Marke. Mischen Sie nicht
verschiedene Marken.
Ziehen Sie das Netzkabel ab, wenn Sie das Gerät mit Batterien betrei-
ben möchten.
SEHR WICHTIG: Dieses Gerät ist mit ErP Schaltung (Stand-By Power Ma-
nagement) und wannnicht operative seit einiger Zeit automat isch absc halt
et ausges tattet. So aktivieren Sie das Gerät bewegen Sie bitte die Funktion
auf TAPE/OFF beweg en Sie ihn dann wieder auf CD/Radio -Modus.
RADIO-BETRIEB
1. Die Betriebsart FUNKTIONSWECHSEL (12) wählen.
2. Mit dem Frequenzbandwähler MW / UKW WÄHLER (15) das gewün-
schte Frequenzband (UKW/MW) auswählen.
3. Verwenden Sie den Schalter TUNING KONTROL (18), um den gewün-
schten Sender einzustellen.
4. Regeln Sie die Lautstärke mit LAUTSTÄRKEREGELUNG (13)
UKW/UKW STEREO EMPFANG
Stellen Sie für einen MONO-Empfang die Wellenlänge auf FM (UKW).
Stellen Sie für einen STEREO-Empfang die Wellenlänge auf „FM ST“.
Die Stereo-Kontrollleuchte leuchtet.
DEN EMPFANG VERBESSERN
Für einen besseren UKW-Empfang richten Sie die Antenne aus.
Für einen besseren MW-Empfang richten Sie das Gerät aus.
KASSETTE
1. Die Betriebsart FUNKTIONSWECHSEL (12) (Kassette) auswählen.
2. Drücken Sie auf KASSETTE STOP/EJ TASTE (21), um das Kassetten-
fach zu öffnen.
3. Legen Sie die Kassette ein und schliessen Sie das Fach wieder.
4. Drücken Sie KASSETTE PLAY TASTE (24), um die Wiedergabe der
Kassette zu starten.
5. Stellen Sie die Lautstärke mit LAUTSTÄRKEREGELUNG (13) nach
Wunsch ein.
6. Verwenden Sie KASSETTE FFW/RW TASTE (22)/(23), um die Kassette
vor-oder zurückspulen. Drücken KASSETTE PLAY TASTE (24), um die
Wiedergabe der Kasette zu starten.
7. Drücken Sie auf KASSETTE PAUSE BUTTON (20), wenn Sie die Kas-
sette vorübergehend anhalten möchten.
8. Drücken Sie auf KASSETTE STOP/EJ TASTE (21), wenn Sie die Kas-
sette anhalten wollen. Erneut drücken, um das Kassettenfach öffnen.
CD-WIEDERGABE
1. Die Betriebsart „CD“ auswählen.
2. Das CD-Fach öffnen und eine CD in das Fach einlegen.
3. Das CD-Fach schließen.
4. Wenn die CD richtig eingelegt ist, sucht das Gerät die Titel. Die Gesam-
tzahl der Titel wird im Display angezeigt.
5. Die Wiedergabe beginnt automatisch mit dem 1. Titel.
6. Drücken TASTE SKIP +/- (1)/(2), um zum nächsten oder zum vorheri-
gen Titel zu gelangen. Drücken und gedrückt halten, bis der gewünsch-
te Titel erreicht ist.
7. Stellen Sie die Lautstärke mit LAUTSTÄRKEREGELUNG (13) ach Wun-
sch ein.
8. Drücken Sie erneut auf TASTE PLAY/PAUSE (4), wenn Sie den Titel
vorübergehend anhalten möchten.
9. Drücken Sie auf STOP-TASTE (5), wenn Sie die CD wechseln wollen.
DeutschDeutsch 17 18
CD-PROGRAMM
Bevor Sie die nachfolgenden Schritte machen, müssen Sie auf STOP-
TASTE (5) gedrückt haben.
1. Drücken Sie auf MODE-TASTE (3). Im Display blinkt „PO1“.
2. Wählen Sie durch Drücken der TASTE SKIP +/- (1)/(2) den gewünsch-
ten Titel aus. (Bei einer MP3-CD/USB-Gerät: Sie müssen zuvor durch
Drücken der Taste ALBUM-TASTE (6) das gewünschte MP3-Album
auswählen)
3. Erneut auf MODE-TASTE (3) drücken, um den gespeicherten Titel zu
bestätigen.
4. Wiederholen Sie die Schritte 2 und 3, um weitere Titel zu speichern.
5. Wenn alle Titel gespeichert sind, drücken Sie TASTE PLAY/PAUSE (4),
um die Wiedergabe in der gespeicherten Reihenfolge zu starten.
6. Drücken Sie zwei Mal auf STOP-TASTE (5), um die Speicherung zu
löschen.
WIEDERHOLEN / RANDOM
Wenn Sie während der Wiedergabe einer CD auf MODE-TASTE (3) drüc-
ken, entspricht jedes Drücken den folgenden Funktionen:
1. REPEAT 1: Auf dem Display blinkt “Rep1“, und das aktuelle Lied wird bis
die TASTE STOP/ENTER (3) gedrückt wird, wiedergespielt.
2. REPEAT ALBUM: Alle Lieder des Ordners werden mehrmals gespielt,
bis TASTE STOP/ENTER (3) gedrückt wird.
3. REPEAT ALL: Alle Lieder der CD werden mehrmals gespielt, bis STOP-
TASTE (5) gedrückt wird.
4. RAND: das zufällige Spielen wird automatisch ab dem nächsten Lied
starten, bis alle Lieder gespielt werden, dann wird es gestoppt.
5. NORMALE WIEDERGABE.
USB-WIEDERGABE
1. Die Betriebsart USB auswählen.
2. Die Wiedergabe beginnt automatisch mit dem 1. Titel.
3. Wiederholen (repeat 1-repeat folder-repeat all)/program play/skip up,
sind identisch wie die von CD.
SPECIFICATIONS
UKW-Band: 87.5 to 108 MHz
MW Band: 520 to 1620 kHz
Stromversorgung: AC 230V 50Hz
Batterie: 8x UM2 SIZE
Änderung vorbehalten.
Die Kennzeichnung auf dem Produkt bzw. auf der dazugehörigen Literatur gibt an,
dass es nach seiner Lebensdauer nicht zusammen mit dem normalen HaushaltsmüIl
entsorgt werden darf. Entsorgen Sie dieses Gerat bitte getrennt von anderen Abfal-
len, um der Umwelt bzw. der menschl i chen Gesundhei t ni cht durch unkontrol l i
erte Mül l besei ti gung zu schaden. Recycel n Si e das Gerät, um di e nachhaltige
Wiederverwertung von stofflichen Ressourcen zu fördern. Private Nutzer sollten den
Händler, bei dem das Produkt gekauft wurde, oder die zuständigen Behörden konta-
ktieren, um in Erfahrung zu bringen, wie sie das Gerät auf umweltfreundliche Weise
recyceln können. Gewerbliche Nutzer sollten sich an Ihren Lieferanten wenden und
die Bedingungen des Verkaufsvertrags konsultieren. Dieses Produkt darf nicht
zusammen mit anderem Gewerbemüll entsorgt werden.
Korrekte Entsorgung dieses Produkts
(Elektromüll)

FrançaisFrançais 23 24
POSITIONNEMENT DES COMMANDES
1. BOUTON SKIP +
2. BOUTON SKIP -
3. BOUTON MODE
4. BOUTON PLAY / PAUSE
5. BOUTON STOP
6. BOUTON ALBUM
7. INDICATEUR POWER
8. AFFICHAGE LCD
9. INDICATEUR STEREO FM
10. PORTE CASSETTE
11. ANTENNE FM
12. SELECTEUR FONCTIONS
13. CONTROLE VOLUME
14. PORTE USB
15. SELECTEUR ONDES
16. PORTE CD
17. POINTEUR FREQUENCES
18. TUNING SELECTEUR
19. CD OPEN / CLOSE
20. BOUTON CASSETTE PAUSE
21. BOUTON CASSETTE STOP / EJECT
22. BOUTON CASSETTE AVANCE RAPID
23. BOUTON CASSETTE RETOUR RAPID
24. BOUTON CASSETTE PLAY
ALIMENTATION PAR SECTEUR
Vous pouvez brancher votre radio CD portable en reliant l’unité au secteur
grâce au câble fourni. Veuillez vous assurer que le câble n’est pas dénudé.
ATTENTION
Le symbole “point d’exclamation” à l’intérieur d’un triangle
avertit l’utilisateur que d’importantes instructions d’utilisation
et de maintenance sont contenues dans le mode d’emploi.
Le symbole “éclair” à l’intérieur d’un triangle sert à avertir
l’utilisateur de la présence du courant à l’intérieur du l’appa-
reil qui pourrait constituer un risque.
Afin de minimiser les risques, ne pas ouvrir le boîtier ni ôter
le dos de l’appareil. En case de panne, faites appel aux
techniciens qualifiés pour les réparations. L’appareil ne ren-
ferme aucune pièce reparable par l’utilisateur.
Cet appareil a été conçu pour une tension d’alimentation de
230V ~ 50Hz. Débranchez la prise de courant quand on
prévoit de ne pas utiliser l’appareil pendant un certain
temps.
Mettez l’appareil sous tension seulement après avoir vérifié
que tous les raccordements soient corrects.
L’unité ne doit pas être exposée à l’humidité ou à la pluie.
L’appareil doit être gardé dans un endroit suffisamment
ventilé. Ne le gardez jamais par exemple près des rideaux,
sur un tapis ou dans des meubles, tels qu’une bibliothèque.
L’unité ne doit pas être exposée à la lumière directe du so-
leil ou à des sources de chaleur.

FrançaisFrançais 25 26
ALIMENTATION PAR PILES
Insérez 8 piles LR14 dans le compartiment. Assurez-vous que les piles sont
insérées correctement pour éviter tout dommage. Enlevez les piles lorsque
vous n’utilisez pas l’appareil durant un long moment.
NOTE:
Utilisez toujours des piles de même type et de même marque.
Pour utiliser l’alimentation par piles, veuillez débrancher le câble.
TRES IMPORTANT: cet appareil est équipé d'une circuit 'ErP (Stand-By
gestion d'alimentation) et lorsqu'il n'est pas opérationnel pendant un certain
temps, il s'éteint automatiquement. Pour réactiver l'appareil, s'il vous plaît
déplacer le sélecteur de fonction sur TAPE/OFF puis déplacez-le à nouveau
pour CD/Radio.
FONCTION RADIO
1. Sélectionnez le mode “RADIO” en utilisant SELECTEUR FONCTIONS
(12)
2. Sélectionnez les ondes désirées en utilisant SELECTEUR ONDES (15)
3. Sélectionnez votre radio en utilisant TUNING SELECTEUR (18)
4. Ajustez le volume avec CONTROLE VOLUME (13)
RECEPTION FM / FM STEREO
Réglez SELECTEUR ONDES (15) sur mode FM pour une réception MO-
NO.
Réglez SELECTEUR ONDES (15) sur mode FM ST pour une réception
STEREO. L’indicateur stéréo s’allumera.
POUR UNE MEILLEURE RECEPTION
Orientez l’antenne pour une meilleure réception FM.
Orientez l’appareil pour une meilleure réception AM.
FONCTION CASSETTE
1. Placez SELECTEUR FONCTIONS (12) sur mode TAPE.
2. Appuyez sur BOUTON CASSETTE STOP/EJ (21) pour ouvrir le com-
partiment et y insérer la cassette.
3. Fermez manuellement le compartiment.
4. Appuyez sur BOUTON CASSETTE PLAY (24) pour lancer la lecture.
5. Ajustez le CONTROLE VOLUME (13) comme vous le souhaitez.
6. Utilisez BOUTON CASSETTE FFW/RW (22)/(23) pour effectuer une
avance ou un retour rapide. Appuyez sur BOUTON CASSETTE PLAY
(24) pour lancer la lecture.
7. Appuyez sur BOUTON CASSETTE PAUSE (20) si vous voulez arrêter
temporairement la lecture.
8. Appuyez sur BOUTON CASSETTE STOP/EJ (21) lorsque la cassette
est finie. Un nouvel appui ouvre le compartiment cassette.
FONCTION CD
1. Placez SELECTEUR FONCTIONS (12) sur mode CD.
2. Placez un CD dans le compartiment.
3. Fermez le compartiment CD.
4. L’appareil recherche les pistes si le CD est installé correctement. Le
nombre total de pistes s’affichent sur l’écran.
5. Appuyez sur BOUTON PLAY/PAUSE (4) pour lancer la lecture.
6. Ajustez bbd au niveau souhaité.
7. Appuyez BOUTON SKIP +/- (1)/(2) pour passer à la chanson suivante
ou revenir à la précédente. Appuyez et maintenez pour effectuer un re-
tour ou une avance rapide.
8. Appuyez sur BOUTON PLAY/PAUSE (4) à nouveau quand vous le sou-
haitez pour arrêter la lecture temporairement.
9. Appuyez sur BOUTON STOP (5) lorsque vous voulez changer de CD.

FrançaisFrançais 27 28
CD PROGRAMME
Assurez-vous d’avoir appuyé sur STOP avant la démarche suivante.
1. Appuyez sur BOUTON MODE (3), l’écran clignotera “P01”.
2. Sélectionnez la piste désirée en pressant BOUTON SKIP +/- (1)/(2).
Vous devrez choisir l’album désiré auparavant en appuyant sur la tou-
che BOUTON ALBUM (6).
3. Appuyez à nouveau sur BOUTON MODE (3) pour confirmer la piste
mémorisée.
4. Répétez les étapes 2 et 3 pour mémoriser d’autres pistes.
5. Lorsque toutes les pistes sont mémorisées, appuyez sur BOUTON
PLAY/PAUSE (4) pour démarrer la lecture dans l’ordre établi
6. Appuyez sur BOUTON STOP (5) deux fois pour annuler la mémorisa-
tion.
REPEAT / RANDOM
Appuyez sur BOUTON MODE (3) pendant la lecture du CD, chaque pres-
sion sur cette touche correspond respectivement aux fonctions suivantes:
1. REPEAT 1: la piste en cours sera reproduite plusieurs fois jusqu’à ce
que vous appuyez sur BOUTON STOP (5).
2. REPEAT ALBUM: toutes les plages de l’album seront lues de façon
répétée jusqu’à ce qu’on n’appuie pas sur BOUTON STOP (5).
3. REPEAT ALL: toutes les plages du disque seront lues de façon répétée
jusqu’à ce qu’on n’appuie pas sur BOUTON STOP (5).
4. RANDOM: la lecture casuelle commencera automatiquement à partir de
la plage suivante, jusqu’à ce que toutes les plages ne soient pas jouées
et puis s’arrêtera.
5. NORMAL MODE.
FONCTIONNEMENT USB
1. Placez SELECTEUR FONCTIONS (12) sur mode USB.
2. Brancher le USB à l’entrée USB.
3. Après avoir lu la clé USB, commencera automatiquement la lecture à
partir de la plage 1.
4. Appuyer sur BOUTON STOP (5) pour arrêter la lecture.
5. Répétition de la reproduction (repeat 1- repeat folder - repeat all) /
program play/skip up sont identiques à celles décrites pour le operation
CD.
SPECIFICATIONS
Bande FM: 87.5 to 108 MHz
Bande MW: 520 to 1620 kHz
Sources d'alimentation: AC 230V 50Hz
Batterie: 8x UM2 SIZE
Caractéristiques sujettes à modifications sans avis préalable.
Ce symbole sur le produit ou sa documentation indique qu'il ne doit pas être éliminé
en fin de vie avec les autres déchets ménagers. L' élimination incontrôlée des dé-
chetspouvant porter préjudice a l'environnement ou a la santé humaine, veuillez le
séparer des autres types de déchets et le recycler defaçon responsable. Vous
favoriserez ainsi la réutilisation durable desressources matérielles. Les particuliers
sont invites a contacter le distributeur leur ayant vendu le produit ou a se renseigner
auprès de leur mairie pour savoir ou et comment ils peuvent se débarrasser de ce
produit afin qu'il soit recycle en respectant l'environnement. Les entreprises sont
invitées a contacter leurs fournisseurs et aconsulter les conditions de leur contrat
de vente. Ce produit ne doit pas être éliminé avec les autres déchets commerciaux.
Comment éliminer ce produit
(déchets d'équipements électriques et électroni-
ques)

Other manuals for RCR-3750UMP
1
Table of contents
Languages:
Other Roadstar Portable Stereo System manuals

Roadstar
Roadstar RCR-4635UMP User manual

Roadstar
Roadstar RCR-4625NU User manual

Roadstar
Roadstar RCR-777UD+ User manual

Roadstar
Roadstar RCR-4625CD User manual

Roadstar
Roadstar RCR-3650UMP User manual

Roadstar
Roadstar CDR-4520U User manual

Roadstar
Roadstar CDR-375D+ User manual

Roadstar
Roadstar CDR-4611 UDMP User manual

Roadstar
Roadstar RCR-779D+ User manual

Roadstar
Roadstar CDR-4230MP User manual