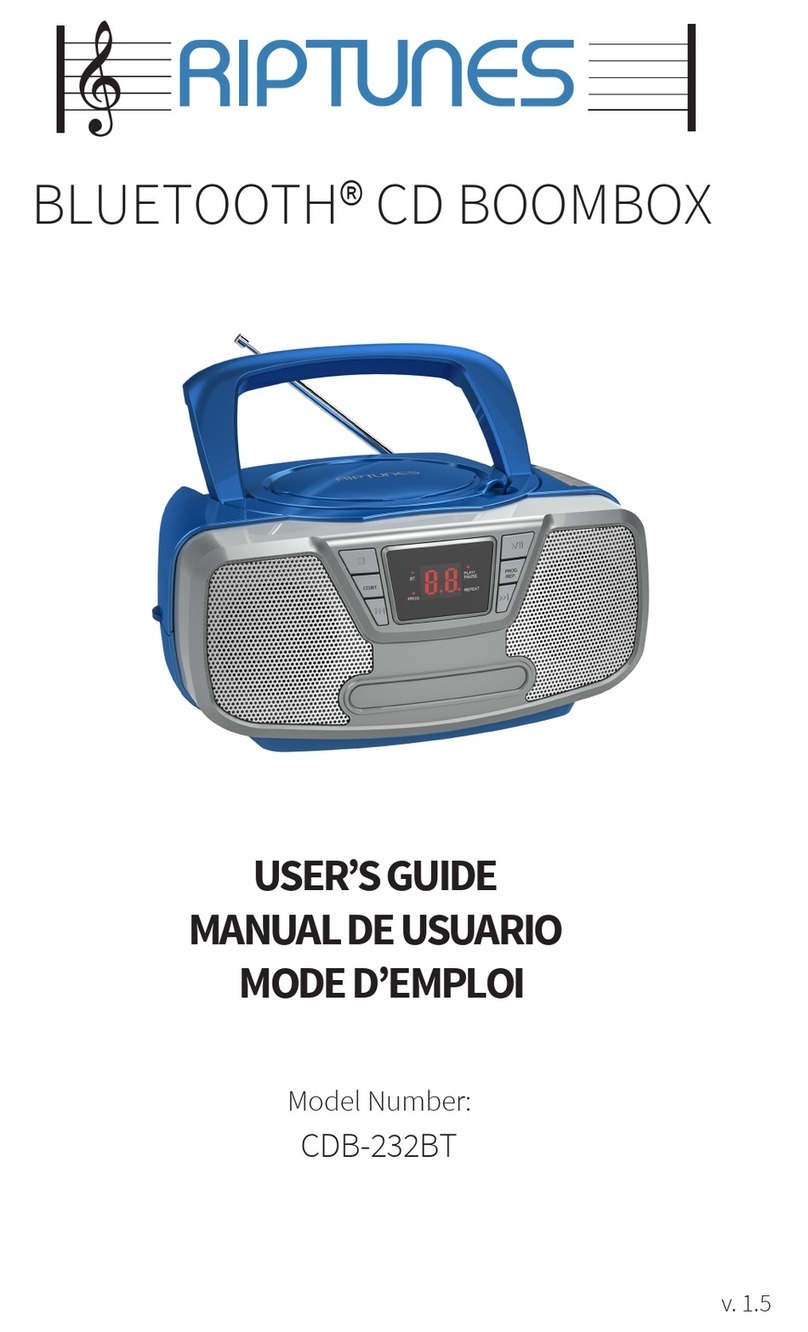
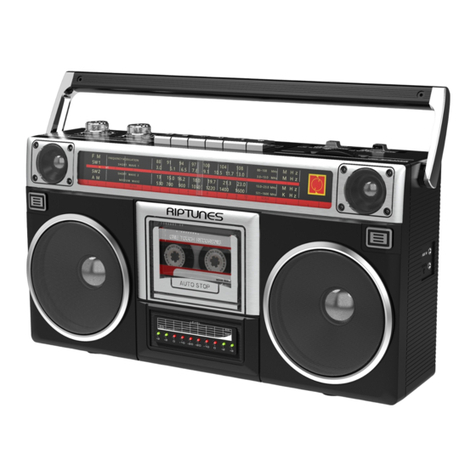
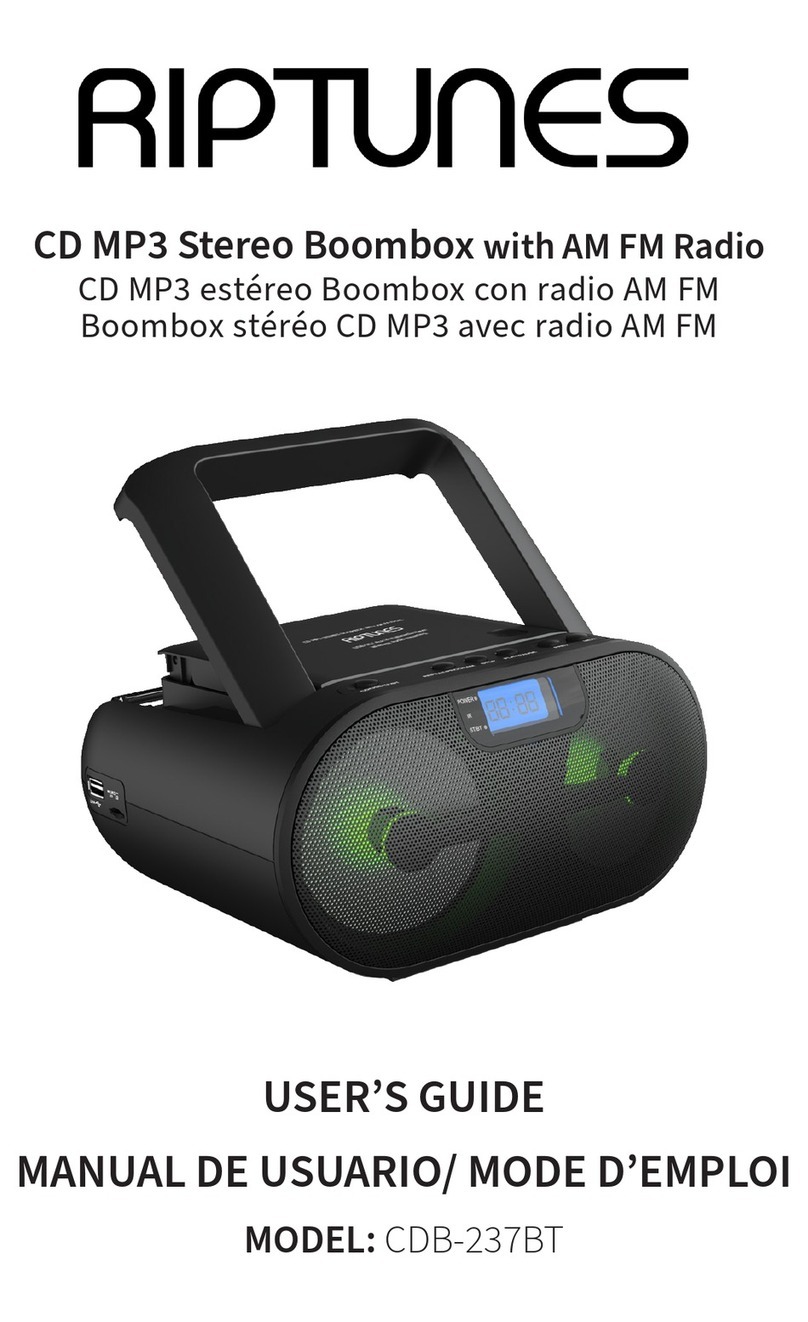
RIP TUNES CDB300 User manual


TABLE OF CONTENTS
Introduction ................................................................................................................................................ 2
Warnings and Safety Instructions............................................................................................................... 3
What’s In the Box........................................................................................................................................ 5
Getting to Know Your Portable CD/MP3 Boombox.................................................................................... 6
Basic Operation........................................................................................................................................... 7
Radio Operation.......................................................................................................................................... 8
CD Operation............................................................................................................................................... 9
MP3/Auxiliary Connection........................................................................................................................ 12
Setting Time and Alarm ............................................................................................................................ 12
Troubleshooting........................................................................................................................................ 13
Specifications ............................................................................................................................................ 14
FRENCH ..................................................................................................................................................... 16
SPANISH .................................................................................................................................................... 31

- 2 -
INTRODUCTION
Congratulations on your purchase of the RIPTUNES™ Portable CD/MP3 Boombox. The Portable CD/MP3
Boombox from RIPTUNES™ is a great way to enjoy your CDs and radio entertainment on the go with full sound
and functionality without the clutter of a full size stereo player. Its compact design provides easy portability.
Battery powered or plugged in to an outlet, with the RIPTUNES™ Portable CD/MP3 Boombox, you will never
have to miss a beat.
Your world. Your music. Tune in.
Features at a Glance
Top loading CD/MP3 player
AM/FM Radio With digital tuning
LCD Digital readout display for CD and Radio
Skip and Search Functions
Preset up to 20 radio stations
CD & Audio Formats Supported: MP3, WMA,CD,
CD-DA, CD-R/-RW
Programmable CD with 20 track memory
Repeat One / Repeat All function
3.5mm Aux-in
Headphone jack
Telescopic Antenna
Dual AC/DC Power Source
Before using this product, it is recommended that you familiarize yourself with the features, functions, and
operating procedures described in this manual. Due to slight modifications in production, the instructions,
features, and/or descriptions found in this manual might be slightly different from your product.

- 3 -
WARNINGS AND SAFETY INSTRUCTIONS
This Portable CD/MP3 Boombox uses a Class 1 Laser Product. To ensure proper use of this product, please
read this owner’s manual carefully and retain for future reference. Modification, adjustments, or
performance of procedures other than those specified herein may result in hazardous radiation exposure. As
the laser beam used in this Portable CD/MP3 Boombox is harmful when exposed directly to the eyes, do not
attempt to disassemble the casing. Should this unit require maintenance, refer servicing to authorized and
qualified personnel only.
To prevent electric shocks, never attempt to disassemble the casing, do not expose to water, and be sure to
match wide-blade plug with wide slot and fully insert into a power outlet. This product should be operated
only from the type of power source indicated on the marking label. This Portable CD/MP3 Boombox is
designed to use 120V –60Hz only. If you are not sure of the type of power supplied to your home, consult
your product dealer or local power company.
NOTE: The player is not disconnected from the AC power source as long as it is still connected to the
wall outlet, even if the Portable CD/MP3 Boombox itself has been turned off.
Additional Safety Instructions
Moisture - Do not expose this apparatus to water or moisture. To prevent fire or shock hazard, do not place
objects filled with liquids, such as vases, on the Portable CD/MP3 Boombox. If liquid enters the unit, unplug
the device immediately. Be sure to install the player in an area where access to the AC power cord is available
so that the unit may be unplugged from the wall socket immediately in the event of trouble or if liquid is
spilled onto the unit.
NOTE: If the unit is brought directly from a cold to a warm location, or is placed in a very damp room,
moisture may condense on the lenses inside the CD player and the player may not operate properly. In
this case, remove the disc and leave the player turned on for about half an hour until the moisture
evaporates.
Heat - The Portable CD/MP3 Boombox should be situated away from heat sources such as radiators, heat
registers, stoves, or other products (including amplifiers) that produce heat.
Proper ventilation - Do not install this player in a confined space, such as a bookshelf or similar unit unless
proper ventilation is provided. Slots and openings in the Portable CD/MP3 Boombox casing are provided for
ventilation to ensure reliable operation of the product and to protect it from overheating. These openings
must not be blocked or covered. The openings should never be blocked by placing the product on a bed, sofa,
rug, or other similar surface as ventilation will be inhibited and overheating will occur.
Overloading - Do not overload wall outlets, extension cords, or integral convenience receptacles, as this can
result in a risk of fire or electric shock.
- 4 -
Grounding or Polarization - Do not attempt to modify or circumvent the safety purpose of the polarized or
grounding-type plug. A polarized plug has two blades with one wider than the other. This plug will fit into the
power outlet only one way. This is a safety feature. A grounding type plug has two blades and a third
grounding prong. The wide blade or the third prong is provided for your safety. If the provided plug does not
fit into your outlet, consult an electrician for replacement of the obsolete outlet.
Note: It is strongly recommended that you unplug this apparatus during lightning storms or when
planning to leave this product unused for long periods of time.
Cleaning - Unplug this product from the wall outlet before cleaning. If dusting or cleaning is required, be sure
to clean the outer portion of the casing only. Do not attempt to clean the inside or to dissemble the casing.
Do not use liquid cleaners or aerosol cleaners. Use a dry cloth for cleaning AND be sure to allow the unit to dry
completely before plugging the unit to a power source.
Servicing - Refer all servicing to qualified service personnel. Servicing is required when the apparatus has been
damaged in any way, such as power-supply cord or plug is damaged, liquid has been spilled or objects have
fallen into the apparatus, the apparatus has been exposed to rain or moisture, does not operate normally, or
has been dropped.
FCC NOTICE
This equipment has been tested and found to comply with the limits for a Class B digital device, pursuant to
Part 15 of the FCC Rules. These limits are designed to provide reasonable protection against harmful
interference in a residential installation. This equipment generates, uses, and can radiate radio frequency
energy and, if not installed and used in accordance with the instructions, may cause harmful interference to
radio communications.
If this equipment does cause harmful interference to radio or television reception, which can be determined
by turning the equipment off and on, the user is encouraged to try to correct the interference by one or more
of the following measures:
–Reorient or relocate the receiving antenna.
–Increase the separation between the equipment and receiver.
–Connect the equipment into an outlet on a circuit different from that to which the receiver is needed.
–Consult the dealer or an experienced radio/TV technician for help.
WARNING:
Changes or modifications to this unit, not expressly approved by the party responsible for compliance, could
void the user's authority to operate the equipment.
If the unit requires servicing, refer servicing to qualified service personnel. If the unit is still under warranty,
contact a RIPTUNES™ service center. See terms and conditions specified under the warranty included with
this product.

- 5 -
WHAT’S IN THE BOX
1. CDB300 Portable CD/MP3 Boombox
2. AC power cord
3. User’s Guide
1
3
2

- 6 -
GETTING TO KNOW YOUR PORTABLE CD/MP3 BOOMBOX
1
LCD Display
10
Clock/Vol+
2
Function Button
11
Left Speaker
3
Snooze / Next / Fast Forward Button
12
Alarm / Vol-
4
Previous / Fast Rewind Button
13
STOP / M+ button
5
Right Speaker
14
PLAY/PAUSE / M- button
6
MEM/PROG button
15
Phones jack
7
FM Antenna
16
Aux-In jack
8
Carrying Handle
17
AC socket
9
CD Compartment access handle
18
Battery Compartment

- 7 -
BASIC OPERATION
Before You Begin
Before operation, please make sure that the VOLTAGE mentioned on the unit is same as the voltage of your
local area.
AC Operation:
Unravel the AC power cord, insert one end into the AC socket on the set, and the other end into a standard AC
outlet.
ATTENTION
1. Do not plug or unplug the power cable while you have wet hands.
2. When planning not to use this unit for a long time, disconnect the power cable from the wall outlet.
3. When disconnecting the power cord from the wall outlet, do not pull on the cord in order to avoid
shock risks that can be caused by a damaged cable.
Battery Operation:
1. Disconnect the AC cord set completely.
2. Open the battery compartment door and insert 8 "C" size (UM-2 ) batteries(not included) into the
battery compartment.
3. Make sure that the polarities of the batteries ( + ) and ( - ) match those of the battery
compartment.
4. Close the compartment door.
Volume Control
Adjust the volume by using the Vol+ or Vol- buttons to set the desired volume level.
Using Headphones
The unit is equipped with a Headphone Jack for private listening. Simply plug any 3.5 mm plug type stereo
headphone into the Headphone Jack. While the headphone is connected, the speaker in the Portable CD/MP3
Boombox will be automatically disabled.

- 8 -
RADIO OPERATION
Antenna
For best reception, fully extend the FM Antenna to receive FM stations. For AM reception, the unit has a
built-in antenna. To improve AM reception performance, turn the whole unit until optimal reception is
achieved.
Basic Operation
1. Press the FUNCTION button to turn the unit on. Press again until FM or AM Tuner is indicated on
the display screen.
2. Adjust the frequency manually by using the buttons.
For Automatic Tuning:
Press and hold the or buttons until the display frequency adjusts automatically.
When a station of sufficient strength has been found, tuning will stop or you can stop the
automatic tuning by pressing or button again.
Repeat until you have found the desired station.
3. To turn off the radio, press and hold the FUNCTION button.
Preset Tuning
1. Select the AM/FM band and tune to your desired station by following the procedures described above.
2. Press the MEM/PROG button.
3. Use the M+ or M- button to change the number where the station will be stored. (1-20)
4. Press the MEM/PROG button again to store the current frequency to the number selected.
5. Repeat the same procedure to set other desired frequencies into one of the 20 memory slots.
Notes: A stored frequency can only be erased by storing another frequency in its place.
The unit can be preset up to 20 stations.
Accessing PreSet stations
Recall the stored frequencies by pressing M+ or M- buttons to select the desired station.

- 9 -
CD OPERATION
Playback Mode
Press the FUNCTION button to turn the unit on. Press again until ‘ CD ’ is indicated on the display.
Otherwise, if no CD or MP3 disc is inserted, ‘ NO ’ will appear.
1. Lift the CD compartment door. Insert the CD disc in the CD compartment and close the CD door, the
unit will start reading the disc, and will then play the first track.
2. To pause the CD, press the PLAY/PAUSE button.
3. To stop playing the CD, press the STOP button.
Skip Mode
1. During playback or pause mode, press the (Next Song / Fast Forward) button to go to the next
track.
2. During playback or pause mode, press the (Previous Song / Fast Rewind)button to go back to the
beginning of the track.
3. During play mode, press the button twice to go back to the previous track.
Scan/Search
1. Press and hold the button during play to scan the current track at high speed.
2. Press and hold the button while playing to scan the current track backward at high speed.
3. When the desired section of the disc is found, release the button and normal play will resume.
Play Modes
Repeat 1 : While a track is playing, press the (MEM/PROG)button once. “REP”will appear on the
LCD display. This single track will be repeated.
Repeat All : Press the (MEM/PROG)button again (or two times). “REP ALL”will appear on the LCD
display. The entire disc will be played continuously.
Random: Press the button three times. “RAND”will appear on the LCD display. All tracks will play
in random order.
Cancel Repeat Function : Press the button until no icon displays on the LCD display.

- 10 -
Programming the CD Player
The programming of the CD player should be done during STOP mode.
1. Press the (STOP) button to stop the currently loaded CD.
2. Press the (MEM/PROG) button. The LCD display will show ‘P 01’.
3. Press the or buttons to select the desired track.
4. Press the PROGRAM button again to store this track in memory. The LCD will show ‘P02’.
5. Repeat steps 2 and 3 to store more tracks in memory. You can store up to 20 tracks in the memory.
6. Press the (PLAY/PAUSE) button to confirm the programmed selections. The list will begin playing
from the first programmed track. The player will stop automatically after all tracks have played.
7. To cancel the programming list, press the (STOP) button.
Playing An MP3 Disc
Press the FUNCTION button to turn the unit on. Press again until ‘ CD ’ is indicated on the display screen
(if no CD or MP3 disc is inserted). Otherwise, ‘ NO ’ will appear. As MP3 Discs have a large storage capacity,
disc access time is a little longer.
1. Open the CD compartment. Hold the disc with the label side facing up and place it onto the spindle
until it clicks into place. Close the CD compartment door.
2. Be sure that Function is set to the “CD/ MP3” position. The disc will rotate for a few seconds. The first
track of the disc will automatically play. Adjust the volume as desired.
3. Press the PLAY/PAUSE button to stop playing temporarily. The Track number will begin to
Flash on the LCD screen. Resume normal play by pressing the PLAY/PAUSE button again.
4. To stop playback, press the STOP button. The total number of tracks will be shown on the display.

- 11 -
Tips for Handling Compact Discs
For best results, protect CDs against scratches, soil, dust, etc. If a disc is treated with reasonable care, wiping
off the disc with a soft cloth should retain its original sound quality. Discs should be stored in their original
case during periods of non-use.
Handle a disc only by its edges. Do not touch the surface or rainbow-colored side of the disc.
Use a soft cloth to wipe a disc clean. Do not use benzene, thinner, or other chemical cleaners to clean
the disc as damage may result. A disc should always be wiped in a straight line from its center to its
edge. Never wipe a disc in a circular motion.
Do not expose a disc to direct sunlight, high humidity, or high temperatures for extended periods of
time. Do not place the disc on equipment that generates high surface temperatures or store them near
heat sources.
Dust on the pickup lens can lead to erratic operation and interruption of the sound during play. To
clean the pickup lens, open the disc compartment and blow the dust off, using a camera lens
blower(available at most camera stores).
Note: Do not touch the surface of the lens. Do not allow any liquids on the inside of the
product.
Never use benzol, benzene, or other strong chemical cleaners, as these could damage the finish.
Tips for Avoiding Condensation
Condensation occurs:
When the unit is brought from the outdoors into a warm room, or if it is in a cold room which is heated
quickly.
In the summer, if the unit is moved suddenly from an air-conditioned room or car to a hot or humid
location.
Should condensation occur, the product may not operate property. When the product is exposed to
temperature extremes, wait for 1-2 hours(to allow the internal parts to adjust to the surrounding
temperature) before use.

- 12 -
MP3/AUXILIARY INPUT CONNECTION
This product is equipped with an auxiliary input jack that allows you to connect an MP3 player, smart phone,
or other compatible electronic device when plugged in with an appropriate auxiliary cable.
1. Insert one side of the audio cable (requires 3.5mm stereo plug, not supplied) into the line-out jack or
phones jack on your MP3 player or external device
2. Connect the other end of the cable to the Aux-In jack on the Portable CD/MP3 Boombox. (Refer to
diagram on page 6 of this manual).
3. Turn on the unit and press the FUNCTION button until AU is displayed.
4. Turn on your external device, such as an MP3 player, and follow the playback instructions.
5. To terminate this function, turn off your external device.
SETTING TIME AND ALARM
You can set the time and an alarm on your Portable CD/MP3 Boombox.
Setting the Time
1. From STANDBY mode, press and hold the button for 2 seconds and the hour begins to flash.
2. Press the / buttons to set the hour.
3. Press the button again to set the minutes. Press the / buttons to adjust the minute.
4. Press the button to confirm
Setting the Alarm
1. In STANDBY mode, press and hold the for 2 seconds and the clock begins to flash.
2. Press the / buttons to set the hour of the alarm.
3. Press the button again. Press the / buttons to set the minutes.
4. Press the button again to confirm alarm time.
5. Press the button to select the alarm source. Continue pressing and releasing to cycle through the
choices: bb (for buzz sound)/ FM (last radio station tuned)/ AM (last radio station tuned)/ CD/ OFF).
The alarm can be temporarily turned off manually by pressing the SNOOZE button. The alarm will turn again
automatically after 9 minutes.
Press the FUNCTION button to disable the alarm when it activates.

- 13 -
TROUBLESHOOTING
Problem
Solution
Unit will not turn on
1. AC power cord may not be connected. Check AC power
cord connection.
2. Try a different wall outlet.
3. If using batteries, check to be sure that batteries are
properly installed.
4. Replace batteries.
Disc will not play
1. CD compartment door may not be closed properly. Be sure
that CD compartment door is fully closed.
2. Disc may be inserted incorrectly. Reinsert disc correctly.
3. CD may be dirty or defective or moisture and condensation
may have accumulated on the CD. Try cleaning the CD.
4. Try using a different CD.
No sound
1. Be sure that volume is not set to minimum.
2. Check to be sure that Function button is not set to the OFF
position.
3. If playing a CD, check to be sure that disc is not defective.
Erratic playback
1. Clean or replace disc.
2. If using battery operated power, one or more of the
batteries may be weak. Test and/or replace batteries if
necessary.
NOTE: Disruptions can be caused by copy protection systems on
certain CDs.
AM or FM mode, no sound.
1. Check to be sure that the Function is set to AM or FM.
2. Be sure that volume is not set to minimum.
AM/FM, poor sound
1. Retune the AM or FM station.
2. For FM stations, be sure to fully extend the telescopic
antenna and adjust the angle accordingly.
3. For AM stations, rotate the unit until best reception is
obtained.
If you experience any issues that are not listed above, or if you are unable to resolve your issue after trying the
methods and solutions described above, please contact Riptunes technical support team:
Website: http://www.rip-tunes.com

- 14 -
SPECIFICATIONS
AC Voltage
AC 120V ~ 60Hz 12W
Battery
8 C Batteries (Not Included)
Output Power:
1W RMS x 2
Unit size:
8.46” x 8.26” x 6.3”
Unit weight:
3.3 lb
Speaker size:
2 ¼ “ (57mm) x 2
Frequency Range
AM: 520 - 1710 KHz
FM 87.5 - 108 MHz
Laser Product
Class 1
Specifications are subject to change without notice.
Riptunes® is a division of WBH Holdings Inc.
All rights reserved. All trademarks are the property of their respective owners and are used by Luzerne
Trading Company solely for descriptive purposes.
This product is serviced and supported exclusively by Riptunes and its Limited Warranty.

- 15 -

- 16 -
TABLE DES MATIÈRES
Introduction .............................................................................................................................................. 17
Avertissements et consignes de sécurité ................................................................................................. 18
Contenu de la boite................................................................................................................................... 20
Connaître votre Lecteur CD/MP3 Portable............................................................................................... 21
Opérations de base ................................................................................................................................... 22
Fonction radio........................................................................................................................................... 23
Fonction CD............................................................................................................................................... 24
Connexion Mp3/Auxiliaire ........................................................................................................................ 27
Réglage de l'heure et l'alarme .................................................................................................................. 27
Dépannage ................................................................................................................................................ 28
Spécifications ............................................................................................................................................ 29

- 17 -
INTRODUCTION
Félicitation pour l'achat de vos RipTunes Lecteur CD/MP3 Portable avec radio AM/FM. Le Lecteur CD/MP3
Portable de RIPTUNES™ est le meilleur moyen de profiter votre CDs et radio avec toutes ces fonctionnalités
sans l'encombrement d'un lecteur stéréo de taille standard. Son design compact permet un accès aisé.
Alimentation en batterie ou avec un chargeur, avec le lecteur Lecteur CD/MP3 Portable de RIPTUNES vous ne
manqueriez jamais le rythme.
Votre monde. Votre musique. Tune in.
Caractéristique
Lecteur CD avec chargement par le haut
Radio AM / FM avec tuner digital
Ecran LCD de lecture numérique pour CD et
radio
Aller et fonctions de recherche
Présélectionner jusqu'à 20 stations de radio
CD & Formats audio supportés: MP3, WMA, CD,
CD-DA, CD-R/-RW
CD programmable avec mémoire 20 de piste
Fonction répété un / répété tous
3.5mm Aux-in
Prise casque
Antenne télescopique
Double alimentation AC/DC
Il est recommandé de vous familiariser avec les caractéristiques, fonctions, et procédures d’utilisations
décrites dans ce guide avant l'utilisation de l'appareil. A cause d'une petite modification de l'appareil, les
instructions, caractéristiques et/ou description de ce guide peut être différent de votre appareil.

- 18 -
AVERTISSEMENTS ET CONSIGNES DE SÉCURITÉ
Ce Lecteur CD/MP3 Portable comporte un laser de Classe 1. Pour assurer une bonne utilisation de cet
appareil, veuillez lire attentivement le manuel du fabricant et le conserver pour vous y référer à l’avenir. Des
modifications, ajustements, ou performances des procédures autres que ceux mentionnés dans la présente
peuvent engendrer une exposition dangereuse à la radiation. Etant donné que le rayon laser utilisé dans ce
lecteur CD/MP3 Portable est nocif du point de vue ophtalmologique n'essayez pas d'ouvrir l'appareil. Si celui-ci
doit être entretenu, veuillez le confier uniquement à un personnel autorisé et qualifié.
Pour éviter les chocs électriques, n’essayez jamais de démonter l’appareil, ne l’approchez pas de l’eau et
veillez à ce que le branchement de la large fiche s’effectue dans une prise correspondante. Ce produit ne doit
fonctionner qu’avec le type d’alimentation indiqué sur l’étiquette. Ce lecteur CD/MP3 Portable est conçu pour
être branché uniquement sur 120V –60Hz uniquement. Si vous n’êtes pas sûr(e) du type d’alimentation de
votre domicile, contactez votre distributeur ou votre compagnie d’électricité.
REMARQUE: Le lecteur n’est pas débranché tant qu’il reste branché à la prise murale, et ce, même si le
lecteur CD/MP3 Portable est éteint.
Consignes de sécurité supplémentaires
Humidité - Ne pas exposé cette appareil à l'eau ou à l'humidité. Pour éviter les incendies ou tout danger
d'électrocution, ne placez pas d'objets contenants des liquides tels que des vases sur le lecteur CD/MP3
Portable. Si du liquide pénètre dans l’appareil, débranchez-le immédiatement. Veillez à installer le lecteur
dans un endroit où l’accès au câble d’alimentation est aisé afin que l’appareil puisse être immédiatement
débranché de la prise murale en cas de problème ou si du liquide tombe dessus.
REMARQUE: Si l'appareil est déplacé d’un endroit froid à un endroit chaud ou s’il est déposé dans une
pièce très humide, de l’humidité peut se former sur les lentilles du lecteur CD qui pourra donc ne pas
fonctionner correctement. Dans ce cas, enlevez le disque et laissez l’appareil allumé pendant environ
une demi-heure jusqu’à ce que l’humidité soit totalement évaporée.
Chaleur - Le lecteur CD/MP3 Portable doit être placé loin de toute source de chaleur, telles que les radiateurs,
les appareils de chauffage, les cuisinières ou tout autre appareil produisant de la chaleur (notamment les
amplificateurs).
Ventilation - N’installez pas le lecteur dans un espace confiné, tel qu’une étagère ou un meuble similaire, à
moins que celui-ci ne soit correctement aéré. Des fentes et des ouvertures de ventilation sur le lecteur
CD/MP3 Portable assure le bon fonctionnement du produit et le protège d'une surchauffe. Ces ouvertures ne
doivent être ni obstruées ni recouvertes. Les ouvertures ne doivent jamais être recouvertes en posant
l'appareil sur un lit, un canapé, un tapis ou toute autre surface similaire comme cela empêcherait une bonne
ventilation et engendrerait une surchauffe.

- 19 -
Surcharge - Ne surchargez pas les prises murales, les rallonges, ou les prises multiples car cela peut entraîner
un risque d’incendie ou de choc électrique.
Mise en masse et polarisation - Ne tentez pas de modifier ou de contourner le dispositif de sécurité de la fiche
polarisée ou de terre. Une fiche polarisée possède deux lames dont une plus large que l'autre. Cette fiche ne
s'introduise dans la prise que dans un seul sens. Ceci est un dispositif de sécurité. Une fiche de terre a deux
lames et une troisième broche de terre. La lame plus large ou la troisième broche est pour votre sécurité. Si la
fiche fournie ne rentre pas dans votre prise, consultez un électricien pour remplacer la prise obsolète.
Remarque: Il est fortement recommandé de débrancher l'appareil en cas d'orage ou si vous prévoyez
de n'est pas l'utilisé pendant une période prolongée.
Nettoyage- Débranchez cet appareil de la prise avant de le nettoyer. Veillez en outre à ne nettoyer que
l’extérieur de l’appareil. N’essayez pas de nettoyer l’intérieur ni de démonter le produit. N’utilisez pas de
nettoyants liquides ni d’aérosols. Utilisez un linge humide pour le nettoyage ET veillez à ce que l’unité soit
totalement sèche avant de la rebrancher à l’alimentation.
Dépannage - Veuillez confier tous travaux d'entretien à une personne qualifiée. Un dépannage est nécessaire
si l'appareil est endommagé, tel qu'un dégât sur le câble ou prise d'alimentation, liquide déversé ou objet
tombant sur l'appareil; pluie, humidité ou mal-fonctionnement.
NOTICE FCC
Cet appareil a été testé et confirmé conforme aux limites des appareils numériques Classe B selon la partie 15
des règlementations du FFC. Ces limites fournies suffisamment de protection contre les interférences nocives
pour les installations résidentielles. Cet appareil génère, utilise, et peut émettre de l'énergie de fréquence
radio si son utilisation n'est pas conforme aux instructions de ce guide et peut engendrer une interférence
nocive aux communications radio.
Cet appareil ne cause pas une interférence nocive à la réception radio ou télévision, qui peut être déterminé
en allumant et en éteignant l'appareil. L'utilisateur est encouragé de rectifier l'interférence avec l'un ou
plusieurs des mesures suivantes:
–Réorienter ou déplacer l'antenne de réception.
–Eloigner l'appareil du récepteur.
–Connecter la prise sur un circuit autre que celui utiliser par le récepteur.
–Consulter un revendeur ou un technicien qualifié radio/TV pour assistance.
AVERTISSEMENT:
Des changements ou modifications de cet appareil, sans une approbation préalable de l'agent de conformité
peuvent, annuler l'autorité de l'utilisateur à utiliser l'appareil.
Si celui-ci doit être entretenu, veuillez le confier uniquement à un personnel autorisé et qualifié. Si l'appareil
est toujours sous garantie, contactez le centre de service de RIPTUNES™. Voir les termes et conditions
spécifiques de la garantie de cet appareil.
Table of contents
Languages:
Other RIP TUNES Portable Stereo System manuals

RIP TUNES
RIP TUNES RACR-510BT User manual

RIP TUNES
RIP TUNES RACR-400 User manual

RIP TUNES
RIP TUNES CDB-232BT User manual

RIP TUNES
RIP TUNES CDB-490BT User manual

RIP TUNES
RIP TUNES CDB-204 User manual

RIP TUNES
RIP TUNES CDB-237BT User manual

RIP TUNES
RIP TUNES CDB200 User manual

RIP TUNES
RIP TUNES RACR-510BT User manual