RMO 660 Operation and maintenance manual
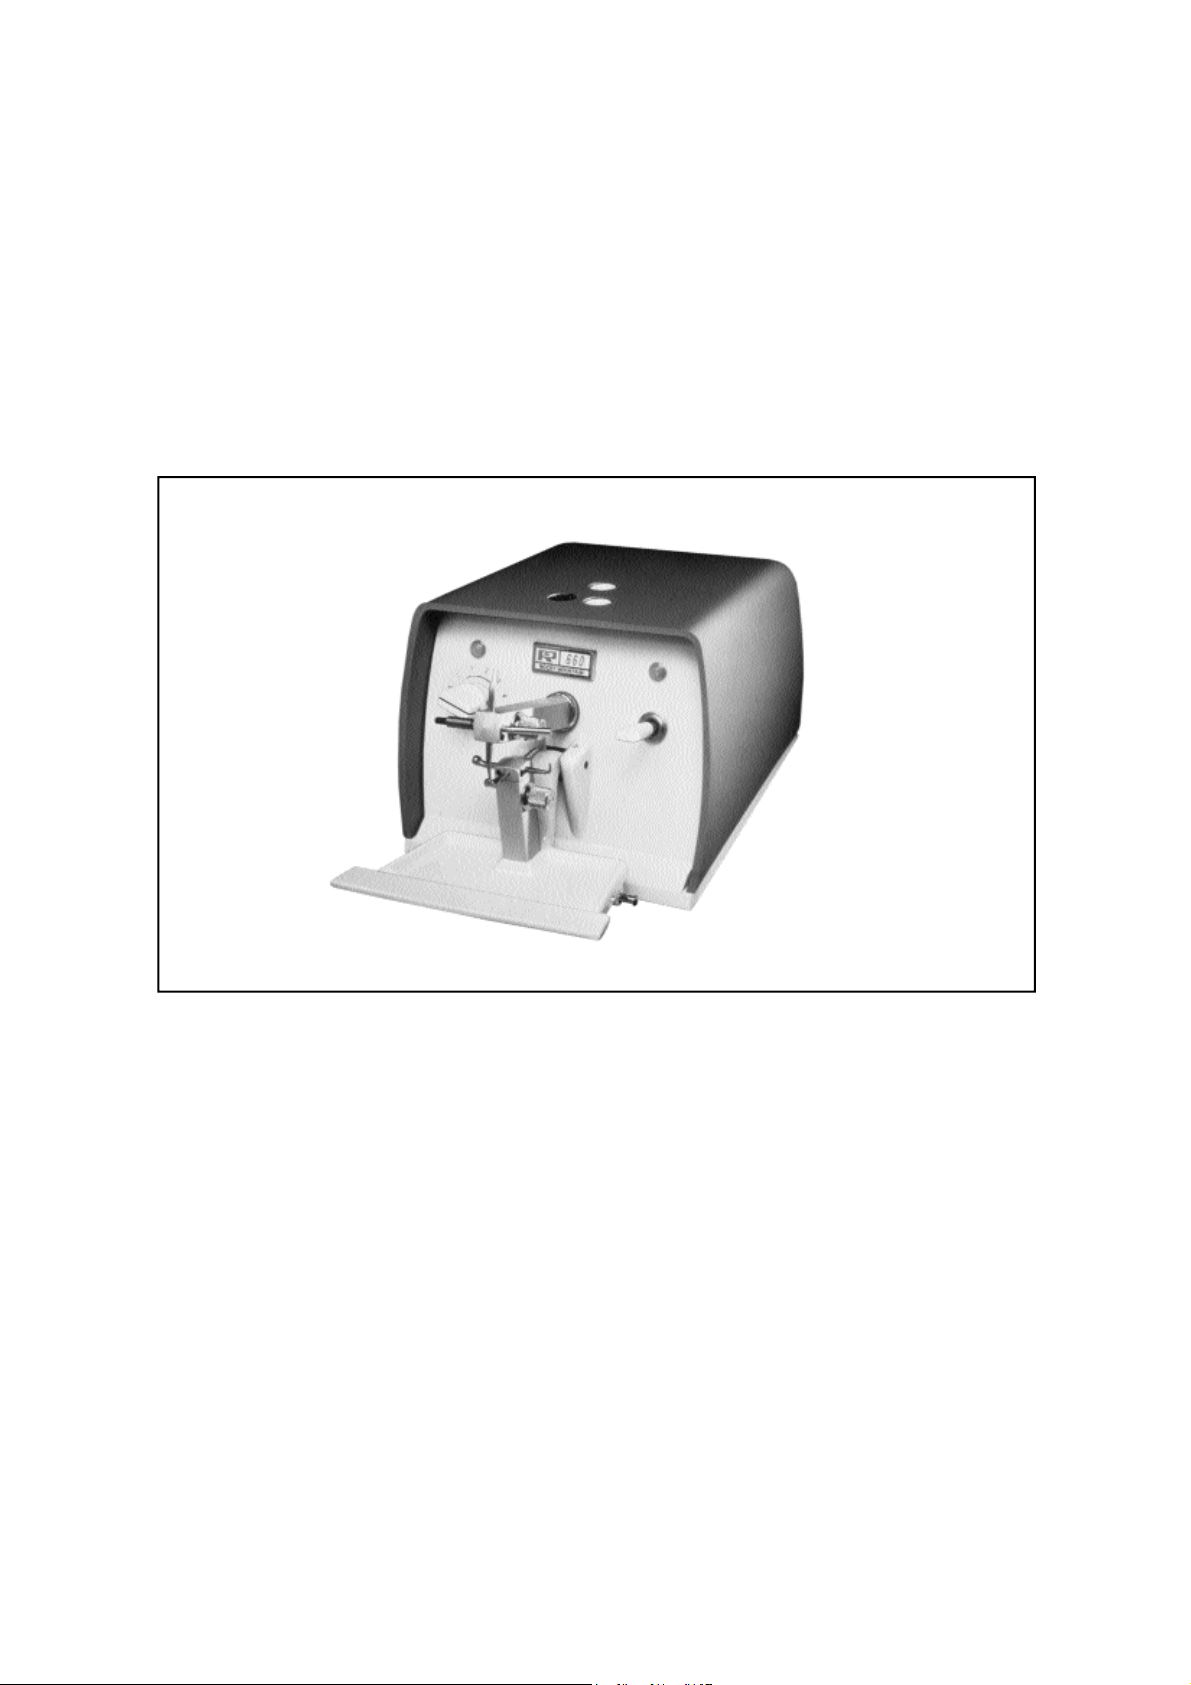
LA SOUDEUSE ROCKY MOUNTAIN 660
660 MULTI PRUPOSE WELDER
DAS SCHWEIßGERÄT RM 660
La soudeuse Rocky Mountain 660 permet d’effectuer tous les travaux de soudure par points,
brasure (soudure par apport de métal) traitements thermiques et détrempes sur les appareillages
orthodontiques réalisés en acier inoxydable (Tru-chrome, Elgiloy). Son encombrement réduit et sa
polyvalence permettent son intégration dans le cabinet.
Your RMO 660 is a small, versatile, economical chairside unit created to fulfill the multi-purpose
requirements or Orthodontic and Pedodontic appliance fabrication. It occupies minimum counter
space and its light weight makes it appropriate for chairside and mobil use. Electrodes align
automatically and accessories add versatility to appliance fabrication.
Ihr RMO 660 ist ein kleines, vielseitiges, wirtschaftliches Behandlungsgerät, das entwickelt wurde,
um den Mehrzweckbedarf bei der Apparaturherstellung für die Kieferorthopädie und für die
Kinderzahnkunde zu erfüllen. Man benötigt einen minimalen Arbeitsplatz und das geringe Gewicht
ermöglicht den mobilen Einsatz am Stuhl. Die Elektroden zentrieren sich automatisch und das
Zubehör trägt zur Vielseitigkeit bei der Apparaturherstellung bei.
J64
J00064 Notice Instructions Rev01
COMBINAISONS D’ELECTRODES
RECOMMENDED ELECTRODE COMBINATIONS
EMPFOHLENE ELEKTRODENKOMBINATIONEN
Attachements sur bagues
Matériau à bagues / Matrices
Attachments to bands, joining
plier-formed bands and matrices
Attachments auf Bänder - das Verbindung von
Matrizen und Bandmateriel
Attachements sur bagues de petite dimension
incisives inf. et canines
Attachements to bands too small to go over the pointed
electrodes, like small size anterior and
cuspid bands.
Attachments auf zu kleine Bänder, für die spitzen Elektroden,
wie kleine Bandgrößen, Front und Eckzanhnbänder.
Fils sur bague ou couronnes
Mainteneurs d’espaces
Wires to bands or crowns, space maintainers, fixed
linguals, etc.
Drähte auf Bänder oder Kronen, Lückenhalter, festsitzende
Lingualapparaturen etc.
Fils sur fils, ressorts sur arcs.
Wires to wires. “finger” springs to arch wires cribs, occlusal
rests, etc.
Draht auf Draht.... “Feder” auf Bogendrähte, Okklusalauflagen
etc
Pointe + Pointe
Pointed / Pointed
Spitzf / Spitz
Pointe + 1/2 Lune
Pointed / Round Anvil
Spitz / Amboß
Gorge + Boule
Grooved / Ball
gefurcht / Kugelförmig
Plat + 1/2 Lune
Blunt / Grooved Anvil
Stumpf / Amboß
I/ PRINCIPE DE FONCTIONNEMENT / HOW TO WELD WITH THE 660 / WIE MAN MIT DEM SCHWEIßGERÄT 660
SCHWEISST
Pour souder par points, on utilise la propriété qu’à l’acier inoxydable d’être mauvais conducteur du courant électrique. Etant mauvais conducteur, il
s ’ é c h a u ffe quand il est parcouru par un courant électrique, jusqu’à sa température de fusion si l’intensité est suff i s a n t e .
Si deux pièces d’acier inoxydable sont pressées ensembles, elles resteront soudées à l’endroit où elles auront été portées à la température de
fusion.
Dans ce principe, on peut retenir que les parties à souder par point doivent être maintenues en pression l’une contre l’autre. et que l’on ne peut
souder par cette méthode que des métaux mauvais conducteurs et par conséquent aucun des métaux précieux qui sont tous d’excellents
conducteurs électriques.
Aresistance weld is made by passing an electrical charge of high amperage and very low voltage through the materials to be joined. The material
must be electrically resistant.
The combination of heat and pressure causes the two surfaces to fuse into one. In a fraction of a second, the materials are joined and cooled. Mosts
types of stainless steel and Elgiloy®are ideal materials for resistance welding. However there are some so-called stainless steels that are so high in
nickel content that they are not as electrically resistant and will not weld satisfactorily.The electrically conductive materials such as aluminium,
copper and precious metal alloys, do not lend themselves to resistance welding by dental welders.
Schweissen : Eine Widerstandsschweißung erfolgt, mit hoher Amperezahl und sehr geringer Voltzahl zur Verbindung des Materialien. Dabei wird
die Elektrische widerstand des Materials genutzt. Das Material muß für diese elektrische Ladung
strapazierfähig sein.
Durch die Kombination aus Hitze und Druck werden die beide “Metalloberflächen” verschmolzen. In einem Bruchteil von Sekunden wird das Material
miteinander verbunden und kühlt ab. Die meisten Edelstähle und Elgiloy-Draht sind ideale Materialien für die Widerstandsschweißung. Jedoch gibt
es einige sogennante Edelstähle, mit sehr hohem Nickelanteil ; diese haben einen niedrigenren elektrischen Widerstand und sind somit für die
Schweißung ungeeignet. Elektrisch leitfähige Materialien wie Aluminium, kupfer und Edelmetallegierungen eignen sich nicht für die
Widerstandsschweißung bei Dentalschweißgeräten.
II/ SOUDURE PAR POINTS / SPOT / PUNKTSCHWEIßUNG
Le tableau ci-dessous montre les combinaisons d’électrodes à utiliser en fonction des travaux à effectuer.
This board shows the electrodes combinations to use according to different tasks you have to carry out.
Die Folgende Tabelle zeigt die Kombinationen von Elektroden, je nach Aufgabe.
J00064 Notice Instructions Rev01

III/ BRASURE (SOUDURE PAR APPORT DE METAL) / SOLDERING / ELEKTROLÖTEN
La soudeuse 660 permet de braser soit avec l’électrode charbon se trouvant sur la tourelle porte-électrodes supérieure, soit avec les câbles
auxiliaires.
The 660 welder permits to solder with the turret-mounted carbon electrode or with auxiliary cables. This procedure is especially suited for fabrication
of space maintainers and fixed lingual arches. Bar solder, rather than wire solder, must be used with this technique.
Das Löten mit dem Schweißgerät 660, erfolgt mit den auf elektrodenarm den aufgesetzten Kohlelektroden oder mit den Handkabeln. Dieses
Verfahren ist besonders für die Herstellung von Lückenhaltern und festsitzenden Lingualbögen geeignet. Bei dieser Technik sollte eher Stangenlot
als Drahtlot von der Rolle verwendet werden.
A/ brasure effectuée avec les électrodes / Soldering using turret-mounted carbon electrode / Löten mit den
Elektrodenarm 1Souder par points les deux parties.
Position and weld the materials together.
Setzen und schweißen Sie das Material laut Beschreibung des Schweißverfahrens zusammen.
2Mettre les électrodes charbon et coudées en regard.
Rotate the select AMatic turrets to the carbon tip upper and soldering lower electrodes.
Drehen Sie den oberen Elektrodenarm bis zur oberen kohleelektrode und den unteren bis zür
Lötelektrode.
3Nettoyer le charbon avec la lime carton.
Clean the carbon tip so all dried flux is removed and brighten the lower electrode with the
carbon file.
Reinigen Sie die Kohlespitze, bis das gesamte getrocknete Flußmittel entfernt ist und polieren
Sie die untere Elektrode mit der Kohlefeile.
4Régler le sélecteur sur “S” et bloquer le plateau en position basse.
Turn the heat Selector to “S” station and lock the Handrest in the “down” position.
Stellen Sie den Temperaturregler auf “S” ein. Blockieren Sie das Handrest in der unteren
Stellung.
5 et 6 Former une paillette de soudure en forme d’accent circonflexe ou choisir une paillette de
soudure préfabriquée.
Before cutting a piece of bar solder, contour the end into a slade shape with a plier or by
grasping with a cutter. Cut a piece of the contoured bar solder large enough to keep the flux
from contacting the carbon tip and sufficient to join the materials.
Bevor Sie ein Stück vom Stangenlot abschneiden, biegen Sie das Lotende mit einer Zange um
Schneiden Sie ein Stück von dem geformten Stangenlot ab. Beachten Sie bitte, daß es groß
genug ist, damit Flußmittel und Kohlespitze nicht in Berührung kommen ; es muß jedoch für die
Verbindung der Materialien von ausreichender Größe sein.
7Appliquer du flux sur les pièces à souder.
Next, apply RMO flux to area to be soldered.
Als nächstes tragen Sie bitte das RMO Flußmittel auf die zu lötende Fläche auf.
8Placer la paillette de soudure sur le flux et mettre les électrodes en position.
Place the piece of solder on top of the fluxed joint. Insert the assembled material between the
electrodes.
Plazieren Sie das Stückchen Lot auf die gefluxte Verbindungsstelle. Legen Sie die
zusammengesetzten Materialien zwischen die Elektroden.
9Abaisser le commutateur et le maintenir en position basse jusqu’à la fusion complète de la
paillette, ceci est très important.
Depress “operate” switch. Continue to heat joint only until solder covers joint.
Drücken Sie den Betriebsschalter nach unten. Erhitzen Sie die Verbindungsstelle nur solange,
bis das Lot sie bedeckt.
J00064 Notice Instructions Rev01

B/ Brasure effectuée avec les câbles / Soldering with auxiliary cables / Das Löten mit den Handkabeln :
Cette méthode permet de braser des fils entre eux et tous les appareillages orthodontiques directement sur le modèle.
This method is recommended for soldering wire to wire, appliances fabricated on models, and for precise, delicate soldering of hooks, eyelets,
etc...
Dieses Verfahren ist für das Löten von Draht auf Draht, vorgefertigten Apparaturen auf Modellen und für die exakte, schwierige Lötung von
Haken, Ösen, usw. empfehlenswert.
1Immobiliser les pièces à braser dans la bonne position (soit par un point de soudure, soit avec
de l’acrylique ou autre moyen).
Weld materials together, if possible to facilitate exact placement. Asmall amount of acrylic,
plaster, high temperature wax or Mortite may be used to stabilize the materials in position.
Punktschweißen Sie die Materialien, falls möglich um eine genaue Plazierung zu erleichtern. Ist
das Zusammenschweißen nicht möglich wie z.B. bei der Herstellung von Apparaturen auf
Modellen, kann eine kleine Menge von Acrylat, Gips, Hochtemperaturwachs oder Mortite
verwendet werden, um das Material in der gewünschten Stellung zu fixieren.
2Brancher les câbles sur les deux prises blanches situées sur le sommet de la soudeuse. (Le
courant sortant entre une prise blanche et une prise noire, ne serait pas assez fort).
Plug both cables in the white auxiliary cable receptacles.
Stecken Sie beide Kabel in die weißen Steckvorrichtungen, die für die Handkabel vorgesehen
sind.
3Monter les embouts de câbles permettant de braser :
- 1 câble avec la pointe du charbon,
- 1 câble avec la pince ou la pointe laiton (on peut, si le travail le rend nécessaire,
remplacer ce câble par la pince auxiliaire).
Equip cables for soldering. Prepare one handle with carbon tip and other with metal or vise
tip. For freehand soldering of wires, use carbon tip and vise tip (or auxiliary vise instead of
one cable).
Rüsten Sie nun die Kabel für das Löten aus. Bereiten Sie eine Seitekabel mit der Kohlespitze
und die andere mit einer Metallspitze oder falls erforderlich der sogenannten Dritten Hand vor.
4Nettoyer le charbon avec une lime en carton, appliquer du flux et placer la soudure.
Clean the carbon tip with the carbon file. If bar silver solder is used, flux the joint (flux should
be watery).
Säubern Sie die Kohlespitze mit der Kohlefeile. Wenn Stangensilberlot benutzt wird, muß die
Verbindungsstelle mit Flußmittel überzogen sein (das Flußmittel sollte wässrig sein).
5Verouiller le plateau en position basse. Régler le sélecteur sur “S” et toucher une des pièces à
souder avec l’électrode laiton (serrer ou toucher selon le cas) et ceci au plus près de la
soudure.
Clip the vise-tipped cable to the heavier of the two wires just as close as possible. Set the
heat selector to “S”. Lock the Handrest / Tray in the down position.
Klemmen Sie das kabel und der Metallspitze sogennante “dritte Hand” an der Draht mit dem
größeren Durchmesser so nah wie möglich am Lot. Stellen sie den Temperaturregler auf “S”.
Blockieren Sie das Handrest / Tray in der unteren Stellung.
6Toucher la soudure avec l’électrode charbon jusqu’à la fusion de la soudure.
Touch the carbon tip to the solder.When the solder flows around the joint, remove the tip.
Berürhren Sie das Lot mit der Kohlespitze. Wenn das Lot um die Verbindungsstelle fließt,
enftfernen Sie bitte die Kohlespitze.
7Nettoyer avec une brossette métallique.
When the joint is cool, use a stainless steel rotary wire brush (unless materials are too
delicate) to loosen and remove the flux.
Nach dem Abhühlen des Verbindungsstelle, verwenden Sie bitte eine
Rotationsdrahtbürste aus Edelstahl (sofern das Material nicht zu empfindlich ist), um das
Flußmittel zu lösen und zu entfernen.
J00064 Notice Instructions Rev01

Pour braser un bâtonnet de laiton sur un arc, utiliser des bâtonnets comportant déjà un cylindre de soudure à l’une des extrémités et procéder
comme suit :
To weld a carbon tip on an arch, use tips which already have a welding cylindre at one of its limits and proceed as follow :
Um ein kupferlötstöbchen auf einen Draht zu löten, verwenden Sie Stöbchen mit Lot an einem Ende, und gehen wie folgt vor :
1. Brancher la pince auxiliaire (prise blanche) et serrer le bâtonnet dans celle-ci, la soudure se trouvant environ à 1cm de la pince.
Plug the auxiliary Plier (white plug) and place the tips in this one.
Stecken Sie die Hilfsklammer in die weiße Steckvorrichtung und Klemmen Sie das Stöbchen ein.
2. Brancher le câble comportant la pointe charbon (prise blanche) et vérouiller le plateau de la soudeuse en position basse. Régler la
soudeuse sur “S”.
Plug the cable which has the carbon tip (white plug) and lock the handrest in the down position. Turn the heat selector to “S”.
Stecken Sie der kabel mit den Kohlespitze ein. Blockieren Sie das handrest/tray in der unteren Stellung. Stellen Sie den
Temperaturregler auf “S”.
3. Déposer un peu de flux sur l’arc à l’endroit où le bâtonnet sera soudé et appliquer l’arc contre la soudure du bâtonnet dans la position
relative souhaitée.
Apply RMO flux to area to be welded.
Tragen Sie das RMO flußmittel auf die zu lötenden Flächen auf.
4. Toucher la soudure avec la pointe charbon et maintenir le contact jusqu’à la fusion complète de la soudure. (Ne pas toucher l’arc avec
le charbon).
Touch the weld with the carbon tip and keep in position until the materials are jointed.
Berühren Sie mit der Kohlespitze die Schweißstelle. Wenn das Lot um die Verbindungsstelle fließt, entfernen Sie bitte die Kohlespitze.
5. Nettoyer avec une brossette métallique.
Use a stainless steel rotary wire brush to loosen and remove the flux.
Verwenden Sie bitte eine bestehende Rotationsdrahtbürste aus Edelstahl, um das Flußmittel zu lösen und zu entfernen.
Autres exemples de brasure / Other examples of solders / Anderen Beispiele zum löten
J00064 Notice Instructions Rev01

C/ Traitement d’un arc lingual / The treatment of a lingual arch / Behandlung des lingualbogens :
Cette opération s’effectue directement sur le modèle.
This operation is made directly on the modell.
Die Bearbeitung erfolgt direkt am Model.
1Brancher un câble sur une prise noire et l’autre sur une prise blanche.
Plug the cables into the black and white auxiliary receptacles.
Stecken Sie ein Handkabel in die schwarze und das andere in die weiße Steckvorrichtung.
2Equiper les câbles des deux pointes en laiton. Régler le sélecteur sur “S”.
Set up the handles for grooved metal tip operation. Turn the heat selector to “S”.
Verwenden Sie die Handkabel mit den gefurchten Metallspitzen. Stellen Sie den
Temperaturregler auf “S”.
3Vérouiller le plateau en position basse. Toucher l’arc avec les deux pointes en laiton en laissant
environ 20 mm entre elles et attendre que l’arc prenne une couleur jaune paille. Dès que cette
couleur est obtenue, couper le contact entre les pointes de laiton et l’arc.
Recommencer cette opération jusqu’au traitement complet de l’arc en prenant soin de retraiter
à chaque fois une petite longueur de la section précédemment traitée.
Lock the handrest in the “down” position. Place the metal tips of the cables on the wire with the
tips as far apart as you wish to anneal the wire. When the wire becomes bright red, quickly
remove the tips. Moving the tips closer to one another during the operation will also allow the
wire to heat more rapidly.
Blockieren Sie das Handrest / Tray in der unteren Stellung. Um den Draht zum Glühen
zu bringen, Plazieren Sie die Metallspitzen der Handkabel in dem
gewünschten Abstand auf dem Draht. Wenn der Draht leuchtend rot wird,
entfernen Sie bitte schnell die Spitzen. Wenn die Spitzen während das
Glühvorganges näher zueinander bewegt werden, wird sich der Draht
schneller erhitzen.
D/ Détrempe / Annealing (heat softening) / Das Glühen :
La prise de détrempe permet de détremper les arcs sur une petite longueur, là où contrairement à l’élasticité, la malléabilité est recherchée (par
exemple, pour reformer la boucle d’un arc extra oral après en avoir raccourci les branches externes, pour façonner la boucle verticale fermée ou
“post” d’un arc lingual ou palatin amovible).
Resilient stainless steel wires can be softened (annealed) by heating to a temperature of about 2000° F ( bright red). Annealing is a practical
method of removing the temper from sections of wire prior to forming loops for extra-oral appliances, plier-formed lingual arch posts or hooks for
elastics.
Resilient Edelstahldrähte können durch Erhitzen bis zu einer Temperatur von 1095°C (leuchtend rot) ausgeglüht werden. Das Glühen ist eine
praktische Methode zum Veichmachen von Drähten vor der Formung von Schlaufen für extra-orale Apparaturen,
die Aktivatoren bei Lingual oder Palatalbögen oder Häkchen für Elastiks.
1Brancher la prise de détrempe entre une prise noire et une prise blanche.
Insert the annealing plug into the black and white receptacles.
Stecken Sie den Anlaßstecker in die schwarz / weiße Steckvorrichtung.
2Régler le sélecteur sur “S”.
Set the heat selector to “S”. Place the section of the stainless steel wire to be annealed
between the copper elements of the plug.
Stellen Sie den Temperaturregler auf “S”.
3Vérouiller le plateau en position basse.
Depress the Handrest / Tray to activate the internal auxiliary function switch.
Drücken Sie das Handrest / Tray herunter, um den inneren Hilfsbetriebsschalter in Gang
zu setzen.
4Mettre la portion de fil à détremper entre les branches de la prise de détrempe et maintenir le
contact jusqu’au rouge vif.
When the wire becomes bright red, release the Handrest / Tray or if the Handrest /
Tray is in “locked” position, remove the wire from the plug elements.
Wenn der Draht leuchtend rot wird, lösen Sie das Handrest oder entfernen den Draht von den
J00064 Notice Instructions Rev01

IV/ TRAITEMENT THERMIQUE / STRESS-RELIEVING (THERMO-SETTING) / VERMEIDUNG VON DRAHTSPANNUNG
(HITZEHÄRTBARKEIT)
Avec la soudeuse 660, on peut traiter les fils directement sur la soudeuse ou à distance (par ex : arc lingual sur le modèle).
With the 660 welder we can treat wires directly on the welder or from a distance (for example : lingual arch on the modell).
Mit dem Schweißgerät 660 können die Drähte direkt auf dem Schweißgerät oder mit Hilfe der Handkabel behandelt werden.
A/ Traitement d’un arc vestibulaire / Treatment of a buccal arch / Behandlungs des Bukkalbogens :
1. Brancher la pince auxiliaire sur une prise blanche et brancher 1 câble (pointe laiton apparente) dans l’autre prise blanche.
Plug the cables into black and white receptacles.
Stecken Sie die Kabel in die schwarz / weiße Steckvorrichtung.
2. Serrer l’arc vestibulaire dans la pince auxiliaire de telle façon que l’arc soit divisé en deux parties 1/3 et 2/3.
Prepare both handles for slotted metal tip operation.
Bereiten Sie beide Handkabel mit den geschlitzten Metallspitzen vor.
3. Régler le sélecteur sur “S”, “1” ou “3” en fonction de la section de l’arc (un arc de faible section nécessite une intensité plus
importante).
Turn the heat selector to “S”.
Stellen Sie den Temperaturregler auf “S”.
4. Vérouiller le plateau en position basse.
Lock the Handrest/Tray in the “down” position.
Blockieren Sie das Handrest/Tray in der unteren Stellung.
5. Toucher avec la pointe laiton l’extrémité de l’arc située aux 2/3 par rapport à la pince et attendre que le métal prenne une couleur jaune
paille.
Place the metal tips on the wire to be stress relieved with about 15 to 20 mm between the tips.
Legen Sie die Metallspitzen in einem Abstand von 15 bis 20 mm an den Draht.
6. Dès que cette couleur est obtenue, couper le contact entre la pointe laiton et l’arc.
When the wire turns a straw color, immediatly remove one tip from the wire to break the current flow.
Wenn der Draht strohfarben wird, nehmen Sie bitte sofort eine der Spitzen vom Draht und somit den Stromfluß zu unterbrechen.
7. Déplacer le point de serrage de la pince auxiliaire sur l’arc vers la partie traitée (de nouveau 1/3 et 2/3) et recommencer 5 et 6 pour
terminer le traitement de l’arc.
Move the tips to an adjacent section of the wire, overlapping the previous section slightly and repeat this procedure around the arch.
Legen Sie die Metallspitzen an ein angrenzendes Bogensegment, und zwar so, daß der soeben erhitzte Drahtteil ein wenig
überschnitten wird und wiederholen diese Verfahrensart ringsherum um den Bogen.
J00064 Notice Instructions Rev01

L’entretien de la soudeuse 660 se limite à quelques opérations très simples :
The maintenance of the 660 welder is made of some very easy operations :
Die Wartung des Schweißgeräts 660 beschrankt sich auf einige einfache Punkte :
1. Electrodes en charbon / Soldering electrodes / Lötelektroden :
Limer de temps en temps avec une lime en carton pour éliminer le flux séché. Remplacer
l’embout quand celui-ciest complétement usé. Procéder de même pour l’électrode en charbon
équipant les câbles mais en veillant à conserver celle-ci très pointue.
Burnish with carbon file before each soldering operation to remove dried flux to restore full
conductivity. When the carbon tip is worn and shortened so it does not heat satisfactorily,
replace the tip.
Schleifen Sie die Kohlespitze vor jedem Lötvorgang mit einer Kohlefeile, um getrockenes
Flußmittel zu beseitigen und um die volle Leitfähigkeit wiederherzustellen. Wenn die
kohlspitze abgenutzt und kurz geworden ist, wird sie sich nicht mehr zufriedenstellend
erhitzen und ein Austausch der Spitze ist erforderlich.
2. Electrodes en cuivre / Welding electrodes / Schweißelektroden :
LImer de temps en temps avec une lime métallique pour éliminer l’oxydation. Pour les
électrodes pointues, limer également la circonférence pour ne pas augmenter la section de
contact et diminuer ainsi l’intensité ponctuelle.
Dress the pointed tip electrodes with a fine flat steel file to approximately 1 mm diameter and
level the surfaces so they meet evenly. With the electrode tips level and in full contact,
burnish the outside circumference of the two electrodes to remove horizontal burrs.
Feilen Sie die spitzförmigen Elektroden mit einer feinen, flachen Stahlfeile bis auf etwa 1 mm
Durchmesser und richten Sie die Spitzenoberflächen so aus, daß sie gleichmäßig
aufeinandertreffen. Wenn die Elektrodenspitzen gleichmäßig aufeinandertreffen und sich
berühren, polieren Sie bitte das Äußere der Elektroden, um den horizontalen Metallgrat zu
entfernen.
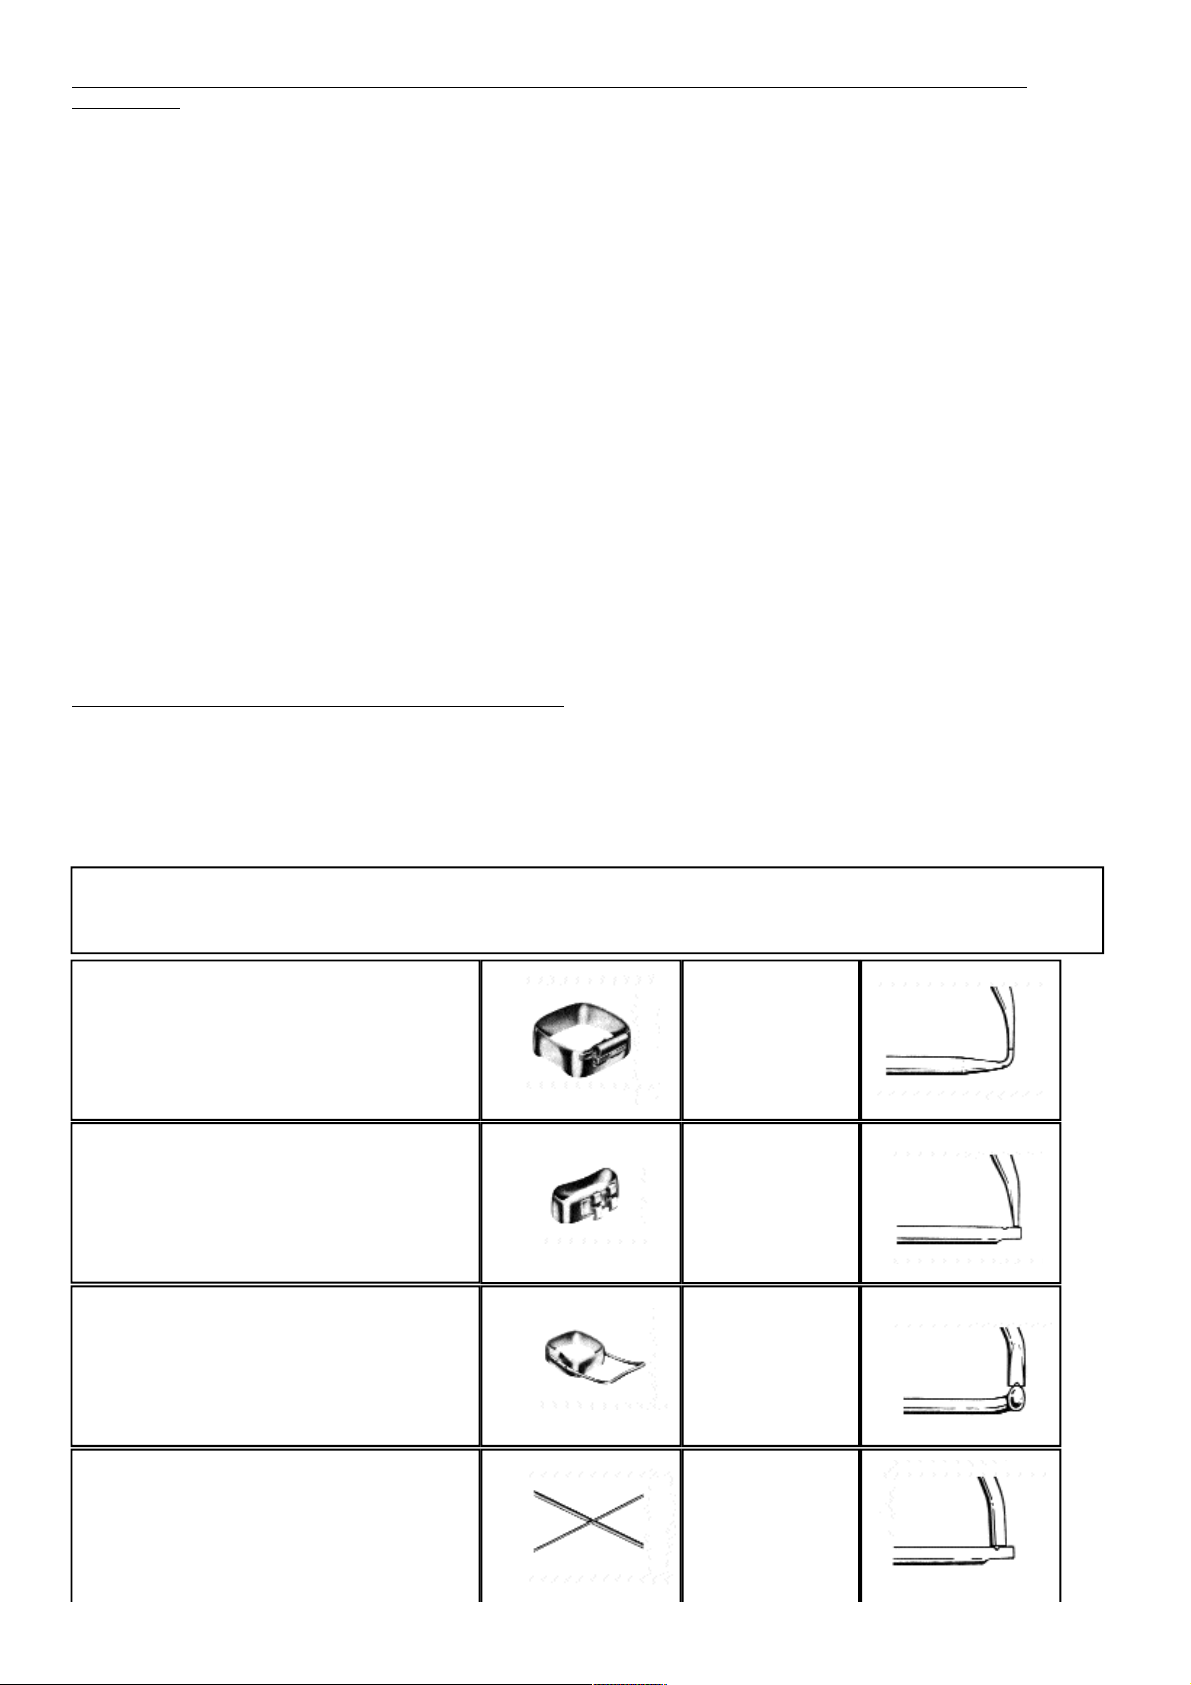
3. Plateau / Handrest / Handrest-Tray :
Le plateau doit s’articuler sans jeu sur son axe. Si il y a du jeu, l’intensité diminue et peut devenir insuffisante. Pour éliminer le jeu, procéder
comme suit :
- désserrer les 2 vis A
- serrer alternativement les vis B gauche et droite jusqu’à l’élimination du jeu
- resserrer les vis A
The Handrest must be articulated with its axis without play.If there is play, the intensity decreases and could be insufficient. To eliminate play,
proceed as follow :
- loosen 2 screws (A)
- tighten right and left screws (B) to eliminate play
- tighten screws A
Das Handrest/Tray muß sich auf seiner Achse und ohne Spiel bewegen. Wenn es Spiel gäbe, würde die Intensität abnehmen und könnte
ungenügend werden. Zur Eliminierungs des Spiel wie folgt vorgehen :
- die zwei Schrauben A lösen.
- die zwei Schrauben B links und recht abwechselnd festdrehen bis zum Verschwinden des Spiels.
- die Schrauben A wiederanziehen.
J00064 Notice Instructions Rev01
H 112 Tourelle supérieure avec électrodes.
Upper turret with electrodes
Oberes Electrodenarm mit Elektroden
H113 Tourelle inférieure avec électrodes
Lower turret with electrodes
Unteres Elektrodenarm mit Elektroden
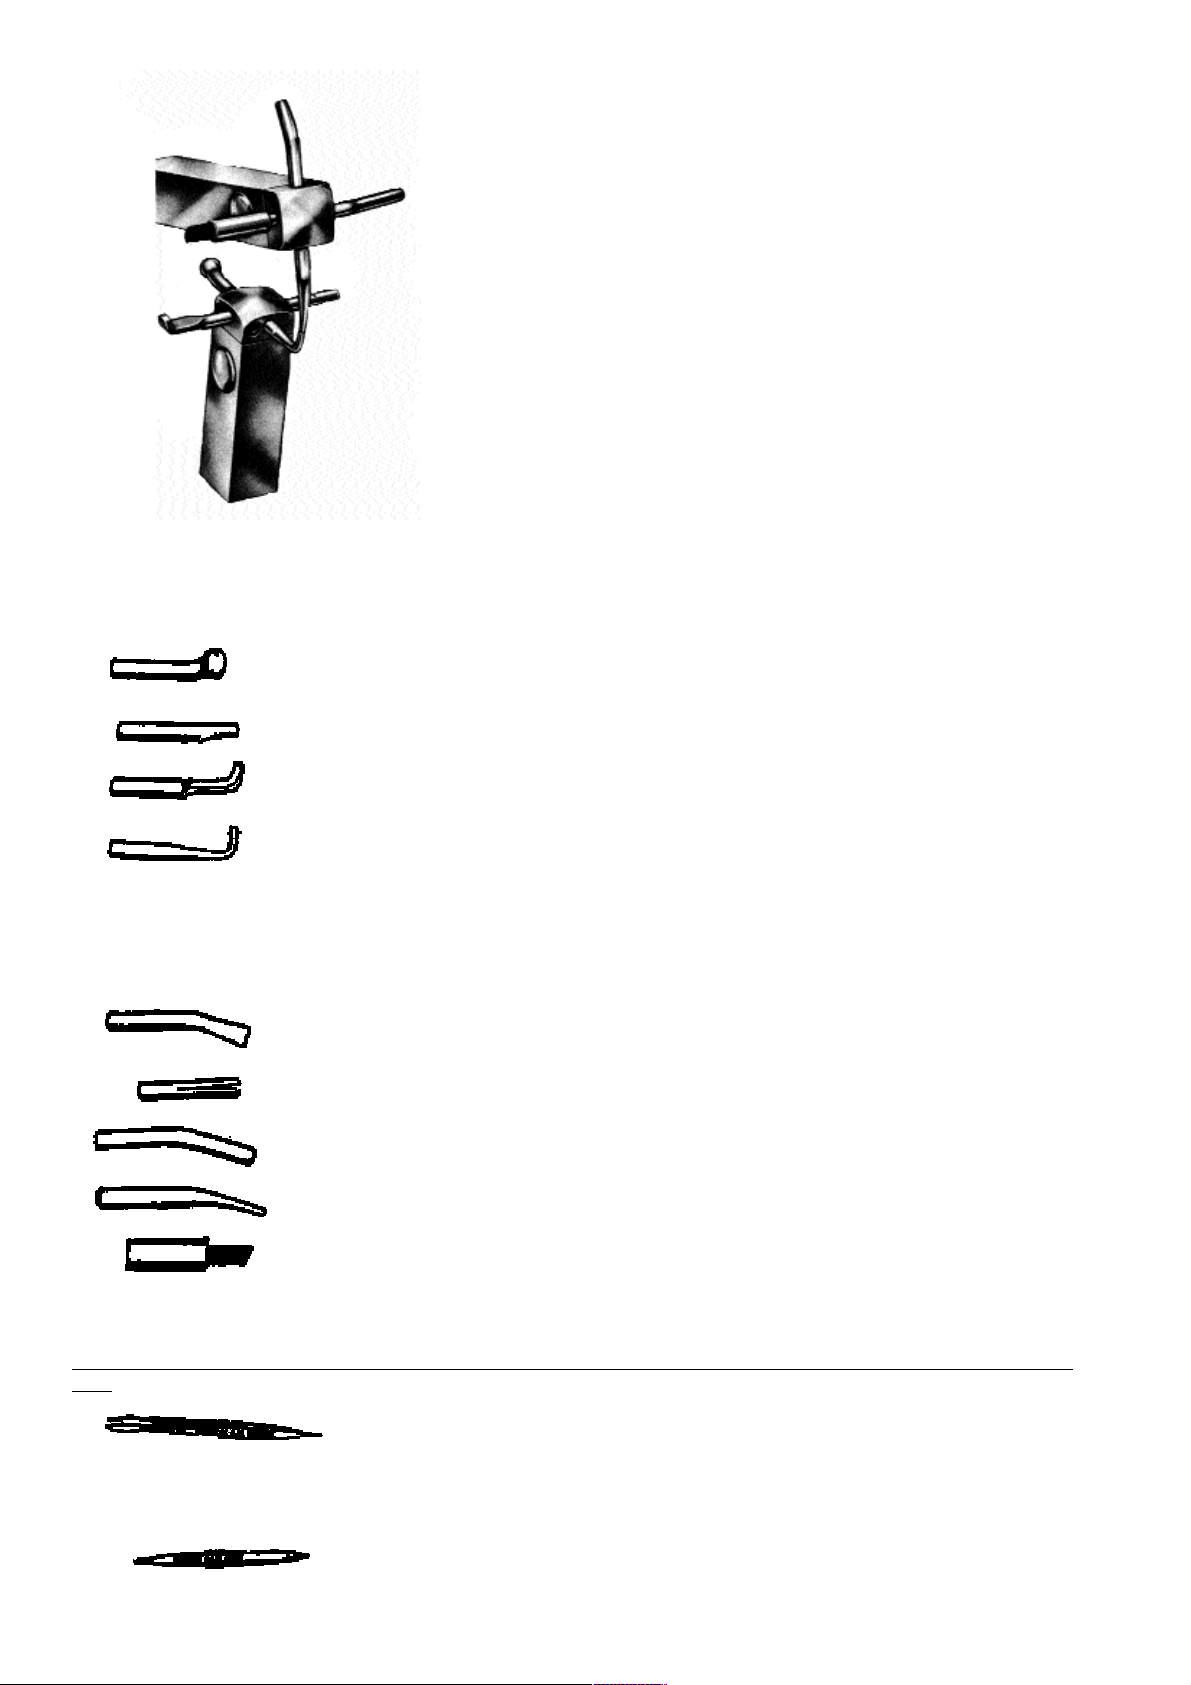
Electrodes inférieures
Lower Electrodes
Untere Elektroden
H101 à boule / ball / Kugel
H102 à brasure / with solder / Lötelektrode
H103 en demi lune / round anvil /Amboß rund
H104 en pointe / pointed / sptiz Amboß
Electrodes supérieures
Upper Electrodes
Obere
Elektroden
EMBOUTS DE RECHANGE POUR CABLES J431 / SPARE PARTS FOR J431 CABLES / WECHSELSPITZE FÜR KABEL
J431
H91 pointe laiton et pince / vise tip and plier / Klemme mit Metallspitze.
H92 embout métal et pointe charbon / Metal tip and carbon tip / Metallspitze und Kohlespitze
H105 à gorge / grooved / Furche
H106 pour embout charbon / for carbon tip / Halter für obere Kohlspitze
H107 cylindrique / cylindrical / zylindrisch
H108 en pointe / pointed / spitz
H109 embout charbon / carbon tip / Kohlspitze
J00064 Notice Instructions Rev01

CHOIX DE L’INTENSITE (sélecteur d’intentité) /SELECT PROPER WELDING HEAT ON THE HEAT SELECTOR / WÄHLEN
DER RICHTIGEN SCHWEIßTEMPERATUR ÜBER DEN TEMPERATURREGLER
Les valeurs indiquées ci-dessous sont indicatives et peuvent varier en plus ou en moins en fonction du courant d’alimentation.
These values are indicatives and they can change according to the current.
Die angegebenen Zahlen sind indikativ und können sich je nach Stromstäche ändern.
“S” Ane jamais utiliser pour la soudure par points car délivre une intensité continue au lieu d’une
impulsion.
For Soldering only
Nur zum Löten.
1Fils fins sur arcs ; matériau à matrice.
Small wires to arches, matrix material.
Dünne Drähte auf Bögen, Matrizenmaterial.
2Taquets sur bagues : matériau à bague (.003, .004) ; fils moyens.
Seating lugs, joining band material, medium diameter wires.
Cleat/lug Bandmaterial (.003, .004) Drähte mittleren Durchmessers.
3Attachements sur bagues (sauf tubes pour molaires) matériau à bagues (.005, .006) boutons
linguaux.
Light or medium attachments to bands, heavy band material and lingual buttons.
Kleine oder mittlere Attachements auf Bänder (wie zB. im Frontzahnbereich, im
Seitenzahnbereich, Zwillings-Brackets und Single Brackets auf Bänder),
stärkeres Bandmaterial (.005, .006) und Lingualknöpfchen.
4Tubes pour bagues
Buccal and lingual tubes and heavy attachments to molar bands and molar band material.
Bukkal Tubes, Lingual Tubes und große Attachements auf Molarenbänder und Bandmaterial
für Molaren.
COMMENT SOUDER PAR POINTS / SOLDERING / PUNKTSCHWEIßUNG
Après avoir choisi les électrodes correspondant au travail à effectuer, placer les pièces à souder entre les électrodes, mettre le sélecteur en position
1 pour les pièces minces ou 2 pour les pièces plus épaisses et donner une impulsion en abaissant le commutateur de fonctionnement. Les deux
pièces sont alors légèrement soudées ensemble mais peuvent être orientées autour du point de soudure et éventuellement être
déssoudées si le positionnement relatif n’est pas correct.
Quand celui-ci est estimé correct, placer le sélecteur d’intensité en position désirée et donner une impulsion.
On effectue en général 4 points de soudure pour un bracket et 6 pour un tube.
Select the electrode combination most appropriate for the materials to be joined. Place the materials between the electrodes. Check and ajust
position of the materials if necessary.Next depress the operate switch. One press...one weld !
Wählen Sie die Elektroden-Kombination, die sich am besten für die Materialien die miteinander verschmolzen werden sollen eignet. Plazieren Sie
das Material zwischen den Elektroden. Überprüfen Sie die Plazierung des Materials und, falls notwendig, korrigieren Sie diese. Als nächstes drücken
Sie bitte den Betriebsschalter herunter.Ein Druck...eine Schweißung !
POUR SOUDER UN BOUTON LINGUAL / TO WELD A LINGUAL BUTTON / SCHWEIßEN EINES LINGUALKNÖPFCHEN
Donner une impulsion (sélecteur : 3) sur le sommet du bouton pour le placement en bonne position puis faire 4 points de soudure sur la base.
NB : Pour être certain d’avoir un bon contact entre les pièces à souder, on peut accentuer la pression de l’électrode inférieure en poussant
légèrement de bas en haut sur le plateau.
Give one press (turn the heat selector to “3” station) on the top of the button to place it in good position. Next make 4 series of welds on basis.
To be sure of having a good contact between welding materials, you can increase the pressure of the lower electrode.
Zur Plazierung gibt man einen Impuls (Temperaturregler auf 3) auf den Mittelpunkt des knöpfchen. Anschließend werden 4 schweißpunkte auf die
basis gemacht.
Um sicher zu sein, einen guten Kontakt zwischen den Schweißteilen herzustellen, kann man den Druck des unteren Elektrode erhöhen, in dem man
das Handrest / Tray leicht von unten nach oben drückt.
J00064 Notice Instructions Rev01

RMO®Europe
0 800 49 11 70
B.P. 20334 - 67411 ILLKIRCH
FRANCE
J00064 Notice Instructions Rev01
Popular Welding System manuals by other brands


Hobart Welding Products
Hobart Welding Products AirForce 375 owner's manual

GF
GF MSA 330 instruction manual

Hakko Electronics
Hakko Electronics FX-888D instruction manual

Abicor Binzel
Abicor Binzel ABIPLAS WELD 100 W operating instructions

EWM
EWM Taurus 355 Basic TDM operating instructions

Thermal Dynamics
Thermal Dynamics PakMaster 100 XL plus operating manual


