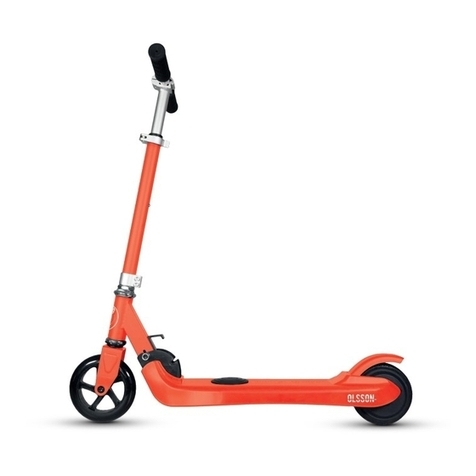
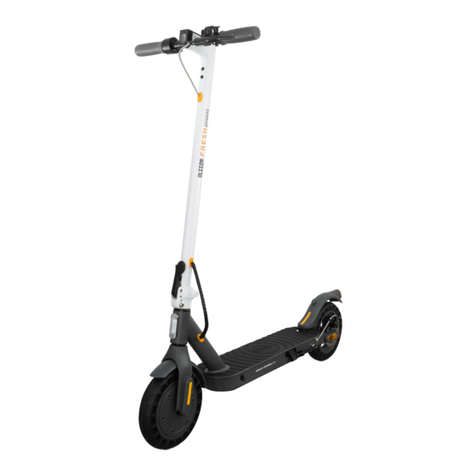
Olsson and Brothers Stroot FLIP User manual

MANUAL DE USUARIO Y GARANTÍA
USER’S MANUAL AND GARANTEE
GUIA DO UTILIZADOR E GARANTIA
GUIDE DE L’UTILIZATEUR ET GARANTIE
BENUTZERHANDBUCH UND GARANTIE
3
12
21
30
39
E-SCOOTER STROOT
FLIP
ES
EN
PT
FR
DE


3
ES
Descubre tu nuevo E-Scooter Olsson
Gracias por habernos elegido. Para poner en
funcionamiento tu E-Scooter y empezar a disfrutar
de una experiencia enriquecedora, le aconsejamos
lea muy atentamente este manual antes de utilizar
su E-Scooter
MANUAL DE USUARIO Y GARANTÍA
Bienvenido a la familia
Este manual está diseñado para brindarle la información necesaria para
la puesta en marcha, circulación y el mantenimiento seguro de su nuevo
E-Scooter.

4
ES
CONSEJOS DE SEGURIDAD
• Este producto no es un juguete. Utilice protecciones, (casco de cabeza, protección
de manos, codos y rodillas) a la hora de conducir su E-Scooter
• No quite las manos del manillar, ni utilice el teléfono, mientras conduce.
• No haga movimientos peligrosos ni conduzca con una sola mano mientras y
mantenga sus pies sobre los scooter
• Antes de poner en circulación su E-Scooter, asegúrese de conocer la legislación de
su localidad.
• Utilice solo accesorios originales de la marca.
• No intente desmontar su E-scooter
• Mantenga su E-Scooter protegido de la lluvia y agua. Evite temperaturas extremas.
No exponga su E-Scooter al fuego.
• No haga saltos con su E-Scooter
• Inspeccione a fondo todo el dispositivo antes de cada viaje, y no circule con él,
hasta que haya corregido cualquier problema.
• Cualquier E-Scooter que no funcione correctamente puede hacer que pierda el
control.
• No intente saltar un bordillo/elevación del terreno de más de 3 centímetros de
distancia, ya que pueden provocar daños en el conductor o el scooter.
• Los usuarios deben ajustar la altura del manillar en la posición adecuada para
garantizar la seguridad.
• No use este producto en un entorno con tempertura inferior a -5 ℃.
• No use este producto en un camino cuesta abajo, cuya pendiente sea de más de 5
grados.
• Si se usa en un suelo con pendiente, mayor de 5 grados, deberá utilizar el format
manual (pie), ya que el scooter desactivará el motor.
• El E-Scooter es un medio para desplazarse de manera individual. Nuestra
tecnología y procesos de producción son desarrollados y vericados con pruebas
muy estrictas para cada E-Scooter.
• Circular el E-Scooter, sin seguir las indicaciones de este manual, puede ocasionar
daños a su E-Scooter, o lesiones.
CONTENIDO DE LA CAJA
• Scooter Eléctrico
• Cargador
• Manual de usuario

5
ES
CARGAR LA BATERIA DE LITIO
MANTENIMIENTO
Lea atentamente esta información para mantener al dia su E-Scooter.
Cada vez, que utilice su E-Scooter, le recomendamos mantenga limpia y secas las
ruedas, asi como sus ejes, dirección, manillar,palanca para plegar el manillar, display
(no mojar , ni limpiar con liquidos abrasivos).
Evite mojar su E-Scooter, esto le generará la pérdida de garantía.
Cada tres meses, agregue una pequeña cantidad de lubricante a la parte donde se
dobla la manija (plegado) para realizar el mantenimiento.
El neumático debe reemplazarse cuando aparezca algún sintoma de desgaste o
rotura, contactando con el distribuidor para reemplazar el neumático original.
Verique si hay tornillos sueltos en el scooter. Si hay alguno aojado, apriételo.
No coloque los scooters al sol o en otros lugares severamente húmedos durante
mucho tiempo; Por favor, mantenga limpios los scooters.
Le recomendamos que, antes de usar por primera vez su E-Scooter, cargue la batería
al completo: conecte el cargador a su E-Scooter y enchufe el cargador a la corriente.
No desconecte el equipo hasta que la bateria no esté cargada por complete. El
visualizador de bateria, le indica la carga de bateria.
Cuando la batería está inactiva por un tiempo prolongado, cárguela al menos una vez
al mes.
Nota: El daño a la batería debido a la entrada de agua, colisión y otros factores no
normales no está cubierto por la garantía.
El cargador esta provisto por una función de protección de carga, de modo que la
carga se detendrá automáticamente cuando la batería esté completamente cargada
al 100%.
Conecte el cargador a la toma de la fuente de alimentación. (AC100V-240V)
Cuando el indicador del cargador está en rojo, indica que la batería se está cargando,
y cuando la luz del cargador se ilumina en verde, la batería está completamente llena.
La batería de litio de este producto se puede recargar por ciclos al menos 500 veces
y se puede usar más de 600 veces en circunstancias normales. Cuando la batería
está completamente cargada y el kilometraje es solo la mitad del rango de la fábrica,
lo que indica que se debe reemplazar por envejecimiento de la batería y reemplazar
por una nueva
Podrá utilizar el scooter en modo manual, o asistido (a traves de un sensor
inteligente)

6
ES
3
4
2
5
6
7
Instale el soporte de pie usando herramientas.
Presione y mantenga presionado el pedal de
plegado (inferior derecha) con la mano y levante el
tubo de manillar.
Levante el manillar, y ajuste la hebilla (inferior
izquierda) girándola.
Cierre la hebilla delantera para estabilizar el manillar
(Segundo cierre seguridad).
El soporte del manillar, tiene 2 puños, extiéndalos y
introdúzcalos a cada lado, presionándo los pivotes
hasta que entren en el oricio del manillar.
El manillar debe introducirse en la barra, ajustando la
altura dependiendo de la altura del usuario. Dispone
de 3 niveles de altura.
Bloquee la posición cerrando la visagra. Compruebe
que una vez cerrado, el manillar, gira la rueda. Es
muy importante vericar que se ha realizado el
ajuste.
COMO DESPLEGAR EL SCOOTER
1

7
ES
3
4
2
5
6
Suelta la visagra del tubo del manillar.
Presione hacia dentro el botón de ajuste, y empuje
hacia bajo el tubo del manillar.
Extraida los 2 puños del manillar, presionando sobre
cada botón.
Presione la hebilla (inferior izquierda) hacia abajo,
dandole vueltas hasta que aoje.
Presione hacia atrás suavemente el pedal de
plegado,(inferior derecha) hasta que note un clic,
para completar el plegado.
Producto plegado para su transporte o guardado.
COMO PLEGAR DE NUEVO EL SCOOTER
1
Su Nuevo e-scooter se debe ensamblar de acuerdo con los pasos anteriores, como
se muestra en la gura. Asegúrese de que ha relizado todos los pasos durante el
montaje.

8
ES
GUIA DE USO
∙Nivel bajo hasta 3km / h, se activa empujando con el pie el e-scooter y
accelerando en el pulsador del manillar
∙Nivel intermedio hasta 8 km/h
∙Nivel alto hasta 14km / h,
∙INDICADOR DE NIVEL DE VELOCIDAD: Muestra su nivel de velocidad actual
∙INDICADOR DE NIVEL DE LA BATERÍA: Muestra el nivel restante de la batería
∙PANEL DE INFORMACIÓN: Muestra el kilometraje total, la distancia de viaje
parcial, el voltaje y el tiempo de viaje actual.
∙BOTÓN NIVEL VELOCIDAD(+): Presione el boton, para aumentar la velocidad
máxima y la aceleración. Nivel 1 – Despacio. Nivel 2 – Medio. Nivel 3 – Alto.
∙BOTON DE ENCENDIDO / MULTIFUNCIÓN: Para encenderlo: Mantengalo
presionado durante 3 segundos Para apagarlo: Mantengalo presionado durante
3 segundos. Pulsando este boton puede moverse por el kilometraje total, la
distancia de viaje actual, nivel de bateria y el tiempo de viaje actual.
∙BOTÓN NIVEL VELOCIDAD (-): Presione el botón para disminuir la velocidad
máxima y la aceleración. Nivel 1 – Despacio. Nivel 2 – Medio. Nivel 3 – Alto.
∙Electrico: a través de un pulsador que se encuentra en el manillar. Pulsandolo
desactivará el motor y hará reducer la velocidad.
∙Manual: la rueda trasera incorpora un guardabarros, este se utiliza ejerciendo
presion con el pie hacia abajo para reducir la velocidad
• El E-Scooter tiene 3 niveles de velocidad:
• Presione el interruptor de encendido que se encuentra debajo de la plataforma del
scooter y enciéndalo.
• Sostenga el manillar con ambas manos, coloque un pie sobre el pedal y empuje el
otro pie hacia atrás para lograr la aceleración. Irá a bajo nivel (hast 9km/h, según
peso y estado del suelo).
• Para disminuir la velocidad, presione la placa de freno de la rueda trasera con un
pie y con el pulsador del manillar del freno electrico.
• El patinete electrico dispone de 2 tipos de freno:
• Acelerador. El patiente eléctrico incorpora un pulsador en el manillar para acelerar.
Incorpora un sistema de seguridad para que cuando el patienet este parado, si
se pulsa el acelerador, el patinete no salga en movimiento. Para acelerar desde
parado, solo tendra que dar un pequeño empujon al patinete y acelerar con el
pulsador, una vez en movimiento puede acelerar, dependiendo el modo velocidad
que tenga en el display.
• Display. El patinete eléctrico incorpora un display multifunción, donde podrá
visualizar y cambiar diferentes modos
9
ES
COMPONENTES DEL E-SCOOTER
1
3
4
2
5
6
8
9
10
11
12
13
15
14
7
Pulsador Acelerador
Pulsador Freno
Manillar
Soporte Manillar
Bisagra ajuste altura
Barra
Horquilla
Guardabarros
Hebilla-pedal plegable
Bateria y Motor
Amortiguador
Reector
Freno de pie
Antideslizante apoyo pie
Display
1.
2.
3.
4.
5.
6.
7
8.
9.
10.
11.
12.
13.
14.
15.

10
ES
El rendimiento y los parámetros del scooter, pueden estar sujetos a cambios,
provocados, por variables, como peso del usuario, pendientes, activación-
desactivación del motor en los empujes, estado del pavimento.
La empresa Rider Division SLU, ubicada en polígono industrial de Barros n 29,
39408 Barros, Cantabria con número de teléfono 942812900 con cif 39856463.
Declaramos bajo nuestra exclusiva responsabilidad la conformidad del producto:
Con las disposiciones de la directiva, 2014/30/UE, 2014/35/UE, 2011/65/UE,
2006/42/CE
Estándares: EN 61000-3-2:2014, EN 61000-3-2:2013, EN 60335-1:2012+A11:2014,
IEC 62321-7:2017, IEC 62321-4:2013, IEC 62321-5:2013, IEC 62321-6:2015, EN ISO
12100:2010
Para más información de nuestros productos, consejos prácticos, preguntas
frecuentes, manuals de usuario, etc… visita: www.olssonandbrothers.com
Para contactar con nuestro servicio de asistencia técnica visita www.
olssonandbrothers.com o a través del Teléfono 942 81 29 00
Este producto incorpora una bateria de litio, por lo que en caso de destrucción, debe
de extraerse la bateria para su adecuada gestión.
MAS INFORMACIÓN Y SOPORTE
DECLARACIÓN DE CONFORMIDAD

11
ES
Modelo:
Nº serie:
Fecha de compra:
Rider división SLU concede a través de este certicado 2 años de garantía al equipo
arriba mencionado, para las piezas a las que pueda imputar un defecto de fabricación.
A excepción de la batería, cargador, accesorios que tiene una cobertura de garantía
de 6 meses. Es imprescindible que mantenga junto a este documento de garantía la
factura de compra, siendo el justicante de la fecha de compra.
La Garantía Legal cubre la reparación, en tal caso, éstas serán gratuitas para el
consumidor, incluyendo mano de obra y materiales. En todo caso, las reparaciones
en garantía deben ser efectuadas por Servicio de Asistencia Técnica Ocial de Rider
Division o distribuidores autorizados. La reparación o sustitución suspenderá el
cómputo del plazo de la Garantía Legal, no dando lugar en ningún caso a un nuevo
plazo de dos años de garantía desde la entrega del producto reparado/
sustituido.
Además, en ningún caso existirá falta de conformidad y por lo tanto no será de
aplicación la Garantía Legal cuando:
Dicho producto o cualquiera de sus identicativos (número de serie, etc.) hayan sido,
total o parcialmente, abiertos, montados, desmontados, manipulados y/o reparados
por persona ajena a los
Servicios de Asistencia Técnica Ocial o distribuidores autorizados de Rider Division.
La falta de conformidad sea consecuencia de una instalación incorrecta (salvo que la
instalación haya sido realizada por el vendedor autorizado de Rider Division o bajo su
responsabilidad. La falta de conformidad se deba al uso de accesorios, cargadores o
consumibles que no sean originales de Rider Division y diseñados para el producto.
Haya rotura de cualquiera de los sellos de la carcasa o celdas de la batería, o bien
indicios evidentes de manipulación en los mismos.
Los daños que se produjeran en el producto fueran causados por cualquier causa de
fuerza mayor o caso fortuito.
No realizar el mantenimiento aconsejado en el manual de usuario .
Ninguna de las garantías aquí recogidas cubre la sustitución de piezas debido al
desgaste o rotura de mecanismos, gomas, carcasas y/o plásticos, así como los
deterioros estéticos, debidos al uso normal del producto.
Datos del propietario
Nombre/apellidos:
Domicilio:
C.P:
Localidad:
Provincia:
Teléfono:
Sello establecimiento vendendor
(Incluido en el equipo)
CERTIFICADO DE GARANTÍA

12
EN
Discover new E-Scooter Olsson
Thank you for choosing us. To start up
your E-Scooter and start enjoying an
enriching experience, please read this
manual carefully.
USER’S GUIDE AND GUARANTEE
Welcome to our family
This manual is designed to provide you with the necessary
information for the start-up, circulation and maintenance of your
new E-Scooter.

13
EN
SECURITY ADVICE
• This product is not a toy.
• Use protections (head helmet, hand protection, elbowpads and kneepads) when
driving your E-Scooter.
• Do not remove your hands from the handlebar, or use a telephone, while driving.
• If you drive in low daylight, make sure the front and rear lights of your E-Scooter
work properly.
• Before putting your E-Scooter into circulation, make sure you know the legislation
in your area.
• Use only original accessories of our brand.
• Do not attempt to disassemble your E-scooter
• Keep your E-Scooter protected from rain and water.
• Avoid extreme temperatures. Do not expose your E-Scooter to re.
• Do not jump with your E-Scooter.
• Do not attempt to jump a curb / terrain elevation more than 3 centimeters away, as
they may cause damage to the driver or scooter.
• Users must adjust the height of the handlebar in the proper position to ensure
safety.
• Do not use this product in an environment with a temperature below -5 ℃.
• Do not use this product on a downhill road whose slope is more than 5 degrees.
• If it is used in a sloping ground, greater than 5 degrees, you must move with the
foot since the scooter will deactivate the motor.
• Thoroughly inspect the entire device before each trip and do not circulate with it,
until you have corrected any problems.
• Any E-Scooter that does not work properly can cause you to lose control while
driving.
• The E-Scooter is a means to travel in a personal way. Our technology and
production processes are developed with very strict tests for each E-Scooter. Drive
the E-Scooter, without following the instructions in this manual, may cause damage
to your E-Scooter, or injury.
BOX CONTENTS
• Electric Scooter
• Charger
• User manual

14
EN
LITHIUM BATTERY CHARGE
MAINTENANCE
Read this information carefully to keep your E-Scooter up to date.
Each time you use your E-Scooter, we recommend you keep the wheels clean and
dry, as well as your axles, steering, handlebars, lever to fold the handlebar, display (do
not wet, or clean with abrasive liquids).
Avoid wetting your E-Scooter, this will generate the loss of warranty.
Every three months, add a small amount of lubricant to the part where the handle is
folded (folded) to perform maintenance.
The tire must be replaced when any signs of wear or breakage appear, contacting the
dealer to replace the original tire.
Check for loose screws on the scooter. If there is one loosened, tighten it.
7.3. Battery
7.4. Daily placement and care.
Do not place scooters in the sun or in other severely humid places for a long time;
Please, keep the scooters clean.
We recommend that you fully charge the battery before using your E-Scooter for the
rst time: connect the charger to your E-Scooter and plug the charger into the mains.
Do not disconnect the equipment until the battery is fully charged. The battery
display indicates the battery charge. When the scooter sends a low-power alarm,
charge immediately to avoid damaging the battery and affecting its path.
When the battery is idle for a long time, charge it at least once a month
Note: Damage to the battery due to water ingress, collision and other non-normal
factors is not covered by the warranty.
The charger is provided by a charge protection function, so that the charge will stop
automatically when the battery is fully charged at 100%.
Open the rubber cap of the charging port on the bottom side of the pedal and insert
the charger output connector into the charging port.
Connect the charger to the power supply socket. (AC100V-240V)
When the charger indicator is red, it indicates that the battery is charging, and when
the charger light turns green, the battery is completely full.
The lithium battery of this product can be recharged by cycles at least 500 times and
can be used more than 600 times under normal circumstances. When the battery is
fully charged and the mileage is only half the range of the factory, which indicates
that it should be replaced by aging the battery and replaced with a new one.

15
EN
3
4
2
5
6
7
Install the foot stand using tools.
Press and hold the folding pedal (lower right) by
hand and lift the handlebar tube.
Lift the handlebar, and adjust the buckle (lower left)
by turning it.
Close the front buckle to stabilize the handlebar
(Second safety lock).
The handlebar support, has 2 handles, extend them
and insert them on each side, pressing the pivots
until they enter the hole in the handlebar.
The handlebar must be inserted in the bar, adjusting
the height depending on the height of the user. It
has 3 levels of height.
Lock the position by closing the hinge. Check that
once closed, the handlebar rotates the wheel. It is
very important to verify that the adjustment has
been made.
HOW TO DEPLOY THE SCOOTER
1

16
EN
3
4
2
5
6
Release the hinge on the handlebar tube.
Press in the adjustment button, and push down on
the handlebar tube.
Remove the 2 handlebar grips by pressing on each
button.
Press the buckle (lower left) down, turning it until it
loosens.
Gently press back the folding pedal (lower right)
until you feel a click to complete the folding.
Folded product for transport or storage.
HOW TO FOLD THE SCOOTER AGAIN
1
Your new e-scooter should be assembled according to the previous steps, as shown
in the gure. Make sure you have completed all the steps during assembly.

17
EN
USE GUIDE
∙Low level up to 3km / h, is activated by kicking the e-scooter and accelerating
on the handlebar pushbutton.
∙Intermediate level up to 8 km/h.
∙high level up to 14km/h.
∙SPEED LEVEL INDICATOR: Displays your current speed level.
∙BATTERY LEVEL INDICATOR: Displays the remaining battery level
∙INFORMATION PANEL: Displays total mileage, partial travel distance, voltage,
and current travel time.
∙SPEED LEVEL BUTTON(+): Press the button to increase the maximum speed
and acceleration. Level 1 – Low. Level 2 – Medium. Level 3 – High.
∙POWER BUTTON / MULTIFUNCTION: To turn it on: Press and hold for 3 seconds
To turn it off: Press and hold for 3 seconds. By pressing this button you can
move around the total mileage, current travel distance, battery level and current
travel time.
∙SPEED LEVEL BUTTON (-): Press the button to decrease the maximum speed
and acceleration: Level 1 – Low. Level 2 – Medium. Level 3 – High.
∙Electric: through a pushbutton located on the handlebars. Pressing it will disable
the engine and slow down.
∙Manual: the rear wheel incorporates a fender, this is used by exerting pressure
with the foot down to reduce the speed.
• The E-scooter has 3 speed levels.
• Press the ignition switch located under the scooter’s platform and turn it on.
• Hold the handlebar with both hands, place one foot on the pedal and push the
other foot back to achieve acceleration. It will go to a low level (up to 9km / h,
depending on the weight and condition of the soil).
• To decrease the speed, press the brake plate of the rear wheel with one foot and
with the pushbutton on the electric brake handlebar.
• The electric scooter has 2 types of brake.
• Accelerator. The electric patiente incorporates a pushbutton on the handlebars to
accelerate. It incorporates a safety system so that when the patienet is stopped, if
the throttle is pressed, the scooter does not go in motion. To accelerate from the
stop, you only have to give a small push to the scooter and accelerate with the
pushbutton, once in motion you can accelerate, depending on the speed mode you
have on the display.
• Display. The electric scooter incorporates a multifunction display, where you can
view and change different modes.

18
EN
COMPONENTS OF THE E-SCOOTER
1
3
4
2
5
6
8
9
10
11
12
13
15
14
7
Throttle
Brake
Handle bar
Handle bracket
Retractable buckle
Handle bar stem
Front shock absorber
Mud guard
Foldable buckle
Battery and motor
Shock absorber
Reector
Foot brake
Anti-skid pedal
Display
1.
2.
3.
4.
5.
6.
7
8.
9.
10.
11.
12.
13.
14.
15.

19
EN
The performance and parameters of the scooter may be subject to changes, caused
by variables, such as user weight, pending, activation-deactivation of the engine in
the thrust, pavement condition.
DECLARATION OF CONFORMITY
The company Rider Division SLU, located in the industrial estate of Barros n 29,
39408 Barros, Cantabria with telephone number +34 942812900 with VAT Nº
E-39856463. We declare under our sole responsibility the conformity of the product:
With the provisions of the directive, 2014/30/UE, 2014/35/UE, 2011/65/UE, 2006/42/
CE
Stardards: EN 61000-3-2:2014, EN 61000-3-2:2013, EN 60335-1:2012+A11:2014,
IEC 62321-7:2017, IEC 62321-4:2013, IEC 62321-5:2013, IEC 62321-6:2015, EN ISO
12100:2010
For more information on our products, practical advice, frequently asked questions,
user manuals, etc. visit:
www.olssonandbrothers.com
To contact our technical assistance service visit www.olssonandbrothers.com or by
Phone + 34 942 81 29 00
This product incorporates a lithium battery, so that in case of destruction, the battery
must be removed for proper management.
MORE INFORMATION AND SUPPORT
DECLARACIÓN DE CONFORMIDAD

20
EN
Model:
Serial Number:
Purchase Date:
Rider Division SLU grants through this certicate 2 years of guarantee to the
aforementioned article or device, for its parts to which a manufacturing defect can be
attributed. Except for the battery, charger, accessories that has a warranty coverage
of 6 months. It is essential that you keep the purchase invoice together with this
guarantee document, being the proof of the date of purchase. The Legal Guarantee
covers the repair, in which case, these will be free for the consumer, including labor
and materials. In any case, warranty repairs must be made by Rider Division’s Ofcial
Technical Assistance Service or authorized distributors. The repair or replacement will
suspend the computation of the term of the Legal Guarantee, not
giving rise in no case to a new term of two years of guarantee from the delivery of the
repaired / replaced product.
In addition, in no case there will be a lack of conformity and therefore the Legal
Guarantee will not apply when:
This previously identied product/device or any of its identications (serial number,
etc.) have been, totally or partially, opened, assembled, disassembled, manipulated
and / or repaired by a person outside the Ofcial Technical Assistance Services or
authorized distributors of the Rider Division SLU.
The lack of conformity is the result of an incorrect installation (unless the installation
has been carried out by the authorized Rider Division salesperson or under his
responsibility. The lack of conformity is due to the use of accessories, chargers or
consumables that are not original Rider Division and designed for this product.
There is a break in any of the seals of the housing or battery cells, or obvious signs of
tampering in them.
The damages that occurred in the product were caused by any cause of force majeure
or fortuitous event.
Do not carry out the maintenance recommended in the user manual.
None of the guarantees included here covers the replacement of parts due to wear
or breakage of mechanisms, rubbers, housings and / or plastics, as well as aesthetic
deterioration, due to the normal use of the product.
Owner’s Information
Name and Lastname:
Address:
ZIP code:
State or Province:
Country:
Telephone number:
Seller’s and/or Distributor’s Stamp
(the one that appears on the device)
CERTIFICATE OF GUARANTEE
Table of contents
Languages:
Other Olsson and Brothers Scooter manuals

Olsson and Brothers
Olsson and Brothers Fresh Neon User manual

Olsson and Brothers
Olsson and Brothers E-SCOOTER User manual

Olsson and Brothers
Olsson and Brothers STROOT SPECTRE User manual

Olsson and Brothers
Olsson and Brothers Fresh Advanced User manual

Olsson and Brothers
Olsson and Brothers STROOT BONNEVILLE 5 User manual

Olsson and Brothers
Olsson and Brothers Unique User manual

Olsson and Brothers
Olsson and Brothers Stroot FUN User manual

Olsson and Brothers
Olsson and Brothers Fresh Wildred User manual

Olsson and Brothers
Olsson and Brothers STROOT B8 User manual