Roadstar TTR-8632UCEN User manual

3 4
MP3 PLAYER WITH TURNTABLE AND
STEREO RADIO.
USB/SD PORTS, ENCODING FUNCTION
AND REMOTE CONTROL.
Instructionmanual
Bedienungsanleitung
Manueld’instructions
Manualed’istruzioni
Manualdeinstrucciones
Manualdeinstruções
TTR-8632UCEN
is a registeredTrademark of Roadstar S.A. - Switzerland All rights reserved
English Page 1
Deutsch Seite 11
Français Page 21
Italiano Pagina 31
Español Página 41
Portuguès Pagina 51
TTR-8632UCEN
INDEX
• Your new unit was manufactured and assembled
under strict ROADSTAR quality control.
Thank you for purchasing our product.
Before operating the unit, please read this instruc-
tion manual carefully. Keep it also handy for further
future references.
• Votre nouvel appareil a été fabriqué et monté en
étantsoumis aux nombreaux tests ROADSTAR. Nous
espérons que cet appareil vous donnera entière sat-
isfaction.
Avant de vous adonner à ces activités, veuillez lire
attentivement ce manuel d’instructions. Conservezle
à portée de main à fin de référence ultérieure.
• Vuestro nuevo sistema ha sido construido según las
normas estrictas de control de calidad ROADSTAR.
Le felicitamos y le damos las gracias por su elección
de este aparado. Por favor leer el manual antes de
poner en funcionamiento el equipo y guardar esta
documentación en case de que se necesite
nuevamente.
• Ihr neues Gerät wurde unter Beachtung der strengen
ROADSTAR-Qualitätsvorschriften gefertigt.
Wir danken Ihnen für den Kauf unseres Produktes.
Bitte lesen Sie diese Bedienungsanleitung durch,
und heben Sie sie auf, um jederzeit darin
nachschlagen zu können.
• Il vostro nuovo apparecchio è stato prodotto ed
assemblato sotto lo stretto controllo di qualitá
ROADSTAR.
Vi ringraziamo di aver acquistato un nostro prodotto.
Prima di procedere all'utilizzo dell'apparecchio,
leggete attentamente il manuale d’istruzioni e
tenetelo sempre a portata di mano per futuri
riferimenti.
• Seu novo aparelho foi construido e montado sob o
estrito controle de qualidade da ROADSTAR.
Agradecemos por ter comprado nosso produto para
a sua diversão.
Antes de usar esta unidade é necessário ler com
atençâo este manual de instruções pare que possa
ser usada apropriadamente; mantenha o manual
ao seu alcance para outras informações.
Front view
Top view Remote control
Rear view
1
10
8
6
3
7
9
4
5
2
EnglishEnglish 1 2
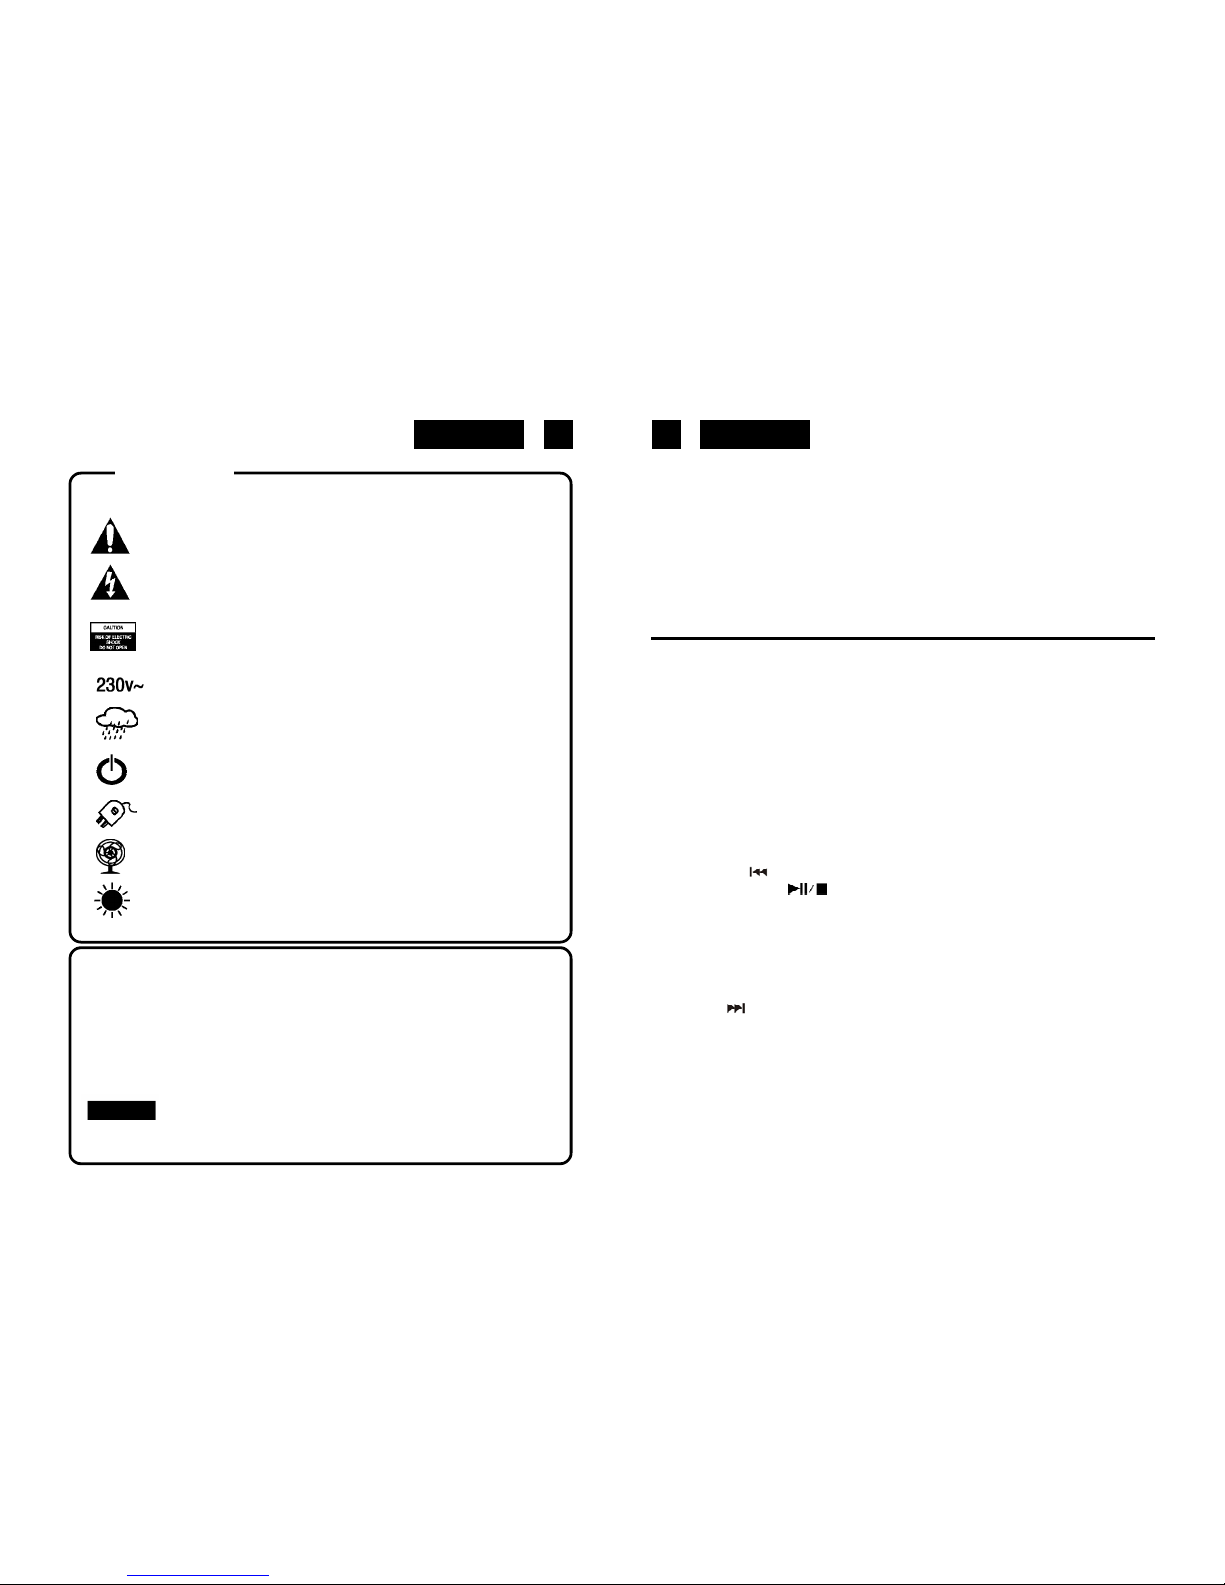
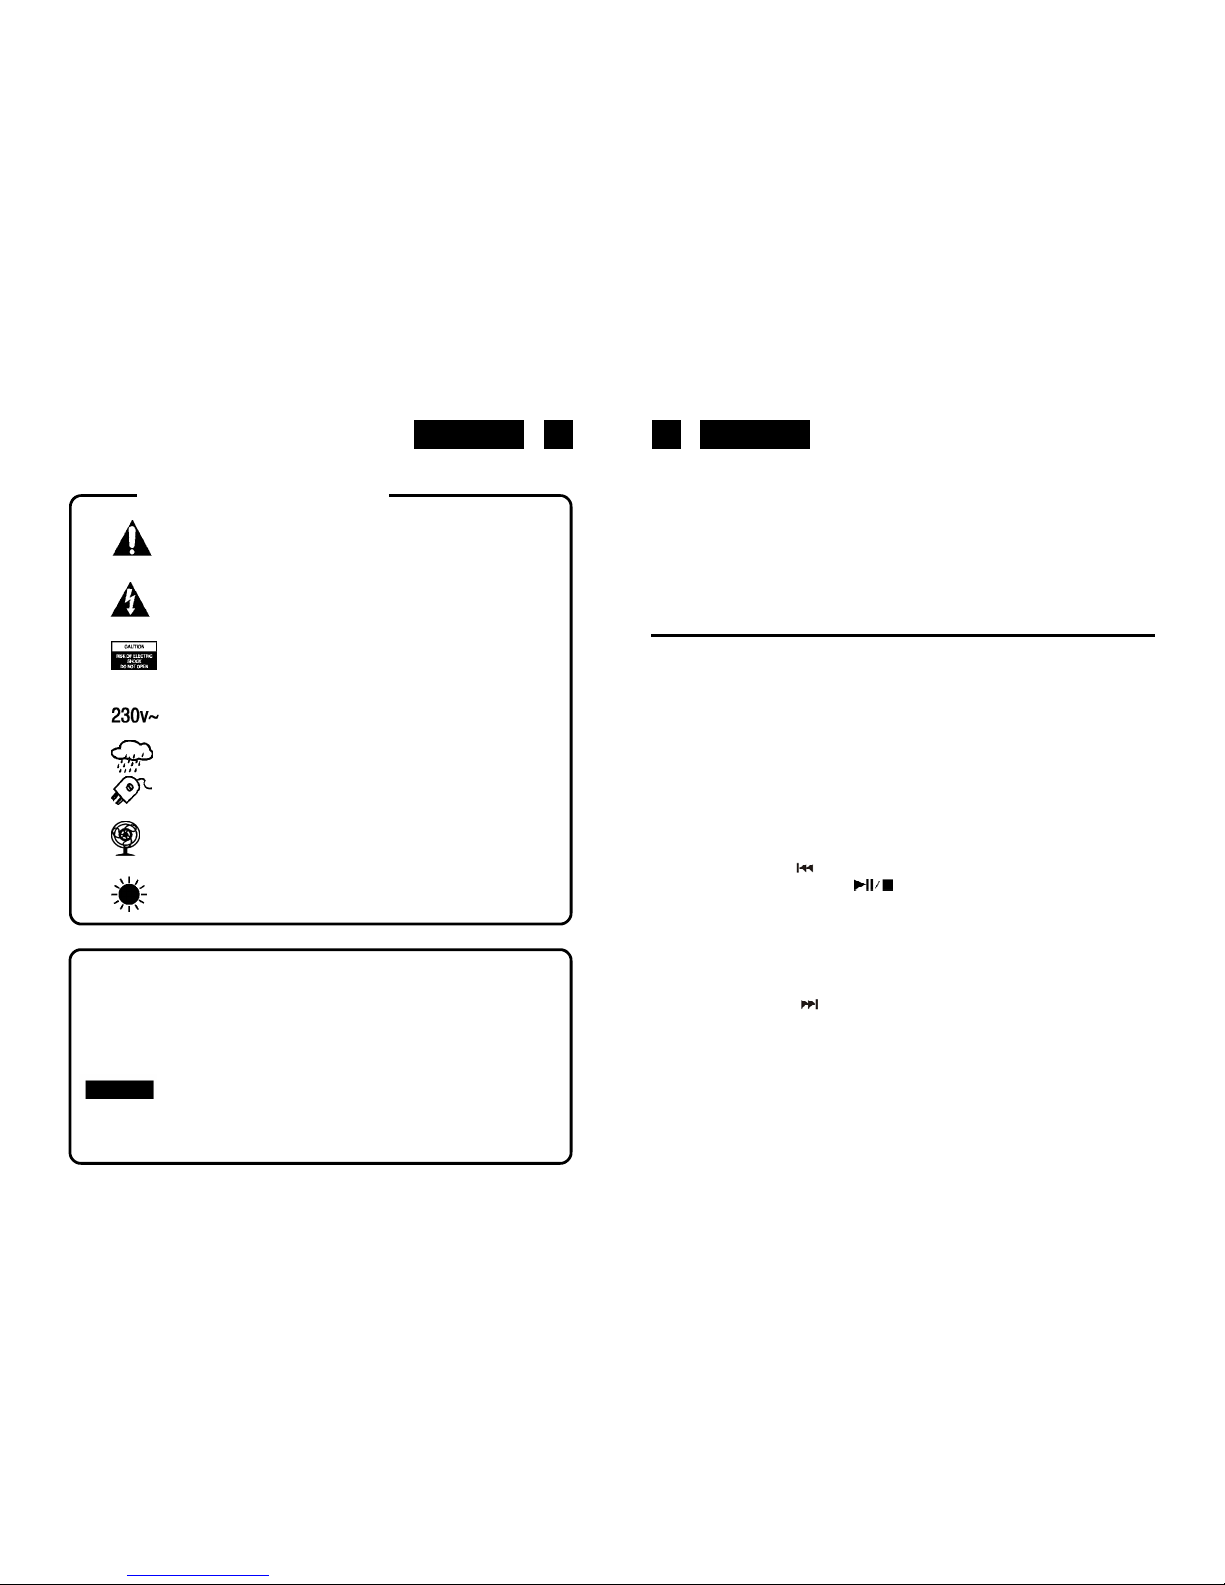
WARNINGS
The exclamation point within the triangle is a warning sign alerting the
user of important instructions accompanying the product.
The lightening flash with arrowhead symbol within the triangle is a warning
sign alerting the user of “dangerous voltage” inside the unit.
To reduce the risk of electric shock, do not remove the cover. No user
serviceable parts inside the unit. Refer all servicing to
qualified personnel.
This unit operates on 230V ~ 50Hz. If the unit is not used for a long period
of time, remove the plug from the AC mains.
This unit must not be exposed to moisture or rain.
The power switch in this unit is mounted on the secondary circuit and
does not disconnect the whole unit from the mains in OFF position.
Ensure all connections are properly made before operating the unit.
This unit should be positioned so that it is properly ventilated.Avoid placing
it, for example, close to curtains, on the carpet or in a built-in installation
such as a bookcase.
Do not expose this unit to direct sunlight or heat radiating sources.
TTR-8632UCEN
MP3 PLAYER WITH TURNTABLE AND STEREO RADIO.
USB/SD PORTS, ENCODING FUNCTION AND REMOTE CONTROL.
INSTRUCTION MANUAL
Please read this instruction manual carefully and familiarize yourself with your new Audio
system before using it for the first time. Please retain this manual for future reference.
LOCATION OF CONTROLS
1) DUST COVER
2) LCD DISPLAY
3) RECORD BUTTON
4) SOURCE BUTTON
5) POWER LED INDICATOR
6) LEFT SPEAKER
7) POWER OFF/ON/FUNCTIONS SELECTOR
8) 3.5 MM HEADPHONE JACK
9) USB SOCKET
10) RADIO BAND SELECTOR
11) SD/MMC CARD SLOT
12) MP3 FOLDER UP BUTTON
13) SKIP DOWN BUTTON
14) PLAY/PAUSE/STOP BUTTON
15) X-BASSON/OFFBUTTON
16) REMOTE SENSOR
17) RIGHT SPEAKER
18) VOLUMEKNOB
19) TUNING KNOB
20) FM STEREO LED INDICATOR
21) SKIP UP BUTTON
22) LED DIAL POINTER
23) SPINDLEADAPTOR
24) TONEARM LEVER
25) 33/45 RPM SPEED SELECTOR
26) PICK-UP HOLDER
27) LINE OUT SOCKET
28) FMANTENNA
29) AUTOSTOPSWITCH
30) AC CORD
Correct Disposal of This Product
(Waste Electrical & Electronic Equipment)
This marking shown on the product or its literature, indicates that it should not
be disposed with other household wastes at the end of its working life. To prevent
possible harm to the environment or human health from uncontrolled waste
disposal, please separate this from other types of wastes and recycle it
responsibly to promote the sustainable reuse of material resources.
Household users should contact either the retailer where they purchased this
product, or their local government office, for details of where and how they
can take this item for environmentally safe recycling.
Business users should contact their supplier and check the terms and conditions
of the purchase contract. This product should not be mixed with other commercial
wastes for disposal.
EnglishEnglish 3 4
REMOTE CONTROL
BATTERY INSTALLATION
the infra-red transmitter requires 2 pcs AAA size battery for operation (not included).
BUTTONS DESCRIPTION
1) FIND in MP3/WMA mode, press to activate file/folder name search function.
2)INFO in USB stop mode, press to select encoding bitrate.
3) REC in PHONO mode, press to activate recording function.
4)REP/INTRO/RAN in USB mode, press to activate Repeat one/ Repeat All/ Folder/ Intro/
/ Random functions.
5)PROGRAM in USB mode, press to active programming function.
6)PLAY/PAUSE in USB mode, press once to start playback. press again to enter
pause mode.
7) SKIP/SEARCH forward press once to Skip to next track.
Press & hold for search forward
SKIP/SEARCH backward press once to Skip to previous track.
Press & hold for search backward.
8) STOP in USB mode, press to stop playback or cancel the stored
program.
9) FOLDER up /down in MP3 mode, press to selec tFolder up or down.
10) SOURCE in USB mode, press to select USB/CARD function repeatly.
CONNECTING TO POWER
Before switching on make sure that the voltage of your electricity supply is the same as
that indicated on the rating plate.
For your own safety read the following instructions carefully before attempting to connect
this unit to the mains.
MAINS (AC) OPERATION
This unit is designed to operate on AC 230V 50Hz current only. Connecting it to other
power sources may damage the unit.
CAUTION
To prevent electric shock disconnect from the mains before removing cover. No user
serviceable parts inside. Refer servicing to qualified service personnel.
SAFETY PRECAUTION
Do not allow this unit to be exposed to rain or moisture.
Mains Supply: 230V 50Hz - AC only
This symbol means that this unit is double insulated. An earth connection is not
required.
POWER SUPPLY
Remove the stereo carefully from the box, retaining the packaging for future use (servicing).
AC POWER OPERATION
Connect the plug to a mains power inlet 230V AC ~ 50 Hz.
MW/FM TUNER
Operation
• Set the Function Selector (7) to the RADIO position.
The red Power Indicator (5) will light up.
• Select the desired frequency band with the Band Selector (10).
• Tune to the desired radio station by turning the Tuning control (19).
ANTENNA
• For FM reception there is a built-in FM antenna wire (28) at the rear of the unit. Move the
wire around to obtain the best reception.
• For MW reception the signals are picked up through a built-in ferrite antenna. Your may
have to orient the unit to obtain the best reception.
FM & FM-STEREO RECEPTION
• Stereo reception is possible when the tuned FM station is broadcasting in stereo.
• When in FM STereo mode and the station is broadscasting in Stereo, the STEREO
indicator (20) lights up.
• When FM stations are weak and are disturbed, listening can be improved by switching
the Band selector to FM (Mono). Reception will then be in MONO.
EnglishEnglish 5 6
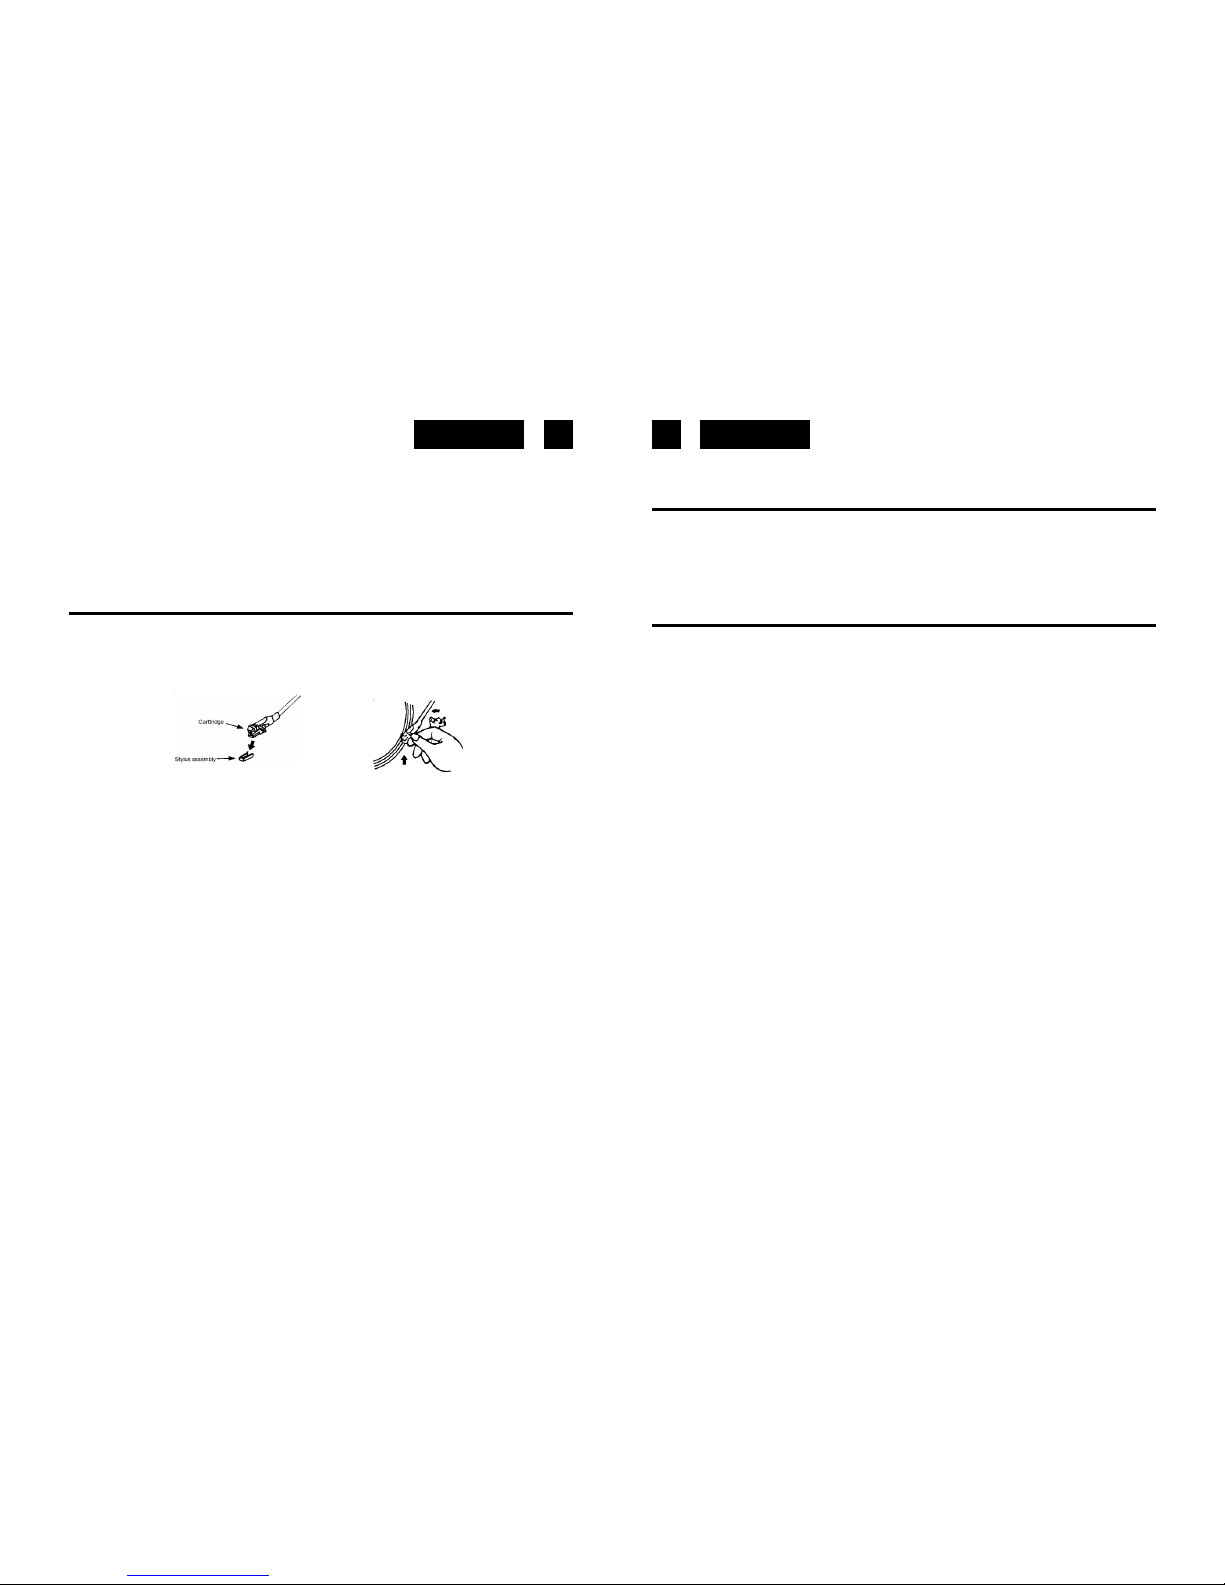
TURNTABLE OPERATION
Preparation
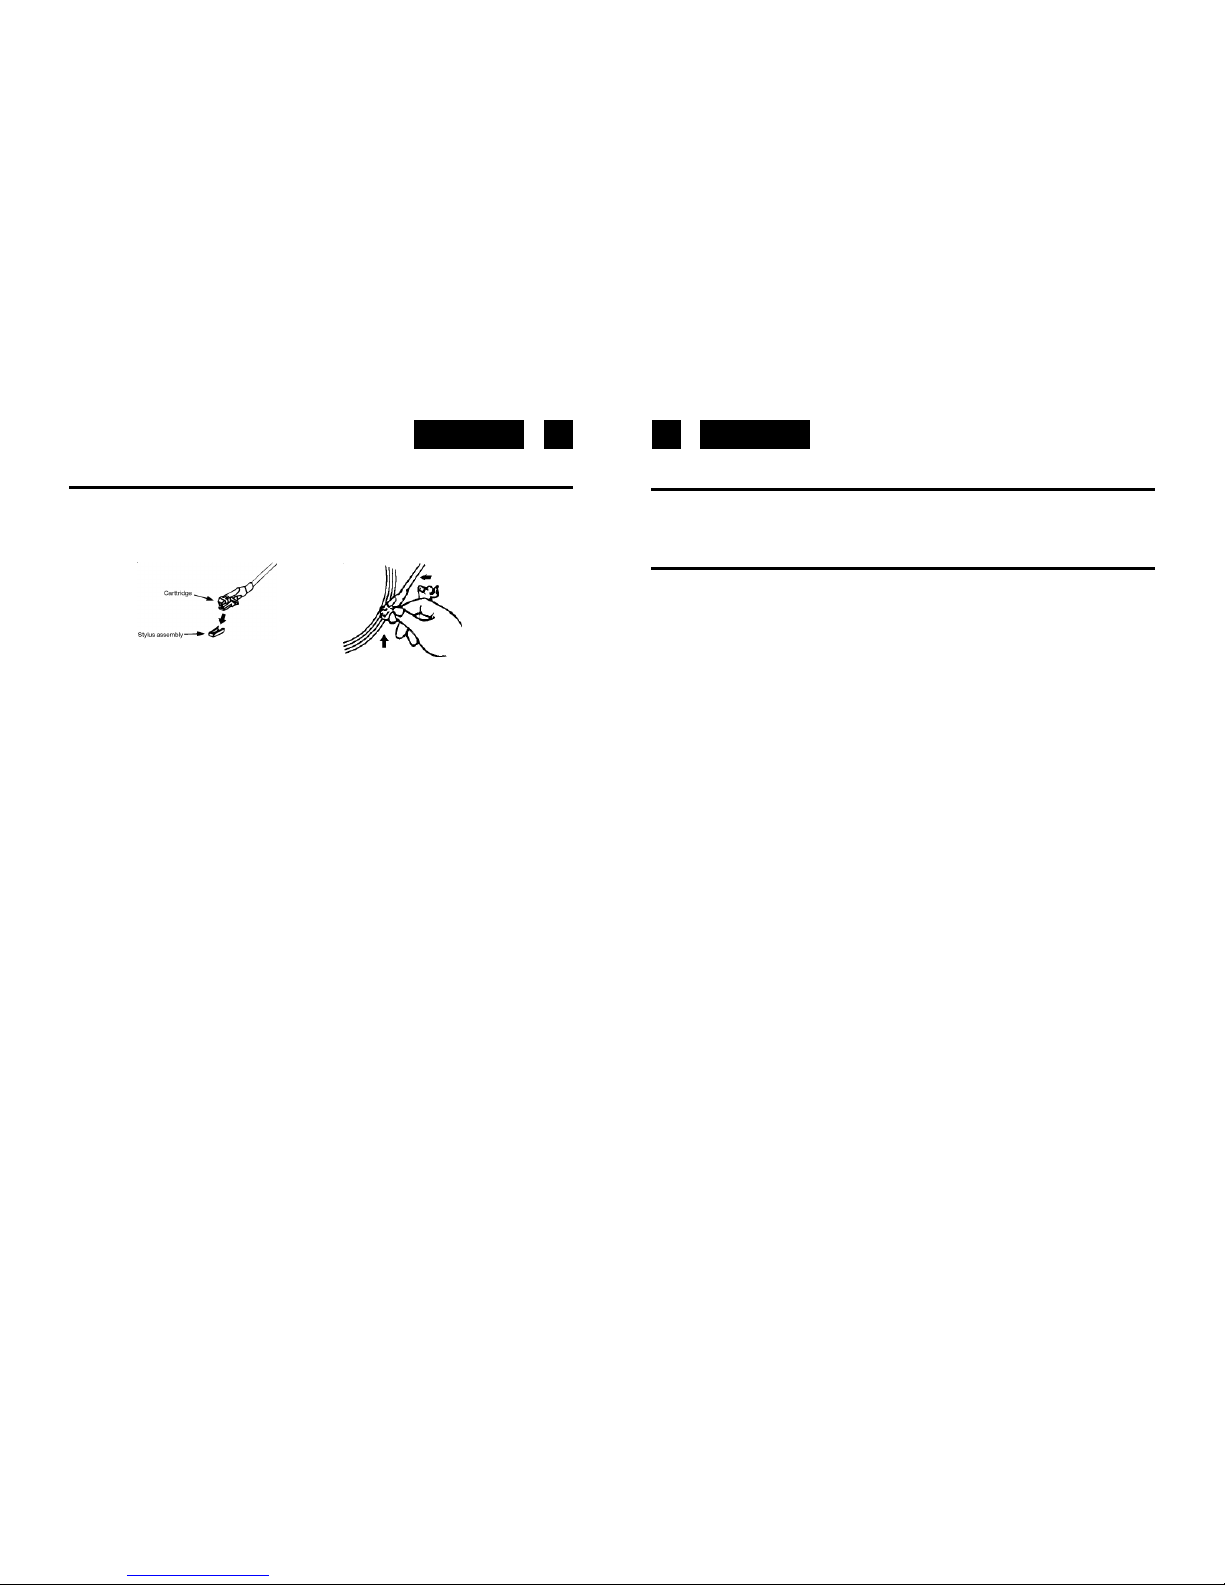
Open the Record Player Cover.
Release the Tonearm Clamp, and remove the stylus protector.
Listening to Records
1. Set the Function Selector (7) to the PHONO position.
2. Place a record on the turntable, over the central spindle. Place the EP adapter over the
central spindle when playing 17cm EP records.
3. Set the Speed Selector (25) to 33 or 45 rpm according to the record.
4. Release the tonearm clamp, and remove the protective cap from the stylus.
5. Lift the Tonearm with the Tonearm Lift Lever.
6. Move the tonearm to the beginning of the record, or to the start of a particular track.
7. Gently lower the tone arm onto the record with the Tonearm Lift lever to start playing.
8. When the record is finished the tonearm will automatically stop. Lift the tonearm from
the record and return it to the rest .
9. To stop manually, lift the tonearm from the record and return it to the rest.
10. To select Auto Stop mode, move the Auto Stop Switch (29) to ON position.
Notes: Do not stop or turn the platter manually.
Moving or jarring the turntable without securing the Tonearm clamp could result in damage
to the Tonearm. Replace the protective cap on the stylus when not in use.
ID3 (TRACK/ALBUM TITLE) FUNCTION(BY REMOTE HANDSET)
1. Press the “ INFO “ (2) button during playback of MP3/WMA disc, the song title is being
displayed. press the “ INFO “ button again to disable the function.
SONGTITLE/FOLDERNAMESEARCHFUNCTION(BYREMOTEHANDSET)
You can search the track by the title/floder name in disc during Stop mode:
1. Press the “ FIND “ (1) button once, then press the “skip up” (or skip down) button (7),
you can search the title of each song one by one under alphabet order on Lcd display,
then press the “ PLAY/PAUSE “ button (6) to start the playback of the selected track.
2. Press again “ FIND “ button, the folder name is being displayed. then press the “skip
up” (or skip down) button to select the desired folder, and press the ” PLAY/PAUSE“
button (6) to start the playback of all tracks inside that selected folder.
REMARK:
- In case no name had been assigned for the track, “ none “ or “ unknown “ is being
displayed” on the display.
- The LCD display supports English language only.
MP3/WMATRACK FORMAT REQUIREMENT:
- MP3 bit rate : 32 kbps~256 kbps and wma bit rate : 32 kbps ~ 320 kbps
- The performance of playing MP3 disc is various from the quality of recording disc and
the method of recording.

EnglishEnglish
REPEAT/INTRO/RANDOMMODE(BYREMOTECONTROL)
Press the Repeat/Intro/Random button (4) on the remote control before or during playback,
a single track, single folder (MP3 only) or all the tracks can be played in different mode as
follows:
FOR MP3/WMA
(1) REPEAT 1 (2) REPEAT ALLTRACK (3) REPEAT ONEFOLDER
(6) OFF MODE (5) RANDOM (4) INTRO PLAY
INDICATOR
PLAYMODE ON LCD DISPLAY
REPEATSINGLETRACK
REPEAT ALL TRACKS ALL
REPEAT SINGLE FOLDER
INTROPLAYMODE INTRO
RANDOMMODE RANDOM
OFF MODE ------------
Repeat play
You can listen the desired tracks or folder repeatedly by this function.
Intro play
You can listen the beginning (10 seconds) of each track in a cd by this function & saving
your time to search the desire song
Random play
You can listen all the tracks or folder in a random order by this function
USB/SDPROGRAMMING(BYREMOTE CONTROL)
Up to 32 tracks can be programmed for MP3 file and play in any order. before use, be sure
the system is at stop mode before programming:
1. Set in USB mode with the Source button (10).
2. Press the “PROGRAM” button (5), “ PROG “ will appear on LCD display. Moreover, it
will indicate program no. and digits for track no. to be programmed.
3. Select a desired track by pressing SKIP or buttons (7).
4. Press the “ program “ button to store the trace into memory.
5. Repeat steps 3 and 4 to enter additional tracks into the memory if necessary.
6. When all the desired tracks have been programmed, press “ PLAY/PAUSE “ button
(6) to play the disc in assigned order.
7. To cancel the programmed file, press “STOP” button on remote handset until “ PROG
“ is disappear on LCD display (2).
PLAYBACK OF MP3/WMA SONG VIAUSB STORAGE MEDIA OR MEMORY
CARD CONNECTING
The system is able to decode and playback all MP3 /WMA file which stored in the memory
media with USB connecting port or SD/MMC memory card.
1. Set Function selector (7) at USB mode and then press SOURCE button (10) to select
“ USB or CARD” mode.
2. Plug-in the USB plug with the face up & make sure it going into completely or insert
the memory card in the direction of the arrow as shown in the label on the underside
of the MEMORY CARD slot cover. Insert straight without bending.
Connecting the USB upside down or backwards could damage the audio system or
the storage media (usb thumb drive / sd/mmc card). Check to be sure the direction is
correct before connection.
3. The system will start reading the storage media automatically after connecting, and
LCD display (2) will show the total number of MP3/WMA files and total number of
folder being detected.
7 856
REMARK
- The system can detect and read the file under mp3
and wma format only though the usb port.
-If connect the system to MP3 player via the usb
socket, due to variances inMP3 encoding format,
some mp3 player may not be able to play via the
usb socket. this is not a maul-function of the
system.

EnglishEnglish
ENCODING OF PHONO INTO MP3 FILE
The system is able to ENCODE music from TURNTABLE to MP3 format and recording at
memory media with USB connecting port.
REMARK:
- The recording speed is 1:1 and according to the actual plying time of the track
- The system will creat a “ AUDIO “ folder and then store the encoding track in it.
- The recording format is preset at – MP3 bit rate : 128 kbps, sampling rate : 44.1khz
- No song title will be recorded during encoding mode
- To interrupt the recroding, press the “ RECORD “ button again during record mode.
-Recording will be completed only entire song being encoded, if terminate the
encoding process intermediately, there is no track being recorded nor stored to
the USB or SD/MMC card.
COPYING OF MP3/WMA FILE FROM USB TO MMC
By pressing the “ RECORD “ button (3) the system will copy the files from to the USB to the
MMC card, and the system will switch to copying mode only if MP3/WMA file is being read.
REMARK:
- The system will store the file to USB source first if both USB and SD slot are being
occuplied by storage media.
- If press the “ Record “ button during playback of USB or SD source, the file will copy
from USB to SD or SD to USB.
A) PHONO ENCODING
1) Set the Function button to “ PHONO“ mode and then press the “ RECORD “ button (3)
directly.
2) The LCD display with show the word “ USB “ and then flashing, and then display “
“ & “ “ and flashing after few seconds. Now the system is starting the
encoding mode.
3) Start playback at PHONO for the track which you want to record to USB.
4) After finishing of recoding, press and hold the “ RECORD “ button (3) until the LCD
stops flashing and returns to “ PHONO “ mode.
B) ENCODING BITRATE (BY REMOTE HANDSET)
You can select the desired BITRATE during ENCODING from PHONO to USB, the selectable
range from 32 / 64 /96 /128 / 192 / 256 Kbps.
1) Set in “ PHONO “ function (7) & remain in stop mode.
2) Press the “ INFO “ function and the LCD display will show the default bitrate (128
Kbps)
3) Press skip or buttons (7) to select the desired bitrate for encoding.
4) Press again the “ INFO “ to confirm the setting and the lcd display (2) resume to “
phono “ mode
REMOVING OF USB / MEMORY CARD
To remove the USB / MEMORY CARD, turn off the power or switch the function mode to
either AUX or TUNER first. For USB port – un-plug it by pulling out the USB socket directly,
for memory card – press the memory card inward & then release, now the card being
partially eject and you can remove it by hand.
LINEOUTCONNECTION
You can connect the system to your home Hi-fi system by connecting the LINE OUT socket
(27) to the auxiliary input socket with a RCA cable (not included).
9 10
SPECIFICATIONS
Power Supply
AC: 230V ~ 50Hz
RC Battery: 2 xAAA(UM-4) 1.5V (not included)
Radio Frequency Coverage
FM: 87.5 - 108MHz
MW: 522 - 1620kHz
Power output 2 x 2 W RMS (10% THD)
Design and specifications are subject to change without notice.
DeutschDeutsch 11 12
TTR-8632UCEN
MP3 PLAYER MIT PLATTENSPIELER UND STEREORADIO.
USB/SD-EINGÄNGE, ENCODIERUNG FUNKTION UND FERNBEDIENUNG.
BEDIENUNGSANLEITUNG
Bitte lesen Sie aufmerksam diese Bedienungsanleitung, um sich mit Ihrem neuen Radio-
Plattenspieler vertraut zu machen, bevor Sie ihn zum ersten Mal in Betrieb nehmen. Bitte
bewahren Sie diese Anleitung auf, um später jederzeit nachschlagen zu können.
LAGE DER BEDIENUNGSELEMENTE
1) SCHUTZDECKEL
2) LCD-DISPLAY
3) EINZEICHENTASTE (RECORD)
4) TASTE QUELLE (SOURCE)
5) POWER-LED-ANZEIGE
6) LINKER LAUTSPRECHER
7) POWER OFF/ON-FUNKTIONSWAHLSCHALTER
8) 3,5-MM-KOPFHÖRERBUCHSE
9) USB-PORT
10) BANDWAHLSCHALTER
11) SD/MMC-KARTENSTECKPLATZ
12) TASTE FOLDER UP (MP3)
13) SPRUNGAB TASTE
14) TASTE CD PLAY/PAUSE/STOP
15) X-BASSEIN/AUSTASTE
16) FERNBEDIENUNGSSENSOR
17) RECHTERLAUTSPRECHER
18) LAUTSTÄRKETASTEN + / -
19) TUNING-REGLER
20) LED-ANZEIGE FÜR FM-STEREO
21) SPRUNG AUFTASTE
22) LED-SKALENZEIGER
23) SINGLE-ADAPTER
24) TONARM-HEBEL
25) GESCHWINDIGKEITSWAHLSCHALTER 33/45 U/MIN
26) TONARMABLAGE
27) LINE-OUT-BUCHSE
28) FM-ANTENNE
29) AUTO-STOP-SCHALTER
30) WECHSELSTROMKABEL
SICHERHEITSHINWEISE
Das Ausrufezeichen im Dreieck weist den Benutzer auf wichtige
Bedienungs- und Wartungsanweisungen (Service) in diesem
Handbuch hin, die unbedingt zu befolgen sind.
Das Blitzsymbol im Dreieck weist den Benutzer auf “gefährliche
Spannungen” an einigen freiliegenden Bauteilen im Innem des Gerätes
hin.
Um die Gefahr elektrischer Schläge auszuschliessen, Gehäuse auf
keinen Fall abnehmen. Im Innern befinden sich keine vom Benutzer
selbst instandsetzbaren Teile. Reparaturen dürfen nur von einer
autorisierten Fachwerkstatt durchgeführt werden.
Dieses Gerät ist für 230V ~ 50Hz Netzspannung ausgelegt. Bei längerer
Nichtbenutzung des Geräts ziehen Sie den Stecker aus der Steckdose.
Setzen Sie das Gerät weder Feuchtigkeit noch Regen aus.
Schalten Sie das System erst dann ein, wenn Sie alle Verbindungen
genau geprüft haben.
Stellen Sie das Gerät so auf, dass immer eine ungestörte
Frischluftzufuhr sichergestellt ist. Stellen Sie das Gerät keinesfalls auf
Teppiche und in die Nähe von Gardinenund bauen Sie es nicht in
Bücherregale ein.
Setzen Sie das Gerät weder direkter Sonneneinstrahlung noch
Wärmequellen aus.
Korrekte Entsorgung dieses Produkts (Elektromüll)
Die Kennzeichnung auf dem Produkt bzw. auf der dazugehörigen Literatur gibt
an, dass es nach seiner Lebensdauer nicht zusammen mit dem normalen
HaushaltsmüIl entsorgt werden darf. Entsorgen Sie dieses Gerat bitte getrennt
von anderen Abfallen, um der Umwelt bzw. der menschlichen Gesundheit nicht
durch unkontrollierte Müllbeseitigung zu schaden. Recyceln Sie das Gerät, um
die nachhaltige Wiederverwertung von stofflichen Ressourcen zu fördern.
Private Nutzer sollten den Händler, bei dem das Produkt gekauft wurde, oder
die zuständigen Behörden kontaktieren, um in Erfahrung zu bringen, wie sie das
Gerät auf umweltfreundliche Weise recyceln können.
Gewerbliche Nutzer sollten sich an Ihren Lieferanten wenden und die
Bedingungen des Verkaufsvertrags konsultieren. Dieses Produkt darf nicht
zusammen mit anderem Gewerbemüll entsorgt werden.

DeutschDeutsch 13 14
FERNBEDIENUNG
BATTERIE
DieInfrarot-Fernbedienungerfordertzum BetriebzweiBatterienvomTypAAA(nichtmitgeliefert).
BESCHREIBUNG DERBEDIENTASTEN
1) FIND Im MP3/WMA-Modus zur Suche nach Datei- oder Albumnamen.
2)INFO Im USB-Stoppmodus zur Auswahl der Bitrate für die Encodierfunktion.
3) REC Im Phono-Modus zur Aktivierung der Aufzeichnungsfunktion.
4) REP/INTRO/RAN Im USB-Modus zum Aufrufen der Funktionen Wiederholung (1/Alle),
Intro und Zufallswiedergabe.
5)PROGRAM Im USB-Modus zum Aufrufen der Programmierfunktion.
6)PLAY/PAUSE Im USB-Modus zum Starten der Wiedergabe einmal drücken; bei
erneuter Betätigung schaltet das Gerät in den Pausenmodus.
7) SKIP/SEARCH vorwärts Bei einmaligem Drücken weiter zum nächsten Lied;
Vorwärtssuchlauf bei dauerhafter Betätigung.
SKIP/SEARCH rückwärts Bei einmaligem Drücken zurück zum vorangehenden Lied;
Rückwärtssuchlauf bei dauerhafter Betätigung.
8)STOP Im USB-Modus zum Stoppen der Wiedergabe bzw. zum Löschen des
gespeicherten Programms.
9) FOLDER auf/ab ImMP3-ModuszurAlbumauswahlinAufwärts-bzw.Abwärtsrichtung.
10) SOURCE Im USB-Modus zur Auswahl der USB/Card-Funktion.
NETZANSCHLUSS
Bevor Sie das Gerät einschalten, vergewissern Sie sich, daß Ihre örtliche Netzspannung
mit der auf dem Typenschild angegebenen Spannung übereinstimmt.
Zu Ihrer eigenen Sicherheit lesen Sie sorgfältig die folgende Bedienungsanleitung, bevor
Sie das Gerät ans Netz anschließen.
NETZBETRIEB(AC)
Dieses Gerät funktioniert nur mit einer Spannung von AC 230V 50Hz. Wird das Gerät an
andere Stromquellen angeschlossen, könnte es Schaden nehmen.
Vorsicht
Um elektrischen Schlägen vorzubeugen, trennen Sie das Gerät vom Netz ab, bevor Sie den
Deckel entfernen. Verwenden sie keine nutzbaren inneren Teile. Für die Wartung wenden
Sie sich an qualifiziertes Kundendienstpersonal.
Sicherheitsmaßnahmen
Setzen Sie das Gerät weder Regen noch Feuchtigkeit aus.
Stromversorgung: AC 230Volt / 50Hz - nur Wechselstrom (AC)
Dieses Zeichen bedeutet, daß dieses Gerät doppelt isoliert ist. Eine Erdung ist nicht
notwendig.
VORBEREITUNG FÜR INBETRIEBNAHME
• Nehmen Sie das Gerät vorsichtig aus der Verpackung.
Bewahren Sie diese für einen eventuellen späteren Gebrauch auf (Service).
• Bitte lesen Sie diese Bedienungsanleitung sorgfältig, bevor Sie das Gerät in
Betrieb nehmen.
Netzbetrieb (AC)
• Schließen Sie das AC-Netzkabel an Ihr AC-Haushaltstromnetz an.
RUNDFUNKEMPFANG
1. Stellen Sie den Funktionswahlschalter (7) auf Radio.
Die EIN-Anzeige erleuchtert (5).
2. Wählen Sie das gewünschte Frequenzband mit dem Bandwahlschalter (10).
3. Stimmen Sie die gewünschte Radiostation mit dem Abstimmregler (19) ab.
Antenne
Für den UKW-Empfang befindet sich auf der Rückseite des Gerätes ein eingebauter UKW-
Antennendraht (28). Bewegen Sie den Draht hin und her, bis der beste Empfang erreicht wird.
Für den MW-Empfang werden die Signale über eine eingebaute Ferritantenne empfangen.
Sie brauchen das Gerät nur auszurichten, bis der beste Empfang erreicht wird.

DeutschDeutsch 15 16
UKW-Stereo- und Mono-Empfang
Wenn ein UKW-Signal eingestellt wird und Sie den UKW-Modus-Wahlschalter auf FM ST
(UKW-Stereo) stellen, können Sie die Sendung in Stereo empfangen. Die UKW-Stereo-
Anzeige (20) leuchtet auf. Wenn die Stereosignale schwach sind und der Empfang
geräuschvoll ist, ist es oft vorzuziehen, die Sendung in Mono zu empfangen. Stellen Sie den
UKW-Modus-Wahlschalter auf FM (Mono). Der Empfang ist dann weniger geräuschvoll.
PLATTENSPIELERBETRIEB
Vorbereitung
Öffnen Sie die Abdeckung. Entfernen Sie die Tonarmklemme und nehmen Sie die
Schutzkappe der Wiedergabenadel weg.
Plattenspielerbetrieb
1. Stellen Sie den Funktionswahlschalter (7) auf PHONO.
2. Legen Sie eine Schallplatte auf die mittlere Spindel des Plattentellers. Legen Sie den
EP- Adapter auf die mittlere Spindel, wenn Sie 17 cm-EP-Platten abspielen.
3. Stellen Sie die Drehzahl-Wahlschalter (25) auf 33 oder 45 U./Min., entsprechend der
Schallplatte.
4. Entriegeln Sie die Tonarm-Klemme und entfernen Sie die Schutzklappe von der
Wiedergabenadel.
5. Heben Sie den Tonarm mit dem Tonarm-Hebel an.
6. Bewegen Sie den Tonam an den Anfang der Plane oder eines bestimmten Titels.
7. Senken Sie den Tonarm vorsichtig mit dem Tonarm-Hebel auf die Platte, um die
Wiedergabe zu starten.
8. Am Ende der Platte, heben Sie den Tonarm und bringen Sie es zum Rest.
9. Wenn Sie die Platte während der Wiedergabe stoppen wollen, den Tonarm von der
Platte heben und zur Ruhe zurückbringen.
10. Auto Stop schalter auf OFF (29), für die Platte automaisch stoppen.
ID3-FUNKTIONZURANZEIGEVONTRACK-/ALBUMTITELN
(MITTELSFERNBEDIENUNG)
1. Drücken Sie zur Anzeige des Tracktitels während der Wiedergabe einer MP3/WMA-
Disc auf die Taste „INFO”. Betätigen Sie die Taste „INFO” erneut, um die Funktion
wieder zu deaktivieren.
SUCHENACHTRACKTITELN/ORDNERNAMEN(MITTELSFERNBEDIENUNG)
Sie können einen gewünschten Track über seinen Titel oder den Namen des
entsprechenden Albums auf der Disc im Stoppmodus suchen:
1. Drücken Sie einmal auf die Taste „FIND” und anschließend auf die Taste „SKIP UP/
DOWN” (3), um die Tracktitel in alphabetischer Reihenfolge auf dem LCD-Display zu
durchsuchen. Nach Auswahl eines Tracks drücken Sie auf die Taste „CD PLAY/PAUSE”
(6), um die Wiedergabe dieses Tracks zu starten.
Hinweise: Drehen oder stoppen Sie den Plattenteller nicht manuell. Wenn Sie den
Plattenteller bewegen oder anstossen, ohne den Tonarm mit der Klemme gesichert zu
haben, konnte der Tonarm beschadigt werden
Stecken Sie die Schutzkappe auf die Wiedergabenadel, wenn das Gerät nicht benutzt wird.
2. Wenn Sie die Taste „FIND” ein weiteres Mal betätigen, wird der Ordnername angezeigt.
Suchen Sie dann den gewünschten Ordner mittels der Taste „SKIP UP/DOWN” (3)
aus und drücken Sie anschließend auf die Taste „CD PLAY/PAUSE” (6), um die
Wiedergabe aller in dem ausgewählten Ordner befindlichen Tracks zu starten.
ANMERKUNG:
- Wenn einem Track kein Name zugewiesen ist, wird „None” (Keiner) oder „Unknown”
(Unbekannt) auf dem Display angezeigt.
- Das LCD-Display unterstützt nur die englische Sprache.
ANFORDERUNGEN AN DAS MP3/WMA-TRACKFORMAT:
- MP3-Bitrate: 32 kbps-256 kbps; WMA-Bitrate: 32 kbps-320 kbps.
- Die Qualität bei der Wiedergabe einer MP3-Disc hängt von der Aufnahmequalität und
dem Aufnahmeverfahren ab. Außerdem dauert auch der Such- und Einlesevorgang
bei einer MP3-Disc aufgrund des unterschiedlichen Formats länger als bei einer
herkömmlichen CD.
DeutschDeutsch
WIEDERHOLUNG, INTRO UNDZUFALLSWIEDERGABE
(MIITELSFERNBEDIENUNG)
Drücken Sie die Taste „REPEAT/INTRO/RANDOM” (4) vor oder während der Wiedergabe
mehrfach, um den gewünschten Wiedergabemodus für einen Track, ein Album (nur bei
MP3) oder alle Tracks auszuwählen:
FÜR MP3/WMA
(1) REPEAT 1 (2) REPEAT ALL TRACK (3) REPEATONE FOLDER
(6) OFF MODE (5) RANDOM (4) INTRO PLAY
ANZEIGEAUF
WIEDERGABEMODUS DEMDISPLAY
WIEDERHOLEN 1 LIED
WIEDERHOLEN ALLE LIEDER ALL
WIEDERHOLEN 1 ALBUM
INTRO MODUS INTRO
RANDOM MODUS RANDOM
AUS MODUS -------------
Wiederholung
Mittels dieser Funktion können Sie die gewünschten Tracks oder ein Album wiederholt
anhören.
Intro-Funktion
Mit der Intro-Funktion können Sie jeden Track auf einer CD kurz (10 Sekunden lang)
anspielen, wenn Sie einen bestimmten Track suchen.
Zufallswiedergabe
Diese Funktion ermöglicht die Zufallswiedergabe aller Tracks oder eines bestimmten
Albums.
PROGRAMMIERFUNKTION(MITTELSFERNBEDIENUNG)
Bis zu 32 Tracks können bei gewöhnlichen MP3 programmiert und in beliebiger
Reihenfolge abgespielt werden:
1. Stellen Sie den USB-Modus ein und stoppen Sie die CD-Wiedergabe.
2. Drücken Sie auf die Taste „PROGRAM” (5), woraufhin „PROG” auf dem LCD-Display
eingeblendet wird. Außerdem erscheinen die Programmnummer und Ziffernstellen
für die zu programmierende Tracknummer.
3. Wählen Sie nun einen Track mittels der SKIP-Tasten (7) aus.
WIEDERGABEVONMP3-TRACKSVONUSB-SPEICHERMEDIENODER
SPEICHERKARTEN (MIITELSFERNBEDIENUNG)
Das System ist in der Lage, MP3- und WMA-Dateien zu entschlüsseln und abzuspielen,
die auf angeschlossenen USB-Speichermedien oder eingesteckten SD/MMC-
Speicherkarten enthalten sind.
1. Stellen Sie den Funktionswahlschalter (7) auf die Option USB ein und drücken Sie
dann auf die Taste SOURCE (4), um den Modus „USB or CARD” auszuwählen.
2. Stecken Sie anschließend den USB-Anschluss mit der Oberseite nach oben vollständig
in den USB-Port ein bzw. schieben Sie die Speicherkarte in Pfeilrichtung (siehe
Kennzeichnung auf dem Aufkleber) in den Speicherkarten-Steckplatz. Die Karte muss
gerade eingeschoben werden und darf nicht gebogen werden.
Werden Speichermedien falsch angeschlossen, können Schäden am Audiosystem
oder an den Speichermedien (USB oder SD/MMC-Karte) entstehen. Achten Sie daher
bitte unbedingt darauf, dass Sie Speichermedien stets richtig herum einstecken.
3. Nach dem Anschluss beginnt das System automatisch mit dem Einlesen des
Speichermediums, und das LCD-Display zeigt die Gesamtzahl der MP3/WMA-Dateien
sowie die Gesamtzahl der erfassten Ordner an.
4. Gehen Sie bei der Wiedergabe entsprechend der obigen Beschreibung für MP3 vor.
ANMERKUNG
- Über den USB-Port kann das System nur
Dateien im MP3- und WMA-Format erfassen
und einlesen.
-Wird das System über den USB-Port an
einen MP3-Player angeschlossen, kann es
bei einigen MP3-Playern passieren, dass
aufgrund von Unterschieden im MP3-
Kodierformat die Wiedergabe über den USB-
Port nicht möglich ist. Hierbei handelt es sich
nicht um eine Fehlfunktion des Systems.
4. Speichern Sie den Track durch Drücken der Taste „PROGRAM”.
5. Wiederholen Sie die Schritte 3 und 4 gegebenenfalls zum Speichern weiterer Tracks.
6. Nachdem Sie alle gewünschten Tracks programmiert haben, drücken Sie auf die
Taste „CD PLAY/PAUSE” (6) , um die Tracks in der programmierten Reihenfolge
abzuspielen.
7. Zum Löschen des Programms betätigen Sie die Taste „STOP” auf der Fernbedienung,
bis die Anzeige „PROG” auf dem LCD-Display erlischt.
17 18

DeutschDeutsch 19 20
MP3-ENCODIERUNGVONPHONO(MIITELS FERNBEDIENUNG)
Das System ermöglicht die Encodierung von Plattenspieler in das Format MP3 und die
Aufzeichnung auf Speichermedien über den USB-Port.
ANMERKUNG:
- Die Aufzeichnungsgeschwindigkeit ist 1:1 und entspricht der Spielzeit des Tracks.
- DasSystemerstellt einen„AUDIO”-Ordner,indemdieencodiertenTracksgespeichertwerden.
- Das Aufzeichnungsformat ist auf eine MP3-Bitrate von 128 kbps und eine Abtastrate
von 44,1 kHz voreingestellt.
- Während des Encodiermodus werden keine Liedtitel aufgezeichnet.
- Zum Unterbrechen der Aufzeichnung drücken Sie während des Vorgangs erneut auf
die Taste „RECORD”.
- Die Aufzeichnung wird nur abgeschlossen, wenn ein vollständiger Track encodiert
wird. Wenn Sie den Encodiervorgang vor seiner Beendigung abbrechen, wird kein
Track aufgezeichnet oder auf dem USB-Speichermedium bzw. der SD/MMC-
Speicherkarte gespeichert.
KOPIEREN EINER MP3/WMA-DATEI VON USB ZU MMC
Wenn Sie eine MP3/WMA-Disc eingelegt haben, Bei Betätigung der Taste „RECORD” (3)
kopiert das System die Dateien auf das USB-Speichermedium zur MMC-Karte. Beachten
Sie bitte, dass das System nur in den Kopiermodus schaltet, wenn die MP3/WMA-Datei
gelesen wird.
ANMERKUNG:
- Ist sowohl in den USB-Port als auch in den SD-Kartensteckplatz ein Speichermedium
eingesteckt, speichert das System die Datei zuerst auf dem USB-Speichermedium.
- Wenn Sie während der Wiedergabe einer auf einem USB-Speichermedium oder
einer SD-Karte befindlichen Datei auf die Taste „RECORD” drücken, wird die Datei
von USB auf SD oder umgekehrt kopiert.
A) PHONO-ENCODIERUNG
1) Stellen Sie den Funktionswahlschalter auf den Modus „PHONO” und drücken Sie
dann direkt auf die Taste „RECORD” (3).
2) Auf dem LCD-Display wird die Anzeige „USB” eingeblendet, die daraufhin zu blinken
beginnt, und im Anschluss erscheint die nach einigen Sekunden die blinkende
Anzeige “ “ & “ “. Das System startet nun den Encodiermodus.
3) Starten Sie nun unter PHONO die Wiedergabe des Tracks, der auf dem USB-
Speichermedium aufgezeichnet werden soll.
4) Im Anschluss an die Aufzeichnung halten Sie die Taste „RECORD” (3) gedrückt, bis
das LCD-Display zu blinken aufhört und in den Phonomodus zurückkehrt.
TECHNISCHE DATEN
Stromversorgung
Netzbetrieb (AC) 230V ~ 50Hz
Radio-Frequenzbereich
UKW: 87,5 - 108 MHz
MW: 522 - 1620 kHz
Ausgangsleistung 2 x 2 W RMS
Auf Grund ständiger Verbesserungen bleibt die Änderung der technischen Daten und des
Designs ohne Vorankündigung vorbehalten.
B) EINSTELLEN DER BITRATE FÜR DIE ENCODIERFUNKTION
(MITTELS FERNBEDIENUNG)
Sie können die gewünschte Bitrate für den Encodiervorgang von PHONO auf USB einstellen.
Zur Auswahl stehen hierbei die Bitraten 32, 64, 96, 128, 192 und 256 kbps.
1) Stellen Sie die Funktion „PHONO” mit dem Funktionswahlschalter (7) ein und bleiben
Sie im Stoppmodus.
2) Drücken Sie auf die Taste „INFO”, woraufhin auf dem LCD-Display die Standardbitrate
(128 kbps) angezeigt wird.
3) Verwenden Sie die SKIP-Tasten (3) zur Auswahl der gewünschten Bitrate
für den Encodiervorgang.
4) Drücken Sie zur Bestätigung der Einstellung erneut auf „INFO”; im Anschluss daran
kehrt das LCD-Display in den Phonomodus zurück.
ENTFERNEN VON USB-SPEICHERMEDIEN/SPEICHERKARTEN
Zum Entfernen eines USB-Speichermediums bzw. einer Speicherkarte schalten Sie das
Gerät zunächst aus oder stellen Sie den Funktionsmodus auf AUX oder TUNER. Im Falle
eines USB-Speichermediums können Sie dieses einfach direkt aus dem USB-Port ziehen.
Eine Speicherkarte müssen Sie hingegen zunächst leicht in den Kartensteckplatz
hineindrücken und dann loslassen; die Karte wird nun ein Stück weit aus dem Steckplatz
ausgegeben, sodass Sie sie von Hand entfernen können.
LINE-OUT-ANSCHLUSS
Sie haben die Möglichkeit, das System an Ihre Heim-Anlage anzuschließen. Verbinden
Sie hierzu die LINE-OUT-Buchse (27) über ein RCA-Kabel (nicht im Lieferumfang enthalten)
mit dem AUX-Eingang der Anlage.

FrançaisFrançais 21 22
TTR-8632UCEN
LECTEUR MP3 AVEC TOURNE-DISQUE AVEC RADIO STÉRÉO.
ENTREES USB/SD, FONCTION ENCODAGE ET TELECOMMANDE.
MODE D’EMPLOI
Veuillez lire attentivement ce mode d’emploi, afin de familiariser avec votre nouvel appareil
avant de l’utiliser pour la première fois. Veuillez s’il vous plaît garder ce mode d’emploi
comme référence pour le futur.
POSITIONNEMENT DES COMMANDES
1) COUVERCLE DE PROTECTION
2) ÉCRAN LCD
3) TOUCHE RECORD (ENREGISTREMENT)
4) TOUCHE SOURCE
5) VOYANTD’ALIMENTATION
6) HAUT-PARLEUR GAUCHE
7) SÉLECTEUR DE FONCTION/ M/A
8) PRISE CASQUE 3.5 MM
9) PRISE USB
10) SÉLECTEUR DE BANDE RADIO
11) LOGEMENT CARTE SD/MMC
12) TOUCHE MP3 FOLDER UP
13) TOUCHE SAUT BAS
14) TOUCHE CD PLAY/PAUSE/STOP
15) TOUCHE X-BASS
16) CAPTEUR INFRAROUGE
17) HAUT-PARLEUR DROITE
18) CONTROLE VOLUME
19) CONTROLE DE SYNTONISATION
20) VOYANT DELFM STEREO
21) TOUCHE SAUT HAUT
22) ECHELLE SYNTONIE
23) ADAPTATEUR DISQUES 45 T.
24) MANETTE DE LEVÉE DU BRAS DE LECTURE
25) SÉLECTEUR DE VITESSE 33/45 TR/MIN
26) SUPPORT DE LA TÊTE DE LECTURE
27) PRISE DE SORTIE DE LIGNE (LINE-OUT)
28) ANTENNE FM
29) BOUTONAUTO STOP
30) CORDONALIMENTATION
ATTENTION
Le symbole “point d’exclamation” à l’intérieur d’un triangle avertit
l’utilisateur que d’importantes instructions d’utilisation et de main-
tenance sont contenues dans le mode d’emploi.
Le symbole “éclair” à l’intérieur d’un triangle sert à avertir l’utilisateur
de la présence du courant à l’intérieur du l’appareil qui pourrait
constituer un risque.
Afin de minimiser les risques, ne pas ouvrir le boîtier ni ôter le dos
de l’appareil. En case de panne, faites appel aux techniciens
qualifiés pour les réparations. L’appareil ne renferme aucune pièce
reparable par l’utilisateur.
Cet appareil a été conçu pour une tension d’alimentation de 230V ~
50Hz. Débranchez la prise de courant quand on prévoit de ne pas
utiliser l’appareil pendant un certain temps.
L’unité ne doit pas être exposée à l’humidité ou à la pluie.
Mettez l’appareil sous tension seulement après avoir vérifié que
tous les raccordements soient corrects.
L’appareil doit être gardé dans un endroit suffisamment ventilé. Ne
le gardez jamais par exemple près des rideaux, sur un tapis ou
dans des meubles, tels qu’une bibliothèque.
L’unité ne doit pas être exposée à la lumière directe du soleil ou à
des sources de chaleur.
Comment éliminer ce produit -
(déchets d'équipements électriques et électroniques)
Ce symbole sur le produit ou sa documentation indique qu'il ne doit pas être
éliminé en fin de vie avec les autres déchets ménagers. L'élimination incontrôlée
des déchets pouvant porter préjudice a l'environnement ou a la santé humaine,
veuillez le séparer des autres types de déchets et le recycler de
façon responsable. Vous favoriserez ainsi la réutilisation durable des ressources
matérielles.
Les particuliers sont invites a contacter le distributeur leur ayant vendu le produit
ou a se renseigner auprès de leur mairie pour savoir ou et comment ils peuvent
se débarrasser de ce produit afin qu'il soit recyclé en respectant l'environnement.
Les entreprises sont invitées a contacter leurs fournisseurs et a consulter les
conditions de leur contrat de vente. Ce produit ne doit pas être éliminé avec
les autres déchets commerciaux.

FrançaisFrançais 23 24
TÉLÉCOMMANDE
INSTALLATION DES PILES
La télécommande nécessite 2 piles AAA (pas fournies).
DESCRIPTION DES TOUCHES
1) FIND en mode MP3/WMA, appuyez sur cette touche pour activer la fonction
recherche du nom du fichier/dossier.
2) INFO en mode Arrêt USB, appuyez sur cette touche pour sélectionner
la vitesse d’encodage.
3) REC en mode Phono, appuyez sur cette touche pour activer la
fonction enregistrement.
4) REP/INTRO/RAN en mode USB, appuyez sur cette touche pour activer la fonction
répéter / intro / lecture aléatoire.
5) PROGRAM en mode USB, appuyez sur cette touche pour activer la fonction
de programmation.
6) PLAY/PAUSE en mode USB, appuyez une fois sur cette touche pour lancer la
lecture.Appuyezde nouveau sur la touche pour activer le mode pause.
7) SAUT/RECHERCHEavant appuyez une fois sur cette touche pour passer à la
piste suivante, restez appuyés sur la touche pour
activer la fonction avance rapide.
SAUT/RECHERCHEarrière appuyez une fois sur cette touche pour revenir à la
piste précédente, restez appuyés sur la touche pour la activer
fonction retour rapide.
8)STOP en mode USB, appuyez sur cette touche pour interrompre
la lecture ou effacer le programme mémorisé.
9) FOLDER suivant /précédent en mode MP3, ap puyez sur cette touche pour
sélectionner la fonction dossier suivant ou précédent.
10) SOURCE en mode USB, appuyez sur cette touche pour sélectionner la fonction USB.
BRANCHEMENT A LASOURCE D’ALIMENTATION
Avant l’utilisation, vérifier que la tension électrique de votre source d’alimentation
corresponde à celle indiquée sur la plaque des caractéristiques techniques de
l’appareil.Avant de brancher l’appareil au réseau, il faut lire attentivement les instructions
suivantes pour des raisons de sécurité.
UTILISATION DU RESEAU (CA)
L’appareil est conçu pour fonctionner sur une tension de CA 230V, 50Hz seulement. S’il est
branché à d’autres sources d’alimentation cela peut endommager l’appareil.
Danger
Pour éviter tout risque de décharge électrique, débrancher l’appareil avant d’enlever la
protection. A l’intérieur il n’y a pas de parties utilisables. S’adresser au personnel qualifié
pour toute opération d’entretien.
Consignes de Sécurité
N’exposer cet appareil ni à la pluie ni à l’humidité.
Alimentation du réseau: CA 230Volt 50Hz - CC seulement
Ce symbole signifie que l’appareil a été doublement isolé. La connexion de terre
n’est pas nécessaire.
PREPARATION POUR L’UTILISATION
• Enlever le stéréo de son emballage avec attention et garder la boîte en cas
d’utilisation future (service après vente).
• Avant la mise en service de l’appareil, lire attentivement le mode d’emploi
présent.
Utilisation source d’alimentation CA
• Brancher le cordon d’alimentation CA à votre prise murale CA et alimenter le
réseau. S’assurer que la tension est compatible.
ECOUTE DE LA RADIO
1. Placer le Sélecteur de Fonctions (7) sur la position RADIO.
L’indicateur de Marche (5) s’allume.
2. Choisir la bande de fréquence souhaitée avec le Sélecteur de Bandes (10)
3. A l’aide du Sélecteur de Recherche des Stations (19), intercepter la station
émettrice souhaitée.
4. Régler le contrôle de Volume (18) pour obtenir le niveau de son souhaité.
Antenne
Pour la réception en FM il y a une antenne FM incorporée (28) dont le câble est placé à
l’arrière de l’appareil. Orienter le câble de manière à ce que la qualité de la réception soit la
meilleure possible.
Pour la réception en MW les signaux sont interceptés par une antenne en ferrite incorporée.
Pour que la réception soit la meilleure possible, il faut orienter l’appareil.
FrançaisFrançais
Réception FM en Stéréophonie et Monophonie
Quand un signal FM est intercepté, si l’on place le sélecteur de BANDES sur la position FM
ST il est possible d’écouter la station émettrice en stéréophonie. L’indicateur FM Stéréo
(20) s’allume. Si la puissance des signaux stéréo est faible et la réception devient bruyante.
il vaut souvent mieux de recevoir la station émettrice en monophonie. Placer le Sélecteur
FM ST sur Mono. La réception devrait être alors moins bruyante.
TOURNE-DISQUES
Préparation
Ouvrir le couvercle de la platine Tourne-disques.
Dégager le bras de lecture de son agrafe, et enlever la protection de la pointe de lecture.
Ecoute des Disques
1. Placer le Sélecteur de Fonctions (7) sur la position PHONO.
2. Placer un disque sur la platine, au-dessus de l'axe central. Placer l'adaptateur EP au-
dessus de l'axe central quand on veut ecouter des disques EP 17cm.
3. Placer le bouton de sélection de la vitesse (25) sur 33 ou 45 tours/minute, selon le
disque.
4. Dégager le bras de lecture de son agrafe, et enlever le capuchon de protection de la
pointe de lecture.
5. Soulever le bras de lecture à l'aide de la manette de levée du bras de lecture.
6. Placer le bras de lecture au début du disque ou au début d'une piste précise.
7. Baisser doucement le bras de lecture sur le disque à l'aide de la manette de levée du
bras de lecture pour commencer la lecture de la piste.
8. A la fin du disque la platine s'arrête. Lever le bras de lecture et posez-le sur le support.
9 Pour arrêter le disque pendant la lecture, soulever le bras de lecture du disque et
posez-le sur le support.
10. Pour sélectionner la modalité Auto Stop, vous sélectionnez ON par le sélecteur Auto
Stop (29).
Remarques: Ne pas faire tourner et ne pas arrêter le disque manuellement.
Faire tourner ou heurter la platine tourne-disques sans avoir fixé l'agrafe au bras de lecture
peut causer des dommages au bras de lecture.
Remettre le capuchon de protection sur la pointe de lecture quand l'appareil n'est pas utilisé.
25 26
FONCTION ID3 (TITRE DE PISTE/ALBUM) ACTIVÉE À L’AIDE DE LA
TÉLÉCOMMANDE
1. Pendant lalectured’undisqueMP3/WMA, appuyez sur la touche “ INFO “(2), le titre
de la piste s’affiche. Appuyez de nouveau sur la touche “ INFO “ pour désactiver la
fonction.
.
FONCTIONRECHERCHE DU NOM D’UN DOSSIER/TITRE (ACTIVÉE À L’AIDE
DELATÉLÉCOMMANDE)
En mode Arrêt, vous pouvez rechercher une piste par titre/nom de dossier:
1. Appuyez une fois sur la touche “ FIND “, appuyez ensuite sur la touche “Saut haut” (ou
Saut bas) (7). Vous avez la possibilité de recherche le titre de chaque piste affiché par
ordre alphabétique sur l’écran LCD, puis appuyez sur la touche “ PLAY/PAUSE “(6)
pour lancer la lecture de la piste sélectionnée.
2. Appuyez de nouveau sur la touche “ FIND “, le nom du dossier s’affiche. Appuyez
ensuite sur la touche“Saut haut” (ou Saut bas) (7) pour sélectionner le dossier désiré,
et appuyez sur la touche “ PLAY/PAUSE “(6) pour lancer la lecture de toutes les pistes
contenues dans le dossier sélectionné.
REMARQUE:
- Si aucun nom n’a été attribué à la piste, “ none “ (aucun) ou “ unknown “ (inconnu)
s’affiche à l’écran.
- L’écran LCD ne supporte que la langue anglaise.
CRITÈRES DE FORMAT DE PISTE MP3/WMA REQUIS:
- Débit binaire MP3: 32 kbps~256 kbps et débit binaire WMA: 32 kbps ~ 320 kbps
- La lecture du disque MP3 dépend de la qualité de l’enregistrement et de la méthode
d’enregistrement.

FrançaisFrançais
MODERÉPÉTER/INTRO/LECTUREALÉATOIRE(PARTELECOMMANDE)
En appuyant sur la touche Repeat/Intro/Random (4) sur la télécommande avant ou pendant
la lecture, il est possible de répéter la lecture d’une piste, d’un dossier (MP3 uniquement)
ou de toutes les pistes. Chaque pression change la modalité de lecture comme suit:
POUR MP3/WMA
(1) REPEAT 1 (2) REPEAT 1 FOLDER (3) REPEATALL FOLDER
(6) OFF MODE (5) RANDOM (4) INTRO PLAY
27 28
INDICATION
MODE LECTURE SUR L’AFFICHEUR LCD
REPEAT SINGLE TRACK
REPEAT ALL TRACKS ALL
REPEAT SINGLE FOLDER (album)
INTROPLAYMODE INTRO
RANDOMMODE RANDOM
OFF MODE -------------
Répéter la lecture (Repeat play)
Cette fonction permet de répéter la lecture des pistes ou des dossiers désirés.
Fonction lecture de l’intro (Intro play) activée à l’aide de la télécommande
Cette fonction permet d’écouter le début (les 10 premières secondes) de chaque
piste d’un CD et de gagner du temps dans la recherche de la piste désirée.
Lecture aléatoire (random play)
Cette fonction permet d’activer la lecture aléatoire de toutes les pistes ou des pistes
d’un dossier.
PROGRAMMATIONUSB/SD(PARTELECOMMANDE)
Il est possible de programmer jusqu’à 32 pistes pour la lecture de fichiers MP3 dans un
ordre quelconque. Avant de procéder à la programmation, assurez-vous que le système
se trouve en mode stop:
1. Activez le mode USB avec la touche Source (10).
2. Appuyez sur la touche “PROGRAM” (5), “ PROG “ s’affiche sur l’écran LCD . Le numéro
de programme et les numéros de piste pour la programmation seront également
visibles.
3. Sélectionnez une piste désirée en appuyant sur les touches SKIP (7) ou sur
les touches numériques.
4. Appuyez sur la touche “ Program “ pour mettre la piste en mémoire.
LECTURE DE PISTES MP3/WMA PAR L’INTERMÉDIAIRE D’UN DISPOSITIF
USBOU D’UNE CARTE MÉMOIRE (PARTELECOMMANDE)
Le système est en mesure de décoder et de lire tous les fichiers MP3 /WMA sauvegardés
dans le dispositif de stockage grâce à la connexion au port USB ou dans la carte mémoire
SD/MMC.
1. Positionnez le sélecteur de fonction (7) sur USB/SD puis appuyez sur la touche
SOURCE (4) pour sélectionner le mode “ USB or CARD” (USB ou CARTE).
2. Insérez à fond le dispositif USB ou introduisez la carte mémoire, bien droite et sans
la plier, en suivant la direction de la flèche reportée en dessous du cache de la
CARTEMÉMOIRE.
l Le fait de connecter le dispositif USB dans le mauvais sens pourrait endommager le
système ou le support de stockage (USB / carte SD/MMC). Vérifiez le sens avant
d’effectuer le branchement.
3. Le système commencera à lire automatiquement le dispositif de stockage après la
connexion, l’écran LCD affichera le nombre total de fichiers MP3/WMA et le nombre
total de dossiers détectés.
REMARQUE
- Le système est en mesure de détecter et de
lire les fichiers au format MP3 et WMA uniquement
à travers le port USB.
-Si le système est relié à un lecteur MP3 via
la prise USB, à cause des différences de format
d’encodage MP3, certains lecteurs MP3
pourraient ne pas être en mesure de lire les
fichiers. Ce n’est pas liée à un
dysfonctionnement du système.
5. Si nécessaire, répétez les étapes 3 et 4 pour mettre en mémoire des pistes
supplémentaires.
6. Lorsque toutes les pistes ont été programmées, appuyez sur la touche “ PLAY/PAUSE
“(6) pour lire le disque dans l’ordre paramétré.
7. Pour effacer le fichier programmé, appuyez sur la touche “STOP” de la télécommande
jusqu’à ce que le mot “ PROG “ disparaisse de l’écran LCD.

FrançaisFrançais
ENCODAGED’UNDISQUE45/33TOURSENFICHIERMP3(PARTELECOMMANDE)
Le système est en mesure d’encoderun disque 45/33 tours au format MP3et de l’enregistrer
dans le dispositif de stockage par l’intermédiaire de la connexion au port USB.
REMARQUE:
- La vitesse d’encodage est 1:1 et dépend de la durée de lecture actuelle de la piste du CD
- Le système créé un dossier “ AUDIO “ et enregistre la piste dedans.
- Le format d’enregistrement prédéfini le suivant: débit binaire MP3: 128 kbps,
fréquence d’échantillonnage : 44.1khz
- Aucun titre de piste de sera enregistré en mode encodage
- Pour interrompre l’enregistrement, appuyez de nouveau sur la touche “ RECORD “.
- L’enregistrement sera terminé uniquement si la piste a totalement été encodée. Si le
processus d’encodage est interrompu, la piste ne sera ni encodée ni mémorisée
dans le dispositif USB ou dans la carte SD/MMC.
COPIE D’UN FICHIER MP3/WMA DE USB AMMC
En appuyant sur la touche “ RECORD “ (3), le système va copier les fichiers sur le dispositif
USB sur la carte SD/MMC. Le système passera en mode copie uniquement si le fichier
MP3/WMAest lu.
REMARQUE:
- Le système va mémoriser le fichier en priorité sur le support USB si la prise USB et
le logement de la carte SD sont tous deux occupés par un dispositif de stockage.
- Si vous appuyez sur la touche “ Record “ pendant la lecture de la source USB ou SD,
le fichier sera copié du dispositif USB vers la carte SD ou vice-versa.
A) ENCODAGE D’UN DISQUE 45 OU 33 TOURS
1) Positionnez le bouton fonction sur le mode “ PHONO “ et appuyez directement sur la
touche “ RECORD “(3).
2) L’écran LCD affichera le mot “ USB “ puis commencera à clignoter, il affichera ensuite
“ “ et “ “ et se mettra à clignoter quelques secondes après. Le système
commence désormais le processus d’encodage.
3) Lancez la lecture de la piste que vous souhaitez mémoriser sur le support USB.
4) Une fois l’enregistrement terminé, restez appuyés sur la touche “ RECORD “(3)
jusqu’à ce que l’écran LCD cesse de clignoter et revienne en mode “PHONO “ .
B) VITESSE D’ENCODAGE (TÉLÉCOMMANDE)
Vous pouvez sélectionner le débit binaire désiré lors du processus d’ENCODAGE d’un
disque 45/33 tours vers le dispositif USB. Il est possible de sélectionner parmi les valeurs
suivantes :32 / 64 /96 /128 / 192 / 256 Kbps.
1) Activez la fonction “ PHONO “ (7) et restez en mode stop.
2) Appuyez sur la touche “INFO “(2), l’écran LCD affichera le débit binaire prédéfini (128 Kbps)
3) Appuyez sur la touche “Saut” (7) ou sur les touches numériques pour
sélectionner le débit binaire désiré pour l’encodage.
4) Appuyez de nouveau sur la touche “ INFO “ pour confirmer le réglage, l’écran LCD
passera de nouveau en mode “ Phono”.
RETRAIT DU DISPOSITIF USB / CARTE MÉMOIRE
Pour retirer le dispositif USB / CARTE MÉMOIRE, éteignez l’appareil ou bien activez le
mode AUX ouTUNER. Le dispositif USB doit être déconnecté en le débranchant directement
de la prise USB. Pour retirer la carte mémoire, il suffit d’exercer une légère pression sur
cette dernière et de relâcher. La carte est maintenant partiellement éjectée et vous pouvez
la retirer manuellement.
CONNEXION DE LA SORTIE DE LIGNE
Vous pouvez connecter le système à votre chaîne hi-fi en reliant la prise de SORTIE DE
LIGNE ( LINE OUT) (27) à l’entrée auxiliaire à l’aide d’un cordon RCA (non fourni).
29 30
CARACTERISTIQUESTECHNIQUES
Alimentation Electrique
CA: 230V ~ 50Hz
Fréquences Radio
FM: 87,5 - 108 MHz
MW: 522 - 1620 kHz
Puissance 2 x 2W RMS (10% THD)
Caractéristiques sujets à modifications sans avis préalable.

ItalianoItaliano 31 32
TTR-8632UCEN
LETTORE MP3 CON GIRADISCHI E RADIO STEREO.
ENTRATAUSB/SD, FUNZIONE ENCODING E TELECOMANDO.
INTRODUZIONE
Raccomandiamo la lettura accurata di questo manuale per potervi familiarizzare con il
vostro nuovo SISTEMA AUDIO prima di utilizzarlo per la prima volta. Raccomandiamo di
conservare questo manuale per futuri riferimenti
LOCALIZZAZIONE DEI CONTROLLI
1) COPERCHIO DI PROTEZIONE
2) DISPLAY LCD
3) TASTO RECORD
4) TASTO SOURCE
5) LED DIALIMENTAZIONE
6) ALTOPARLANTE SINISTRO
7) SELETTORE DI FUNZIONI/POWER OFF/ON
8) PRESA CUFFIE 3.5 MM
9) PRESA USB
10) SELETTORE DI BANDA RADIO
11) ALLOGGIAMENTOPERSCHEDASD/MMC
12) TASTO FOLDER MP3 UP
13) TASTOSALTOGIU
14) TASTOCDPLAY/PAUSE/STOP
15) TASTO X-BASS
16) SENSORE REMOTO
17) ALTOPARLANTE DESTRO
18) MANOPOLA VOLUME
19) MANOPOLADI SINTONIA
20) INDICATORE LED FM STEREO
21) TASTOSALTO SU
22) INDICATORE DI SINTONIA A LED
23) ADATTATORE DISCHI 45 GIRI
24) LEVETTADEL BRACCIO DI LETTURA
25) SELETTORE DI VELOCITÀ 33/45 GIRI/MIN
26) SOSTEGNO DELLA PUNTINA
27) PRESAUSCITA DI LINEA
28) ANTENNAFM
29) INTERRUTTOREAUTO STOP (ARRESTOAUTOMATICO)
30)CAVOALIMENTAZIONEAC
Il punto esclamativo all’interno di un triangolo avverte l’utente
che il libretto d’istruzioni contiene delle importanti istruzioni per
l’uso e la manutenzione.
Il simbolo del fulmine all’interno di un triangolo avverte l’utente
della presenza di una pericolosa tensione all’interno
dell’apparecchio.
Per ridurre i rischi di scosse elettriche, non aprire l’apparecchio.
L’apparecchio non contiene parti riparabili dall’utente. In caso di
guasto fare appello a tecnici qualificati per le riparazioni.
Questo apparecchio è stato progettato per funzionare a 230V ~
50Hz. Se nonsi intende utilizzare l’apparecchio per un lungo
periodo di tempo, rimuovere la spina dalla presa di corrente.
Non esporre l’apparecchio alla pioggia o all’umidità.
Utilizzare l’apparecchio solo dopo aver verificato che tutte le
connessioni siano state eseguite correttamente.
Posizionare l’apparecchio in un luogo sufficientemente ventilato.
Evitare di sistemarlo vicino a tende, sul tappeto o all’interno di
un mobile quale, ad esempio, una libreria.
Non esporre l’apparecchio alla luce diretta del sole o a fonti di
calore.
Noi.Roadstar Italia Spa
Viale Matteotti 39
I-22012 Cernobbio (Como)
Dichiariamo:
Che il modello Giradischi con radio stereo TTR-8632UCEN della Roadstar è prodotto
in conformità al D.M. no. 548 datato 28/08/95 (G.U. no. 301 datata 28/12/95) e, in
particolare, è in conformità alle prescrizioni dell’articolo 2 comma 1.
ATTENZIONE
ItalianoItaliano 33 34
TELECOMANDO
INSTALLAZIONE DELLE BATTERIE
Il telecomando necessita di 2 batterie del tipo AAA (non incluse).
DESCRIZIONE DEI TASTI
1) FIND in modalità MP3/WMA, premere questo tasto per attivare la funzione
ricerca del nome del file/cartella.
2)INFO in modalità arresto (Stop) USB, premere questo tasto per selezionare
la velocità di codifica o le informazioni ID3.
3) REC in modalità Phono (disco 45/33 giri), premere questo tasto per
attivare la funzione registrazione.
4)REP/INTRO/RAN in modalità USB, premere questo tasto per attivare le funzioni
RIPETI 1 / RIPETI TUTTO / INTRO / RANDOM.
5)PROGRAM in modalità USB, premere questo tasto per attivare la funzione
programmazione
6)PLAY/PAUSE in modalità USB, premere una volta questo tasto per avviare la
riproduzione. Premere nuovamente il tasto per attivare la modalità
pausa.
7) SALTO/RICERCA avanti premere una volta questo tasto per passare alla traccia
seguente, mantenere premuto il tasto per attivare la funzione
avanzamento veloce.
SALTO/RICERCA indietro premere una volta questo tasto per tornare alla traccia
precedente, mantenere premuto il tasto per attivare la funzione ritorno
veloce
8)STOP in modalità USB, premere questo tasto per interrompere la
riproduzione o per cancellare un programma memorizzato.
9) FOLDER su/giù in modalità MP3, premere questo tasto per selezionare
la cartella seguente o precedente.
10) SOURCE in modalità USB, premere ripetutamente questo tasto per
selezionare la funzione USB o SD
COLLEGAMENTOALLAFONTEDI ALIMENTAZIONE
Prima di accendere l’apparecchio assicurarsi che la tensione di alimentazione sia lo stesso
come indicato sulla targhetta dei dati di funzionamento.
Per la vostra propria sicurezza leggere le seguenti istruzioni accuratamente prima di cercare
di collegare questo apparecchio alla presa di corrente.
FUNZIONAMENTO A CA
Questo apparecchio è stato progettato per funzionare solo con una fonte di alimentazione
di AC 230V 50Hz. Il collegamento ad un atro tipo di fonte di alimentazione potrebbe
danneggiare l’apparecchio.
Attenzione
Per prevenire le scariche elettriche, scollegare la spina prima di rimuovere il coperchio.
Fare riferimento al personale di un centro di servizi qualificato.
Precauzioni di Sicurezza
Non esporre l’apparecchio alla pioggia o all’umidità.
Fonte di Alimentazione Principale: solo AC 230V / 50Hz - AC
Questo simbolo significa che questo apparecchio è doppiamente isolato. Non è
richiesto un collegamento a terra.
ALIMENTAZIONE
Rimuovere accuratamente l’apparecchio dalla scatola, conservare l’imballaggio per un
futuro uso (servizio dopo vendita).
Leggere accuratamente queste istruzioni prima dell’uso.
ALIMENTAZIONE CA
Collegare il cavo elettrico alla presa di corrente AC. Controllare che la vostra fonte di
alimentazione sia di 230V, 50 Hz.

ItalianoItaliano 35 36
UTILIZZO DELLA RADIO
•
Regolare il Selettore Funzione (7) sulla posizione Radio.
Si accende l’indicatore (5) di funzionamento.
•Selezionare la banda di frequenza desiderata con il Selettore Banda (10).
•Sintonizzare la stazione radio desiderata girando il controllo Sintonia (19).
•Regolare il controllo Volume (18) al livello desiderato.
Antenna
Per la ricezione in FM, si trova incorporata sul lato posteriore dell’apparecchio un’antenna
a filo (28). Muovere il filo fino a raggiungere la migliore ricezione.
Per una ricezione in MW i segnali verranno raccolti attraverso l’antenna in ferrite incorporata.
Dovrà orientare l’apparecchio fino a raggiungere la migliore ricezione.
Ricezione FM Stereo e Mono
Quando un segnale FM viene sintonizzato, regolando il selettore BANDA sulla posizione FM
ST permetterà alla stazione di essere ricevuta in suono stereo. L’indicatore FM Stereo (20)
si illuminerà. Quando i segnali stereo sono deboli e la ricezione è rumorosa, spesso è
preferibile ricevere la stazione in mono. Spostare il Selettore FM ST sulla posizione FM
(Mono). La ricezione sarà meno rumorosa.
GIRADISCHI
Preparazione
Aprire il coperchio del giradischi. Rilasciare il gancetto del braccio di lettura.
Ascolto dei dischi
1. Regolare il Selettore Funzione (7) sulla posizione PHONO.
2. Posizionare un disco sul giradischi, sul perno centrale. Posizionare l'adattatore EP sul
perno centrale quando si ascoltino dischi EP di 17 cm (45 giri).
3. Regolare il selezione velocità (25) su 33 o 45 giri, a seconda del disco utilizzato.
4. Rilasciare la chiusura del braccio della testina di lettura, e rimuovere il cappuccio di
protezione dalla puntina.
5. Sollevare il braccio di lettura con la levetta del braccio.
6. Posizionare il braccio di lettura sull'inizio del disco, o sull'inizio di un brano particolare.
7. Abbassare con delicatezza il braccio sul disco con la levetta del braccio per iniziare la lettura.
8. Quando il disco giunge alla fine, il giradischi si fermerà. Alzare il braccio di lettura e
riportarlo sull’appoggio.
8. Per fermare il disco durante la lettura, alzare il braccio di lettura e riportarlo sull’appoggio.
il giradischi si fermerà.
10. Per selezionare la modalitàAuto Stop, selezionate ON tramite il selettoreAuto Stop (29).
Nota: Non girare il piatto manualmente.
Muovere o scuotere il giradischi senza la protezione della puntina e della chiusura del
braccio di lettura lo potrebbe danneggiare. Mettere il cappuccio di protezione sulla puntina
quando non verrà utilizzata.
FUNZIONE ID3 (TITOLO DITRACCIA/ALBUM)
(DATELECOMANDO)
1. Durante la riproduzione di un file MP3/WMA, premere il tasto “ INFO “(2), il titolo della
traccia viene visualizzato. Premere nuovamente il tasto “ INFO “ per disattivare questa
funzione.
FUNZIONERICERCADELNOMEDIUNACARTELLA/TITOLO
(DATELECOMANDO)
In modalità arresto (Stop), è possibile ricercare una traccia per titolo/cartella nel disco:
1. Premere una volta il tasto “ FIND “ (1), quindi premere il tasto “Salto su” (o Salto giu) (7).
È possibile cercare il titolo di ogni traccia in ordine alfabetico sul display LCD, quindi
premere il tasto “ PLAY/PAUSE “ (6) per avviare la riproduzione del brano selezionato.
2. Premere nuovamente il tasto “ FIND “(1), il nome della cartella viene visualizzato, quindi
premere il tasto “skip up” (o skip down) per selezionare la cartella desiderata, e premere
il tasto” PLAY/PAUSE “(6) per avviare la riproduzione di tutte le tracce contenute
nella cartella. NOTA: - Nel caso in cui nessun nome sia stato assegnato alla traccia,
il display visualizzerà “none” (nessuno) o “unknown” (sconosciuto). - Il display
LCD supporta soltanto la lingua inglese.
REQUISITI DI FORMATO DI TRACCIA MP3/WMA:
-Bit rate MP3: 32 kbps~256 kbps e bit rate WMA : 32 kbps ~ 320 kbps
- La performance di riproduzione di un disco MP3 dipende dalla qualità di registrazione
e del metodo di registrazione.
Table of contents
Languages:
Other Roadstar MP3 Player manuals

Roadstar
Roadstar PCD-498NMP User manual

Roadstar
Roadstar PCD-3055MP User manual

Roadstar
Roadstar HRA-1750D+BT User manual

Roadstar
Roadstar RU-285RD/HP User manual

Roadstar
Roadstar MP-425 User manual

Roadstar
Roadstar MP-415 User manual

Roadstar
Roadstar PCD-5453WMPT User manual

Roadstar
Roadstar HIF-1799T User manual

Roadstar
Roadstar HIF-1897T User manual

Roadstar
Roadstar MPS-020 User manual

Roadstar
Roadstar PCD-495MP User manual

Roadstar
Roadstar HIF-1899TUMPK User manual

Roadstar
Roadstar PCD-498MP User manual

Roadstar
Roadstar MP-425N User manual

Roadstar
Roadstar RU-295 User manual

Roadstar
Roadstar HIF-1800TUMPK User manual

Roadstar
Roadstar RU-400RD User manual

Roadstar
Roadstar CLR-2981MP User manual


