manuals.online logo
Brands
  1. Home
  2. •
  3. Brands
  4. •
  5. Roadstar
  6. •
  7. Turntable
  8. •
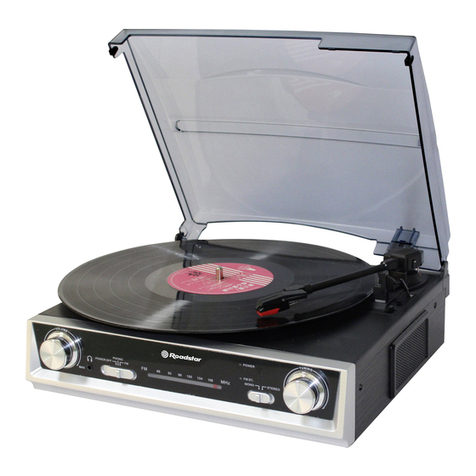
  9. Roadstar TTR-8630 User manual

Roadstar TTR-8630 User manual

U
Ul
lt
t
r
ra
aM
Me
ed
di
ia
a
GmbH & Co. Handels KG
TTR-8630, Art.-Nr. 340312
Sehr geehrte Kundin,
Sehr geehrter Kunde,
vielen Dank, dass Sie sich für ein Roadstar®-Gerät entschieden haben.
Leider hat sich in der Bedienungsanleitung trotz sorgfältiger Prüfung ein Fehler
eingeschlichen:
Auf Seite 8 wird u.a. eine Abspielgeschwindigkeit von 78 U/Min. beschrieben.
Diese Funktion besitzt dieses Gerät nicht !
Die übrigen beiden Abspielgeschwindigkeiten von 45 und 33,3 U/Min. können Sie für
Singles, bzw. LPs nutzen !
Wir entschuldigen dieses Versehen !
Wir wünschen Ihnen noch viel Freude an Ihrem Roadstar-Gerät!
EnglishEnglish 12
WARNINGS
The exclamation point within the triangle is a warning sign alerting the
user of important instructions accompanying the product.
The lightening flash with arrowhead symbol within the triangle is a warning
sign alerting the user of “dangerous voltage” inside the unit.
To reduce the risk of electric shock, do not remove the cover. No user
serviceable parts inside the unit. Refer all servicing to
qualified personnel.
This unit operates on 230V ~ 50Hz. If the unit is not used for a long period
of time, remove the plug from the AC mains.
This unit must not be exposed to moisture or rain.
The power switch in this unit is mounted on the secondary circuit and
does not disconnect the whole unit from the mains in OFF position.
Ensure all connections are properly made before operating the unit.
This unit should be positioned so that it is properly ventilated.Avoid placing
it, for example, close to curtains, on the carpet or in a built-in installation
such as a bookcase.
Do not expose this unit to direct sunlight or heat radiating sources.
CAUTION
RISK OF ELECTRIC
SHOCK
DO NOT OPEN
230v~
TTR-8630
TURNTABLE WITH STEREORADIO RECEIVER
INSTRUCTIONMANUAL
Please read this instruction manual carefully and familiarize yourself with your new HiFi
system before using it for the first time. Please retain this manual for future reference.
LOCATION OF CONTROLS
1) DUST COVER
2) LEFT SPEAKER
3) DIAL POINTER
4)3.5MM HEADPHONE JACK
5) POWER LED INDICATOR
6) POWER OFF/FUNCTION SELECTOR
7)BAND/FM STEREO SELECTOR
8) RIGHT SPEAKER
9)ROTARYVOLUME KNOB
10) TUNING KNOB
11) FM-STEREO LED INDICATOR
12) SPINDLEADAPTOR
13) 33/45/78 RPM SPEED SELECTOR
14) PICK-UP HOLDER
15)AUXILIARYSPEAKER (not included) OUTPUT
16)FMANTENNA
17)AC CORD
CONNECTING TO POWER
Before switching on make sure that the voltage of your electricity supply is the same as
that indicated on the rating plate.
For your own safety read the following instructions carefully before attempting to connect
this unit to the mains.
MAINS(AC) OPERATION
This unit is designed to operate on AC 230V 50Hz current only. Connecting it to other
power sources may damage the unit.
EnglishEnglish 34
CAUTION
To prevent electric shock disconnect from the mains before removing cover. No user
serviceable parts inside. Refer servicing to qualified service personnel.
SAFETYPRECAUTION
Do not allow this unit to be exposed to rain or moisture.
Mains Supply: 230V 50Hz - AC only
This symbol means that this unit is double insulated. An earth connection is not
required.
POWER SUPPLY
Remove the stereo carefully from the box, retaining the packaging for future use.
ACPOWEROPERATION
Connect the plug to a mains power inlet 230V AC ~ 50 Hz.
MW/FMTUNER
Operation
• Set the Function Selector (3) to the RADIO position.
The red Power Indicator (5) will light up.
• Select the desired frequency band with the Band Selector (7).
• Tune to the desired radio station by turning the Tuning control (10).
• To switch off the radio set the Function Selector (3) to the OFF position.
ANTENNA
• For FM reception there is a built-in FM antenna wire (16) at the rear of the unit. Move the
wire around to obtain the best reception.
• For MW reception the signals are picked up through a built-in ferrite antenna. Your may
have to orient the unit to obtain the best reception.
FM&FM-STEREORECEPTION
• Stereo reception is possible when the tuned FM station is broadcasting in stereo.
• When in FM STereo mode (7) and the station is broadscasting in Stereo, the STEREO
indicator (11) lights up.
• When FM stations are weak and are disturbed, listening can be improved by switching
the Band selector (7) to FM (Mono). Reception will then be in MONO.
TURNTABLE OPERATION
Preparation
Open the Record Player Cover.
Release the Tonearm Clamp, and remove the stylus protector.
Listening to Records
1. Set the Function Selector (3) to the PHONO position.
2. Place a record on the turntable, over the central spindle. Place the EP adapter over the
central spindle when playing 17cm EP records.
3. Set the Speed Selector (13) to 33 or 45 or 78 rpm according to the record.
4. Release the tonearm clamp, and remove the protective cap from the stylus.
5. Lift the Tonearm with the Tonearm Lift Lever.
6. Move the tonearm to the beginning of the record, or to the start of a particular track.
7. Gently lower the tone arm onto the record with the Tonearm Lift lever to start playing.
8. When the record is finished the tonearm will automatically stop. Lift the tonearm from
the record and return it to the rest .
9. To stop manually, lift the tonearm from the record and return it to the rest.
Notes: Do not stop or turn the platter manually.
Moving or jarring the turntable without securing the Tonearm clamp could result in damage
to the Tonearm.
Replace the protective cap on the stylus when not in use.
AUXILIARYSPEAKER (NOT INCLUDED)OUTPUT
You can connect the system to external speakers (8 Ohm) by connecting the Speaker output
sockets L, R (15) to your external speakers (not included).
Note: The sound from the original built-in speakers will still be heard even after connecting
the external Speakers.
HEADPHONE
This unit will accept stereo headphones (not included) with a 3.5mm plug and an impedance
of 8 ohms or greater. The speakers are automatically disconnected when headphones are
connected to the PHONES JACKS (4).
EnglishEnglish 56
SPECIFICATIONS
Power Supply
AC: 230V ~ 50Hz
Radio Frequency Coverage
FM: 87.5 - 108MHz
MW: 522 - 1620kHz
Design and specifications are subject to change without notice.

Other Roadstar Turntable manuals

Roadstar TT-385BT-T User manual

Roadstar

Roadstar TT-385BT-T User manual

Roadstar HIF-1996D Plus BT User manual

Roadstar

Roadstar HIF-1996D Plus BT User manual

Roadstar TTR-635WD User manual

Roadstar

Roadstar TTR-635WD User manual

Roadstar CD-365 User manual

Roadstar

Roadstar CD-365 User manual

Roadstar TT-380BT-T User manual

Roadstar

Roadstar TT-380BT-T User manual

Roadstar HIF-1999D+BT User manual

Roadstar

Roadstar HIF-1999D+BT User manual

Roadstar HIF-1850TUMPK User manual

Roadstar

Roadstar HIF-1850TUMPK User manual

Roadstar HIF-8888TUMPN User manual

Roadstar

Roadstar HIF-8888TUMPN User manual

Roadstar TTL-6970EPC User manual

Roadstar

Roadstar TTL-6970EPC User manual

Roadstar TT-260SPK User manual

Roadstar

Roadstar TT-260SPK User manual

Roadstar TTR-730U User manual

Roadstar

Roadstar TTR-730U User manual

Roadstar TTR-8633 User manual

Roadstar

Roadstar TTR-8633 User manual

Roadstar HIF-1937TUMPK User manual

Roadstar

Roadstar HIF-1937TUMPK User manual

Roadstar HIF-8899BT User manual

Roadstar

Roadstar HIF-8899BT User manual

Roadstar TT-540 User manual

Roadstar

Roadstar TT-540 User manual

Roadstar TTR-630WD User manual

Roadstar

Roadstar TTR-630WD User manual

Roadstar HIF-1996BT User manual

Roadstar

Roadstar HIF-1996BT User manual

Roadstar TTR-8633 User manual

Roadstar

Roadstar TTR-8633 User manual

Roadstar TTR-8634 User manual

Roadstar

Roadstar TTR-8634 User manual

Roadstar MP-450 User manual

Roadstar

Roadstar MP-450 User manual

Roadstar HIF-1896TUMPK User manual

Roadstar

Roadstar HIF-1896TUMPK User manual

Roadstar TTR-1923UCEN User manual

Roadstar

Roadstar TTR-1923UCEN User manual

Roadstar CDR-7000U User manual

Roadstar

Roadstar CDR-7000U User manual

Roadstar HIF-2030BT User manual

Roadstar

Roadstar HIF-2030BT User manual

Popular Turntable manuals by other brands

Teac LP-R400 Quick-start recording guide

Teac

Teac LP-R400 Quick-start recording guide

Konig HAV-TT10USB manual

Konig

Konig HAV-TT10USB manual

auna TP-30 manual

auna

auna TP-30 manual

camry CR 1149 user manual

camry

camry CR 1149 user manual

Gemini XL-500 Operation manual

Gemini

Gemini XL-500 Operation manual

Pro-Ject Audio Systems T1 Phono SB Instructions for use

Pro-Ject Audio Systems

Pro-Ject Audio Systems T1 Phono SB Instructions for use

EAT C-Major Instructions for use

EAT

EAT C-Major Instructions for use

Akai AP-100 Operator's manual

Akai

Akai AP-100 Operator's manual

Audio Technica AT-LP2X user manual

Audio Technica

Audio Technica AT-LP2X user manual

Kenwood KD-600 instruction manual

Kenwood

Kenwood KD-600 instruction manual

volkano Retro Series instruction manual

volkano

volkano Retro Series instruction manual

Dual 1216 Service manual

Dual

Dual 1216 Service manual

Pioneer QuartzPLL PL-540 Service manual

Pioneer

Pioneer QuartzPLL PL-540 Service manual

LENCO L-3866 USB instruction manual

LENCO

LENCO L-3866 USB instruction manual

Fluance RT80 Stylus Replacement/Upgrade Guide

Fluance

Fluance RT80 Stylus Replacement/Upgrade Guide

Akai ATT-14BT instruction manual

Akai

Akai ATT-14BT instruction manual

auna TT-Classic Light manual

auna

auna TT-Classic Light manual

Tektronix MTX100B Technical reference

Tektronix

Tektronix MTX100B Technical reference

manuals.online logo
manuals.online logoBrands
  • About & Mission
  • Contact us
  • Privacy Policy
  • Terms and Conditions

Copyright 2025 Manuals.Online. All Rights Reserved.