Robaux LL8 User manual

User ManualUser Manual

Sweetie‘s lil bro.
The Lil Eight is an eight-track trigger se-
quencer that focuses on the core tasks of a
classic drum computer. No menu diving - the
main functions are directly accessible via the
straightforward user interface. The module
offers 16 different patterns with up to 16
Steps.
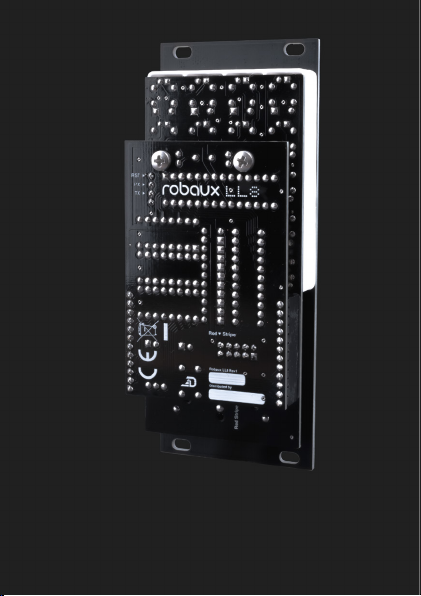
Installation
The LL8 requires a ±12V power supply (2x5-
pin connector). The red strip of the ribbon
cable (-12V side) must be oriented on the
same side as the «Red Stripe» mark on the
board. The module draws about 15mA from
the +12V rail.
Operation
Connect input fof the LL8 to a clock signal
from a sequencer or LFO and the sequencer
will start running. If the sequencer does not
receive a clock signal for a few seconds, it
jumps back to the rst step of the sequence
and waits until the clock continues.
b c d e
a
f
g
k
m i
n h
l j
Connect the circular-
ly arranged outputs
gthrough nto the
gate inputs of your
drum modules, LFOs
or other modulation
sources. Now you‘re
ready to go!
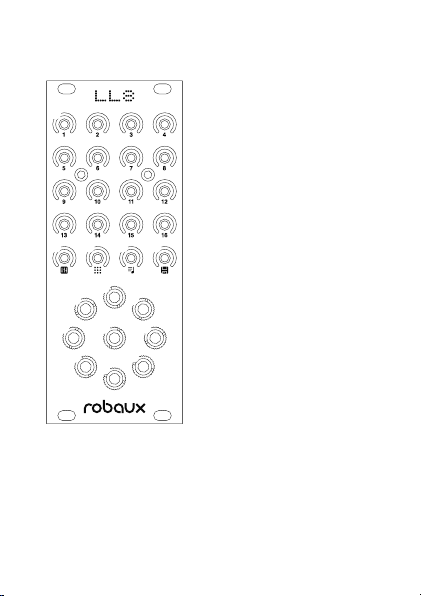
The control panel
with its 20 switches is
divided into two parts.
The rst four rows are
the astep buttons of
the sequencer. In the
remaining row you will
nd the function keys.
The functions are de-
scribed in detail on the
following pages.

In edit mode, you can program, modify or
delete the current pattern.
Press the aswitch.
Switches 13-16 provide various functions
which are described below.
Step
Switch 13 calls up the step mode where you
can program the sequencer like a TR machi-
ne. Use the keys 1-8 to select the track you
want to program. Then use the keys 1-16 to
program the individual steps. You can return
to track selection by pressing the abutton.
Tap
Switch 14 calls up the tap moder where you
can program your patterns on the y. Each
of the keys 1-8 represents one track. Play
the buttons while the sequencer is running
to program your pattern. The tap inputs are
automatically quantized to the clock.
a Edit

Random
Switch 15 calls up the random mode. Pressing
switches 1-8 overwrites the track content with
a random pattern. Try it a few times until you
get a random pattern that you like.
Delete
Switch 16 calls up the delete mode. Pressing
switches 1-8 deletes the track.
To prevent accidental deletion of the track, a
cross symbol and a bar is displayed on the
keys before the deletion process. You can
cancel the deletion process by pressing the
cross or conrm the deletion by pressing the
bar.
A pattern has a length of 16 steps.
You can change the length by holding
down the aswitch, then use the keys 1-16 to
select the new length of the pattern.

In Mute & Fill mode you can mute and unmute
the eight tracks. You can also add continuous
triggers.
Press the hswitch.
With the switches 1-8 you can mute and un-
mute the individual tracks.
Switches 9-16 let you add continuous triggers
to individual tracks, perfect for drum rolls.
Press and hold the hkey, and you can
quickly switch between the 16 different
patterns by pressing one of the 16 keys
simultaneously. Please note that there is no
pattern chaining in the quick selection.
h Mute & Fill

In Pattern mode, you can switch between the
16 different patterns.
Press the sswitch.
Select the pattern with keys 1-16. You can
combine two or more patterns: Press and hold
the pattern you want to play rst, then press
and hold the next pattern, and so on. When
you release the keys, the selected patterns
will be played in sequence.
In edit mode, pattern chaining continues, but
only the pattern that plays when you enter edit
mode can be changed. If necessary, switch
back to Pattern Mode and wait until the pat-
tern you wish to change is playing, then switch
back to Edit Mode.
Press and hold the sswitch to copy
patterns. Use the 1-16 keys to select the
pattern source. Then use keys 1-16 to select
where you want to copy the pattern. Release
the skey to execute the copy operation.
s Pattern

Whenever you make a change, such as
modifying a pattern or selecting a pattern
sequence, the olights up.
Use this button to save the changes so that
they are retained even after the module is
switched off. The saving process is nished
when the key no longer lights up.
Press and hold the okey during startup
to restore the factory settings.
o Save

During startup, press and hold the aswitch
to enter debug mode. In this mode you can
check the individual buttons and lights. The
current rmware version is also displayed at
device startup.
Each button lights up when pressed. Buttons
1-8 also send out a trigger via the respective
jacks. Press buttons hand osimultaneously
to switch to normal sequencer mode.
You can also use this mode to turn the
sequencer into a 8-trigger pad.
If you prefer to use the module upside down,
you can press the skey when starting the
module. This will rotate all keys of the control
panel by 180°. This option is mainly intended
for experienced users, as the function of the
buttons no longer matches the labeling. You
can turn the knobs back to their initial position
when you press the sbutton during startup.
Debug Mode
Flip Mode

With the optional MIDI adapter you can output
the tracks via MIDI. The channel and note can
be set individually for each track.
During startup, press the hkey for MIDI
settings. You can access the MIDI settings by
pressing the hand sbuttons simultaneously
in sequencer mode.
MIDI Output
You can select the tracks for MIDI operation
individually. Press the hswitch and use
switches 1-8 to select which tracks will output
MIDI notes. Use switches 9-16 to select which
track is to be used as an accent track.
This track can be used like any other track,
but controls the velocity values for all tracks.
MIDI Channel
Press the aswitch to set the MIDI channel.
Use switches 1-8 to select the track. Then
press switches 1-16 to select the MIDI chan-
nel. Return to the track selection with key a.
MIDI Settings

MIDI Note
Press the sswitch to set the MIDI note to
be output. First select the track with the keys
1-8. Then you can select the note with the
keys 1-12. Key 1 represents the note C, Key 2
represents the note C#, Key 3 represents the
note D, and so on.
Use keys 13-16 to select the octave of the
note. For example, if you want to output the
note A3, rst select key 15 for octave three
and then key 10 for note A.
Return to the track selection with key s.
When pressing a key, the selected note
will be output via MIDI.
Save MIDI Settings
Press the okey to save the MIDI settings and
switch to sequencer mode.
Other manuals for LL8
1
Table of contents
Other Robaux Recording Equipment manuals


