Fuse
This apparatus must be protected by a 3A fuse (BS1362) in a 13A plug
(BS1363). If another type of plug is used a 5A fuse should be fitted in the
plug,adaptorordistributionboard.
IF IN DOUBT - CONSULT A QUALIFIED ELECTRICIAN.
Back-upBattery(notnecessaryfortheunittofunction)
Slide the battery cover catch in the direction of the arrow. Remove the
batterycover.Fita9voltIECsize6LR61(6F22,PP3)orequivalentbattery
intothe compartment. Replacethe battery cover.
Thetimeandalarmsettingswillberetainedduringatemporaryfailureofthe
ACmainssupply.TheLEDdisplaywillnotbeoperational.Thedisplaywill
beextinguishedtoconservebatterylife,butthememorywillretaindetails
of the time and alarm time settings.
Ifyourclockradioisnottobeusedforaprolongedperiodoftime,remove
the battery to avoid damage by battery leakage.
The wire coloured BLUE must be
connectedto the terminal marked N
orcolouredBLACK.
Thewire coloured BROWNmust be
connected to the terminal marked L
orcolouredRED.
E
L
N
3 amp
Brown
Blue
(Live)
(Neutral)
(Earth)
Mains Lead
9
(Underside)
General
Donot allow thisunittobeexposedtowaterorsteam. It isrecommended
that the FM band be used wherever possible as better results in terms of
qualityandfreedomfrominterferencewillusuallybeobtainedthanonthe
MW or LW bands.
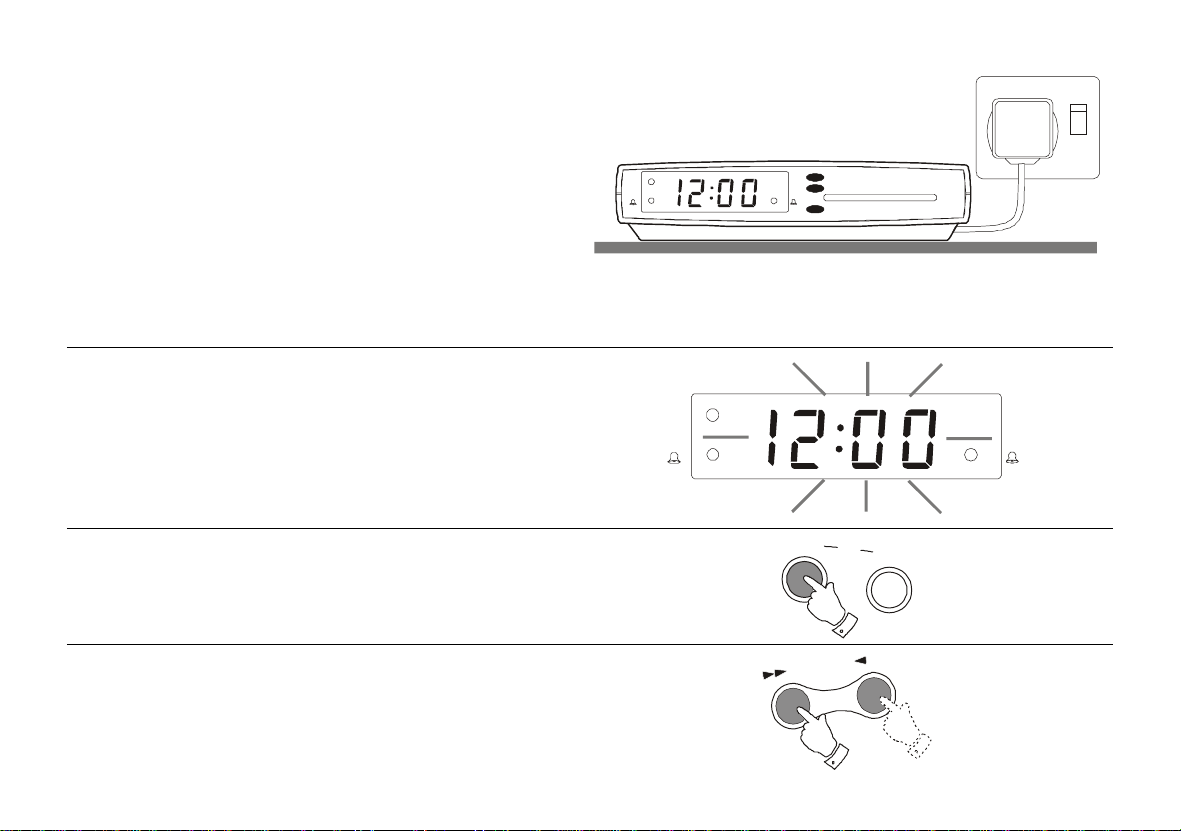
Mainssupply
The CR9902 will operate from a supply of AC 230volts, 50Hz only.
Foryourconveniencethisproductissuppliedwithaplugwhichisfittedwith
afuseoftheappropriaterating.Iftheplugsuppliedisnotsuitableforyour
socketoutlet,itshouldberemovedbyunscrewingtheplugtop,theterminal
screws,andremovingthe cable.
The correct style of plug to suit your household together with a correctly
rated fuse should be fitted.
IFINDOUBT-CONSULTAQUALIFIEDELECTRICIAN
IMPORTANT.DONOTmakeanyconnectiontothelargerterminalwhich
is marked with the letter E or by the safety earth symbol or coloured
GreenorGreen-and-yellow.
Thewiresinthemainsleadarecolouredinaccordancewiththefollowing
codes :- BLUE - NEUTRAL BROWN - LIVE
Asthesecoloursmaynotcorrespondwiththecolouredmarkingsidentifying
the terminals in your plug, proceed as follows:-
CR9902 Instruction Book.pm6 24/10/99, 13:4910