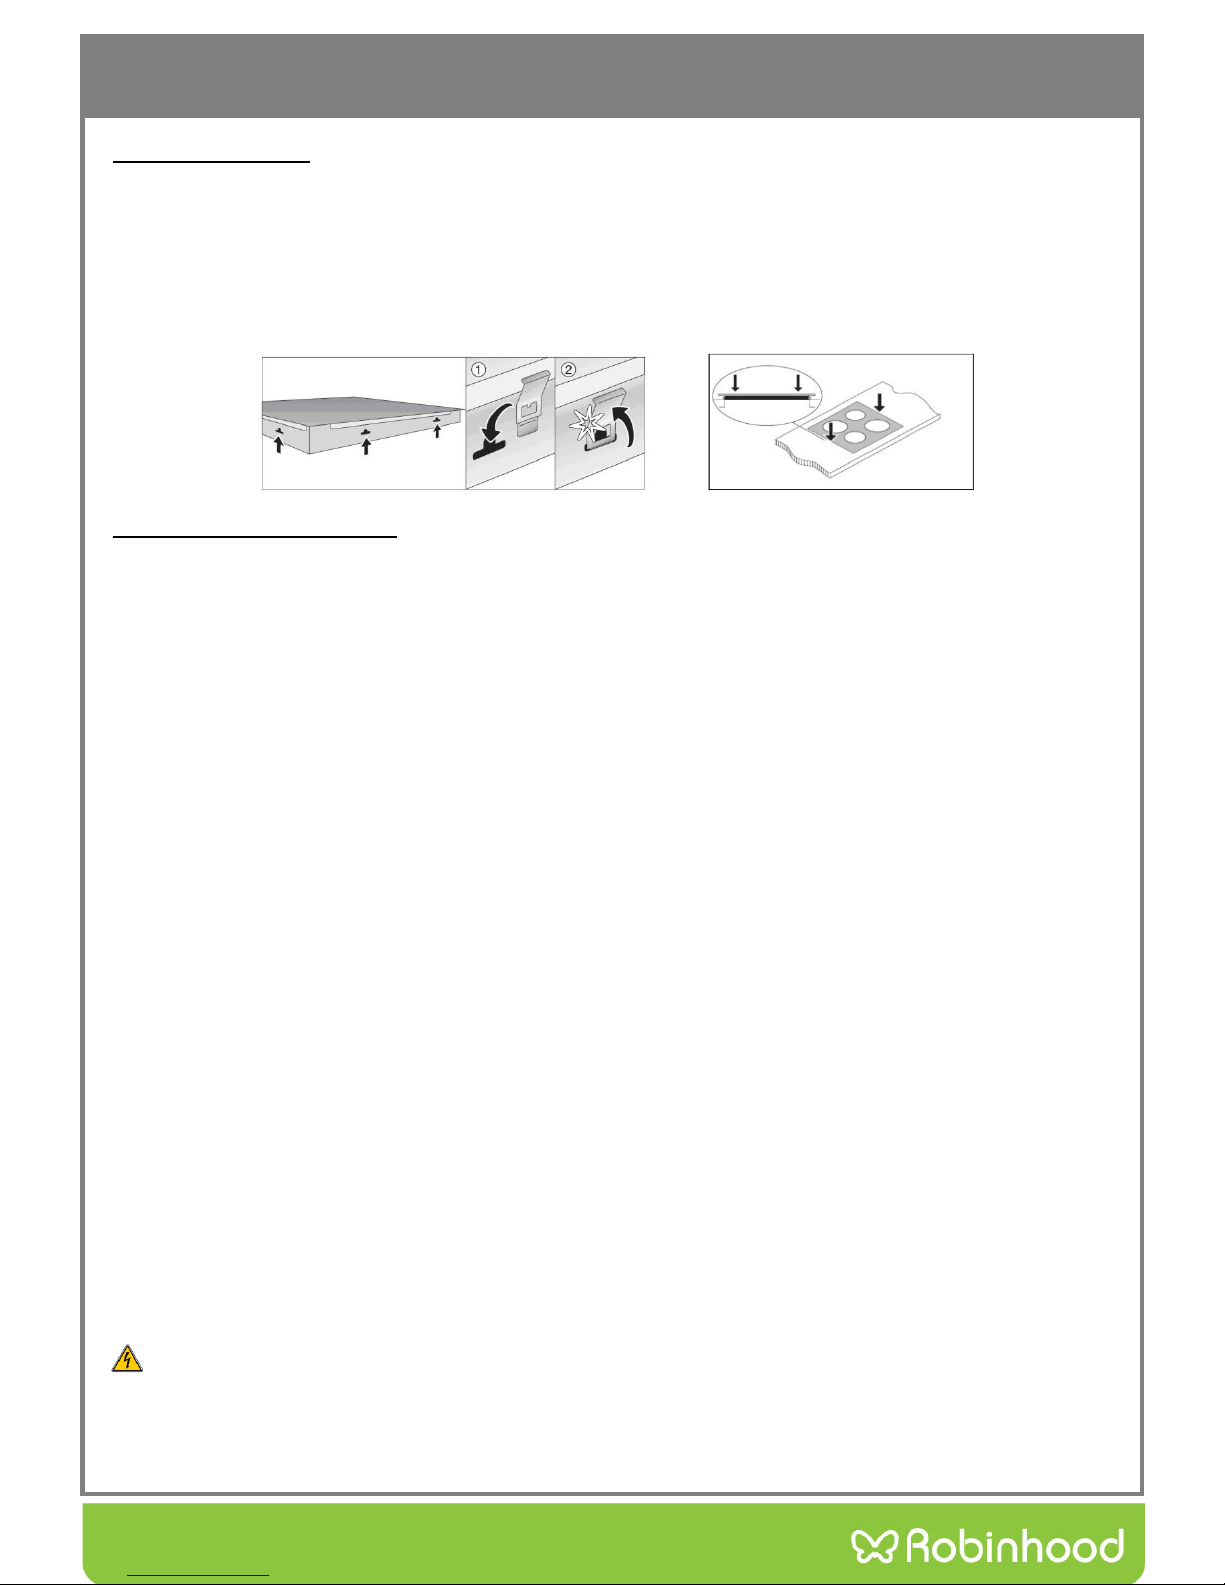
Instructions for use and maintenance
Turning hotplates on
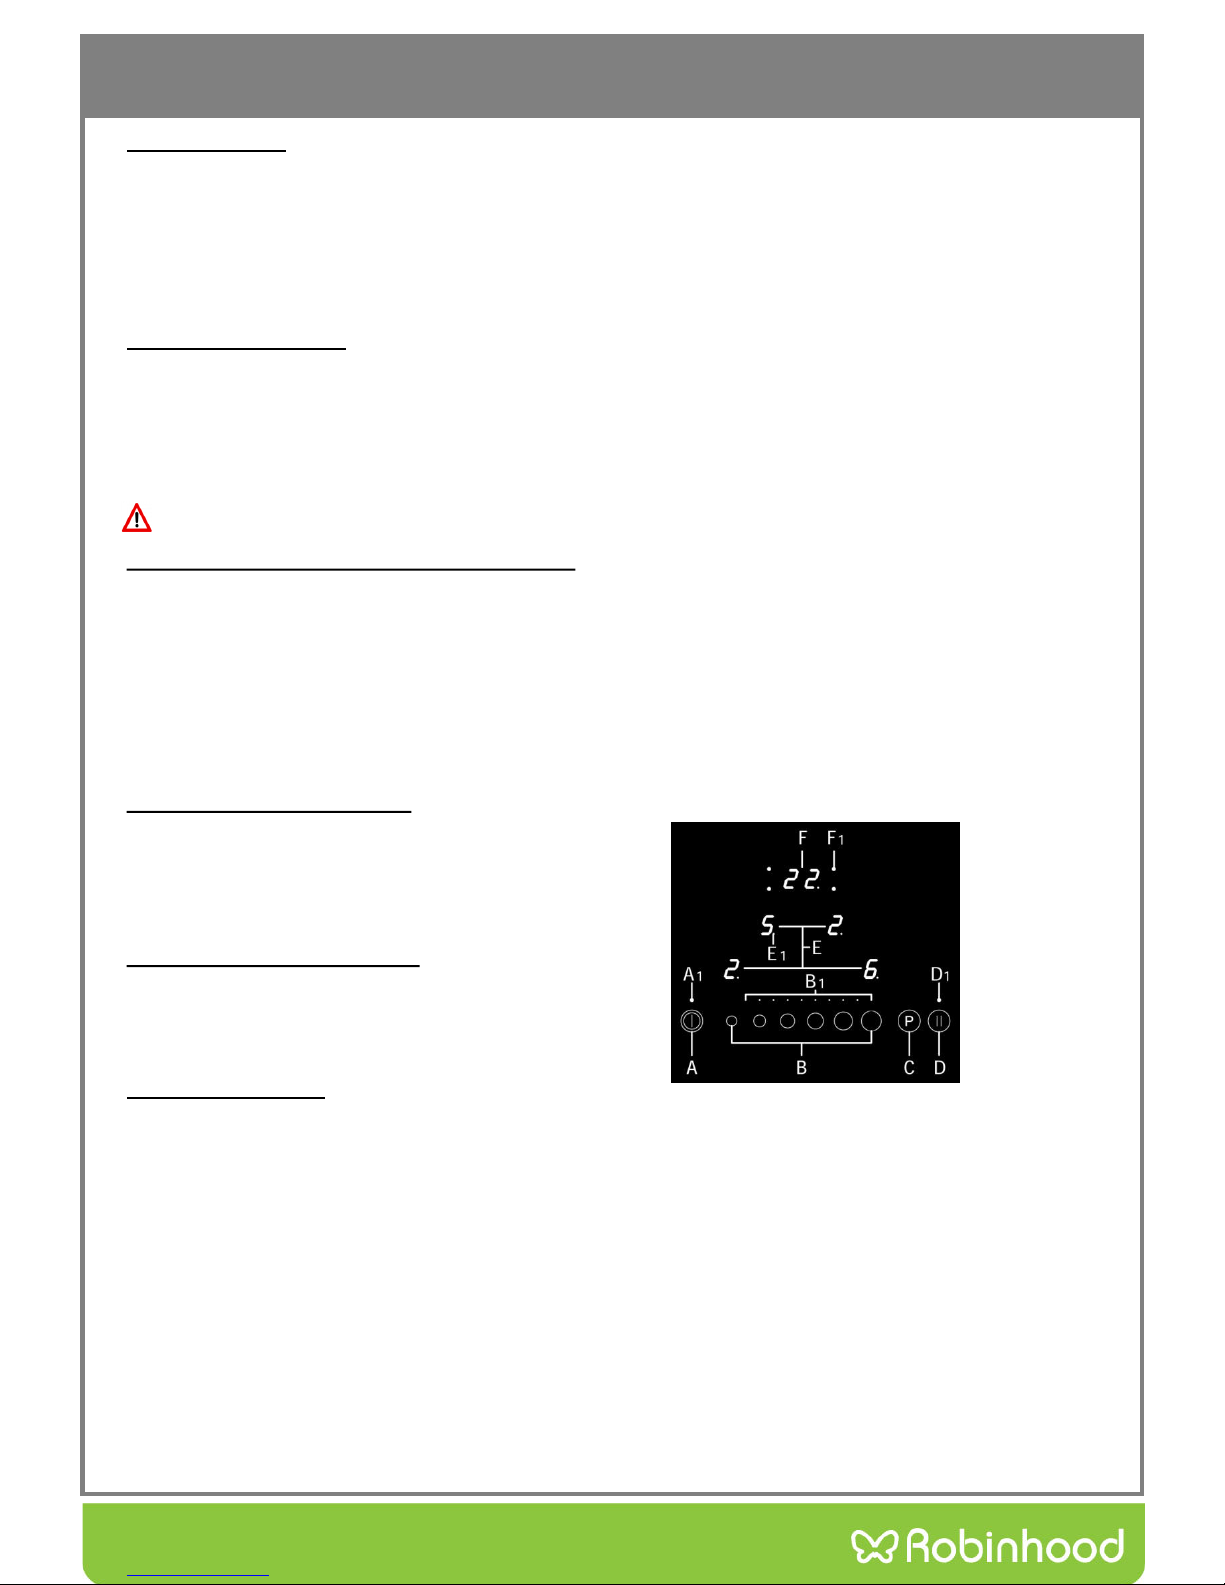
1. After turning the hob on using the ON/OFF sensor (A), within
the next 20 seconds start one of the hotplates.
2. Touching the desired hotplate sensor (E), its relevant power
indicator indicates »0« and decimal dot (E1) changes from
flashing fixed.
3. Set the power level 1-9 by touching the slider. At the first touch,
the level is set according to the part of the slider that you touch.
Upon the slider, the control LEDs light up, according to the level
set. By sliding along the slider, the power level setting is changed.
By sliding to the right, the level increasing, while sliding to the left
decreases the level. When you move your finger away from the slider,
the cooking field starts to operate at the level set. If the first touch of
the slider is on its far right side (level 9), followed by a new pressure
level 9, the automatic cooking is activated (see Automatic fast heating).
Changing hotplate power settings
•Select a particular hotplate by touching the sensor (E), the respective decimal point (E1) lights.
•By touching or sliding along the slide sensor you change power setting.
•When you remove the finger from the slide sensor, the hotplate starts to operate at selected power.
Switching hotplates off
•Selected hotplate must be activated.
•To select a particular hotplate, touch the sensor (E), the respective decimal point (E1) lights.
• By touching the slide sensor (B) at the start, bring the power setting to “0”. Short beep confirms the OFF position.
Switching the cooktop off
The hob is switched off by pressing the main ON/OFF sensor (A). The sound signal beeps and all indicators go off,
except for those hotplates which are still hot and display the warning “H” sign as an indication of the remaining heat.
If you switch the hob off prior end of cooking session, use the remaining heat and save electric energy.
Locking the control unit / child safety lock
Locking/Activating Child-Lock:
The activation of the child lock is only possible with switched-on control panel, if no cooking zone is active and no timer
is selected. Therefore it is necessary that the cooking zone display of the front right cooking zone and the (C) key are
pressed simultaneously followed by pressing the front right cooking zone display again. All displays now show “L” for
LOCKED. Possible optic warnings for hot cooking zones “H” are displayed in alternation with “L”.
This operational procedure must be completed within 10sec and no other key than the one described must be pressed.
Otherwise the procedure is cancelled for not being complete.
Unlock for cooking:
It is necessary for unlocking and preparing the control panel, to press cooking zone display front right and the (C) key
simultaneously. “L” disappears from the displays. All cooking zone displays show “0” with a flashing dot.
Possible optic warnings for hot cooking zones “H” are displayed permanently. After switching off the control panel the
child lock is active again.
This operational procedure must be completed within 10sec and no other key than the one described must be pressed.
Otherwise the procedure is cancelled. No other key actuation is possible. Solely the Power Key (A) may be used for
switching off the control panel.