17
Mopping
Note:
•To prevent excessive dirt buildup on the mop, oors should be vacuumed at least three times before the rst
mopping session.
•The mopping feature cannot clean up large particles. Please vacuum the oor regularly to ensure satisfactory
cleaning performance.
•Vacuuming or mopping cannot start if the battery level is too low. Allow the robot to charge before starting
cleanup.
•Before cleaning, tidy cables (including the power cable of the dock) and valuables from the oor. Loose cables may
be dragged by the robot, resulting in the disconnection of electrical appliances or damage of cables and property.
•If vacuuming or mopping is completed in less than 10 minutes, the area will be cleaned twice.
•If the battery runs low during the vacuuming or mopping cycle, the robot will automatically return to the dock.
After charging, the robot will resume where it left o.
1. Preparations for Mopping
Note:
•To prevent corrosion or damage, do not use cleaning uid or disinfectant not specied by Roborock in the
water tank.
•Do not use hot water as this may cause the tank to deform.
Instructions for Use
2. Press the button to start mopping. The robot will plan its mopping route
according to its scan of the room. It splits a room into zones, rst draws out zone
edges, and then lls the zone in a zigzag pattern. In so doing, the robot mops all
zones one by one, eciently cleaning the house.
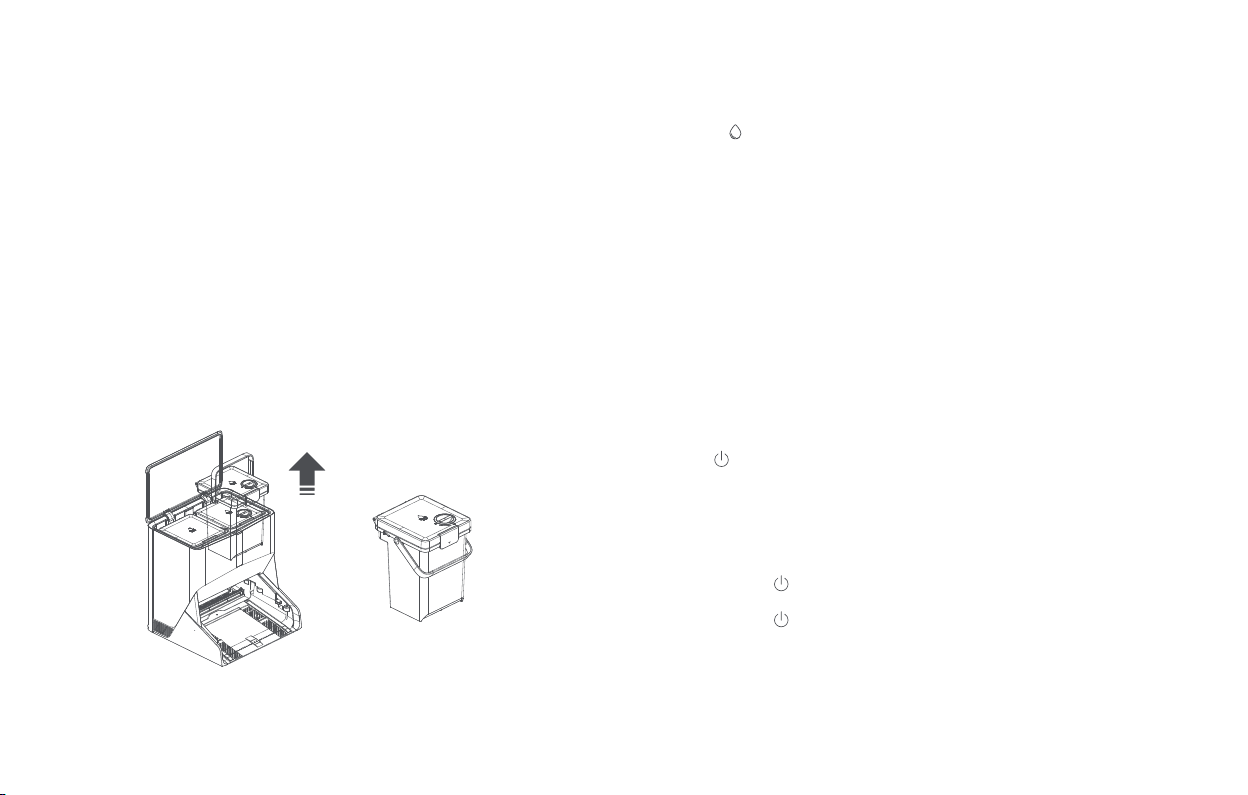
Take out the clean water tank and remove the lling port cover. Add water below
the Max line. Tighten the port cover and t the water tank back in place.
4. Upon completion of mopping, the robot automatically returns for deep cleaning
of the mop and self-cleaning of the dock. After the cleaning, it starts charging
and air-dries the mop. (You may disable the air-dry feature in the app.)
3. The robot automatically returns for mop washing every 10 minutes by default.
You can adjust this interval in the app, or press and hold the Dock button to per-
form mop washing manually. The robot automatically resumes mopping upon
completion of mop washing.
Note:
•Malfunctioning of the dock during mop washing will bring the mopping cycle to a halt.
•If the problem is solved within 10 minutes, the robot will continue with mop washing.
•If the problem persists after 10 minutes, the robot will automatically end mopping and return to the dock to
charge.
On/O
Press and hold the button to turn on the robot. The power indicator will turn on
and the robot will enter standby mode.
Press and hold the button to turn o the robot and complete the cleaning cycle.
Note: The robot cannot be turned o when it is being charged.
Start Cleaning
Press the button to start cleaning. The robot will plan its cleaning route accord-
ing to its scan of the room. It splits a room into zones, rst draws out zone edges,
and then lls the zone in a zigzag pattern. In so doing, the robot cleans all zones
one by one, eciently cleaning the house.


