ROBOTIQ POWERPICK10 User manual

Robotiq PowerPick10 Vacuum Gripper
Instruction Manual
ROBOTIQPOWERPICK10 VACUUM GRIPPER
robotiq.com | leanrobotics.org
Original Notice
© 2024 Robotiq Inc.

PowerPick10 - Instruction Manual
Table of Contents
Revisions 5
1. General Presentation 7
1.1. Disclaimer 7
1.2. Nomenclature 7
2. Safety 9
2.1. Disclaimer 9
2.2. Risk Assessment 10
2.3. Use of the PowerPick10 Vacuum Gripper 11
3. Installation 13
3.1. Scope of Delivery 13
3.2. Environmental and Operating Conditions 15
3.3. Air Supply 15
3.4. Reception of the Product 16
3.5. Mechanical Installation 16
3.6. Electrical Installation 30
3.7. Supply Pressure Adjustment 31
3.8. Configuration Steps and Tips 32
4. Software 39
4.1. Grip Check 39
5. Specifications 41
5.1. Technical dimensions 41
5.2. Mechanical Specifications 47
5.3. Tool Center Point and Center of Mass 49
5.4. Electrical Specifications 51
5.5. Control specifications 51
6. Maintenance 52
6.1. Safety Measures 52
6.2. Maintenance 53
7. Spare Parts, Kits and Accessories 55
8. Troubleshooting 57
2


PowerPick10 - Instruction Manual
Revisions
Robotiq may modify this product without notice, when necessary, due to product improvements, modifications or changes in
specifications. If such modification is made, the manual will also be revised, see revision information. See the latest version of this
manual online at: support.robotiq.com.
2024/02/08
Updated user manual to reflect the latest hardware release of the Gripper
2023/08/09
Updated Tool Center Point and Center of Mass section
2023/01/31
Initial release
5

PowerPick10 - Instruction Manual
Copyright
© 2023 Robotiq Inc. All rights reserved.
This manual and the product it describes are protected by the Copyright Act of Canada, by laws of other countries, and by
international treaties, and therefore may not be reproduced in whole or in part, whether for sale or not, without prior written consent
from Robotiq. Under copyright law, copying includes translation into another language or format.
Information provided by Robotiq in this document is believed to be accurate and reliable. However, no responsibility is assumed by
Robotiq for its use. There may be some differences between the manual and the product if the product has been modified after the
edition date.
The information contained in this document is subject to change without notice.
6

PowerPick10 - Instruction Manual
1. General Presentation
1.1. Disclaimer
The terms
Gripper
,
PowerPick
10
Gripper
,
PowerPick10 Vacuum Gripper
and
PowerPick10
used in the following manual all refer to
the Robotiq PowerPick10 Vacuum Gripper. The Robotiq PowerPick10 Vacuum Gripper is a robotic device designed for industrial
applications. The vacuum is generated with a venturi system that uses compressed air as an energy source. It is an end-of-arm tool
designed to pick, place and handle a range of items (typically cardboard boxes) of varying sizes and weights.
NOTICE
The following section presents the key features of the Robotiq PowerPick10 Vacuum Gripper and
must not be considered as exhaustive and comprehensive for the operation of the Gripper. Each
feature is detailed in the appropriate section.
1.2. Nomenclature
1.2.1. PowerPick10 Gripper
The PowerPick10 Gripper is a mechanical assembly equipped with interchangeable components. It is the end effector of the robot.
It uses the negative pressure generated by the PowerPick10 Vacuum Generation Unit to create a vacuum and, through the multiple
suction cups, lifts, holds and moves boxes and other objects weighing up to 11.3 kg (24.9 lb). To simplify this manual, the word
“box” will be used to represent the item to be handled with the Gripper. The PowerPick10 Gripper is directly installed on the wrist of
the robot, without a coupling interface.
Fig. 1-1: PowerPick10 Gripper, Default Configuration
7

PowerPick10 - Instruction Manual
1.2.2. PowerPick10 Vacuum Generator
The PowerPick10 Vacuum Generator is a dual-channel electrical and pneumatic device composed of two solenoid valves, two
pressure sensors and two vacuum generator cartridges. It is an intermediate control device, connected to the robot control box and
the PowerPick10 Gripper via I/O terminal blocks and air tubes. The PowerPick10 Vacuum Generator creates and releases the
vacuum for the PowerPick10 Gripper.
Fig. 1-2: PowerPick10 Vacuum Generator
8

PowerPick10 - Instruction Manual
2. Safety
2.1. Disclaimer
CAUTION
Any user of the Robotiq PowerPick10 must have read and understood all of the instructions in the
following section before operating it.
It is the installer/operator's responsibility to ensure that all local safety measures and regulations are
met.
The intent of this section is to provide general guidelines for safe use of the PowerPick10 Vacuum Gripper.
Always follow local rules and regulations.
The installer is responsible for the safe installation and commissioning of the PowerPick10 Vacuum Gripper.
Robotiq accepts no liability for damage, injury or any legal responsibility incurred directly or indirectly from the use of this product.
The user (installer and operator) shall observe safe and lawful practices including but not limited to those set forth in this document.
The term
operator
refers to anyone responsible for any of the following operations on the Robotiq Vacuum Gripper:
lInstallation
lControl
lMaintenance
lInspection
lCalibration
lProgramming
lDecommissioning
This manual covers the various components of the PowerPick10 Vacuum Gripper and the general operations regarding the whole
life-cycle of the product, from installation to operation and decommissioning.
The drawings and photos in this manual are representative examples. However, discrepancies may be observed between the
visual supports and the actual product.
WARNING
Any use of the PowerPick10 Vacuum Gripper in non-compliance with these instructions is deemed
inappropriate and may cause injury or damage.
9

PowerPick10 - Instruction Manual
2.2. Risk Assessment
2.2.1. General Risk Assessment
The robot, the Gripper and any other equipment used in the final application must go through a comprehensive risk assessment
process before they can be used.
The following non-exhaustive list presents risks that must be assessed during the integration process:
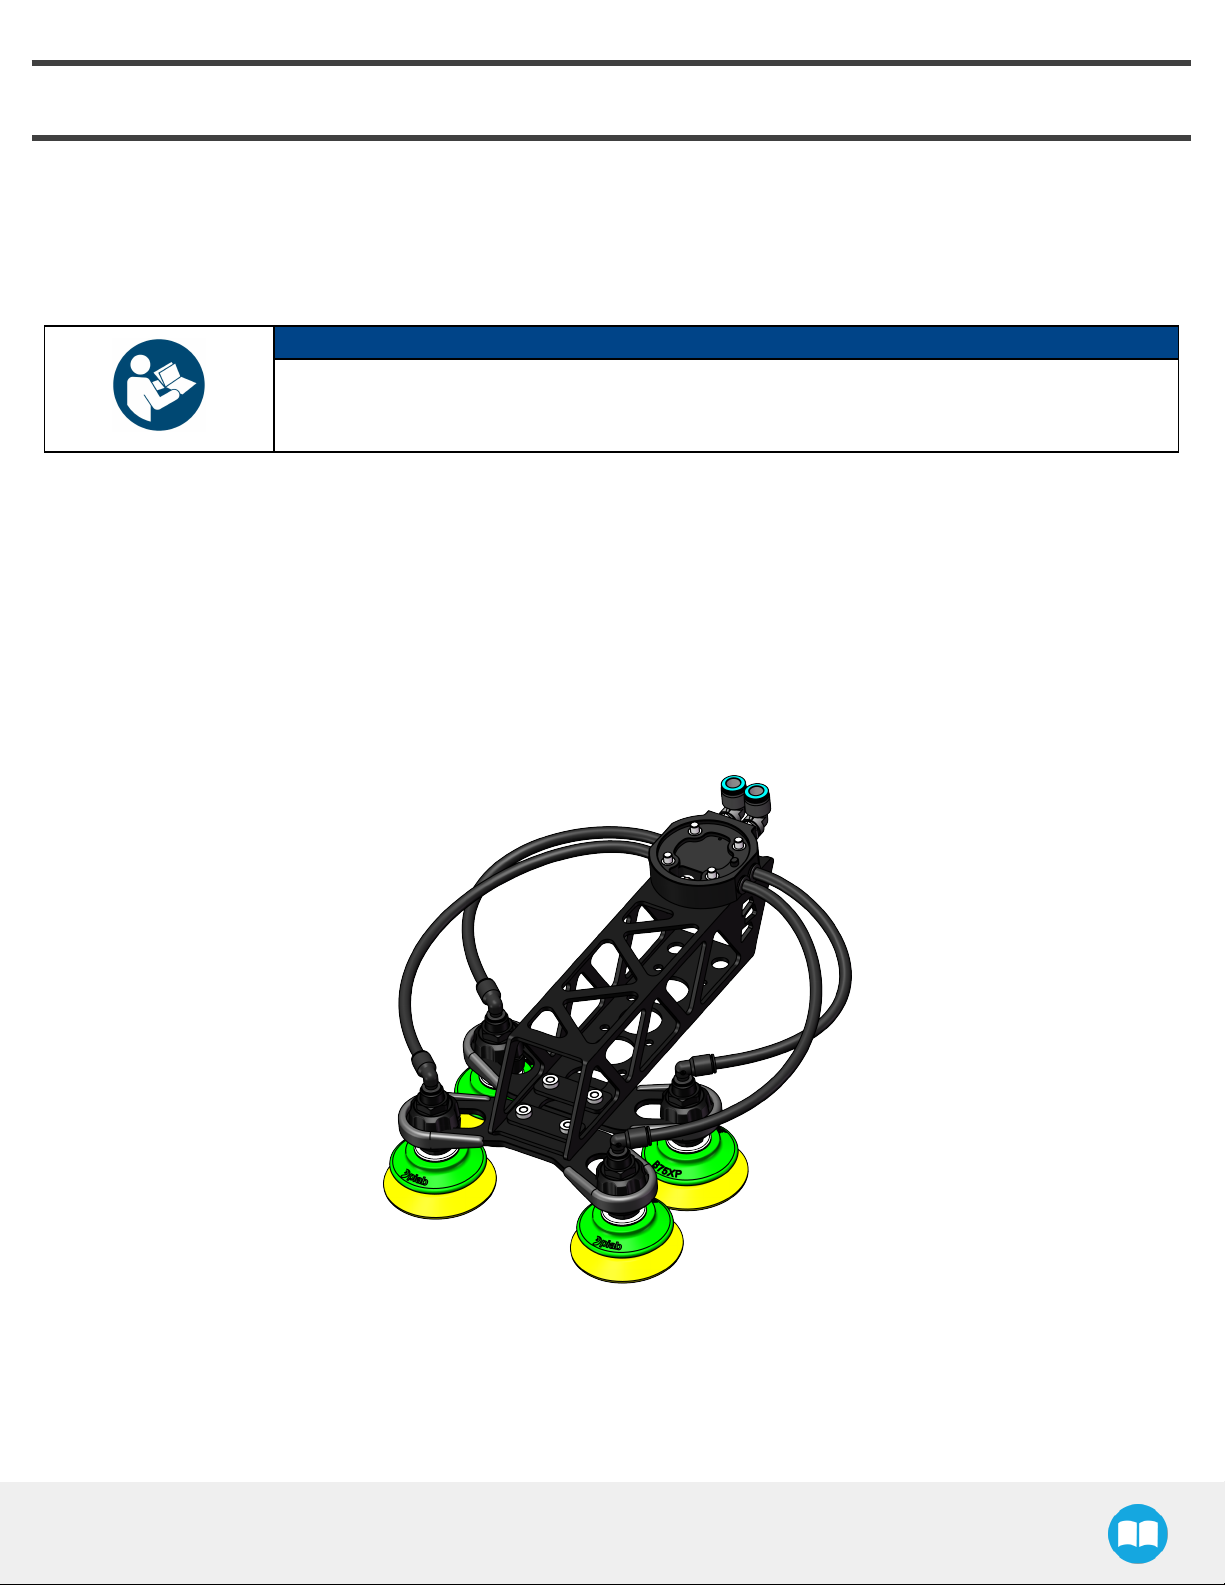
lRisk of contact between body parts and the Gripper and/or suction cups;
lRisk of load ejection resulting from loss of vacuum;
lRisk of load dropping resulting from loss of vacuum;
lRisk of load ejection resulting from loosened fasteners on the end effector;
lRisk of pinching between the Gripper and the items being handled, or other objects in the environment;
lRisk of injury resulting from misuse of the product;
lRisk of entanglement of the tool cables resulting from inappropriate robot cable management.
Depending on the application, configuration and items being handled, additional hazards may be present. For instance, the boxes
handled by the Gripper could be inherently dangerous to the operator. Such hazards may require additional protection or safety
measures (e.g., light curtains, safety scanners, enclosure, etc.).
To ensure an adequate level of safety, floor markings must be applied to delineate safe zones around the work cell. It is the
responsibility of the integrator to establish the proper safe distance from the work cell to protect the user.
The software allows for the limiting of the robot's speed, force and working area in order to reduce residual risk. These measures
can namely give the operator more time to react appropriately, and reduce the robot’s brake time.
WARNING
Collisions between a person and the PowerPick10 Gripper may result in material damage, bodily
injury and even death. Anyone in the vicinity of the work cell should take the necessary precautions.
lMake sure no individual or asset are in the vicinity of the robot and/or Gripper prior to initializing the
robot.
lAlways keep body parts and clothing away from the Gripper while the device is powered on.
lDo not use the Gripper on people or animals.
lNever stand under suspended loads held by the Gripper.
lSecure the Gripper properly before operating the robot.
lAlways meet the Gripper payload specifications.
10

PowerPick10 - Instruction Manual
WARNING
Maintenance and repair work on electrical equipment must only be carried out by qualified and
authorized personnel.
lNever supply the PowerPick10 Vacuum Generator with power from an alternating current source.
lMake sure that the PowerPick10 Generator I/O cable is always secured at both ends.
lAlways meet the recommended keying for electrical connections.
2.2.2. Noise Level
At the optimal pressure (please refer to the Specifications section), the noise level at the workstation is 76 dBA. Hearing protection
is recommended but not mandatory. Make sure that all local safety measures and regulations are met.
2.2.3. Pneumatic Limitations
lThe maximum permissible pressure of all pneumatic components must never be exceeded (8 bar).
lPneumatic tubing must be inspected at regular intervals and, if necessary, replaced (please refer to the Maintenance section for
more details).
lLeaky connections must be sealed to avoid breakage, unnecessary or excessive noise, loss of energy, etc.
lLoss of vacuum can occur due to power failure or air supply interruption.
WARNING
lMake sure that the air tubes are properly secured before pressurizing the PowerPick10 Gripper.
lMake sure that the air tubes are not pressurized before removing the air supply tube or any other
air tube from the PowerPick10 Vacuum Generator and Gripper.
lNever operate the PowerPick10 Gripper with leaking or worn parts.
2.3. Use of the PowerPick10 Vacuum Gripper
The PowerPick10 Vacuum Gripper is designed to pick, place and handle cardboard boxes. If the Gripper is used for other
applications, make sure to consider the type of item to be handled in the risk assessment (please refer to the General Risk
Assessment section) and take the appropriate safety measures.
CAUTION
The Gripper is NOT intended for applying force against objects or surfaces.
lOnly use the Gripper in its original condition without unauthorized modifications.
lOnly use the Gripper if it is in perfect technical condition.
11

PowerPick10 - Instruction Manual
lFollow all safety rules and regulations of the workplace when installing, operating and performing maintenance work on the
Gripper.
lWear all recommended personal protective equipment in accordance with the safety standards of the workplace, including but not
limited to safety glasses, hearing protection, safety footwear, head protection.
lHandle with care any tool that contains sharp edges, pinching surfaces or generate heat.
lComply with local, state, province and/or federal laws, regulations and directives regarding automation safety and general
machine safety.
The unit should be used exclusively within the range of its technical data. Any other use of the product is deemed improper and
unintended. Robotiq will not be liable for any damages resulting from any improper or unintended use
When manually moving the Gripper installed on the robot (e.g., for teaching, maintenance, inspection purposes) make sure not to
insert fingers through bracket cut outs and openings.
Make sure that all workers who operate the Gripper have received the appropriate training to do so in a safe manner.
Perform all necessary maintenance work periodically as specified in the Maintenance section.
12

PowerPick10 - Instruction Manual
3. Installation
This section will guide the user through the installation and general setup of the Robotiq PowerPick10 Vacuum Gripper.
Before installing:
lRead and understand the safety instructions related to the PowerPick10 Vacuum Gripper. Please refer to the Safety section for
more information.
lVerify the package according to the scope of delivery and the order.
lMake sure to have the required parts, equipment and tools listed in the scope of delivery.
lMake sure to meet the recommended environmental conditions.
NOTICE
This manual uses the metric system. Unless specified, all dimensions are in millimeters.
WARNING
When installing:
lDo not operate the PowerPick10 Vacuum Gripper or even turn on the power supply before
confirming the device is firmly attached and the work area is clear.
lMake sure that the air supply source is secured.
lFailure to properly secure and install the equipment can result in material damage and bodily
injury.
If the installation is not performed in compliance with the manufacturer’s instructions, the warranty
will be void.
3.1. Scope of Delivery
3.1.1. PowerPick10 Vacuum Gripper Kit
l1 x PowerPick10 standard kit:
l1 x PowerPick10 Vacuum Generation Unit
l1 x Vacuum Generator
l1 x Mounting bracket
l1 x Filter-regulator with shut-off valve
l1 x M12-12 pin I/O cable (3 m)
l1 x 2 in pre-perforated grommet
13

PowerPick10 - Instruction Manual
l1 x PowerPick10 Vacuum Gripper, pre-assembled, default configuration:
l1 x Manifold assembly
l1 x 200 mm hollow offset link
l2 x Small suction cup brackets
l4 x 75 mm suction cups
l2 x 8 mm air tubes (250 mm)
l2 x 8 mm air tubes (350 mm)
l1 x PowerPick10 Gripper Offset Accessory kit:
l2 x Large suction cup brackets
l4 x Additional 8 mm air tubes (400 mm)
l1 x 100 mm hollow offset link
l1 x 0 mm offset plate
l1 x 120 mm wrist extension assembly
l1 x 10 mm double air tube (3 m)
l1 x Hardware kit:
l4 x M6 x 30 mm hex socket head cap screw with captive spring washer
l10 x 190 mm cable ties
l1 x Tubing curler
l1 x Pneumatic adapter 1/2 BSPP to 12 mm tube
l2 x M6 external tooth lock washers
l1 x M6 flange nut
l1 x Installation tool kit:
l1 x 5 mm hex key, L-shape
l1 x 21 mm / 24 mm double-ended wrench
l4 x 52 mm suction cups (optional)
l4 x 78 mm suction cups (optional)
14

PowerPick10 - Instruction Manual
3.2. Environmental and Operating Conditions
Condition Values
Min Max
Operating temperature (Vacuum Generator) 0°C (32°F) 50°C (122°F)
Operating temperature (suction cups) 10°C (50°F) 50°C (122°F)
Storage temperature -20°C (-4°F) 70°C (158°F)
Humidity (non-condensing) 35% RH 85% RH
IP rating IP2X
Dust, soot and water Affect the time between maintenance
Food
No
Clean room
Intrisic Safety (IS)
Corrosive liquids or gases
Explosive liquids or gases
Table 3-1: Environmental and operating conditions of the PowerPick10 Gripper
3.3. Air Supply
CAUTION
lUse dry and filtered air only.
lFollow ISO 8573-1 Class 7.4.4.
lThe maximum pressure allowed is 8 bar (115 psi). The optimal pressure for compressed air
consumption is 6 bar (87 psi).
lRobotiq recommends using a local pressure regulator with a filter and air dryer. The filter should
prevent any dust particle larger than 5 µm from getting inside the system.
3.3.1. Connecting the Supply Line
Compressed air must be supplied to the Vacuum Gripper according to the technical specifications.
The air supply tubing must be connected and disconnected to or from the inlet port only when the line is depressurized.
It is recommended to use a lockout valve before connecting to the product.
To protect against whipping hazards, the air supply tubing (connected to the PowerPick10 Vacuum Generator) must be firmly
secured. An air fuse can also be installed.
At optimal pressure (6 bar / 87 psi), the air supply line must ensure an air flow of 266 lpm.
Make sure any other pneumatic equipment connected to the same supply line is not temporarily reducing the air flow made
available for the vacuum generator.
3.3.2. Depressurizing the Supply Line
In order to safely depressurize the supply line, the air supply must first be shut off.
If no lockout valve is present to depressurize the line, the Gripper can be activated until the pressure is fully released.
15

PowerPick10 - Instruction Manual
3.4. Reception of the Product
3.4.1. Visual Inspection
Inspect the package for damage or defects before and after opening it.
Make sure to have all components in hand before discarding the box and packaging material.
If damage or defects are discovered, or if components are missing, contact the Robotiq support team at support@robotiq.com.
3.5. Mechanical Installation
WARNING
Failure to properly secure and install the equipment can result in material damage and bodily injury.
The warranty will not cover material damage resulting from an installation that did not comply with
the instructions found in this manual.
3.5.1. PowerPick10 Vacuum Generation Unit Installation
Installation
Fig. 3-1: PowerPick10 Vacuum Generation Unit
1. Identify the area where the PowerPick10 Vacuum Generation Unit will be installed. Choose a location so that the electrical
cable and air tubes will not obstruct the work environment.
2. Install the Powerpick10 Vacuum Generation Unit using two (2) M8 bolts (tools and hardware not provided).
16

PowerPick10 - Instruction Manual
CAUTION
Make sure the installation of the PowerPick10 vacuum generator on a machine or piece of
equipment does not alter the warranty or certification of said machine or piece of equipment.
3. Connect a 12 mm air tube (not provided) to the air supply source and to the PowerPick10 vacuum generator.
4. Connect the PowerPick10 vacuum generator to the robot control box. Please refer to the Electrical Installation section for
more details.
NOTICE
If the PowerPick10 Vacuum Gripper is used in conjunction with either the PE10 or AX10 Robotiq
Palletizing Solution, follow the PowerPick10 Vacuum Generation Unit installation instructions found
in the corresponding Palletizer user manual.
3.5.2. PowerPick10 Gripper Installation
Required Tools
Included:
l1 x 5 mm hex key
l1 x 21 mm / 24 mm double-ended wrench
Not included:
lTorque wrench
l10 mm hex key
Overview
Upon receipt, PowerPick10 includes the following components.
l1 x PowerPick10 Gripper, default configuration, pre-assembled with the following components:
l1 x Manifold Assembly
l1 x 200 mm hollow offset link
l2 x Small suction cup brackets with 75 mm suction cups
l2 x 8 mm air tubes (250 mm)
l2 x 8 mm air tubes (350 mm)
l1 x PowerPick10 Vacuum Gripper Accessories
l2 x Large suction cup brackets
l4 x Additional 8 mm air tubes (400 mm)
l1 x 100 mm horizontal offset tube
l1 x 0 mm offset plate
l1 x 120 mm wrist extension assembly
17

PowerPick10 - Instruction Manual
The following instructions detail how to install any Gripper configuration. However, use the configuration that corresponds best to
the application. For more detail about the possible Gripper configurations, please refer to the Configuration Steps and Tips
section.
NOTICE
Please use the Robotiq Configurator to simulate the configuration that corresponds best to the
application at hand. Should the application require more than one configuration, consider using a
gripper arrangement that adapts to every situation.
Fig. 3-2: PowerPick10 Gripper, Default Configuration
CAUTION
Any unused manifold port should be covered with a port plug to avoid air leakage.
18

PowerPick10 - Instruction Manual
Installation of the Manifold on Gripper Offset Equipment
Manifold on Wrist Extension
Align the holes of the wrist extension with the corresponding pins on the manifold. Please refer to the figure below for correct
alignment.
Secure the manifold onto the wrist extension with one (1) M6 x 10 mm hex socket head cap screw using the provided 5 mm hex
key. Do not over tighten for it could compress the manifold and apply undesired pressure when installed on the robot arm. To that
effect the maximum torque recommended is 0.5 Nm (0.4 lb-ft).
Fig. 3-3: Installation of the Manifold on the Wrist Extension
19

PowerPick10 - Instruction Manual
Manifold on Hollow Offset Link
Align the holes of the hollow offset link with the corresponding pins on the manifold. Please refer to the figure below for the correct
alignment.
NOTICE
The 200 mm hollow offset link is shown in this figure, but the same steps can be followed to install
the manifold on the 100 mm hollow offset link.
Secure the manifold onto the hollow offset link with one (1) M6 x 10 mm hex socket head cap screw using the provided 5 mm hex
key. Do not over tighten for it could compress the manifold and apply undesired pressure when installed on the robot arm. To that
effect the maximum torque recommended is 0.5 Nm (0.4 lb-ft).
Fig. 3-4: Installation of the Manifold on the Hollow Offset Link
20
Table of contents
Other ROBOTIQ Industrial Equipment manuals