manuals.online logo
Brands
  1. Home
  2. •
  3. Brands
  4. •
  5. Rohl
  6. •
  7. Bathroom Fixture
  8. •
  9. Rohl Perrin & Rowe U.3738X User manual

Rohl Perrin & Rowe U.3738X User manual

1
U.3738X
FEA URES COLORS/FINISHES WARRAN Y
www.rohlhome.com
• 9" reach fixed spout
• 4-hole bathtub filler with handshower
• 4 x 1 3⁄8" hole cutouts
• 1⁄4-turn ceramic disc valves
• Retractable handshower
• Made from solid brass
• Unique handle fixing clip, engineered to
increase the life of the valve
• Innovative valve hose connection,
complete with flexible stainless steel
hose and 90° elbow
• 3⁄4" NP connections with 3⁄4" valves
• 16-20 GPM
• Polished Chrome
• Polished Nickel
• Satin Nickel
• Inca Brass
• English Bronze
• Limited lifetime
ROHL Perrin & Rowe®Bath
FOUR HOLE DECK MOUN ED UB SHOWER SE WI H LOW
LEVEL SPOU AND CROSS HANDLES
Consult your local ROHL showroom for additional information and specifications. For complete warranty details and a list of showrooms, go to www.rohlhome.com.
2
www.rohlhome.com
U.3738X Spare Parts
Consult your local ROHL showroom for additional information and specifications. For complete warranty details and a list of showrooms, go to www.rohlhome.com.
9.20777*
9.146157
9.146157
9.30237
9.142367
www.rohlhome.com
Installation Instructions
Valve Body
Backnut
Base Seal
Shower Outlet
Nipple
Banjo
Connection
HOT IN
Cover & Handle Base Ring
Rosette
COLD IN
19/16"
MAX
13/8"
ø
Hole
13/8"
ø
Hole
13/8"
ø
Hole
3/4" NPT
Rough installation cap
provided for centerbody
An extra backnut is supplied
for rough
installations
Nut
Extension
Hose - 1m
HANDSHOWER SOCKET DETAIL
Rosette
Tapered
Bushes
Handshower
Flex - 2m
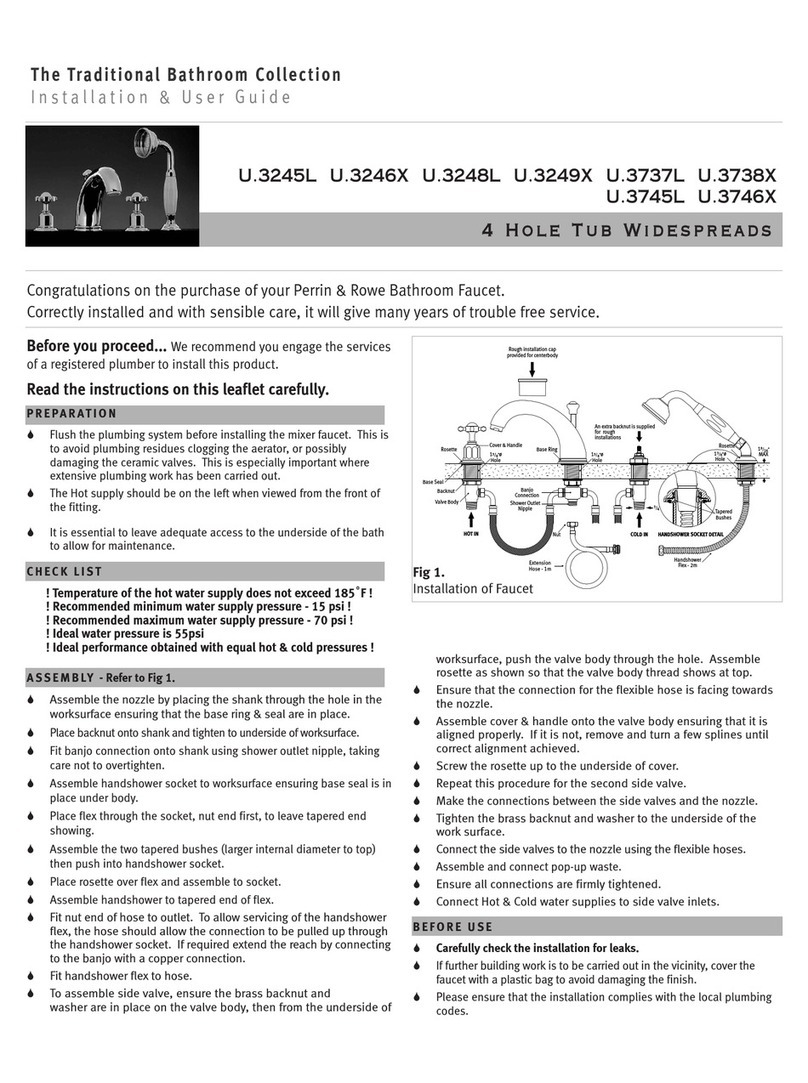
Fig 1.
Installation of Faucet
Before you proceed... We recommend you engage the services
of a registered plumber to install this product.
Read the instructions on this leaflet carefully.
Congratulations on the purchase of your Perrin & Rowe Bathroom Faucet.
Correctly installed and with sensible care, it will give many years of trouble free service.
U.3245L U.3246X U.3248L U.3249X U.3737L U.3738X
U.3745L U.3746X
4
4
H
H
o
o
l
l
e
e
T
T
u
u
b
b
W
W
i
i
d
d
e
e
s
s
p
p
r
r
e
e
a
a
d
d
s
s
PREPARATION
Flush the plumbing system before installing the mixer faucet. This is
to avoid plumbing residues clogging the aerator, or possibly
damaging the ceramic valves. This is especially important where
extensive plumbing work has been carried out.
The Hot supply should be on the left when viewed from the front of
the fit ting.
It is essential to leave adequate access to the underside of the bath
to allow for maintenance.
CHECK LIST
! Temperature of the hot water supply does not exceed 185 F !
! Recommended minimum water supply pressure - 15 psi !
! Recommended maximum water supply pressure - 70 psi !
! Ideal water pressure is 55psi
! Ideal performance obtained with equal hot & cold pressures !
ASSEMBLY - Refer to Fig 1.

Assemble the nozzle by placing the shank through the hole in the
worksurface en sur ing that the base ring & seal are in place.
Place backnut onto shank and tighten to underside of worksurface.
Fit banjo connection onto shank using shower outlet nipple, taking
care not to overtighten.
Assemble handshower socket to worksurface ensuring base seal is in
place under body.
Place flex through the socket, nut end first, to leave tapered end
showing.
Assemble the two tapered bushes (larger internal diameter to top)
then push into handshower socket.
Place rosette over flex and assemble to socket.
Assemble handshower to tapered end of flex.

Fit nut end of hose to outlet. To allow servicing of the handshower
flex, the hose should allow the connection to be pulled up through
the handshower socket. If required extend the reach by connecting
to the banjo with a copper connection.

Fit handshower flex to hose.

To assemble side valve, ensure the brass backnut and
washer are in place on the valve body, then from the underside of
worksurface, push the valve body through the hole. Assemble
rosette as shown so that the valve body thread shows at top.

Ensure that the connection for the flexible hose is facing towards
the nozzle.

Assemble cover & handle onto the valve body ensuring that it is
aligned properly. If it is not, re move and turn a few splines until
correct align ment achieved.

Screw the rosette up to the underside of cover.

Repeat this procedure for the second side valve.

Make the connections between the side valves and the nozzle.

Tighten the brass backnut and washer to the underside of the
work surface.

Connect the side valves to the nozzle using the flexible hoses.
Assemble and connect pop-up waste.

Ensure all connections are firmly tightened.

Connect Hot & Cold water supplies to side valve inlets.
BEFORE SE
Carefully check the installation for leaks.
If further building work is to be carried out in the vicinity, cover the
faucet with a plastic bag to avoid damaging the finish.
Please ensure that the installation complies with the local plumbing
codes.
The Traditional Bathroom Collection
Installation & User Guide
Consult your local ROHL showroom for additional information and specifications. For complete warranty details and a list of showrooms, go to www.rohlhome.com.
4
Consult your local ROHL showroom for additional information and specifications. For complete warranty details and a list of showrooms, go to www.rohlhome.com.
www.rohlhome.com
Installation Instructions
9.18245*
9.13501
9.01456/Hot*
9.01456/Cold*
9.30237
9.18235*
9.13501/Left
9.13500/Right
9.12456*
9.21370*
9.26410
Porcelain
9.12456*
9.14236
9.24193*
9.19193*
9.11246*
9.14615
9.28257
9.28386*
9.26411*
Solid
9.25256
9.19256*
9.28245*
9.25256
9.19256*
Traditional - 9.01247*
Country - 9.01375*
Low Spout - 9.01737*
9.11245 9.07245
Service Kit
9.03245
9.
9.18256*
9.30257
9.14372*
9.20375*
9.25256
9.06745
9.17375*
COUNTRY
TRADITIONAL
LOW SPOUT
9.28448
9.27381* 9.27246*
Perrin & Rowe is a trademark of Avilion Ltd. 903245U/2 02/08
Fig 2.
Spare Parts - *Where indicated specify color
NOTE:
To utilize the rough installation cap it is necessary to remove the top
seating cage, please follow the first 5 points of the Diverter
Replacement section.
SPARE PARTS AND SERVICE
3 Parker
Irvine
CA 92618
(714) 557-1933
OPERATION
Ceramic disc valves are fitted as standard to this mixer faucet. Flow from
FULLY OFF to FULLY O is achieved by rotating the handles a quarter turn.
Diverting action is achieved by pulling up on the diverter knob. Higher water
pressures may make the diverting action difficult.
CARE & MAINTENANCE
Occasional cleaning with warm soapy water, followed by a polish with a soft
cloth is all that is required to keep the plated finish in good condition.
Do not use proprietary abrasive liquids, powders, or pads to clean the
faucet. You will damage the plated finish and void your warranty.
The aerator at the outlet of the spout may need occasional cleaning. This is
accomplished by unscrewing the outlet in an counter-clockwise
direction, dismantling and leaving the inner screen mesh immersed
overnight in vinegar or lemon juice. DO NOT use chemical descaling
liquids for this purpose. Rinse thoroughly in clean water and re install.
DIVERTOR REPLACEMENT
Unscrew the divertor knob from the spindle by lifting the knob and
gripping the flats on the spindle with a 5mm spanner, then unscrew.
Undo the screw in the back of the nozzle using the hexagon key
provided.
Lift the nozzle off base ring and shank.
Unscrew top seating cage and remove.
Replace diverter plate sub-assembly’.
Reassemble the nozzle, check fitting carefully for leaks.
Reassemble the divertor knob.
HANDLE VARIANTS
Both porcelain and solid levers are included with
U.3248L U. 3737L and U.3745L
models.
HOW TO CHANGE
DE
F
A
C
B
A
BE
11))Unscrew lever bolt AAfrom lever ball BBby
hand.
22))Remove metal lever insert C
Cand seal D
D.
33))Place one of the replacement seals EEonto
lever bolt AAand slide to the end. Place
porcelain lever insert FFonto lever bolt AA
and slide to the end of the bolt.
44))place the other replacement seal EEonto
lever bolt AAand slide to the end of the
porcelain lever insert.
55))Screw lever bolt and porcelain lever insert
assembly back into lever ball BBand screw
down tightly by hand
9.28385*

This manual suits for next models

7

Other Rohl Bathroom Fixture manuals

Rohl U.3245L Operation manual

Rohl

Rohl U.3245L Operation manual

Rohl Transitional Bathroom U.5886TX Operation manual

Rohl

Rohl Transitional Bathroom U.5886TX Operation manual

Rohl 300127 User manual

Rohl

Rohl 300127 User manual

Rohl U.2936WH User manual

Rohl

Rohl U.2936WH User manual

Rohl PERRIN & ROWE U.5886X/TO User manual

Rohl

Rohl PERRIN & ROWE U.5886X/TO User manual

Rohl Miscelo MISC77250 User manual

Rohl

Rohl Miscelo MISC77250 User manual

Rohl 50126MF6 User manual

Rohl

Rohl 50126MF6 User manual

Rohl PERRIN & ROWE U.KIT1NL User manual

Rohl

Rohl PERRIN & ROWE U.KIT1NL User manual

Rohl EC08W3IW User manual

Rohl

Rohl EC08W3IW User manual

Rohl ECLISSI EC16W1 User manual

Rohl

Rohl ECLISSI EC16W1 User manual

Popular Bathroom Fixture manuals by other brands

Glacier bay BRINDLEY HDBD48VG Assembly instructions

Glacier bay

Glacier bay BRINDLEY HDBD48VG Assembly instructions

Voda Plumbingware Olympia VOP63RBG quick start guide

Voda Plumbingware

Voda Plumbingware Olympia VOP63RBG quick start guide

Kohler Archer Heated BubbleMassage K-1124-GHLAW quick start guide

Kohler

Kohler Archer Heated BubbleMassage K-1124-GHLAW quick start guide

Hewi 477.02.20084 Installation and operating instructions

Hewi

Hewi 477.02.20084 Installation and operating instructions

Pfister 16 Series manual

Pfister

Pfister 16 Series manual

Gessi TRASPARENZE 34201 manual

Gessi

Gessi TRASPARENZE 34201 manual

Symmons Allura Trim 4703-TRM Operation and maintenance manual

Symmons

Symmons Allura Trim 4703-TRM Operation and maintenance manual

Sanela SLU 08LNB Instructions for use

Sanela

Sanela SLU 08LNB Instructions for use

aquabrass MB2 installation guide

aquabrass

aquabrass MB2 installation guide

Kohler K-2293 Installation and care guide

Kohler

Kohler K-2293 Installation and care guide

Hewi S 01 operating instructions

Hewi

Hewi S 01 operating instructions

Fleurco ATAM3260 Installation and user guide

Fleurco

Fleurco ATAM3260 Installation and user guide

Kohler K-16140 Installation and care guide

Kohler

Kohler K-16140 Installation and care guide

KEUCO Axess 35001 0500 Series Mounting instruction

KEUCO

KEUCO Axess 35001 0500 Series Mounting instruction

Wellis Aura Aroma therapy Vitamin C WZ00095 instruction manual

Wellis

Wellis Aura Aroma therapy Vitamin C WZ00095 instruction manual

Suntherm DRIER 200 instruction manual

Suntherm

Suntherm DRIER 200 instruction manual

Spectrum Pfister Vie 016-VI installation guide

Spectrum

Spectrum Pfister Vie 016-VI installation guide

Hamwells e-Shower quick start guide

Hamwells

Hamwells e-Shower quick start guide

manuals.online logo
manuals.online logoBrands
  • About & Mission
  • Contact us
  • Privacy Policy
  • Terms and Conditions

Copyright 2025 Manuals.Online. All Rights Reserved.