Product Code:
Product Name:
Cequent Consumer Products Inc
Solon, OH 44139 USA
Cequent Help Hotline: 1-800-234-6992
www.rolaproducts.com
Please read all instructions carefully before assembly, installation and/or use of this product.
59114N 3-24-05 Rev_A
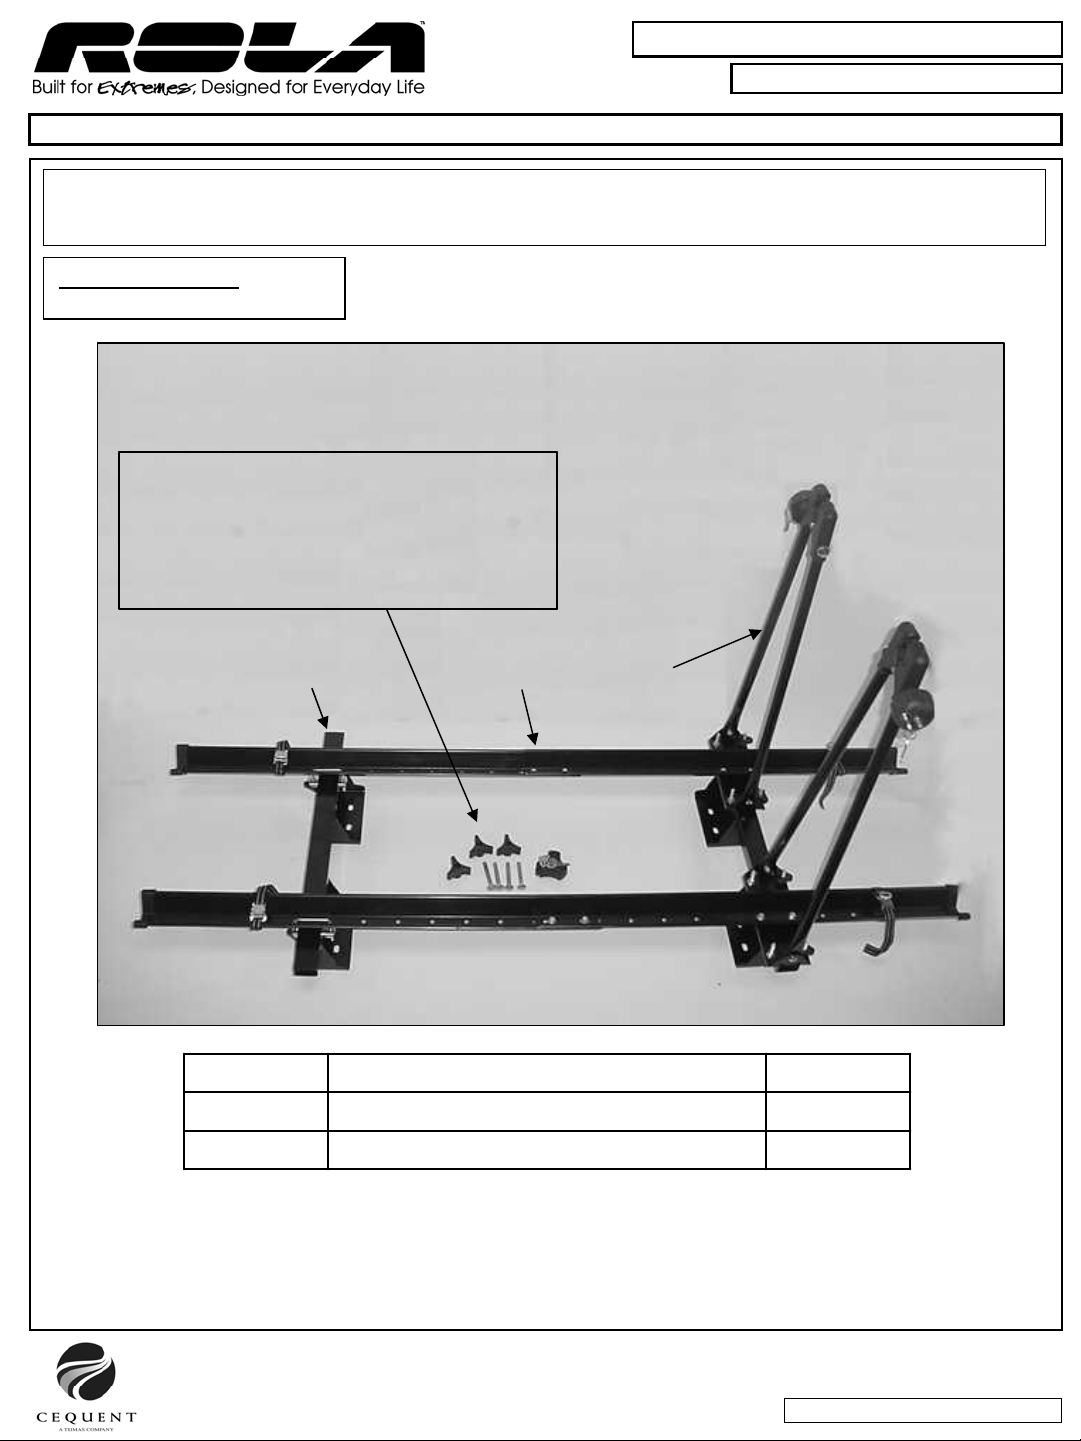
Adventure System Bike Rack
59114 & 59115
•When not in use, take Bike Arm and strap
it down to wheel trough as shown above.
•The tray can be tilted up with the Bike Kit in
the storage position when not in use.
GENERAL OPERATING INSTRUCTIONS continued
•Place straps on each wheel of the bike and
around wheel trough as shown. Tighten
strap until wheel is held firmly.
WARNING!
• Do not exceed rear axle rating of vehicle.
• Accessory capacity limited to 12% of Gross Tow Rating.
• Not to exceed 90 lb for 2-Bike Rack System or 135 lb for 3-Bike Rack System.
• Proper fitting and installation of this ROLA™ Bike Rack is critical, and is the owner’s sole responsibility.
• Improper use of this product may result in damage to your ROLA™ Bike Rack, your vehicle, your bicycles, or even other
vehicles driving behind you (as a result of colliding with or trying to avoid fallen bicycles and/or the rack).
• All bolts, knobs, straps & latches must be properly attached and secured before every use.
• All locks must be locked before every use.
• Check load at stops during trip to ensure tightness and security.
• This rack is designed for typical use and applications (on paved or smooth gravel roads). Do not use this ROLA™ Bike Rack
on a vehicle that will be driven on rough roads or where the rack (and bikes) will be subjected to significant or constant jarring
and/or shock. Any vehicle with very stiff springs will transfer the load shocks directly to the ROLA™ Bike Rack and the bikes.
• The purchaser should be aware that the load created by a ROLA™ Bike Rack and bicycles can exceed the maximum rating
on the hitch or bumper.
• Cequent Towing Products ROLA™ Bike Racks are powder-coated to help prevent rust. As with any metal equipment it is
recommended that you keep the ROLA™ Bike Rack clean and remove road salt and debris.
When leaving them outside for extended periods of time the finish will loose its luster. It is recommended that when not in use
the ROLA™ Bike Rack is stored indoors.
• The ROLA™ Bike Rack won’t carry bikes with oblong frame tubes or unusually large frame sizes.
• Take care to add padding on any area of the bikes that touches another bike. Damage can and will happen to your bikes if
care is not taken during the loading and transporting of your bikes.
• Bicycle tires should be kept at least 6” away from the exhaust pipes of the vehicle. The high temperature exhaust exiting from
the exhaust pipes is hot enough to melt or damage tires. Keep all bike tires totally away from the direct exhaust flow.
• Bikes fitted with large accessories (such as child carrying seat) will greatly increase the wind resistance and therefore the
pressure on the rack and all vehicle-mounting points. Therefore, it is suggested you remove these accessories during
transport. If unable to remove, reducing vehicle speed will reduce the chance of any problems occurring because of this
situation.
• After reading this manual, should you have any additional questions regarding the compatibility, fitting and/or use of the
ROLA™ Bike Rack, please contact your nearest Cequent Towing Products authorized retail dealer or Cequent Towing Products
Customer Service.
Page 8