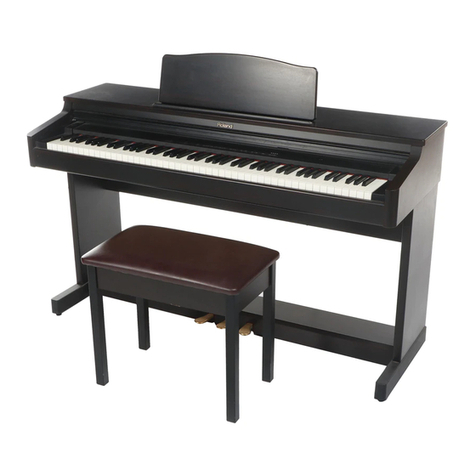
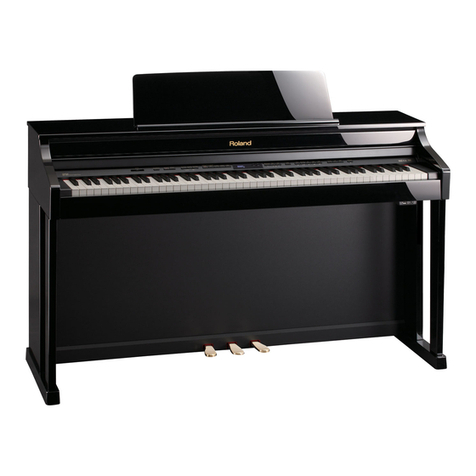
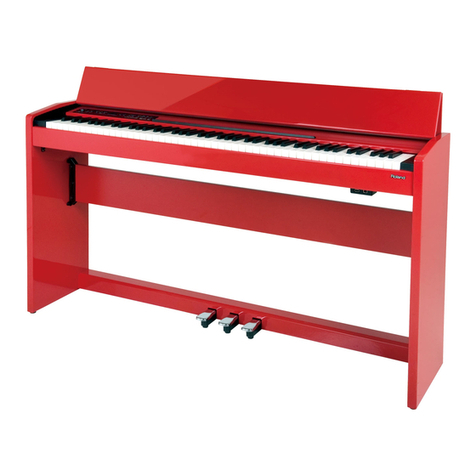
Roland HP 1500 User manual

Roland
Digital
Piano
HP
1500
OWNER'S
MANUAL
Thank
you,
and
congratulations
on
your
choice
of
the
Roland
HP-1500
Digital
Piano.
Thanks
to
its
use
of
Advanced
SA
Process
digital
sound
sources,
the
HP-1500
faithfully
recreates
the
power-
jul
lows
and
sparkling
highs
of
a
concert
grand
piano.
Moreover,
it
comes
equipped
with
a
keyboard
that
is
a
delight
to
play
—
one
which
responds
to
every
playing
dynamic.
And
because
the
instrument’s
sound
sources
are
digital,
the
piano
will
never
need
tuning
lo
retain
its
sound
quality.
For
these
and
many
other
reasons,
you
will
now
be
able
to
enjoy
everything
you
would
expect
from
a
traditional
piano
—
all
within
a
user-friendly,
compact
package
that
more
readily
fits
into
a
modern
lifestyle.
In
order
to
take
full
advantage
of
the
HP-1500's
numerous
features,
and
to
enjoy
years
of
trouble-free
service,
please
lake
the
time
to
read
through
this
manual.
*
Six
Different
Sounds
<Page
4»
*
Tuning
Functions
The
selection
of
sounds,
beginning
with
a
luxurious
Even
though
there
is
no
need
to
tune
an
electric
piano
grand
piano,
allows
you
to
play
music
in
virtually
any
at
regular
intervals,
or
aíter
it
has
been
moved,
the
style.
instrument
allows
for
the
creative
use
of
alternate
tunings.
*
A
Dual
Function
<Page
4>
Any
two
Voices
can
be
combined
dlavered)
and
played
Master
Tuning
«Page
4»
together.
The
overall
pitch
of
the
piano
can
be
changed
to
match
the
pitch
of
other
musical
instruments.
e
Digital
Citects
«Page
5>
Your
new
piano
comes
equipped
with
two
digital
*
MIDI
Capability
«from
Pape
8»
effects:
Chorus
and
Reverb.
The
instrument
also
provides
lor
use
of
MIDI,
the
interface
standard
designed
to
provide
for
the
transfer
of
*
A
“Recorder”
«Page
6»
performance
information
among
electronic
musical
An
easy-to-operate
Recorder
allows
you
to
record
and
instruments
and
computers.
play
back
the
music
you
create.
About
the
Advanced
SA
Sound
Sources
*
A
Key
Touch
Function.
«Page
8>
The
sounds
produced
by
this
instrument
are
created
using
Three
‘Touch’
levels
are
available,
allowing
the
player
the
“Advanced
SA
Process,"
which
represents
a
pooling
of
to
adjust
the
keyboard
feel
to
suit
personal
preferences.
the
best
leading-edge
digital
technology
by
Roland.
The
ASA
process,
developed
as
a
natural
extension
of
the
*
A
Damper
Pedal.
«Page
7»
original
SA
process,
involved
a
series
of
efforts:
first,
an
When
the
Damper
pedal
is
depressed,
the
HP-1500
analvsis
of
the
essential
properties
of
sound
as
generated
provides
a
realistic
simulation
of
"sympathetic
reso-
by
musical
instruments,
then
an
extraction,
and
finally
a
nance.”
This
effect
occurs
when
strings
ton
an
acoustic
re-synthesis
designed
to
facilitate
the
expressive
needs
of
piano}
adjacent
to
the
notes
played
also
resonate,
musicians.
The
result
is
a
sound
generation
method
which
creating
much
richer,
expansive
sonorities.
provides
very
finely
textured
and
realistic
sounds.
Copyright
(O
1992
by
Roland
Corporation
Ali
rights
reserved.
No
part
of
this
publication
may
be
reproduced
in
any
from
without
the
written
permission
of
Roland
Corporation.

bh
Assembling
the
KS-1500
Stand
for
the
HP-1500
Two
people
are
needed
to
carry
out
the
assembly.
Never
attempt
it
alone.
*
To
move
the
main
unit,
be
sure
to
keep
it
level
while
you
lift
it
straight
up.
Be
very
careful,
so
as
to
avoid
getting
fingers
pinched,
or
toes
hurt
by
accidentally
dropping
the
unit.
EE
Check
the
parts
Before
you
begin
assembly,
check
that
you
have
all
the
parts.
Side
board
(elt)
Side
board
(right
Pedal
board"
anter
büzerek
mk
1
Long
screws
(M6
x
60
mm)
`
Short
screws
(M4
x
27
mm)
`
Knob
bolls
o
Plus
screwdriver
ha
$i
Cable
clamps
cscs
2
x
lll
Assembly
procedure
sy
Extend
the
pedal
cable
out
from
the
pedal
board.
(Note)
Bo
sure
that
the
side
boards.
are
oriented
correctly:
the
metal
fittings
ure
on
the
inside.
The
metal
fittings
on
the
inside.
Pedal
cable
..
«İs
Use
the
long
screws
(M6
x
60
mm)
to
lasten
the
side
boards
lo
the
pedal
board
use
two
screws
for
each
)
(
side.
12;
Use
the
short
screws
(M4
x
27
mm)
to
attach
the
center
board
to
the
side
boards
(
use
two
screws
for
each
side.
)
EN
Attach
the
piano
to
the
stand.
(Note)
When
placing
the
piano
on
the
stand,
be
careful
not
to
pinch
your
fingers.
(Avoid
holding
the
ends
of
the
pianu.)
iĝ)
Align
the
screws
(one
on
each
side)
located
on
the
bottom
of
the
piano
with
the
slots
..
in
the
metal
fittings
on
the
side
UC
boards.
Slide
the
piano
so
the
screws
slide
into
the.”
slots.
A
Lift
up
the
piano
and
use
the
two
knob
bolts
to
fasten
the
piano
to
the
stand
One
screw
each
side
on
the
left
1
and
right.
7>
ra
Fasten
the
pedal
cable
with
the
cable
clamps,
and
plug
in
the
power
cable
and
pedal
cable.
Cable
clamps
—
—--
-
5)
Alfix
the
cable
clamps
on
the
back
left
side
of
the
sland
Fasten
the
pedal
cable
with
the
cable
clamps
16)
Insert
the
pedal
cable
into
the
pedal
jack
on
the
back
panel
of
the
piano
7;
Connect
the
power
cabie
into
the
AC
inlet
on
the
back
panel
of
the
piano.
The
power
cable
is
included
with
the
piano.
EN
Adjust
the
adjusting
bolt
3:
When
you
finish
assembling
the
stand,
rotate
the
adjusting
bolt
until
it
fouches
the
floor
(Note)
If
the
piana
is
placed
on
carpeting,
rotate
the
adjustment
bolt
little
more.
(Note)
When
placing
the
piano
in
its
location,
be
careful
not
tu
pinch
the
power
cable
underneath
the
piana.
:8:
Rotate
the
adjusting
bolt
until
it
touches
the
floor.

Setting
Up
the
Music
Rest
1.
Move
the
Music
Stand
into
the
upright
position.
2.
Move
the
legs
al
right
and
lell
(A)
out
into
the
proper
position.
Y
dean
the
stand
backward
slightly
until
it
is
positioned
firmly
in
place
against
the
instrument.
*
To
fold
down
the
Music
Stand,
first
move
(A)
back
into
their
original
positions,
then
lower
the
stand.
Be
careful
not
to
get
your
fingers
caught.
Important
Notes
Contents
j————————
İ
Assembling
the
KS-1500
Stand
for
the
HP-1500
...2
SettingüptheMusicRest....................................3
Important
Notes
............
————
Á—M
Panel
Description
..............
eese
d
EFEMERA
neye
en
el
LİR
e
a
dei
-
RearPanel...............
Turning
the
Power
On
..
Using
Headphones...
5
Listening
to
the
Demonstration
Songs
...................
6
TryRecordingWhatYouPlay..............................
6
Playing
with
the
Key
Transposed..........................7
Playing
a
piece
in
some
other
key
with
the
fingering
Ol
C
adc
cce
mee
Red
enda
7
Pedal
Functions
...............eeeeeseeeeeeeeeen
eee
ennneeennenee
7
Using
the
Left
Pedal
as
a
Sostenuto
Pedal
.........
7
Changing
the
Depth
of
the
Chorus
Effect.
8
Applying
Reverb
to
the
Sound
....
8
Key
Touch
Function
.................
8
For
Those
Who
Wish
To
Use
MIDI
.......................8
AbOUF
MIT
S
ad
Beis
cand
leads
t
Hee
Ferca
ved
tae
8
Setting
the
MIDI
Transmit/Receive
Channels
....9
ÖNÜ
ON
ON
eid
assesses
tata
edi
san
ens
att
ole
ie
een
9
tocak
OMOT
crear
r
b
retener
9
The
Multi-Timbral
Mode...
10
Selecting
the
Transmission/Reception
Mode
...
10
Transmission/Reception
of
Prgram
Change
Messapes......en
Troubleshooting
................
ree
12
Specifications
............
eene
12
MIDI
implementationChart..............................
13
In
addition
to
the
items
listed
under
Safety
Precautions
on
page
16,
please
read
and
adhere
to
the
following:
Power
Supply
*
When
making
any
connections
with
other
devices,
always
turn
off
the
power
to
all
equipment
first;
this
will
help
prevent
damage
or
maliunction.
*
Do
nol
use
this
unit
on
Ihe
same
power
circuit
with
any
device
that
will
generate
line
noise,
such
as
a
motor
or
variable
lighting
system.
Placement
*
Do
not
subject
the
unit
to
temperature
extremes
(ep
direct
sunlight
in
an
enclosed
vehicle).
Avoid
using
or
storing
the
unit
in
dusty
or
humid
areas
or
areas
that
are
subject
to
high
vibration
levels.
*
This
unit
may
interfere
with
radio
and
television
reception.
Do
not
use
this
unit
in
the
vicinity
of
such
receivers.
*
Make
sure
you
always
have
the
instrument
placed
so
it
is
level
and
sure
to
remain
stable.
Otherwise,
if
played
while
tilted,
you
risk
causing
damage
to
the
keyboard
as
à
result
of
the
unnatural
degree
of
force
that
might
be
applied
to
certain
parts
of
it.
Maintenance
*
For
everyday
cleaning
wipe
the
unit
with
a
soft,
dry
cloth
(or
one
that
has
been
slightly
dampened
with
water).
To
remove
stubborn
dirt,
use
a
mild
neutral
detergent.
Afterwards,
be
sure
to
wipe
the
unit
thor-
oughly
with
a
soft,
dry
cloth.
*
Never
use
benzene,
thinners,
alcohol
or
solvents
of
any
kind,
to
avoid
the
risk
of
discoloration
and/or
deforma-
tion.
Additional
Precautions
*
Protect
the
unit
from
strong
impact.
*
Do
not
allow
objects
or
liquids
oi
any
kind
to
penetrate
the
unit.
In
the
event
of
such
an
occurrence,
discon-
linue
use
immediately.
Contact
qualified
service
personnel
as
soon
as
possible.

Panel
Description
Front
Panel
a
VOLUME
BRILLIANCE
M
PIANO
HARPSI-
VIBRA-
E.PIANO
PIPE
STRINGS
CHORD
PHONE
ORGAN
pq
tege
gr-
|
/
FUNCTION
b
a
MIN"
"MAX
—
MELLOW
‘BRIGHT
LL
pd
Ell
VOLUME
Knob
At
“MAX”
the
volume
will
be
greatest.
BRILLIANCE
Knob
The
sound
becomes
brighter
as
the
knob
is
turned
toward
BRIGHT.
FUNCTION
Button
The
FUNCTION
button,
when
used
in
combination
with
other
buttons,
is
used
to
perform
the
following
procedures:
Playing
the
demo
songs
(p.
6)
Transposing
to
other
keys
(p.
7)
Assigning
pedal
functions
(p.
7)
Setting
the
MIDI
Transmit/Receive
Channels
(p.
9)
Setting
Omni
ON
or
OFF
(p.
9)
Setting
Local
ON
or
OFF
(p.
9)
Setting
the
Multi-Timbral
mode
(p.
10)
Setting
the
MIDI
mode
tp.
10)
Iransmission/Reception
of
Program
Change
Messages
(p.
11)
Rear
Panel
Voice
Buttons
Use
these
buttons
to
select
the
sound
you
want.
PIANO
A
rich
concert
grand
piano
sound,
HARPSICHORD
A
distinctively
sensitive
and
refined
harpsichord
sound.
VIBRAPHONE
—
The
sound
of
a
large
vibraphone.
F.
PIANO
Provides
the
timbre
of
a
luminous,
transparent
electric
piano.
PIPE
ORGAN
STRINGS
A
Cathedral
pipe
organ
The
sound
of
a
delightful
string
ensem-
ble.
Press
any
two
Voice
buttons
simultaneously
to
have
those
two
sounds
combined
and
played
together.
(This
is
known
as
the
DUAL
function.)
*
The
Chorus
setting
that
will
apply
to
the
sounds
in
a
layered
pair
will
be
the
setting
made
for
the
Voice
button
on
the
left.
MIDI
PEDAL
TUNE
İNPUT
—
OUTPUT...
OUT
IN
R
L
R
L
[|
O
O
O ©
MIDI
Connectors
Accept
the
MIDI
cables
used
to
connect
external
elec-
tronic
instruments.
PEDAL
Jack
This
is
where
you'll
connect
the
supplied
pedals.
TUNE
Knob
Allows
the
overall
pitch
to
be
adjusted.
With
the
knob
at
its
center
position,
the
center
A
key
Ua)
on
the
keyboard
will
have
a
frequency
of
440
Hz.
Move
the
knob
in
the
direction
of
*&"
to
raise
the
pitch,
and
toward
“
b"
to
lower
it.
By
rotating
the
knob
to
either
extreme,
you
obtain
a
change
of
50
cents
(1/2
semitone).
©
Qoo
L
|
MONO
|
STEREO
STEREO:
INPUT
Jacks
Accept
input
of
audio
signals
from
some
other
unit
(CD
player,
cassette
deck
etc.)
that
you
wish
to
hear
through
the
HP-1500's
speakers.
OUTPUT
Jacks
Provide
output
of
sound
produced
by
the
HP-1500.

CHORUS
REVERB
rn
E
KEY
TOUCH
LIGHT
HEAVY
REC
PLAY
She)
sae
mE
CHORUS
Button
Press
the
CHORUS
button
tits
indicator
will
light
to
add
minute
pulsations
to
the
sounds
vou
play,
and
make
them
seem
fatter
and
more
expansive.
You
can
select
from
six
Chorus
Depth
levels.
(p.
8)
Chorus
On/Off
setting
can
be
set
individually
for
each
Voice.
Hold
down
a
Voice
button
while
you
press
the
CHO-
RUS
button
to
store
the
setting
(ON
/OFF)
along
with
that
Voice.
REVERB
Button
Press
the
REVERB
button
tits
indicator
will
light)
to
add
reverberation
(spacious
ambiance!
to
the
sound.
You
can
select
from
six
Reverb
Depth
levels.
(p.
8)
*
Turning
the
Power
On
l.
+
Reverb
On/Off
cannot
be
set
individually
for
each
Voice.
insert
the
plug
on
the
power
cord
into
an
outlet.
Press
the
POWER
button
on
the
left
side
of
the
panel.
(Press
the
bulton
again
to
turn
it
OFF.)
Pressing
the
button
again
m
E
ON
Of
Pressing
the
button
once
A
muting
feature
comes
into
effect
for
a
brief
interval
(about
2
seconds)
after
power
up.
During
this
interval,
nothing
will
be
heard
if
you
play
the
keyboard.
Be
sure
lo
use
only
the
power
cord
supplied
with
this
unit.
Whenever
you
do
not
intend
to
use
the
piano
for
an
extended
period
of
time,
disconnect
the
power
cord
from
the
outlet.
DEMO
KEYTOUCH
Button
Allows
vou
to
adjust
the
keyboard's
sensitivity.
(p.
8)
[3
REC
Button
Allows
you
to
record
your
performances.
(p.
6)
[9
|
PLAY
Button
Pressed
to
play
back
what
you
have
recorded.
(p.
6)
Using
Headphones
To
use
headphones,
insert
the
plug
into
the
jack
located
on
the
lett
side
of
Ihe
instrument.
*
The
piano's
speakers
will
no
longer
produce
sound
once
you
have
headphones
connected.
This
is
conven-
ient
for
private
practice
or
late-night
playing.
*
The
VOLUME
knob
on
the
instrument
can
be
used
to
adjust
the
volume
as
necessary.
*
We
recommend
the
use
of
stereo
headphones.
Other manuals for HP 1500
1
Table of contents
Other Roland Musical Instrument manuals

Roland
Roland Atelier AT70 User manual

Roland
Roland EP-760 User manual

Roland
Roland FP-5 User manual

Roland
Roland ep-77 Operating and maintenance manual

Roland
Roland Rhythm 77 User manual

Roland
Roland RP301 User manual

Roland
Roland ATELIER 5100001499 User manual

Roland
Roland FP-1 User manual

Roland
Roland LX-15 User manual

Roland
Roland E-60 User manual

Roland
Roland C-30 User manual

Roland
Roland XP-80 User manual

Roland
Roland E-12 User manual

Roland
Roland KR-570 User manual

Roland
Roland DP-990R User manual

Roland
Roland C-190 User manual

Roland
Roland HP504 User manual

Roland
Roland C-80 User manual

Roland
Roland RD-700SX User manual

Roland
Roland KR117/115 User manual