ho
Features.....................
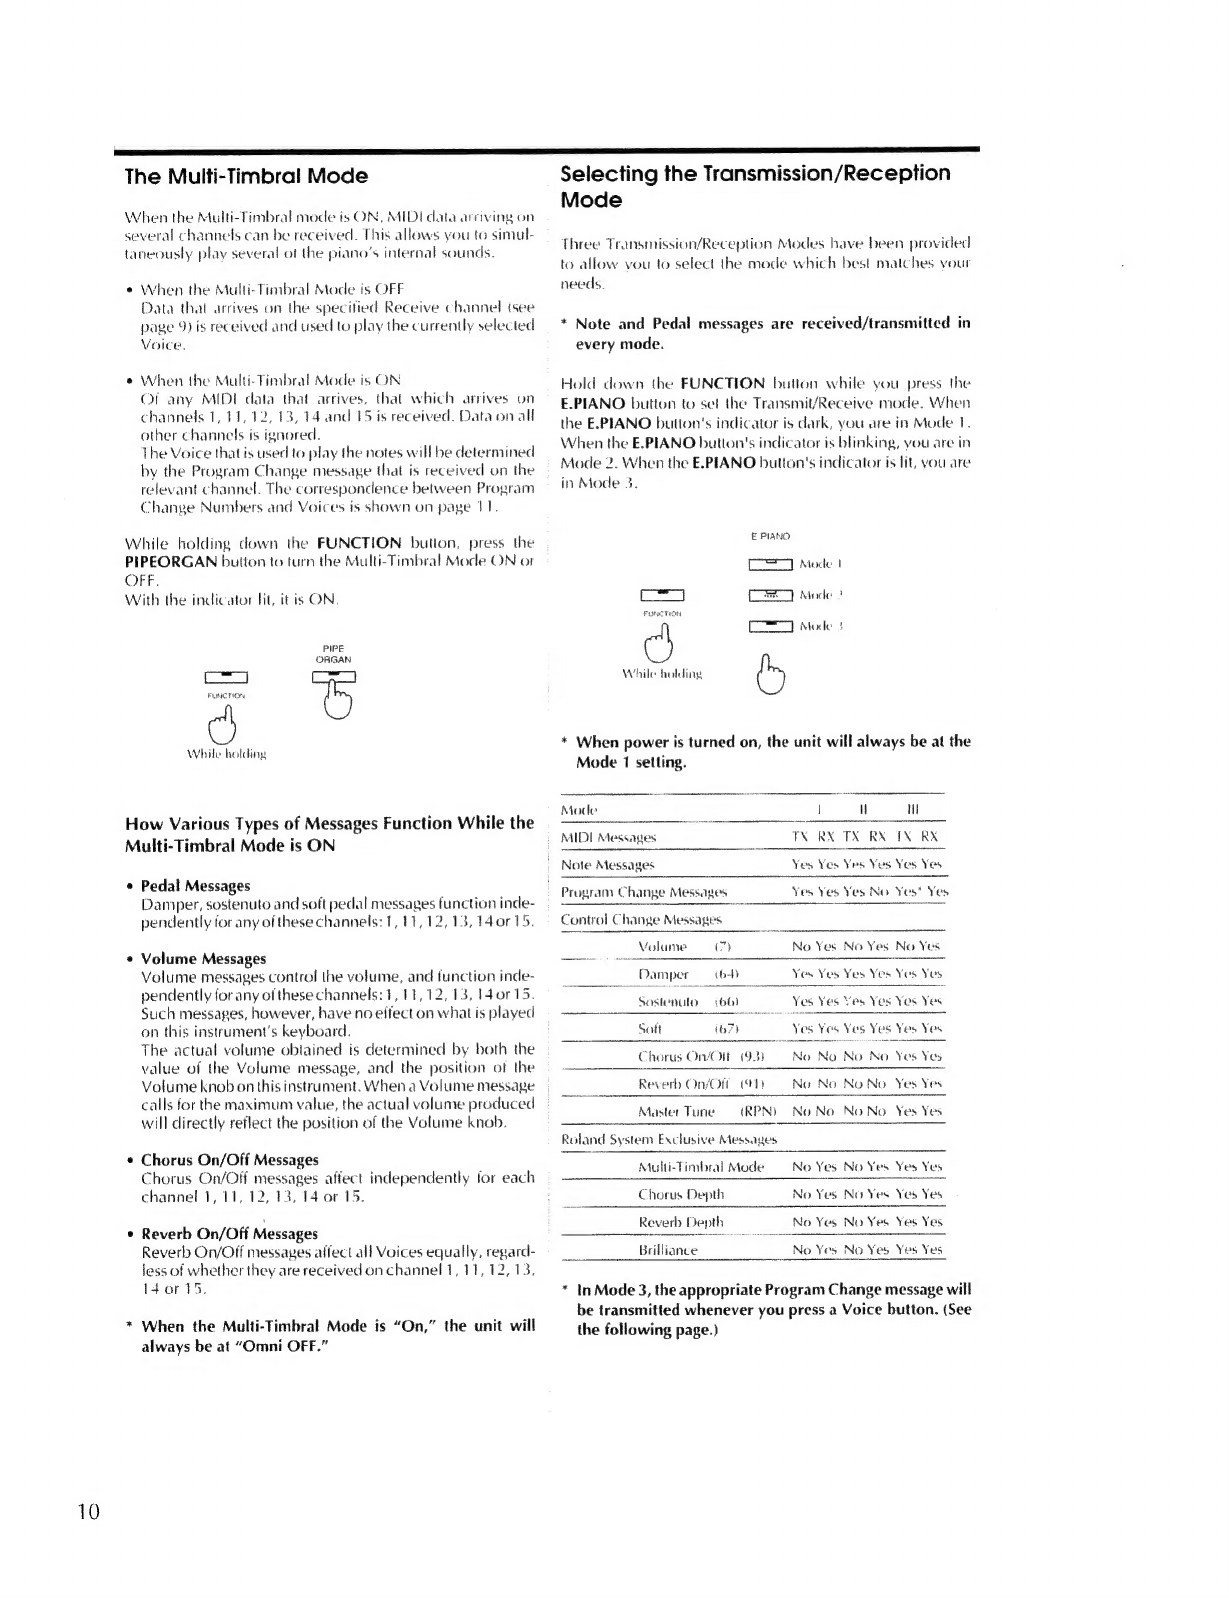
Selmi
EMO
E:
n
"CP
ET
SEE
qe
issued
Contents
......
r
E
eee
qus
beue
ee
e
Ae
deS
IRT
CRES
XE
Important
Notes...
eee
erer
rene
eee
etna
tne
ennt
nnne
eterne
enne
nennen
EE
disk
UA
2
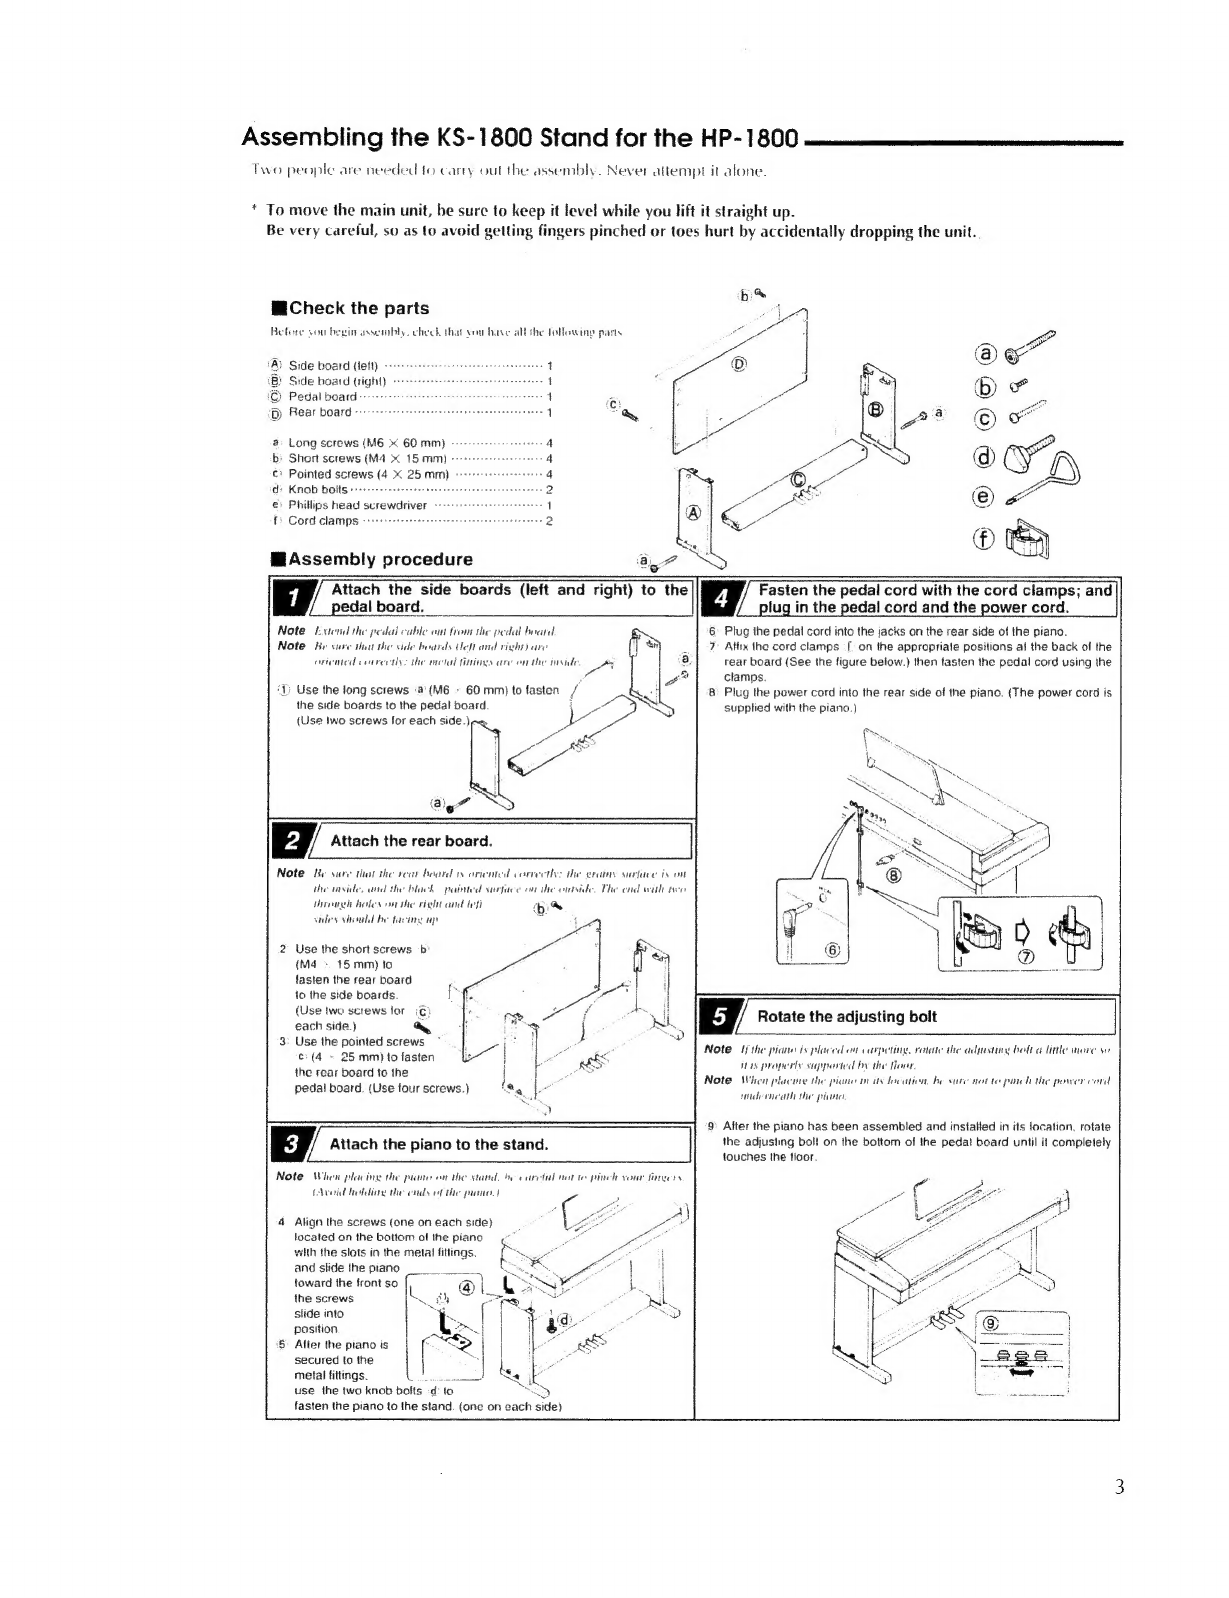
Assembling
the
KS-1800
StandfortheHP-1800.....................
eee
€—
M
Aged
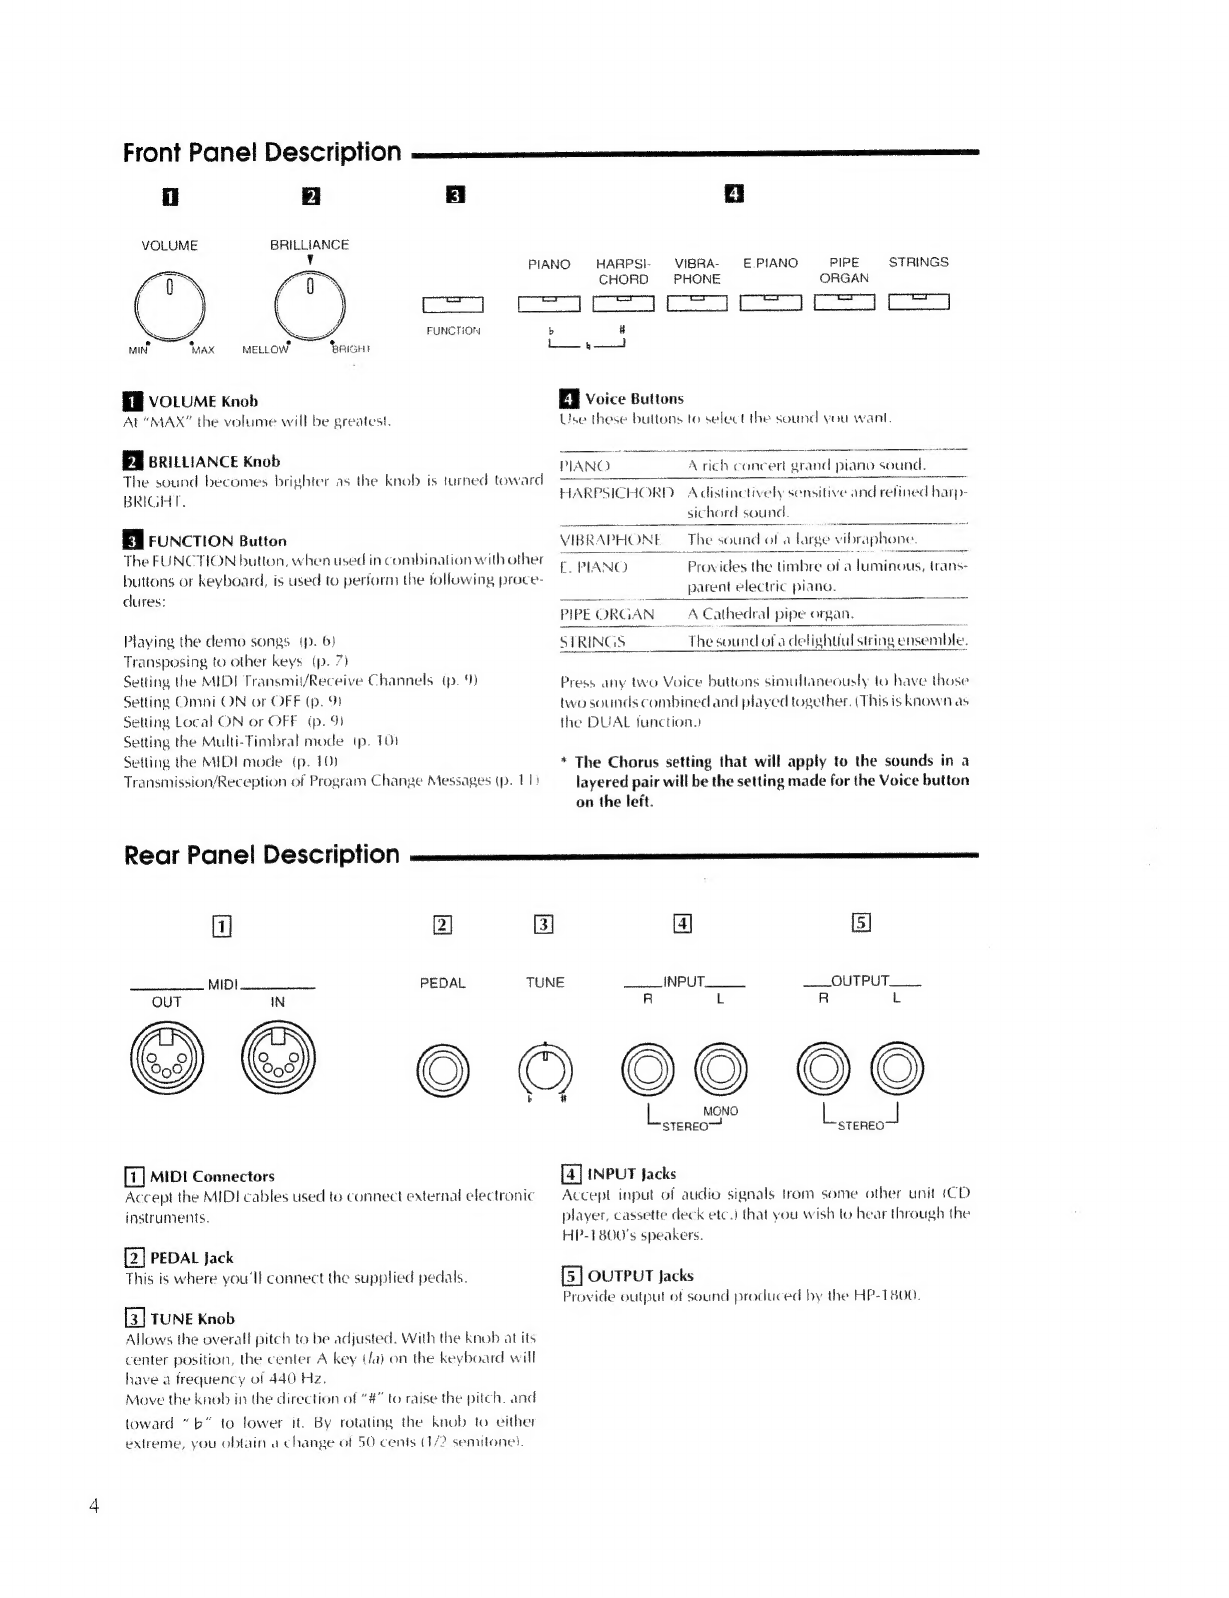
Front
Panel
Description
.................
"—————
Á——Á———
C
—
Ma
—:
Rear
Panel
Description
M
—
M
Ê
Turning
the
Power
On............
eee
——Á——
MIU
ME
—(——
D
Listening
to
the
Demonstration
Songs
.........
eese
EE
6
Try
Recording
What
You
Play
...............
eee
S
"E
EO
R
A
VERE
C
How
to
Create
Recordings
..................
teen
creer
sete
eene
eene
entem
eer
nen
enhn
nre
teer
nennen
eene
nennen
b
Now
try
listening
to
what
you
just
recorded
isses
eee
een
e
ee
eene
Playing
with
the
KeyTransposed.........................
Playing
a
piece
in
some
other
key
with
the
Pedal
Functions
...............
—
PE
Key
Touch
Function
...............
ER
yeme
Pre
5
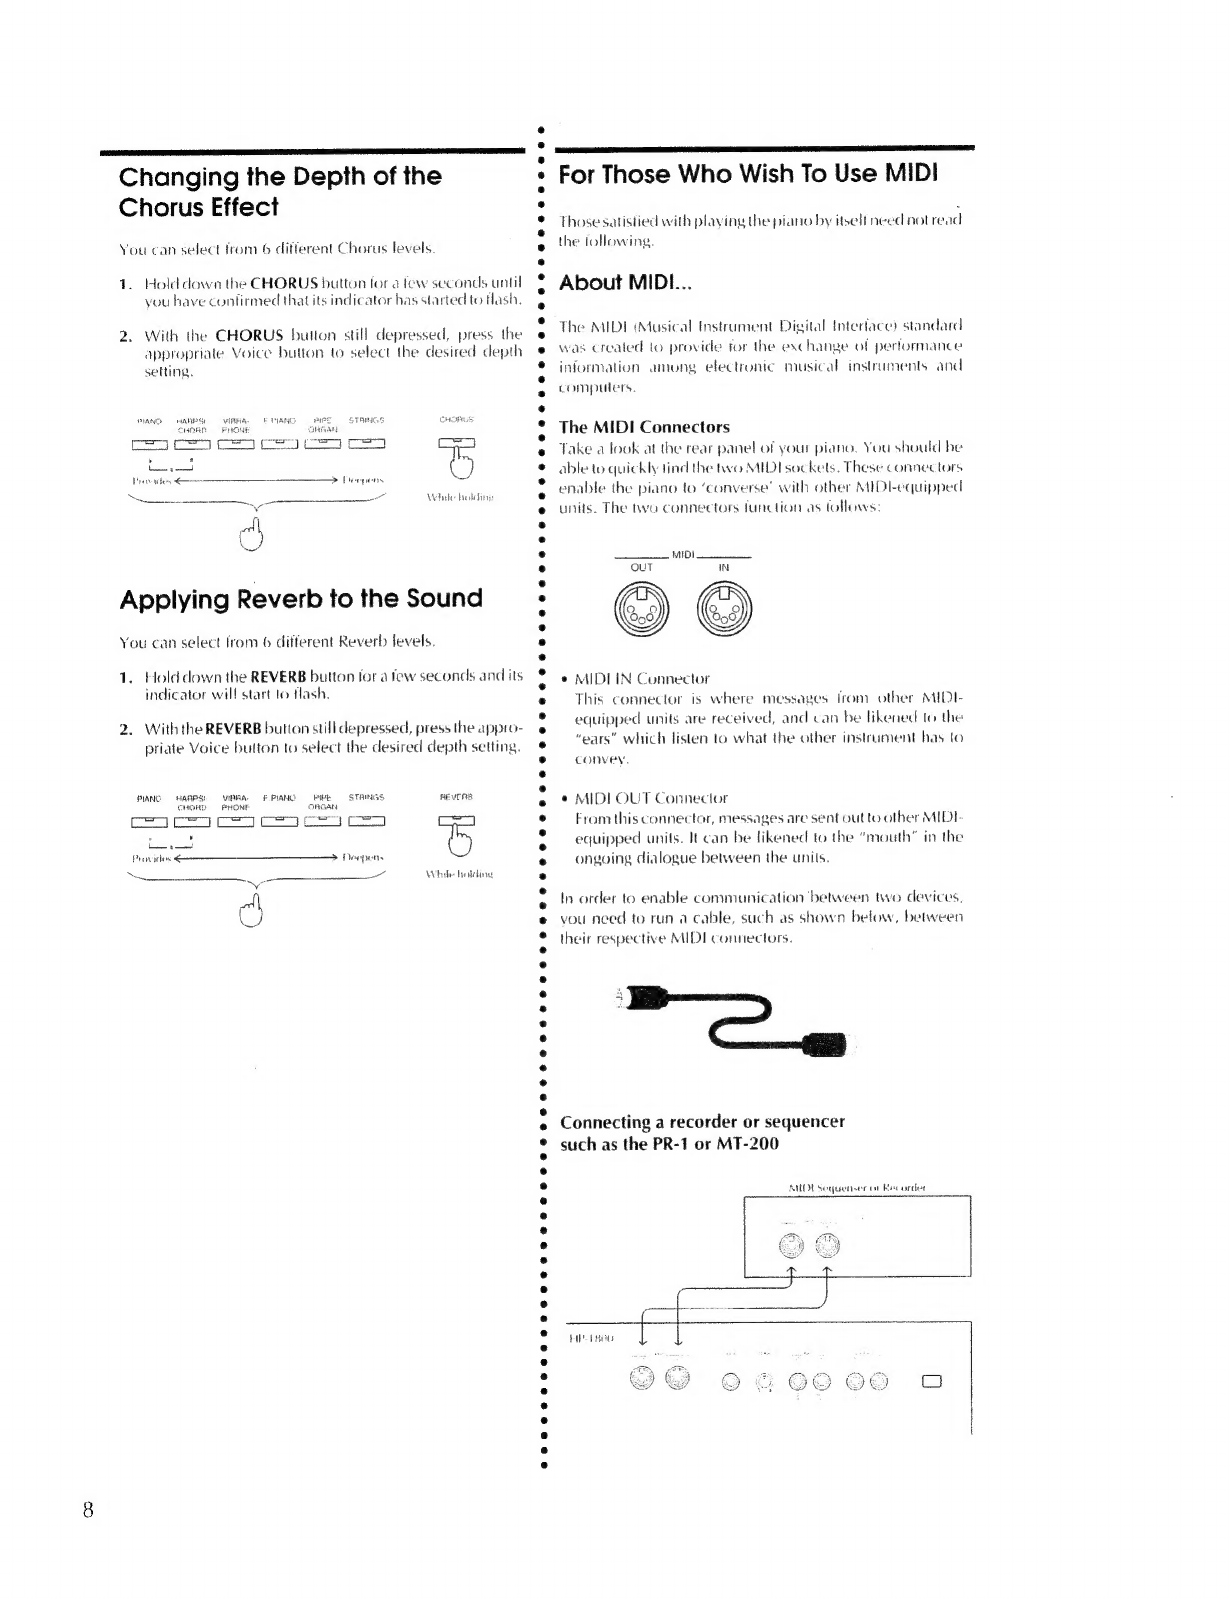
Changing
the
Depth
of
the
Chorus
Effect
...........................
ApplyingReverbtotheSound.............................
—
For
Those
Who
Wish
To
Use
MIDI
...............
—
MÀ
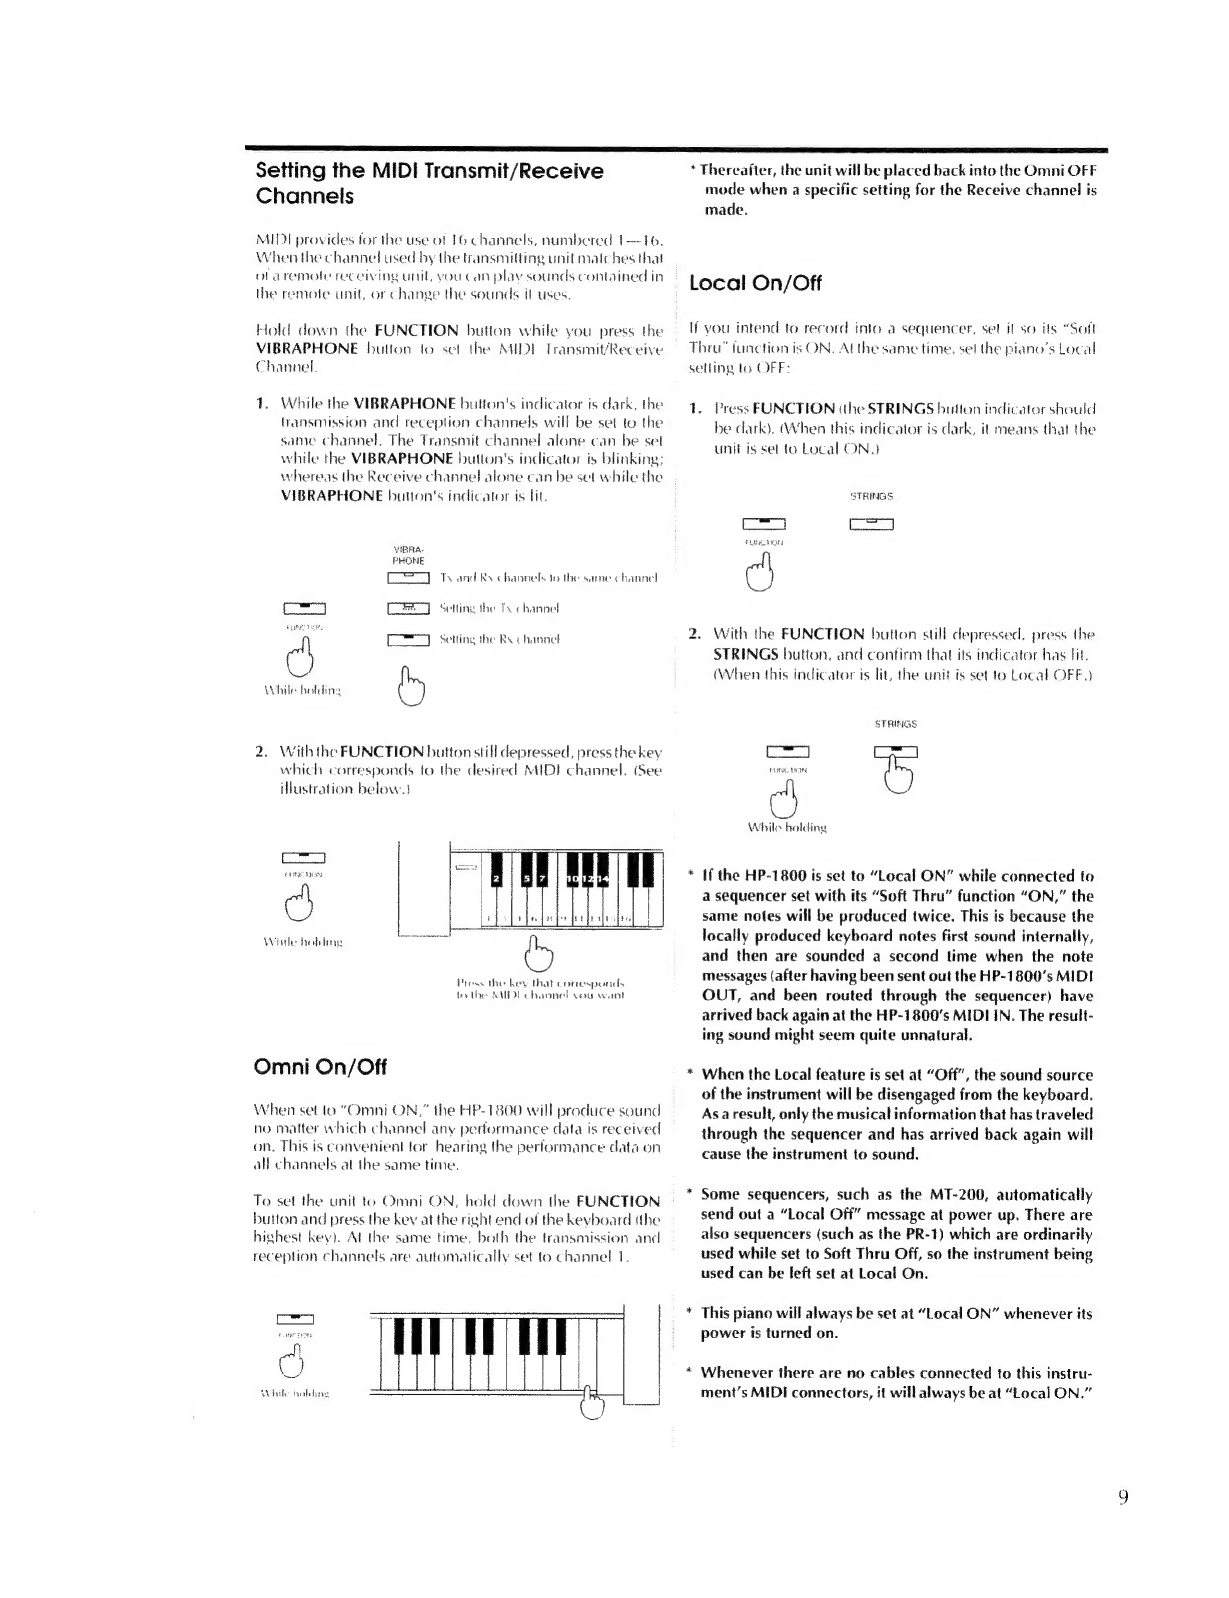
Setting
the
MIDI
Transmil/Receive
Channels
...............
OM
OVOM
iiie
eiae
eter
ayari
Local
ON
ON
set
hay
acerbe
eter
The
Multi-Timbral
Mode...
Selecting
the
Transmission/Reception
Mode
...
Transmission/Reception
ot
Program
Change
Messages
eee
me
El
Troubleshooting
.......
--———————
————————
Hl
DZ
Specifications
eee
P————Á—
MÀ
RE
EE
ERR
REG
TZ
MIDI
implementation
Chart
......
REN
In
addition
to
the
items
listed
under
Safety
Precautions
on
page
16,
please
read
anc
adhere
to
the
following:
Power
Supply
*
When
making
any
connections
with
other
devices,
always
turn
off
the
power
to
all
equipment
first;
this
will
help
prevent
damage
or
malfunction.
*
Do
not
use
this
unit
on
the
same
power
circuit
with
any
device
that
will
generate
line
noise,
such
as
a
molor
or
variable
lighting
system.
Placement
*
Using
the
unit
near
power
amplifiers
tor
other
equipment
containing
large
transtormers
)
may
induce
hum.
*
This
unit
may
interfere
with
radio
and
television
reception,
Do
not
use
this
unit
in
the
vicinity
of
such
receivers.
*
Make
sure
you
always
have
the
instrument
placed
so
it
is
level
and
sure
to
remain
stable.
Otherwise,
il
played
while
tilted,
you
risk
causing
damage
to
the
keyboard
as
a
result
of
the
unnatural
degree
of
force
that
might
be
applied
to
certain
parts
of
it.
Maintenance
*
For
everyday
cleaning
wipe
the
unit
with
a
soft,
dry
cloth
tor
one
that
has
been
slightly
dampened
with
water).
To
remove
stubborn
dirt,
use
a
mild
neutral
detergent.
Afterwards,
be
sure
to
wipe
the
unit
thoroughly
with
a
soft,
dry
cloth.
*
Never
use
benzene,
thinners,
alcohol
or
solvents
of
any
kind,
to
avoid
the
risk
of
discoloration
and/or
deformation.
Additional
Precautions
*
Protect
the
unit
from
strong
impact.
*
Before
using
the
unit
in
a
foreign
country,
consult
with
qualified
service
personnel.
*
Walch
your
fingers
when
opening
or
closing
the
cover.
Smaller
children
might
need
some
help.
*
Do
not
attempt
to
forcibly
the
music
stand
further
forward
than
it
is
designed
for.
(Keep
it
within
its
normal
swing
when
moved
gently.)
»
Never
place
vases,
drinks,
or
any
other
item
containing
liquid
on
top
of
the
unit.
In
the
event
ola
spill,
be
sure
to
wipe
clean
immediately
with
a
dry
cloth.
Any
spill
that
is
not
cleaned
up
promptly
may
damage
the
finish.
H
quic
enters
Ihe
unit,
there
is
the
fire
or
electric
shock.