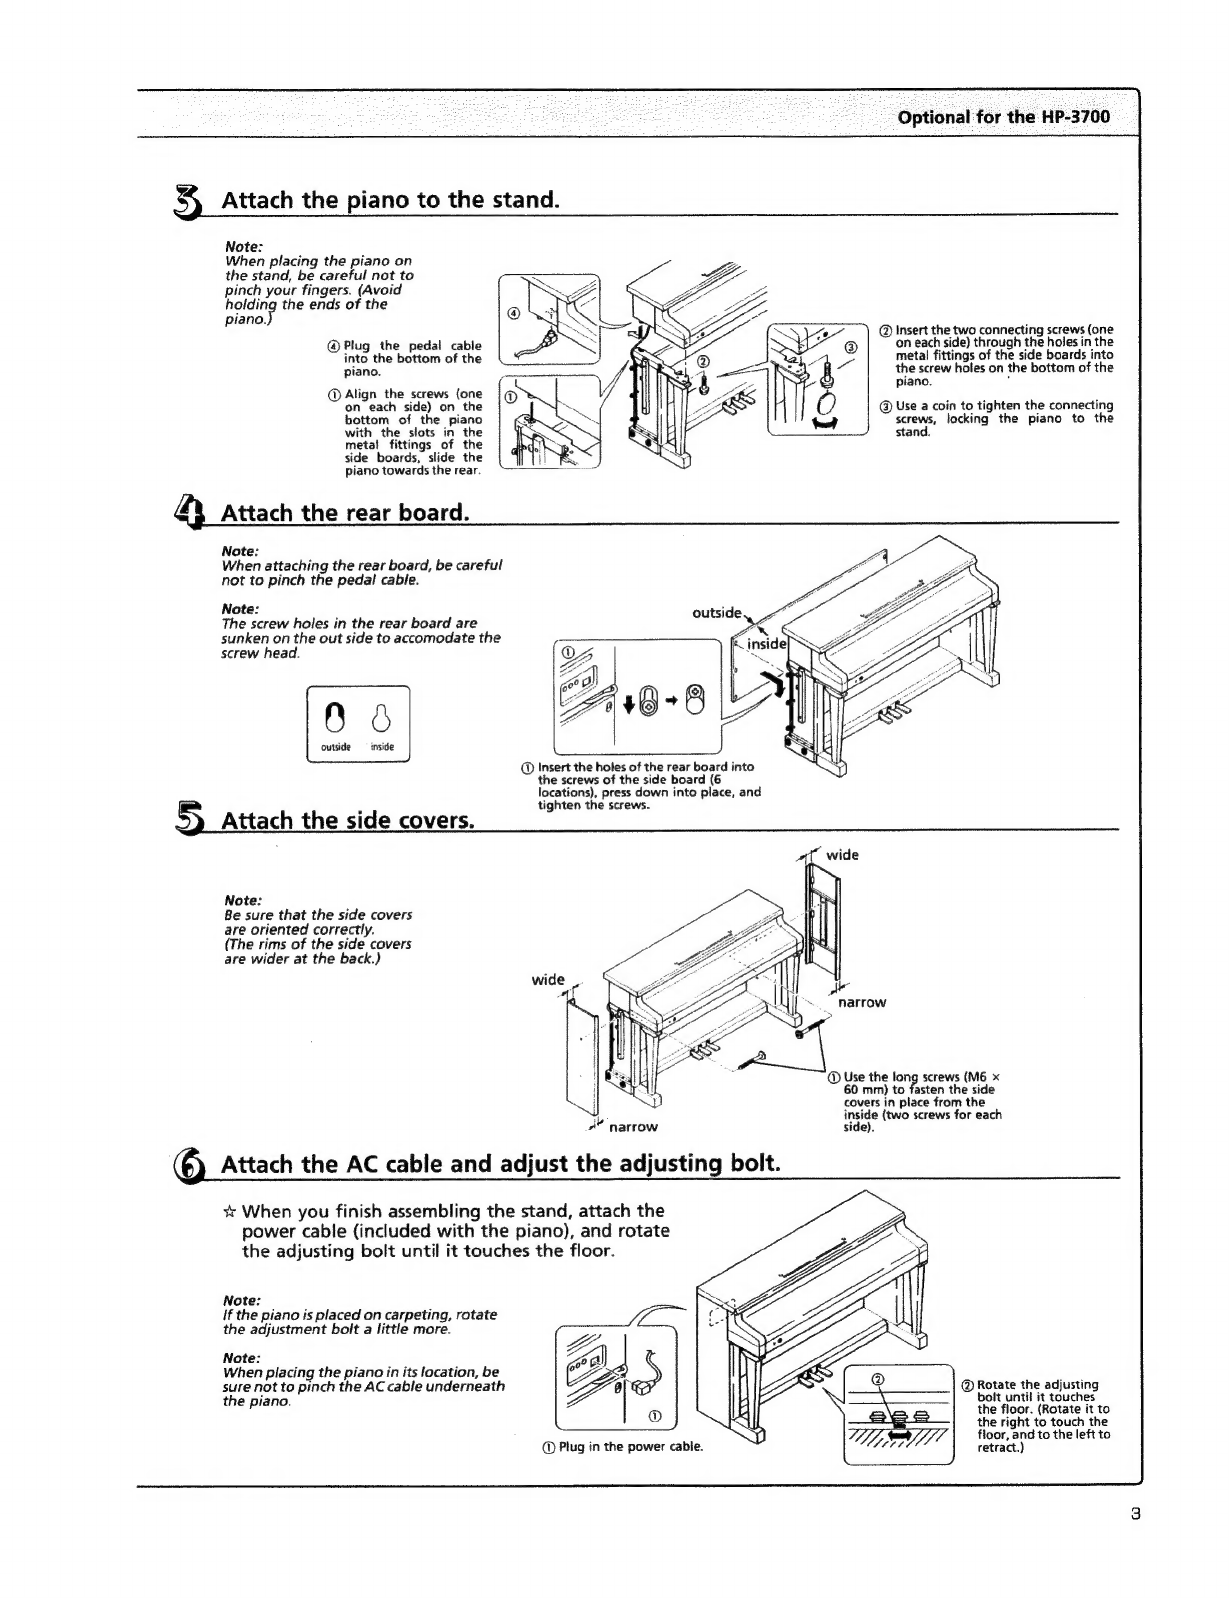
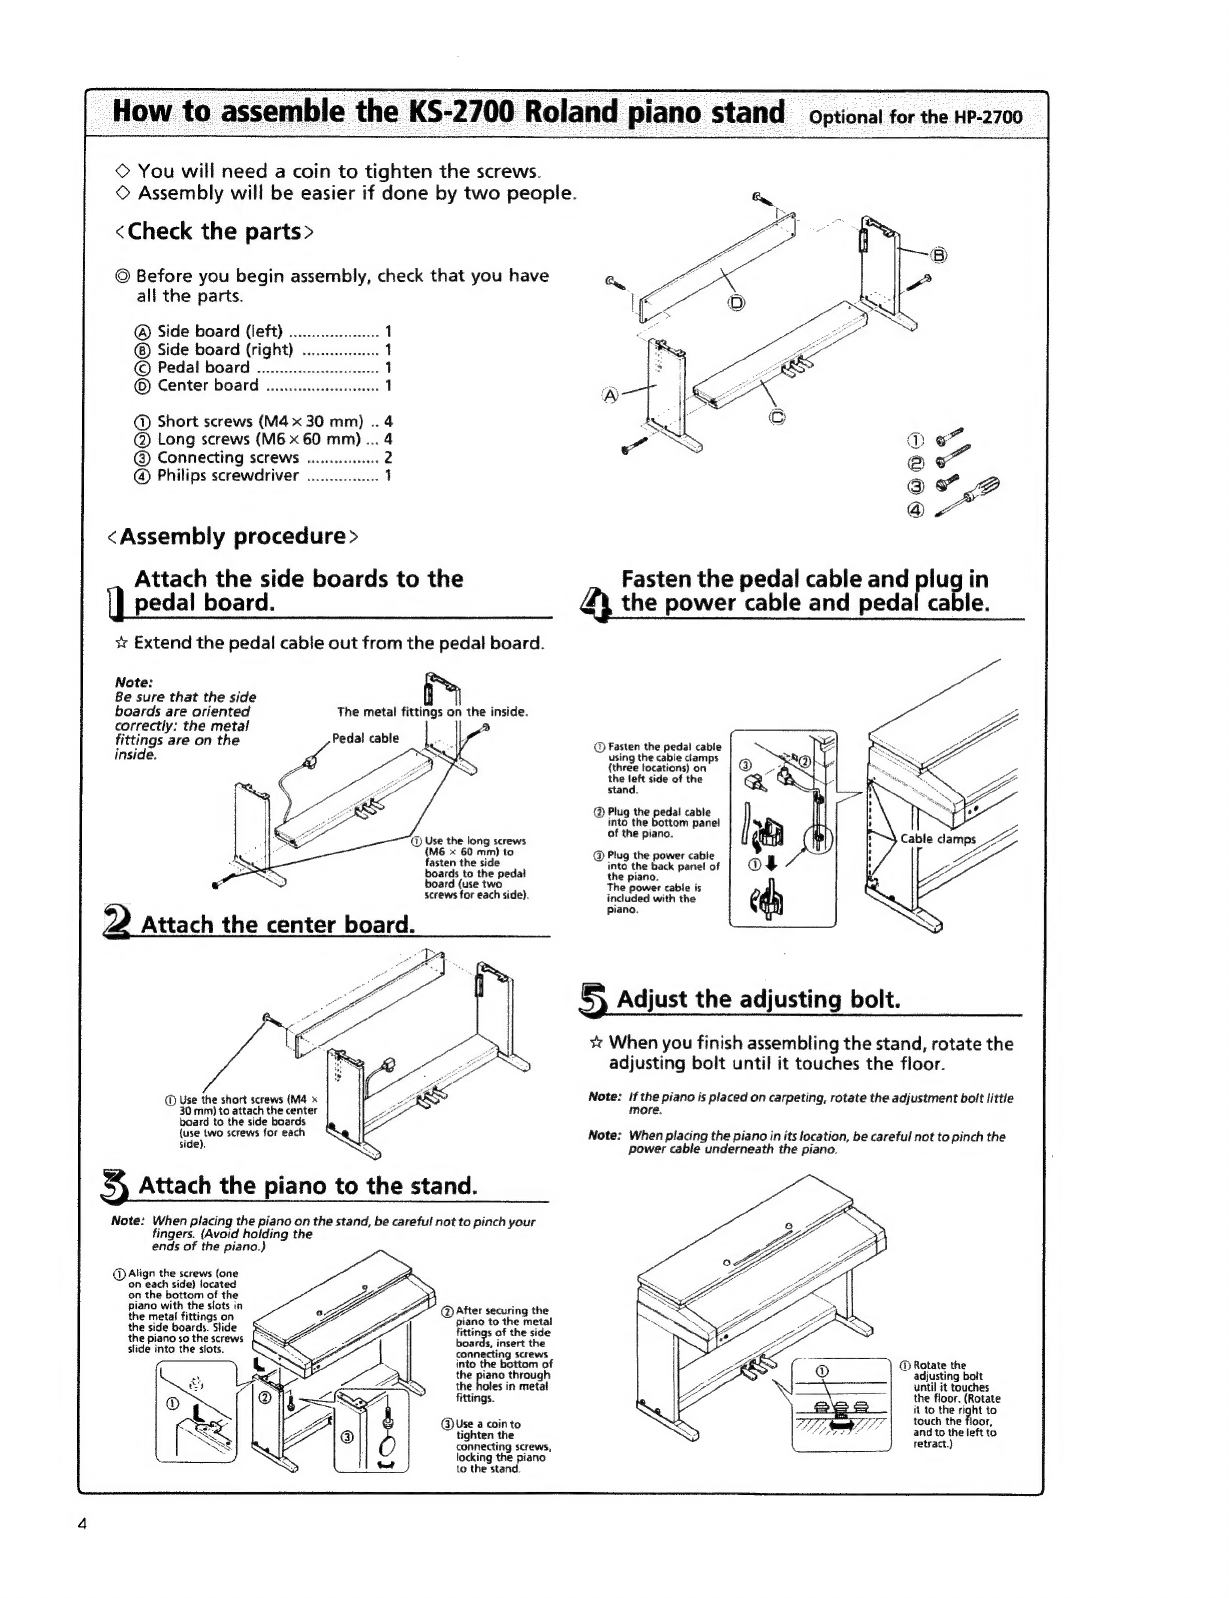
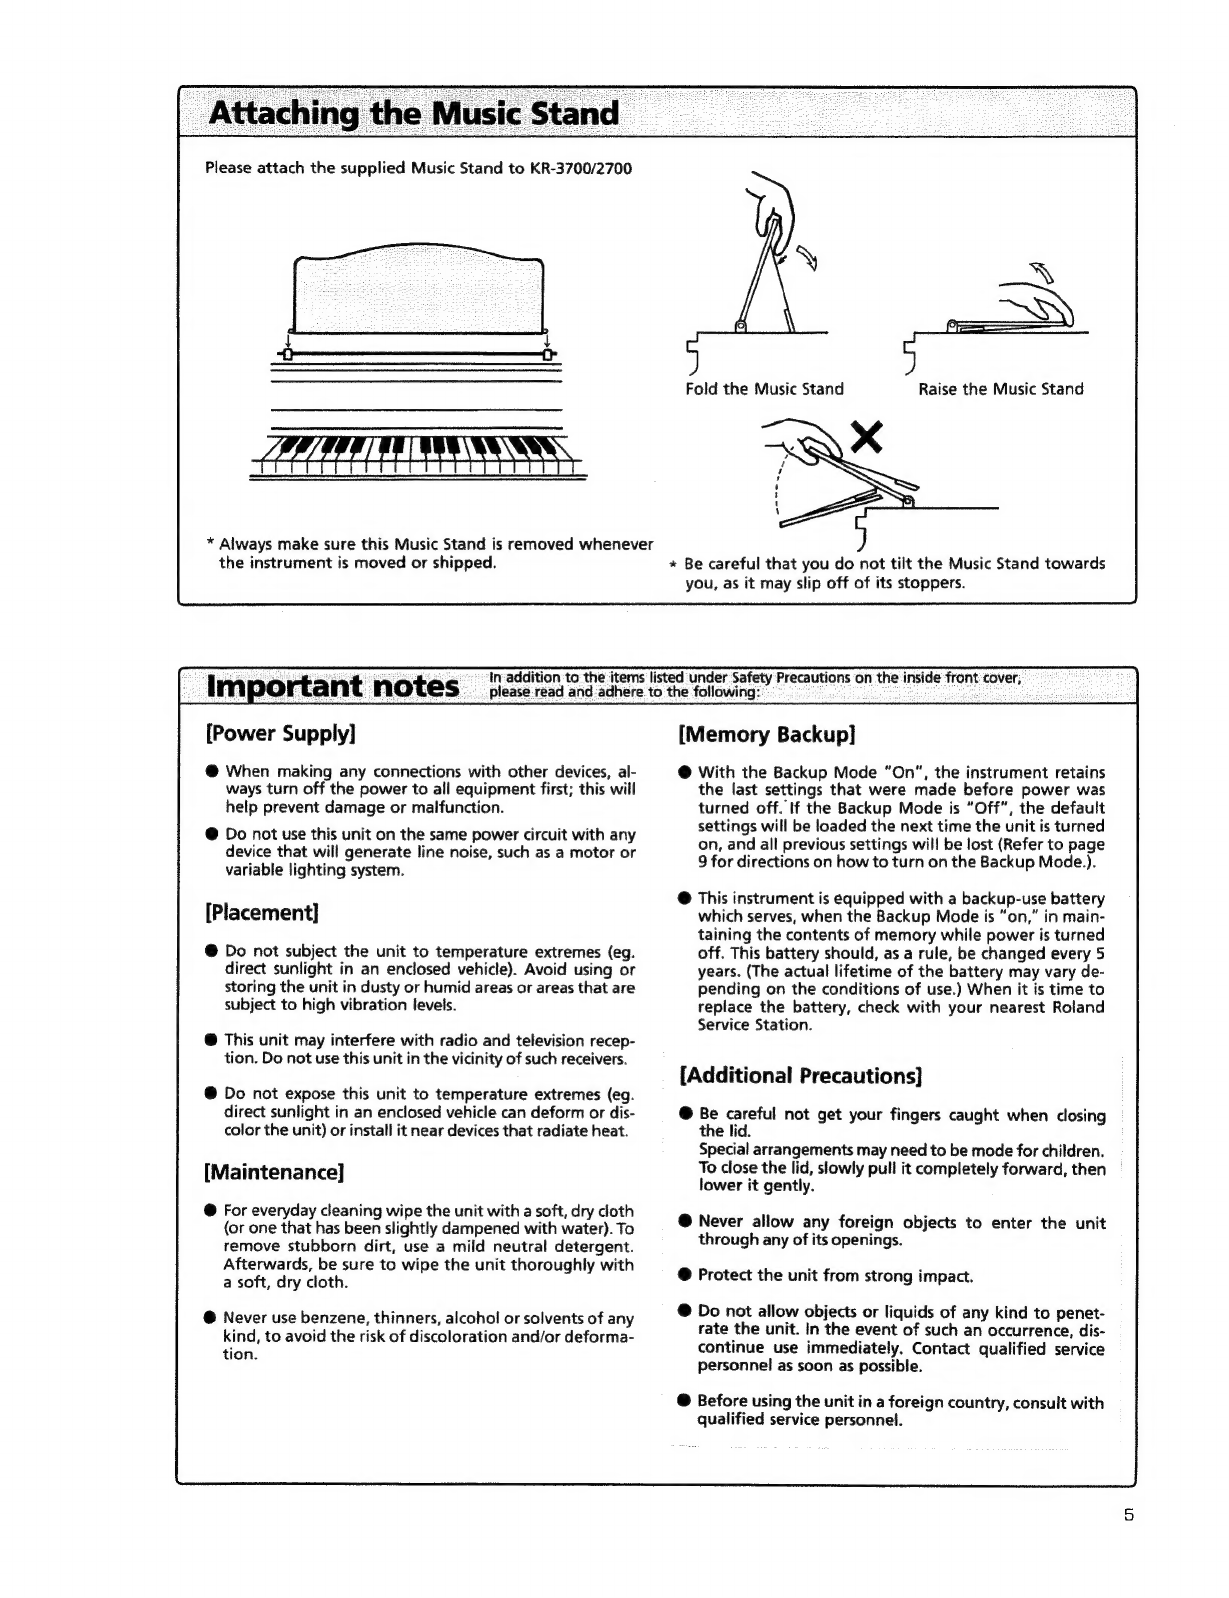
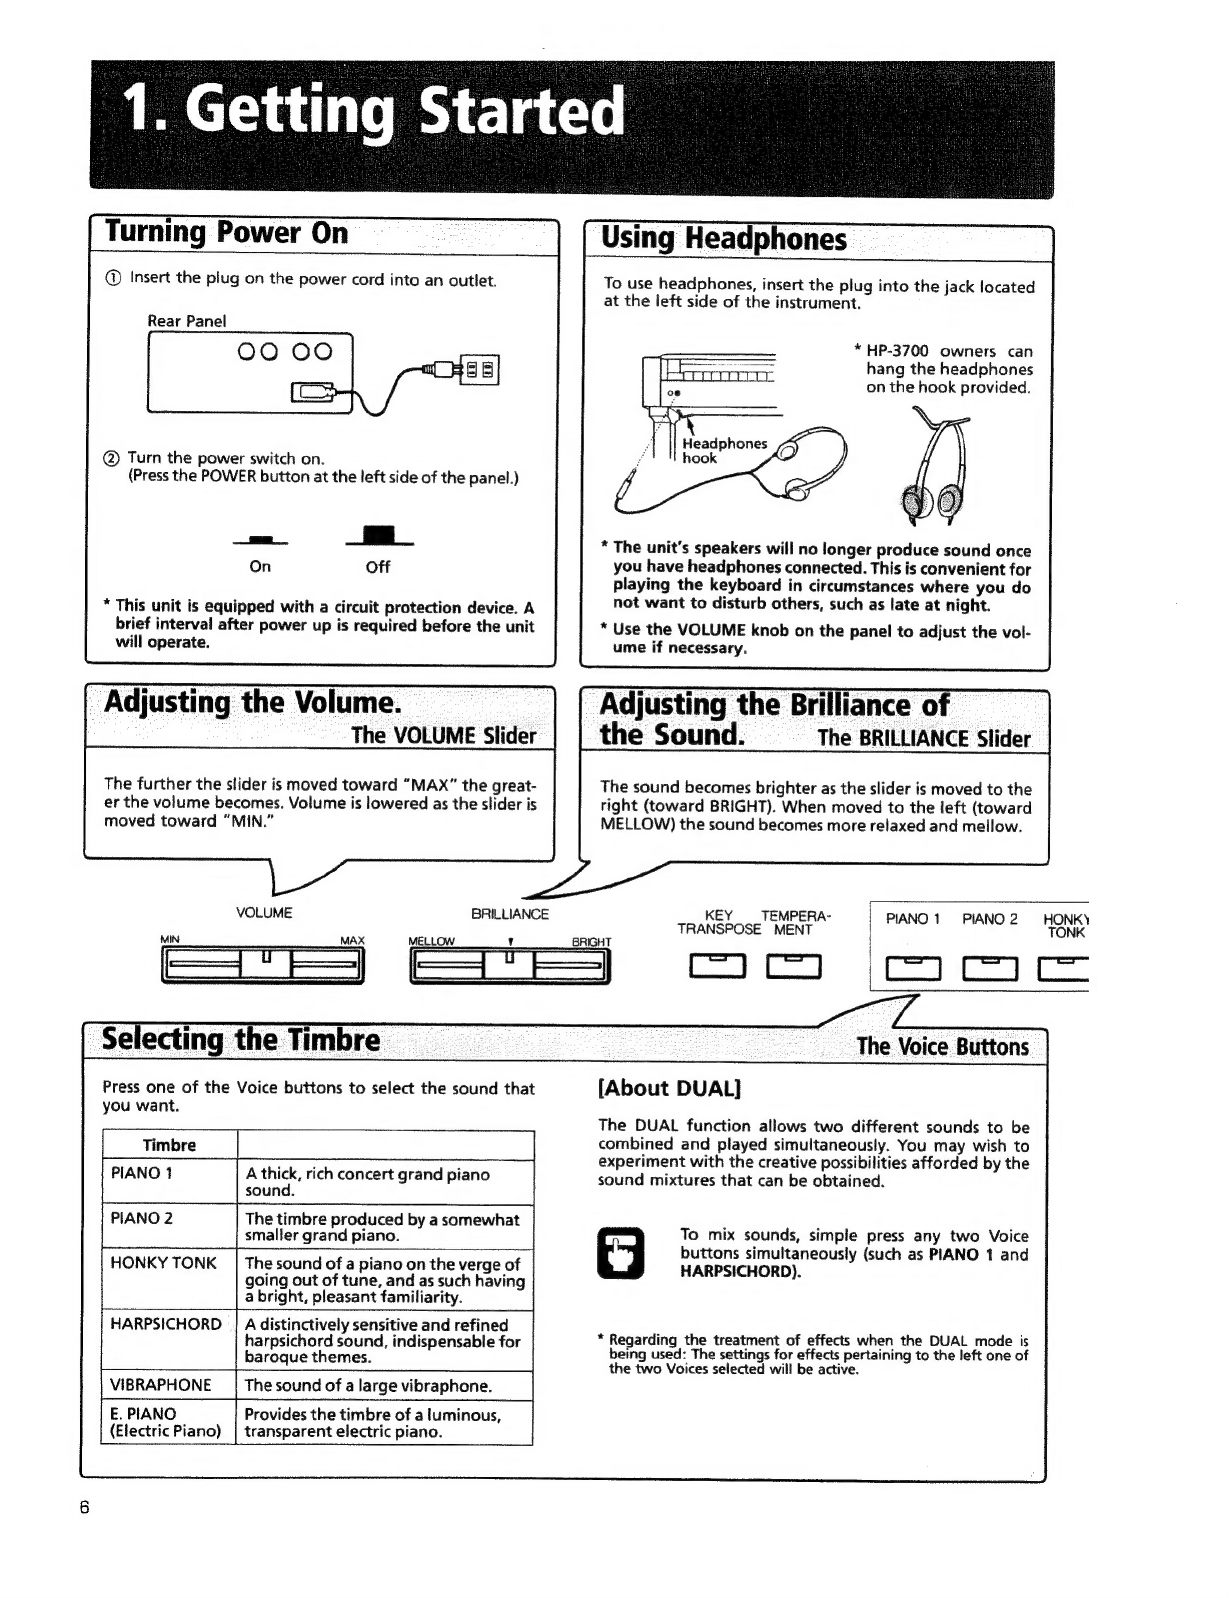
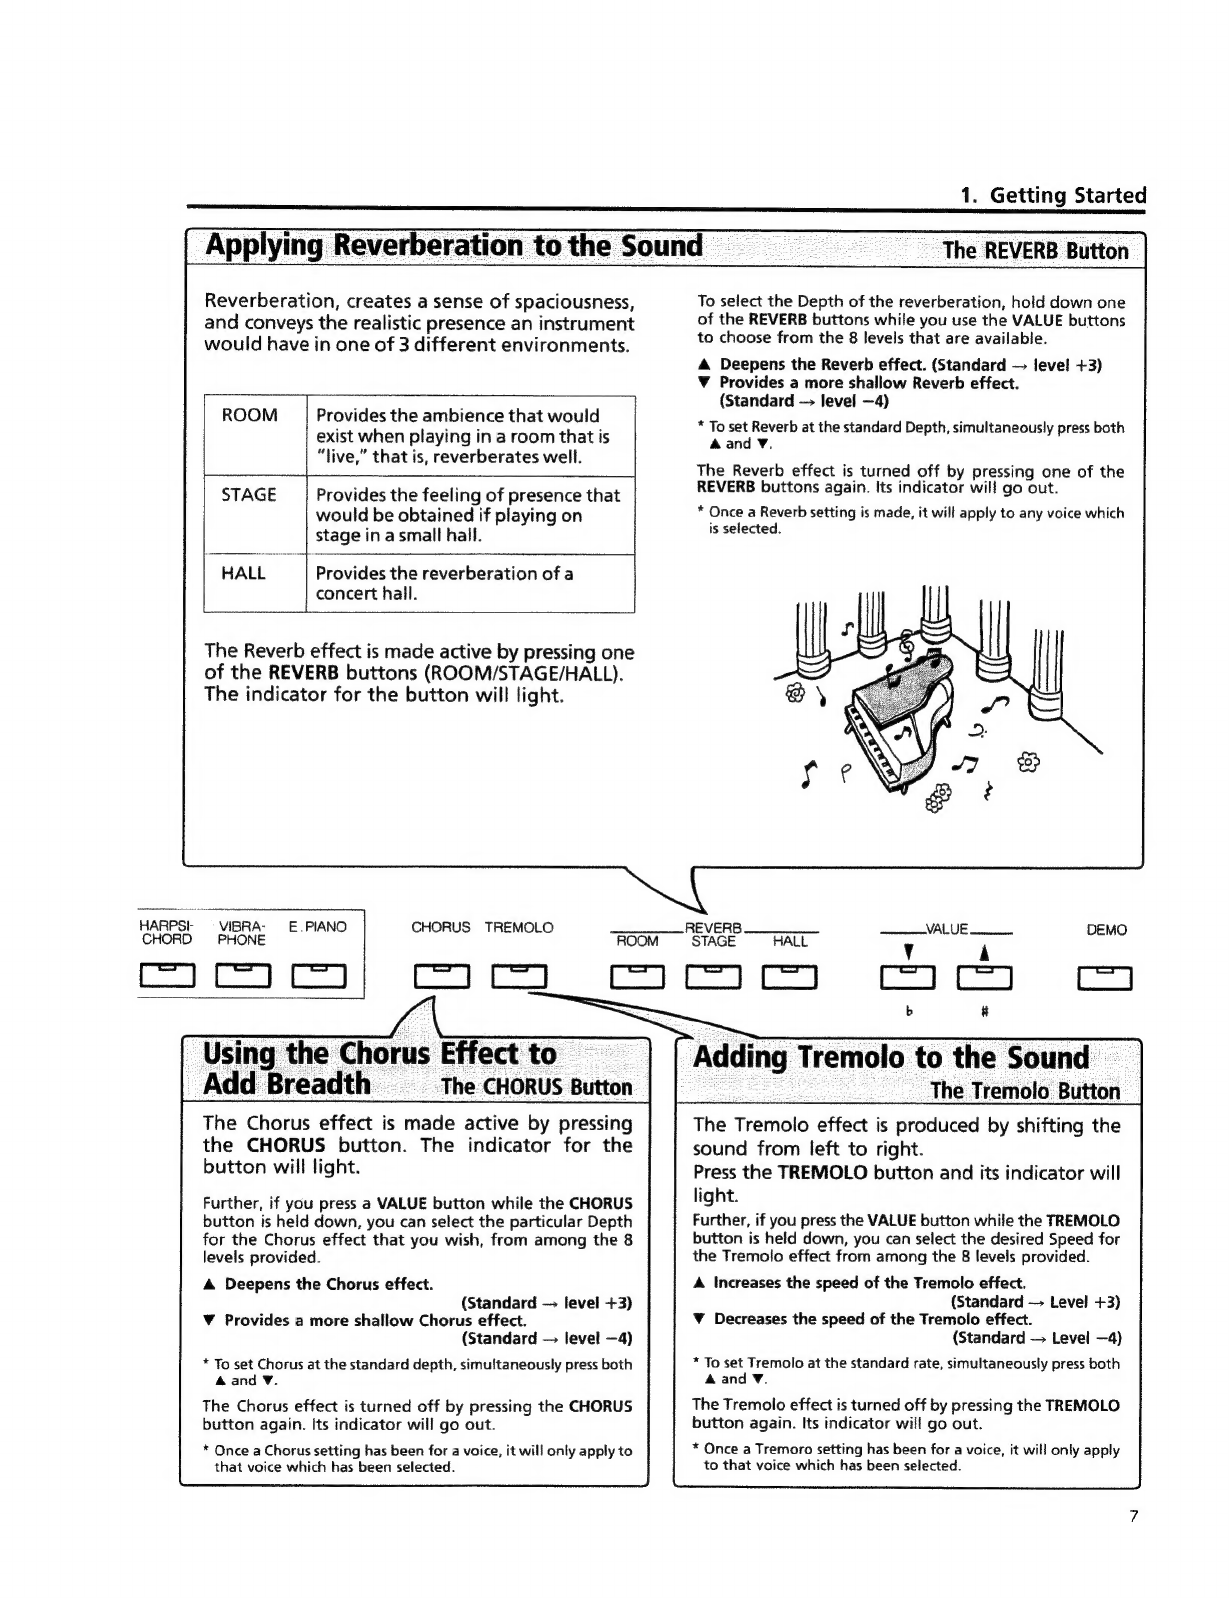
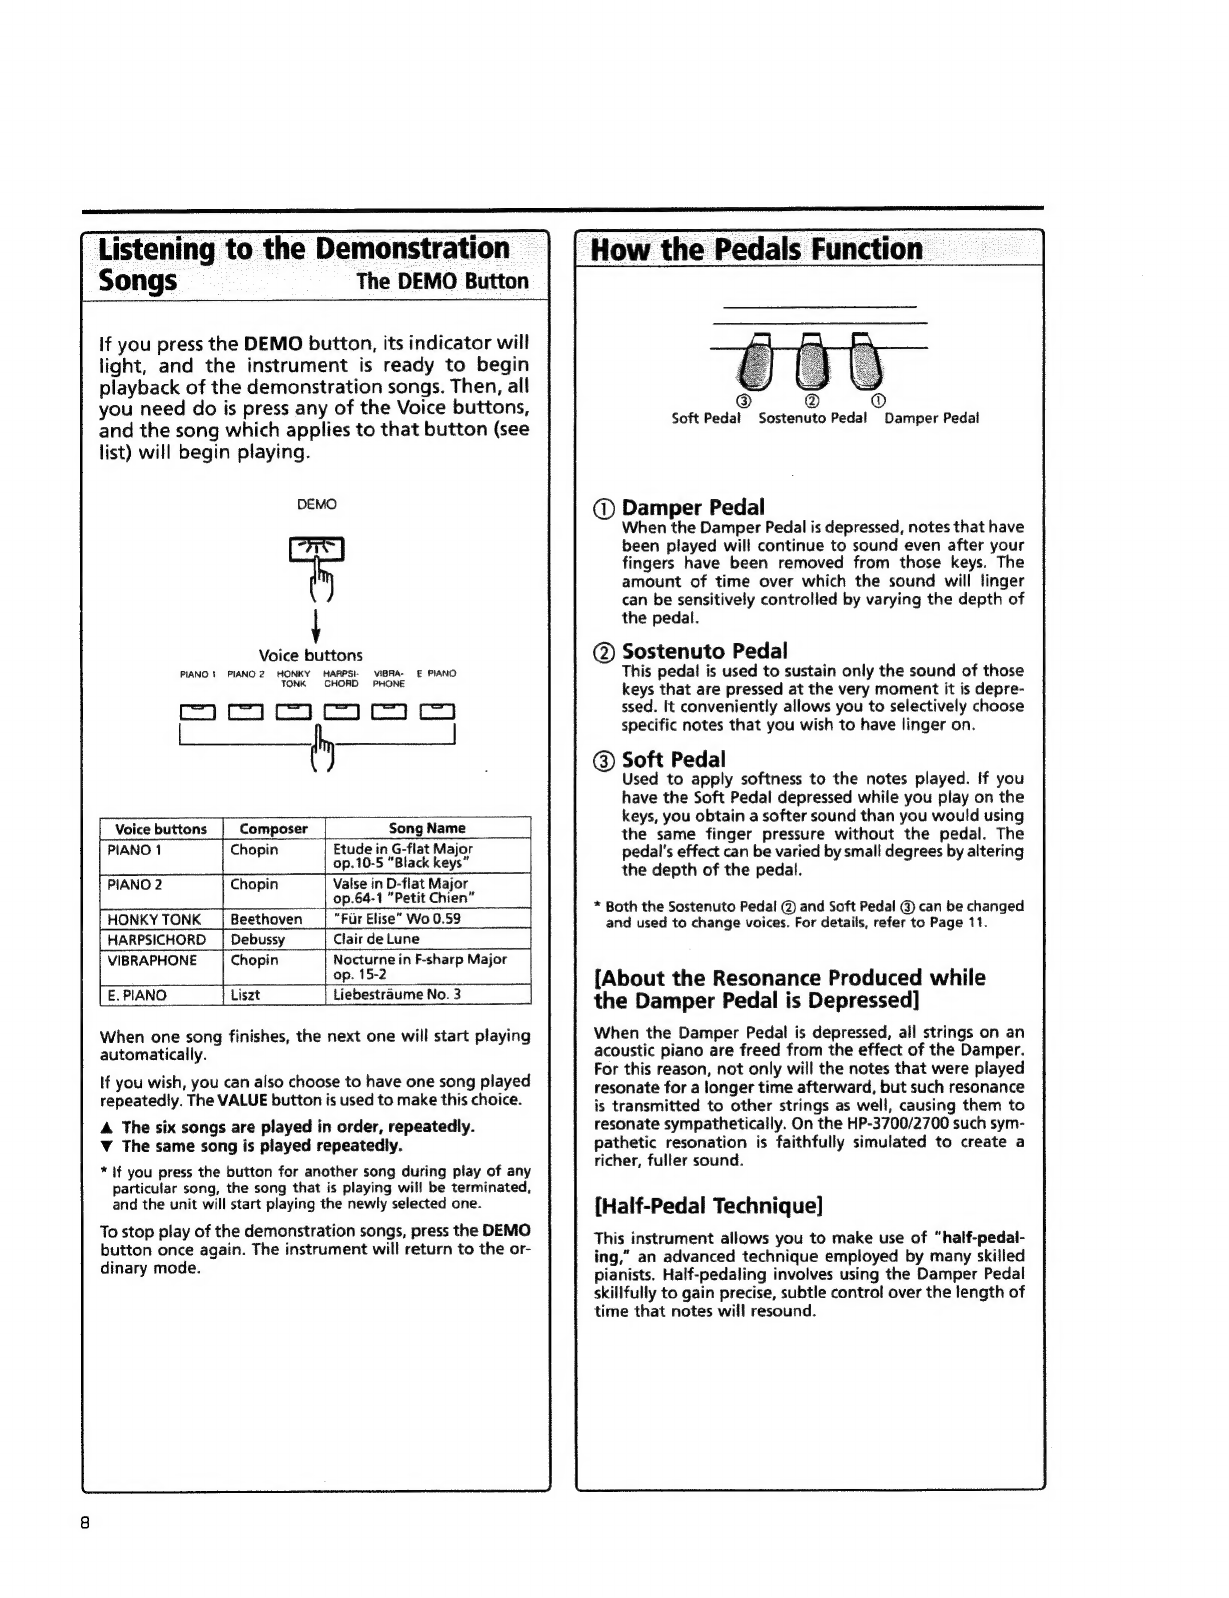
Roland HP 3700 User manual
Other Roland Musical Instrument manuals

Roland
Roland E-50, E-60 User manual

Roland
Roland E-X50 User manual

Roland
Roland HP107 User manual

Roland
Roland MV-8800 Production Studio Instruction manual

Roland
Roland HP 1700L User manual

Roland
Roland GP609 User manual

Roland
Roland RD-700SX User manual

Roland
Roland Piano User manual

Roland
Roland SPD-6 User manual

Roland
Roland HP-2 User manual

Roland
Roland HP107e User manual

Roland
Roland HPi-50e User manual

Roland
Roland HP 1800 User manual

Roland
Roland VS-2400CD Operating and maintenance manual

Roland
Roland F-120R User manual

Roland
Roland RD-64 User manual

Roland
Roland HP 900 User manual

Roland
Roland RD-100 User manual

Roland
Roland KR-15 User manual

Roland
Roland FR-2 V-Accordion User manual