Chapter
1
Quick-Start
Chapter
2
1.
2.
1.
Tritroduictioninsscuii
eee
Ri
a
ie
erect
eng
ki
ete
ah
Hae
es
Ris
Adis
ates
ele
gate
ide
tncte
Meise
4
Important:
Notes
oss.
oycisstet
jy
it
pst
lad
vel
ak
the
Deseo
Geeta
Seeatehe
eds
Pe
EN
Se
andere
eave
neerv
lea
ataasndeeatss
7
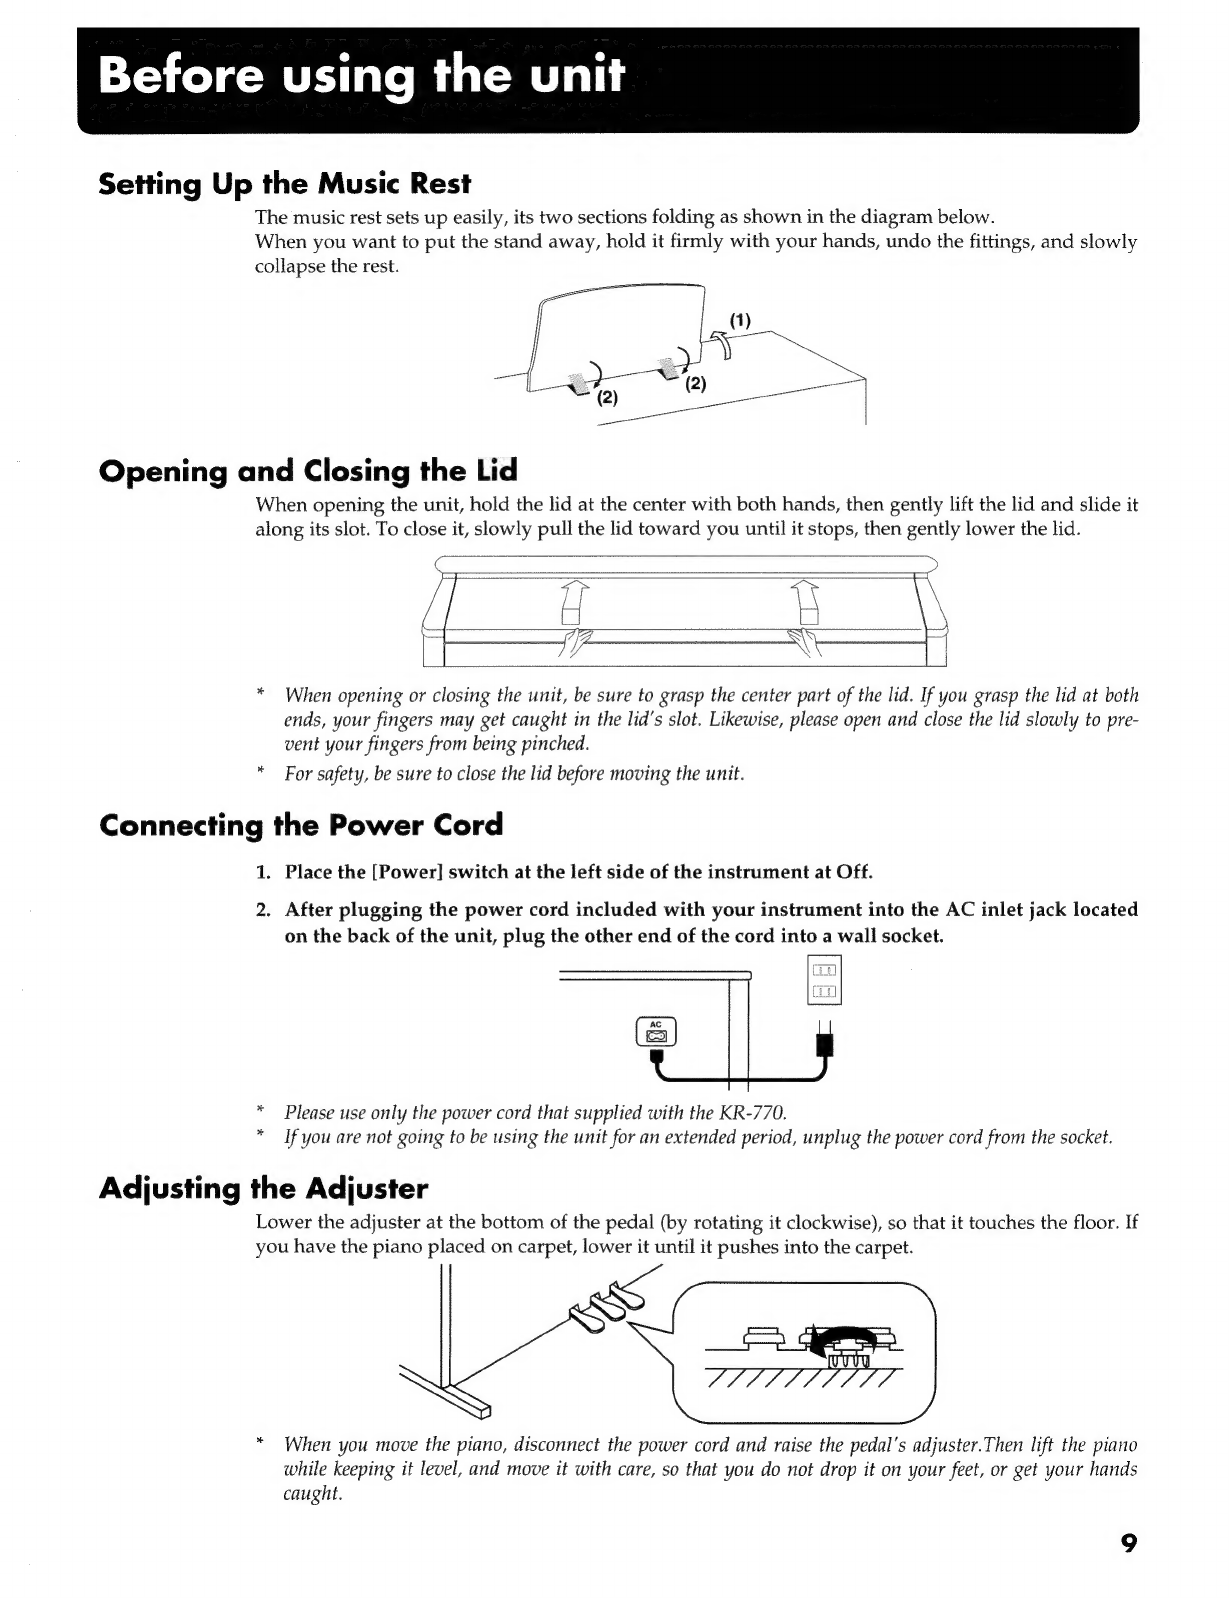
Before
Usirip:
the
Unites
cecsessscs-
es
ccsscascisscsuusctseascusncess
ad
tevecsedsceaeias
vcuts
lu
gussdeataenaybeaedecounaamsnesdel
yes
dndauuaetero
dona
iluadlessegees
9
Panel
Descriptions
Basic
Operation
and
How
to
Read
the
Display
.........cccccccesscsesseseenesesesseseessseeassnessssesasseeseeseareacssesussnssesussceseseaneaseneasees
16
Overview
of
the
KR-770
An
Introduction
to
the
Functions—[Demo]
Button
.......cccceccseeseseeseseseeenseseseesnsesesesenssesssessessacsenessesesssessacsestessaeseaeees
17
The
KR-770’s
Performance
Functions
One
Touch
Program
Let’s
Try
a
Piano
Performance—The
One
Touch
Program
[Piano]
Button...
ce
ecsseeeeeseeceneeeeeerenenenees
19
Let’s
Turn
On
the
Metronome
Let's"
Wsethe:
Peal
soos.
defec
avec
dskr
casccdee
cele
avi
scasvandi
ca
cates
teal
Sei
shcaes
Lovesdg
dutta
ntisvanelamtaiacaaes
seus
soaks
od
ante
vane
bees
Let’s
Try
an
Organ
Performance—The
One
Touch
Program
[Organ]
Button...
ees
eeereeneneeeeneeteeees
20
Let’s
Try
Playing
a
Style—The
One
Touch
Program
[Arranger]
Button
Let’s
Play
“When
the
Saints
Go
Marching
I”
w..cccccceeceeseesecssescsssecseseeeeneeeeseaceteasseaesseusatsnensasseensasseeeseeasanas
Let’s
Try
Some
Drum
Sounds
and
Effects—The
[Drums/SFX]
Button...
ccs
lecseeceeseseesaeenesseseeneeeteerenes
Let’s
Listen
to
Some
Music
Data—Playing
Back
Disk
Performances
Let's.
Sing
Using:
the
Microphone
s:c..isisecccssseiveaccuscuscoscersensieccccst
cpasssevecasvcehesbiaiers
tucebueetetasenceantecatted
cessdeenuebesnisnbavenseentbeds
Tones
Selecting.
TONES.
2..siccesecitetsticecsveneeyeePiaycteesetestuaescinaeecdunatevesudveranidg
oMtvcbeseapecraussecgnetedbecaiuededosdaapvehs
Getpssrgeseennaceetansavaveasts
Adding
Effects
to!
Tomes
sxi.cccd:ccceieessacastscxavacsttis
scqcdens
etuisssshqasizoatesnetesdsbaasevusvsssisiesssotipasndsnasponcets
ifs
actetusicenskeeeslstveenediectton
Adding
Reverberation
to
the
Tone—The
[Reverb]
Slider
Adding
Various
Effects
to
Tones—DSP
Effect
vo...
cccecsssssesssesssessesseesssesssnencersecneersesseneanssisaeanseasseseeasenssseaneneanes
Adding
Breadth
to
Tones—Chorus
Effect...
cscsssscssscsssssssssscsesessesssesesseenesnsansssseessseeneessenssssnesesneanesessestenssnensnens
Changing
the
Sound’s
Pitch
by
Octaves—Octave
Shift
........ccccsesessesesseseensseeseseeneessseesssssesssscsssassassneessseeasanessssensesees
Playing
Using
One
Tone
for
the
Entire
Keyboard—Whole
Keyboard
Play
Playing
With
Different
Tones
in
the
Left
and
Right
Hand—Split
Play
......0.
cose
Sounding
Two
Layered
Tomes—Layer
Play.........sccsssssssessssssscseresserosensssssssseenosscnssssnsesossssssscevssssassussosssavonvasssessonveenseeeets
Style
Play
Settings:for
Playing
in:
Style
Play.
isis
sccevsdevsssces
siseasatecaseserccassccess
gasadscsdcesivisatissount
casgescasdasacseacdt0és
adi
deaausavdaaigdoessangsovess
32
SOLE
CHING:
St
lOS
aves
casessssusdadas
tatson
cette
Saveperatesendshaenesesassetnagsateeschseniuspacanatsedes
suteh
udehssuleucusdadesiesstevtssicstealia
darscapavesicestsaverdes
33
Starting-and
Stopping
Styles
aie.
cicsiscesicnssvscsdsieset
salen
astaoes
aie
ods
palisebtee
avtia
ei
MOAN
steigacecstels
Haeise.
bean
abiatancaretegs
eats
33
Adjusting
the
Tempo:of
a
Style’......iccaiscccscssesssavosensdscccesiueecuttatesecsconsredsaverersencosaascacvenssatvucss
Adjusting
Accompaniment
and
Melody
Volume
Balance—The
[Balance]
Slider
Switching:
Style
Arrangement
s:...5
isco
iseccveceterees
tio
tawdlsenia
titan
dint
ianaietaiad
lisedeets
ATYANPEMENE
LY
PCr
cscs
d
ssccstes
sacavsnest
Wosesssacessdbabs
ses
cask
saassspasvagaoanesiaedens
quctasasvasdaveassavtiasbatsavasubans
Accompaniment
Pattern
Type
Easy
Fingering
for
Chords—Chord
Intelligence
Using
Style
Disks
yi
scahitscass
iksinthenstesasden
tol
Gbcaton
caves
crovicceees
racer
secttiee
dived
ssiecstas
insets
addieds
didstdndseiel
Oucase
auaqinve
peesia
uatastacg
Adding
Harmony
to
the
Melody—The
[Melody
Intelligence]
ButtOn...........ccccceseeessseeseseesneneessrescseeereresrenseeenens
Adjusting
the
Volume
of
Each
Part—The
Part
Volume
Buttons
........cccccscceesessescessesesesseseesseseessseeseseesseresenereesees
Recording
and
Playback
Recording
Performances
(Normal
Recording).......cccccessesesesscsesessesesssnesssseesesesscseseveseeseesenssesscsrasnsssseesnsseeansetseneazaes
Playing
Back:
Recorded
Performances.
isci.s.cc.csccccecssscsvsseteseasonecsctetueva
vonsvscetsnschocastottotsasseterseudcesdatsonegeseuectscsasstseceprevatesd
Erasing
Recorded:
Performances
sissies.
cbsssecsectediccsicesensesdeysessasbadtsnesnadsd
dans
sscayieosssisevl
tondetsbsdd
angedosdetedees
cvactenstsibSotbuises
cess
Saving
Recorded
Performances
to
Disk—Save...
Saving
After
Converting
Data
to
SMF
Formiat..........ccccscssssssseseseesssvessseescseescseessasesseaneesssssarseesesssseeseaneensseensseaseaneneness
maving
User
Stylesiscii$
cccenassteta
si
heatet
taxes
ett
ateanea
die
elects
cas
th
deeb
say
beettrenistea
dive
aaee
in
atiadigs
Grea
Riedaclenedeea
eaten
ite