manuals.online logo
Brands
  1. Home
  2. •
  3. Brands
  4. •
  5. Roland
  6. •
  7. Synthesizer
  8. •
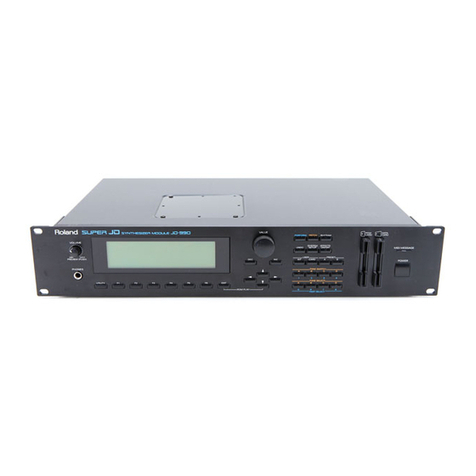
  9. Roland JV-2080 Owner's manual

Roland JV-2080 Owner's manual

Other manuals for JV-2080

1

Other Roland Synthesizer manuals

Roland Sound Canvas SC-155 User manual

Roland

Roland Sound Canvas SC-155 User manual

Roland RS-505 Operating and maintenance manual

Roland

Roland RS-505 Operating and maintenance manual

Roland Sound Canvas SC-55ST User manual

Roland

Roland Sound Canvas SC-55ST User manual

Roland SH-101 Operating and maintenance manual

Roland

Roland SH-101 Operating and maintenance manual

Roland JUNO-Gi User manual

Roland

Roland JUNO-Gi User manual

Roland RODGERS User manual

Roland

Roland RODGERS User manual

Roland RS-09 User manual

Roland

Roland RS-09 User manual

Roland V-Synth User manual

Roland

Roland V-Synth User manual

Roland SH-1000 User manual

Roland

Roland SH-1000 User manual

Roland JV-1080 User manual

Roland

Roland JV-1080 User manual

Roland GW-7 User manual

Roland

Roland GW-7 User manual

Roland SynthPlus10 HS-10 User manual

Roland

Roland SynthPlus10 HS-10 User manual

Roland System-100M 190 User manual

Roland

Roland System-100M 190 User manual

Roland HS-80 User manual

Roland

Roland HS-80 User manual

Roland SH-01A User manual

Roland

Roland SH-01A User manual

Roland JV80 User manual

Roland

Roland JV80 User manual

Roland D-70 Operating and maintenance manual

Roland

Roland D-70 Operating and maintenance manual

Roland SH-09 User manual

Roland

Roland SH-09 User manual

Roland Lucina AX-09 User manual

Roland

Roland Lucina AX-09 User manual

Roland Fantom User manual

Roland

Roland Fantom User manual

Roland SH-09 Operating and maintenance manual

Roland

Roland SH-09 Operating and maintenance manual

Roland Lucina AX-09 User manual

Roland

Roland Lucina AX-09 User manual

Roland JD-990 Operating and maintenance manual

Roland

Roland JD-990 Operating and maintenance manual

Roland juno-ds61 User manual

Roland

Roland juno-ds61 User manual

Popular Synthesizer manuals by other brands

NEON CAPTAIN Radioator user manual

NEON CAPTAIN

NEON CAPTAIN Radioator user manual

Joranalogue Contour 1 user manual

Joranalogue

Joranalogue Contour 1 user manual

Full Bucket Music Mono/Fury manual

Full Bucket Music

Full Bucket Music Mono/Fury manual

IK Multimedia UNO Synth PRO X user manual

IK Multimedia

IK Multimedia UNO Synth PRO X user manual

Kawai MP7 Software update

Kawai

Kawai MP7 Software update

Behringer DEEPMIND 12 quick start guide

Behringer

Behringer DEEPMIND 12 quick start guide

Yamaha S90 ES owner's manual

Yamaha

Yamaha S90 ES owner's manual

Moog Minitmoog 300A Owner's service manual

Moog

Moog Minitmoog 300A Owner's service manual

Gotharman Gotharman's anAmoNo-box user manual

Gotharman

Gotharman Gotharman's anAmoNo-box user manual

QuStream HDFS-550 Technical manual

QuStream

QuStream HDFS-550 Technical manual

Yamaha V50 Authorized product manual

Yamaha

Yamaha V50 Authorized product manual

Akai AX80 Operator's manual

Akai

Akai AX80 Operator's manual

Octave Cat SRM Service manual

Octave

Octave Cat SRM Service manual

Dreadbox Murmux Initiate manual

Dreadbox

Dreadbox Murmux Initiate manual

neutral labs ELMYRA 2 Build guide

neutral labs

neutral labs ELMYRA 2 Build guide

Waldorf KYRA user manual

Waldorf

Waldorf KYRA user manual

EFM VCADSR - 3510 manual

EFM

EFM VCADSR - 3510 manual

Yamaha MOTIF XF Reference manual

Yamaha

Yamaha MOTIF XF Reference manual

manuals.online logo
manuals.online logoBrands
  • About & Mission
  • Contact us
  • Privacy Policy
  • Terms and Conditions

Copyright 2025 Manuals.Online. All Rights Reserved.

The Roland JV-2080 Synthesizer Module builds on the power
of the popular Super JV-1080 Synthesizer Module. This versa-
tile 16-part multitimbral synthesizer module features 64-voices
of polyphony and a total of 768 Patches including a bank for
General MIDI. The JV-2080s eight expansion slots for SR-
JV80 Expansion Boards provide a wide palette of sounds for
any project. Five effect processors and cool sync features offer
additional tools. If you are new to the JV-2080 and would like
an overview of some basic concepts, refer to the JV-2080
TurboStart, which is available from our FaxBack system (docu-
ment #20054) or from our Website (www.rolandus.com). This
supplemental document is not meant to be a replacement of
the the Owners Manual, but simply a collection of answers to
common questions received in the Product Support Department
at Roland U.S. For more in-depth information, please consult
the JV-2080 Owners Manual.
We will cover the following topics in this document:
I. How do I set up a Performance for sequencing?
II. How do I select Patches via MIDI?
III. How do I create a custom drum kit?
IV. How do I pan individual instruments in a drum kit?
V. How do I change the speed of the rotary effect via
MIDI?
VI. How do I sync the LFO to an internal or external clock?
VII. How do I sync phrase/beatloops to a sequencer?
VIII. How do I sync the effects to an external clock?
IX. How do I copy the effects settings of a Patch to a
Performance?
X. What is the difference between the various effect routing
options?
XI. How do I route parts through the direct outputs using an
insert effect (EFX)?
XII. How do I use system controllers?
XIV. How do I perform data transfers and bulk dumps?
TTooppiiccss
©1999 Roland Corporation U.S. JV-2080 Frequently Asked Questions Faxback # 21074 Page 1
JJVV--22008800
FFrreeqquueennttllyy
AAsskkeedd
QQuueessttiioonnss
SN101 v1.0
March 4th, 1999
®
ÂØÒÅÎ
SS
SSuu
uupp
pppp
ppll
llee
eemm
mmee
eenn
nntt
ttaa
aall
ll
NN
NNoo
oott
ttee
eess
ss
The JV-2080 has three modes: Performance, Patch, and
Rhythm. Performance mode allows you to have multiple
instruments playing at the same time, which is ideal for
sequencing. Each Performance contains up to 15 different
Patches, plus a Rhythm Kit. To configure your MIDI gear
with the JV-2080, connect a MIDI cable from the MIDI OUT
of your MIDI interface or hardware sequencer to the MIDI IN
of the JV-2080. The JV-2080 contains many preset
Performances that can be used for sequencing. Lets take a
look at one of these Performances and get familiar with
some of the parameters commonly used when sequencing.
1) Press PERFORM, so it is lit.
2) Press PRESET (located in the upper right section of
the front panel).
3) Use the VALUE dial to select Preset A: 01 [Seq:Pop].
This Performance is ideal for sequencing because each
Part is set to its own MIDI channel.
4) Press F3[PART] to access the Part parameters includ-
ing volume, panning, etc.
5) Press F6[PALETTE]. Now, instead of
looking at the parameters for a single
Part, we can see the parameters for
eight Parts at the same time (see Fig.1).
6) Use the CURSOR buttons to select the
desired Part(1-16).
7) Set the MIDI transmit channel on your keyboard to
match the number of the Part you want to hear. For
example, MIDI channel 1 plays the instrument (Patch)
assigned to Part 1. MIDI channel 2 plays Part 2, etc.
In addition to choosing sounds from the front panel, all of the
sounds in the JV-2080 can be accessed through MIDI. There
are 128 Program Change messages available in MIDI. For
instruments that contain more than 128 sounds, Bank Select
messages (continuous controllers 0 and 32) are used to select
groups (banks) of Patches. The JV-2080 uses controller 0 to
select the main Patch bank that you want (e.g., internal mem-
ory, card, or expansion board), then it uses controller 32 to
choose the appropriate sub-bank (e.g., expansion board A,
Patches 1-128). Software sequencers (e.g., Cubase, Logic,
Performer, Vision, Cakewalk) often have built-in Patch lists for
various MIDI instruments. Simply
Fig. 1
Palette View of the
Perform/Part screen
©1999 Roland Corporation U.S. JV-2080 Frequently Asked Questions Faxback # 21074 Page 2
®ÂØÒÅÎ Supplemental Notes JV-2080 Frequently Asked Questions
I. How Do I Set Up a Performance for Sequencing?
II. How Do I Select Patches Via MIDI?
®ÂØÒÅÎ Supplemental Notes JV-2080 Frequently Asked Questions
configure your software so it recognizes it is working with
the JV-2080. A Patch list is usually accessed in a Patch col-
umn within the software. If your software does not have a
specific Patch list for the JV-2080, then you can use the
following chart (see Fig. 2) to input the appropriate bank
select and program change messages manually.
These commands must appear in the following order: con-
troller 0, controller 32, then the program change. Some
sequencers use a single bank number in place of CC0 and
CC32. If that is the case, use the value listed under Bank #
in Fig. 2 in place of the CC00 and CC32 values. Be sure to
leave some blank space (one measure is usually enough) at
the beginning of your song, so your keyboard will have time
to recall the right Patches before the music starts.
For example, to call up Patch 21 from the Wave Expansion
Board A, put the following information into your sequence:
Controller 0 = 84
Controller 32 = 0
Program Change = 21
FFiigg..
22
BBaannkk
SSeelleecctt
MMeessssaaggeess
80 0 0-127 10,240 User (INT) #1-128
82 0 0-127 10,496 User (CRD) #1-128
81 0 0-127 10,368 Presets A #1-128
81 1 0-127 10,369 Presets B #1-128
81 2 0-127 10,370 Presets C #1-128
81 3 0-127 10,371 Presets D (GM) #1-128
81 4 0-127 10,372 Presets E #1-128
83 0 0-127 10,624 PCM Card #1-128
84 0 0-127 10,752 Expansion Board A #1-128
84 1 0-127 10,753 Expansion Board A #129-255
84 2 0-127 10,754 Expansion Board B #1-128
84 3 0-127 10,755 Expansion Board B #129-255
84 4 0-127 10,756 Expansion Board C #1-128
84 5 0-127 10,757 Expansion Board C #129-255
84 6 0-127 10,758 Expansion Board D #1-128
84 7 0-127 10,759 Expansion Board D #129-255
84 8 0-127 10,760 Expansion Board E #1-128
84 9 0-127 10,761 Expansion Board E #129-255
84 10 0-127 10,762 Expansion Board F #1-128
84 11 0-127 10,763 Expansion Board F #129-255
84 12 0-127 10,764 Expansion Board G #1-128
84 13 0-127 10,765 Expansion Board G #129-255
84 14 0-127 10,766 Expansion Board H #1-128
84 15 0-127 10,767 Expansion Board H #129-255
CC 00 CC 32 Program # Bank # Patch Bank Patch Number
Selecting Patches Via MIDI (continued)
©1999 Roland Corporation U.S. JV-2080 Frequently Asked Questions Faxback # 21074 Page 3
FFiigg..
33
WWaavvee
PPaarraammeetteerr
PPaaggee
®ÂØÒÅÎ Supplemental Notes JV-2080 Frequently Asked Questions
The default instruments within a ROM rhythm kit can be
assigned to other instruments. You can quickly select a
percussion instrument to be edited by using a MIDI key-
board or other controller. Use the following procedure to
customize the instruments used in a drum kit:
1) Press RHYTHM.
2) Press F2[WG] to display the Wave
parameter page (see Fig. 3).
3) Press a key on your MIDI keyboard to
select a percussion instrument.
4) Rotate the VALUE dial or use the
INC/DEC buttons to select the desired
instrument.
5) Repeat steps 3-4 to configure additional percussion
instruments as desired.
6) Press UTILITY to access the WRITE function when
you are finished.
7) Press F1[WRITE] to display the Write page.
8) Rotate the VALUE dial to select a User location
(User 01-02).
9) Press F6[EXECUTE] to store the current settings to
a User location. This will erase the settings for the
User kit selected in step 8 and replace them with the
current settings. If you do not want to erase the
selected User kit, press EXIT.
Every rhythm kit in the JV-2080 can be customized so
that individual instruments are panned within the stereo
field. Both left and right outputs must be connected in
order for these changes to be heard. Remember to write
your changes into a User location once editing is com-
pleted. Use the following procedure to pan individual
instruments in a rhythm kit:
1) Press RHYTHM.
2) Press F4[KEY TVA] to display level and pan parameters.
3) Use the CURSOR buttons to select Tone Pan.
4) Press the appropriate key on your keyboard to
select the desired instrument.
5) Use the VALUE dial to set the panning for that
instrument as desired.
©1999 Roland Corporation U.S. JV-2080 Frequently Asked Questions Faxback # 21074 Page 4
III. How Do I Create a User Drum Kit?
IV. How Do I Pan Individual Instruments in a Rhythm Kit?
Currently Selected
Percussion Instrument
®ÂØÒÅÎ Supplemental Notes JV-2080 Frequently Asked Questions
6) Repeat steps 4-5 to adjust the panning for additional
instruments in the Rhythm kit as desired.
7) Press UTILITY.
8) Press F1[WRITE] to display the Write parameter page.
9) Use the VALUE dial to select a User location (01-02).
10) Press F6[EXECUTE] to save the changes to your kit.
This will erase the settings for the User kit selected in
step 9 and replace them with the current settings. If you
do not want to erase the selected User kit, press EXIT.
The JV-2080 allows you to control the speed of the
rotary speaker effect algorithm remotely via MIDI contin-
uous controller messages. Assigning rotary speed to an
expression pedal is a useful feature that saves your
hands from having to trigger the effect with a bender or
by applying aftertouch. For the following example, we
are going to control rotary speed from a pedal connected
to an external device:
1) Set the external device so that pressing the pedal
transmits Foot Controller messages (CC#4).
2) Press PATCH.
3) Press PRESET.
4) Press the TONE SWITCH 1 button (under USER).
5) Use the VALUE dial to select PR-A:54 Rocker Spin.
6) Press F6[EFFECTS] to display the Effects parameter
page. 7) Press F3[EFX Ctl] to display the Control
Source parameter page (see Fig. 4).
8) Use the CURSOR buttons to select the
EFX Ctrl 1 Control Source parameter.
9) Use the VALUE dial to select Foot.
10) Use the VALUE dial to set the Depth
parameter to +63.
Other Patches that use the rotary effect algorithm are:
PR-A:49 AugerMentive
PR-A:50 Perky B
PR-A:51 The Big Spin
PR-A:52 Roller Spin
©1999 Roland Corporation U.S. JV-2080 Frequently Asked Questions Faxback # 21074 Page 5
Panning Individual Instruments in a Drum Kit (continued).
V. How Do I Change the Speed of the Rotary Effect Via MIDI?
FFiigg..
44
CCoonnttrrooll
SSoouurrccee
PPaarraammeetteerr
PPaaggee
UUssiinngg
eeffffeeccttss
oonn
aa
rrhhyytthhmm
iinnssttrruummeenntt
ccaann
aaffffeecctt
iittss
ppaann
ppoossiittiioonn..
®ÂØÒÅÎ Supplemental Notes JV-2080 Frequently Asked Questions
The Low Frequency Oscillator (LFO) adds varying rates
and depths of modulation to a given waveform in a Patch.
It is often desirable to use the LFO to accentuate the char-
acter of a Patch. The LFO is commonly used to control
pitch, volume, or panning. The JV-2080 lets you sync the
tempo of the LFO to its internal clock, so the changes in
sound caused by the LFO sound in time with the internal
clock tempo of the JV-2080. Use the following procedure
to edit a Patch so its LFO syncs to an external clock:
For a Patch:
1) Press PATCH.
2) Press F5[LFO&CTL] to
display the LFO parame-
ter pages (see Fig. 5).
3) Press F1[LFO 1] or
F2[LFO 2] to select one
of two LFOs.
4) Use TONE SELECT [1]-[4] to select the Tone to
which the settings will apply.
5) Use the CURSOR buttons to select Ext Sync.
6) Use the VALUE dial to select CLK.
7) Use the CURSOR buttons to select Rate.
8) Use the VALUE dial to specify the rate/speed of the
LFO cycle (e.g.,h , q , e ).
9) Press F1 for COMMON.
10) Press F1 for GENERAL.
11) Use the CURSOR buttons to select Clock Source.
12) Use the VALUE dial to set the Clock Source to
SYSTEM.
©1999 Roland Corporation U.S. JV-2080 Frequently Asked Questions Faxback # 21074 Page 6
VI. How Do I Sync the LFO to the Internal or External Clock?
FFiigg..
55
LLFFOO
PPaarraammeetteerr
PPaaggee
YYoouu
ccaann
aallssoo
ccoonnttrrooll
tthhee
ssppeeeedd
ooff
tthhee
rroottaarryy
ssppeeaakkeerr
eeffffeecctt
iinn
PPeerrffoorrmmaannccee
mmooddee,,
aalltthhoouugghh
yyoouu
wwiillll
nneeeedd
ttoo
mmaakkee
ssuurree
tthhaatt
tthhee
MMIIDDII
rreecceeiivvee
cchhaannnneell
ffoorr
tthhee
PPaarrtt
yyoouu
wwiisshh
ttoo
aaffffeecctt
iiss
tthhee
ssaammee
aass
tthhee
ccoonnttrrooll
cchhaannnneell
((oonn
tthhee
SSyysstteemm
MMIIDDII
ppaaggee))..
Controlling the Rotary Effect Via MIDI (continued)
®ÂØÒÅÎ Supplemental Notes JV-2080 Frequently Asked Questions
Now lets write this edited Patch into a User location to
be used in a Performance:
1) Press UTILITY.
2) Press F1[WRITE] to call up the Write screen.
3) Use the VALUE dial to select a User location.
4) Press F6[EXECUTE] to write.
5) Press PERFORMANCE.
6) Press F3[PART] to display the Part Param page.
7) Press F6[PALETTE] to display the Part Palette page.
8) Use the LEFT/RIGHT CURSOR buttons to select a Part.
9) Use the UP/DOWN CURSOR buttons to select
Patch Group.
10) Use the VALUE dial to select USR.
11) Press the CURSOR DOWN button once to select
Patch Number.
12) Use the VALUE dial to select the Patch that was
edited and written to the User bank in steps 3 and 4.
In addition to syncing its LFOs to an internal clock, the
JV-2080 can also set its LFOs to sync to external MIDI clock
messages. For example, the LFO can be synced to a MIDI
sequencer so that the rate of modulation is in time with the
tempo of the song. Use the following procedure to sync the
LFOs in the JV-2080 to external MIDI clock:
1) Select a Patch that uses external LFO sync (as
described previously).
2) Press PERFORM.
3) Press F1[Common].
4) Use the CURSOR buttons to select Clock Source.
5) Use the VALUE dial to set the Clock Source to
SYSTEM.
6) Press SYSTEM.
7) Press F1[SETUP].
8) Use the CURSOR buttons to select Clock Source.
9) Use the VALUE dial to set the Clock Source to MIDI.
©1999 Roland Corporation U.S. JV-2080 Frequently Asked Questions Faxback # 21074 Page 7
TThhee
tteemmppoo
ffrroomm
tthhee
eexxtteerrnnaall
ddeevviiccee
wwiillll
bbee
ddiissppllaayyeedd
uunnddeerr
EExxtteerrnnaall
TTeemmppoo
oonn
tthhee
PPeerrffoorrmmaannccee
CCoommmmoonn
ssccrreeeenn..
Syncing the LFO (continued)
TTiipp
YYoouu
ccaann
eenntteerr
PPaattcchh
EEddiitt
mmooddee
ffrroomm
wwiitthhiinn
PPeerrffoorrmmaannccee
MMooddee
bbyy
hhoollddiinngg
PPEERRFFOORRMM
aanndd
pprreessss--
iinngg
PPAATTCCHH..
AAnnyy
eeddiittss
ddoonnee
hheerree
wwiillll,,
hhoowweevveerr,,
bbee
tteemmppoorraarryy
uunnttiill
tthhaatt
PPaattcchh
iiss
ssaavveedd
ttoo
aa
UUsseerr
llooccaa--
ttiioonn..
®ÂØÒÅÎ Supplemental Notes JV-2080 Frequently Asked Questions
The JV-2080 has eight expansion slots for SR-JV80
Expansion Boards. Some of these expansion boards (e.g.,
SR-JV80-10 Bass & Drums, SR-JV80-11 Techno, SR-JV80-
12 Hiphop) have phrase/beatloops that are set to play at a
specified tempo. The JV-2080 allows each tone [1]-[4] used
in a Patch to be synced to a sequencers clock so that the
tempos match. This sync feature enables you to manipu-
late beatloop tempos to match the tempo of your song. Use
the following procedure to set the JV-2080 to sync a
phrase/beatloop to an external MIDI clock source:
1) Hold PERFORM and press PATCH.
2) Press F2[WG] to select the Waveform Display page.
3) Press F1[WG Prm] to
select the Waveform
Parameter page (see
Fig.6).
4) Use the CURSOR buttons
to select a Tone [1]-[4]
which uses a wave
(phrase/beatloop) that has
a tempo (BPM) display.
5) Use the VALUE dial to set the Tone Delay Mode to
TEMPO-SYNC.
6) Press PERFORM.
7) Press F1[COMMON] to display the Performance
Common parameters.
8) Use the CURSOR buttons to select Clock Source.
9) Use the VALUE dial to select SYSTEM.
10) Press SYSTEM.
11) Press F1[SETUP] to display the global system
parameter page.
12) Use the CURSOR buttons to select Clock Source.
13) Use the VALUE dial to set the Clock Source to MIDI.
©1999 Roland Corporation U.S. JV-2080 Frequently Asked Questions Faxback # 21074 Page 8
FFiigg..
66
WWaavveeffoorrmm
PPaarraammeetteerr
PPaaggee
VII. How do I sync Phrase/Beatloops to a
Sequencer (External Clock Source)?
TTiippIItt
iiss
aa
ggoooodd
iiddeeaa
ttoo
ssaavvee
tthhiiss
PPaattcchh
ttoo
aa
UUsseerr
llooccaattiioonn,,
aass
ddeettaaiilleedd
iinn
tthhee
pprreevviioouuss
sseeccttiioonn
((SSyynncciinngg
tthhee
LLFFOO
--
ppaaggee
77)),,
ffoorr
ffuuttuurree
uussee..
®ÂØÒÅÎ Supplemental Notes JV-2080 Frequently Asked Questions
The JV-2080 allows some of the internal effect algo-
rithms to be synced with external MIDI clock. For exam-
ple, you can set delay times to sync to the tempo of
your song. This is a real time-saver because it saves you
from having to adjust the settings manually. The JV-
2080s effect settings will be controlled by the tempo of
your sequencer.
Use the following procedure to sync 19:TRIPLE-TAP-
DELAY to an external clock:
1) Press PERFORM.
2) Press F5[EFFECTS] to display the Effects page.
3) Press F2[EFX Prm] to display the Effects Parameter page.
4) Use the CURSOR buttons to select Delay Center.
5) Use the VALUE dial to select e (an eighth note value).
6) Use the CURSOR buttons to select Delay Right.
7) Use the VALUE dial to select e (an eighth note value).
8) Use the CURSOR buttons to select Delay Left.
9) Use the VALUE dial to select x (a sixteenth note
value).
10) Press PERFORM.
11) Press F2[WG] to display the Wave Parameter page.
12) Use the CURSOR buttons to select Clock Source.
13) Use the VALUE dial to select SYSTEM.
14) Press SYSTEM.
15) Press F1[SETUP] to select the Setup parameter
page.
16) Use the CURSOR buttons to select Clock Source.
17) Use the VALUE dial select MIDI.
The following effects can be configured so that they
sync to an external MIDI clock:
16:STEP-FLANGER
19:TRIPLE-TAP-DELAY
20:QUADRUPLE-TAP-DELAY
©1999 Roland Corporation U.S. JV-2080 Frequently Asked Questions Faxback # 21074 Page 9
VIII. How Do I Sync the Effects to an External Clock?
®ÂØÒÅÎ Supplemental Notes JV-2080 Frequently Asked Questions
Often, it is desirable to use Patches in Performance
Mode and have them sound exactly as they do in Patch
Mode. The JV-2080 allows you to copy the effects set-
tings of a Patch to a Performance. This enables you to
replicate the reverb, chorus, and insert effect (EFX) set-
tings from Patch Mode in your Performance. Use the fol-
lowing procedure to copy the effects settings of a Patch
to a Performance:
1) Press UTILITY.
2) Press F2[COPY] to select the Copy function.
3) Press F2[EFFECT] to
select the Effect Copy
page (see Fig. 7).
4) Use the CURSOR buttons
to select the Source
parameter.
5) Use the VALUE dial to select PATCH.
6) Use the CURSOR buttons and the VALUE dial to select
the Patch from which you wish to copy the effects.
7) Use the CURSOR buttons to select Copy Type.
8) Use the VALUE dial to select ALL.
9) Press F6[EXECUTE] to copy the effects from the
selected Patch to the Performance.
10) Press EXIT twice to return to Performance Play
Mode.
Once the Patch effects settings have been copied to the
current Performance, we need to ensure that Patches
assigned to the desired Parts are routed to the various
effects processors just as they would be in Patch Mode.
This is determined by the Output Assign setting for each
Part in the Performance. An Output Assign setting of
Pt (A, B, or C) indicates that the Patch assigned to
that Part will determine the EFX settings for the corre-
sponding processor (A, B, or C). Up to three Parts can
be routed this way. Use the following procedure to set
the output assignments for a Part:
1) Press F5[EFFECT] to display the Effects page.
2) Press F6[PALETTE] to view eight parts simultaneously.
3) Use the CURSOR buttons to select Output Assign
for the desired Part.
4) Use the VALUE dial to select Pt-A.
5) Use the CURSOR buttons to select Output Level.
©1999 Roland Corporation U.S. JV-2080 Frequently Asked Questions Faxback # 21074 Page 10
IX. How Do I Copy the Effects Settings of a Patch to a
Performance?
FFiigg..
77
EEffffeeccttss
CCooppyy
PPaaggee