Ronco Showtime ST3001WHGEN User manual

IMPORTANT: “Set It and Forget It” only after all instructional materials (written
And video) have been carefully followed.
Make sure food safely rotates without touching the heating element.
IMPORTANT SAFEGUARDS
When using electrical appliances, basic safety precautions should always be
Taken, including the following:
These 2 items: Grate Cover and Drip Tray must always be in place when
using your Rotisserie
1. Very important: Read all instructions and watch instructional video before using the machine.
2. To protect against electrical hazards, do not immerse cord, plug or appliance itself in water or other
liquids.
3. Do not touch hot surfaces. (NOTE: Glass door, top, back and sides of the rotisserie, as well as the 3-
Piece Food Steamer, Drip Tray, Grate Cover and Heating Element all get very hot during use and retain
heat after use – even when glass door is positioned underneath the unit) Always use adequate oven mitts
or gloves when handling these hot surfaces and when checking hot foods.
4. Close supervision is necessary when appliance is used by or near children.
5. Unplug rotisserie from outlet when not in use, and allow unit to cool thoroughly before putting on or
taking off parts, such as the Drip Tray and Grate Cover before cleaning.
6. Do not operate any appliance with a damaged cord or plug after the appliance malfunctions or is
dropped or damaged in any manner. Return the appliance to Popeil Inventions, Inc. for examination,
repair, electrical or mechanical adjustment.
7. Turn off and unplug the rotisserie if you smell or see smoke or fire. After it has cooled down, make
adjustments so nothing touches the heating element as the food rotates. Do not open the glass door until
it has cooled down. This is an electrical appliance, never put water in it, or on it, to cool it down or stop
it from smoking.
8. Do not use any attachments or anything that is not recommended by Popeil Inventions, Inc. The use of
such items may be hazardous.
9. Do not use outdoors.
10. Do not let cord hang over edge of table or counter or touch hot surfaces.
11. Do not place appliance on or near a hot gas or electric burner, in a heated oven or near easily flammable
material.
12. Use only on a stable, heat-resistant surface and place unit at least 8” (inches) from walls and at least 8”
(inches) clear above unit.
13. To disconnect, turn machine Timer to “OFF” position, then grip plug and pull from wall outlet. Do not
pull on cord.
14. Always unplug the oven before attempting to move it. Never move the unit when it contains hot oil,
liquids or hot foods.
15. Use extreme caution when working near the hot pieces and the Heating Element after using rotisserie as
these parts become (and remain) very hot. Also use maximum care when removing DripTray or disposing of
hot grease or other hot liquids.

16. When using the Rotisserie Baskets, be sure no small bones or other food can fall between or extend
beyond the wires and catch on the Grate Cover or Heating Element or anything else during rotation. It is
important to check while cooking. If the food is still not tight, stop the machine and carefully take out
the basket and tighten the lid.
17. Do not clean with a metal scouring pad. Pieces can break off the pad and touch electrical parts, creating
a risk of electrical shock. In addition, scouring pads may damage rotisserie finish.
18. Do not use appliance for other than its intended use.
19. Oversized foods or metal utensils must not be inserted in the appliance as they may create a fire or risk
of electrical shock.
20. Front, back, top, bottom and side surfaces become very hot. Do not allow contact with any objects other
than Steaming/Heating Tray in its proper operating position. A fire may occur if the rotisserie is covered
or touching flammable material, including curtain, draperies, walls, and the like, when in operation.
21. Do not place, or store, any objects or material other than food and manufacturer’s recommended
accessories in the rotisserie.
22. Unplug unit before changing/replacing the interior light bulb (25-watt small appliance bulb).
23. Polarized Electrical Plug: To reduce the hazard of potential shock, this item has a polarized plug (one
prong is wider then the other), which will fit only one way in a polarized outlet. If the plug does not fit
the outlet properly, turn the plug the other way; if it still does not fit, contact a qualified electrician for
assistance. Never use this plug with an extension cord unless it fits properly. DO NOT ATTEMPT TO
DEFEAT THIS SAFETY FEATURE
24. SHORT CORD INSTRUCIONS: A short cord is provided to reduce the risks of becoming tangled in or
tripping over a longer cord. Extension cords may be used if care is exercised in their use and the wattage
rating is at least as great as the wattage stamped on the back of the appliance. If an extension cord is
used, it should be arranged so that it will not drape over the counter or tabletop where it can be reach by
children or tripped over accidentally.
THIS PRODUCT IS FOR HOUSEHOLD USE ONLY
SAVE THESE INSTRUCTIONS
Please Don’t Take “Set It and Forget It” Literally
Always use caution by checking your Rotisserie from time to time.
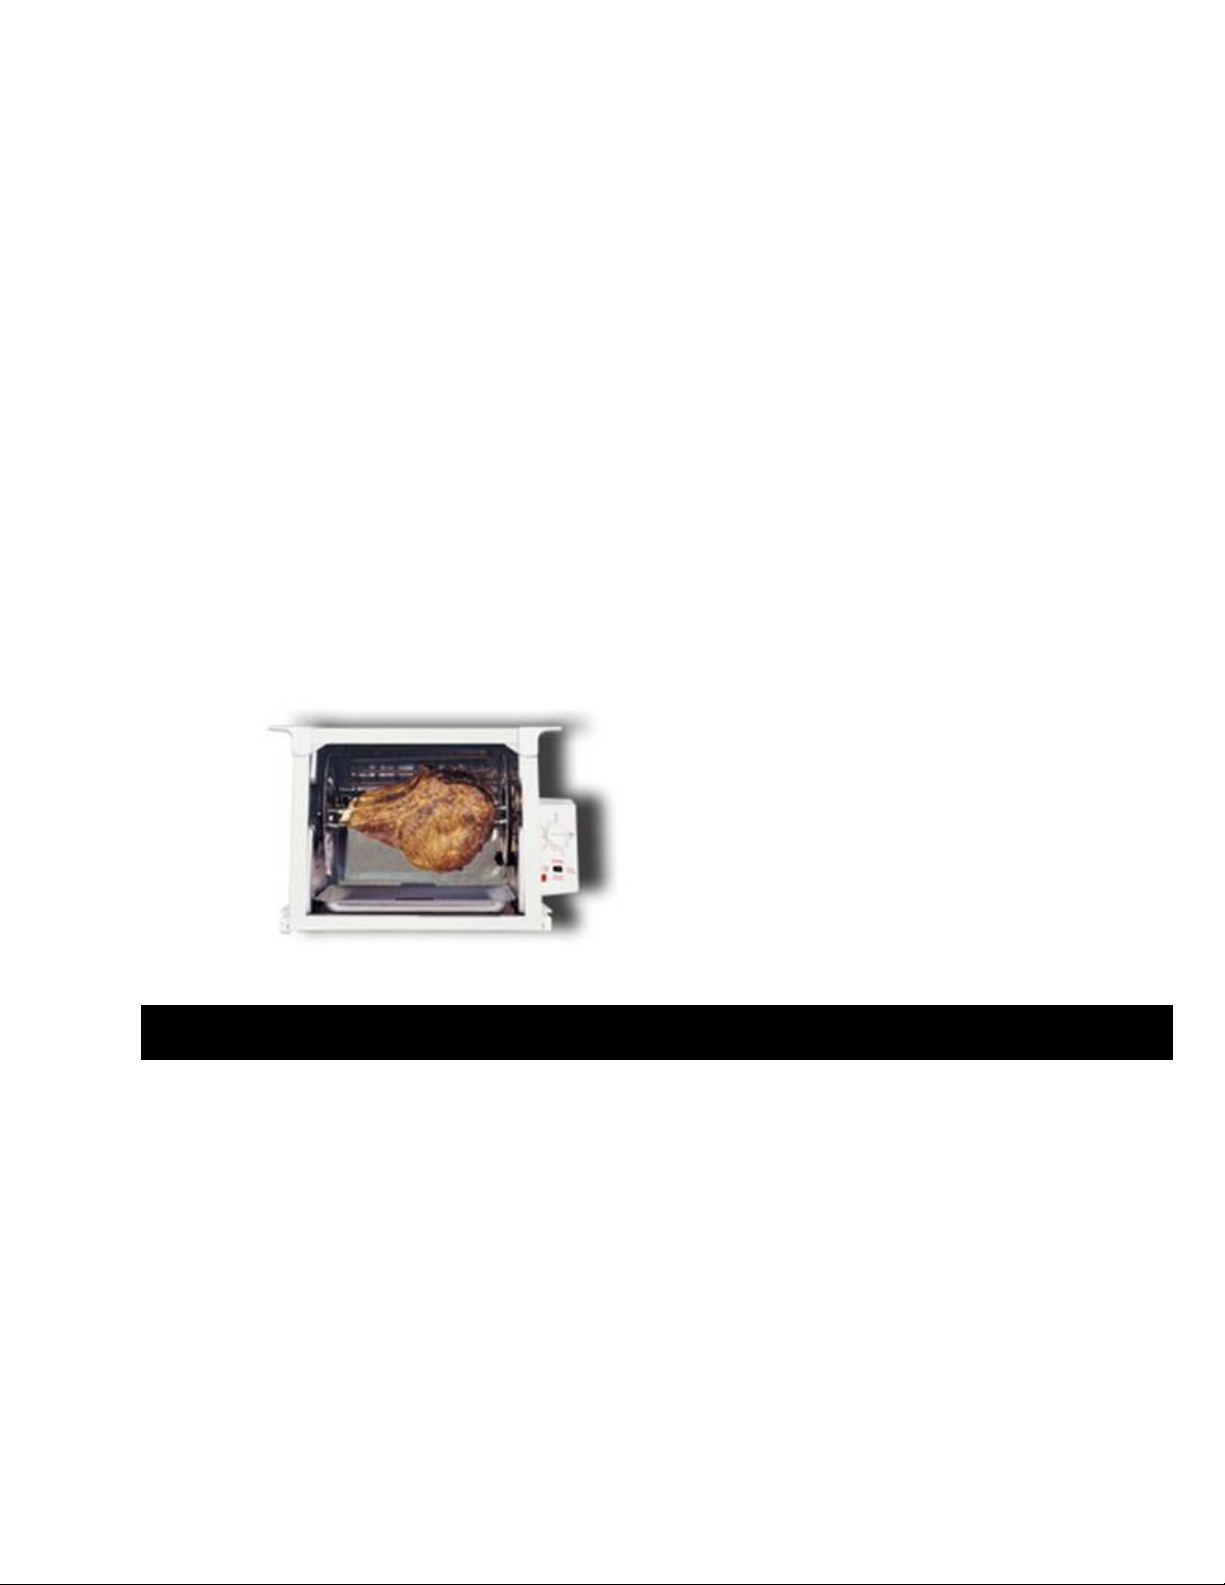
It is highly unlikely, but if you should see or smell smoke it’s because the food is rubbing against the hot
Heating element. This indicates that the meat or poultry is too big or it wasn’t tied properly – or the food is
off-center (lopsided) on the spit rods. If this occurs. Turn off and unplug your machine. Do not open
the glass door. Let it cool down.
Trim any excess fat or mat, retie your food tightly and be sure the food is centered on the spit rods so it
always rotates without touching the heating element.
Grease Flickers? Foods with high fat content can produce a small flicker of flame as fat spatters off the
heating element. This is normal. However, if you see smoke or fire, turn off and unplug the machine and
let it cool off. DO NOT OPEN THE DOOR until it has cooled down. Never put water on the
Rotisserie. After it has cooled, check to see if the food has touched the heating element.
Never cook food larger than recommended in the booklet for your model of Showtime™Rotisserie.
Ronco

Cleaning and Caring for your Rotisserie & BBQ Oven
Before First Use Be sure rotisserie is not plugged in. Wash and dry the removable parts in warm soapy
water. Never immerse the machine or the cord in water. Keep at least 8 inches of clearance on all sides
and do not place it under a cabinet when in use. A little smoking is normal when you first use the
machine.
The Door Set the right side pin in the bottom first then slide the left pin in.
After Use Unplug and allow it to cool before washing any parts. Note: The Heating Element cleans
itself and no other maintenance is necessary.
The Light is on when the heat is on. If you need to replace the bulb, it uses a 25 watt appliance bulb.
Any repairs should be handled only by an authorized service facility. Call Customer
Service at 818 772-6450 if all lines are busy, please use e-mail:
www.ShowtimeRotisserie.com
Copyright © 2000 by Popeil Inventions, Inc. All Rights Reserved. Ronco is a trademark of Ronco
Inventions, LLC and is used with its permission. No part of this book may be reproduced without
written permission of Popeil Inventions, Inc. U.S. and Foreign Patents Pending. Rev 6.14.0
INTRODUCTION
Table of Contents
4Parts & Accessories
6 Instructions
7 Rotisserie Baskets
8 Elastic Chicken Ties
9 Loading Spit Rods
10 Rib Roasts
11 6 Easy Steps – Chicken
13 Automatic Timer
14 Kabobs and Ribs
15 Rotisserie Turkey
16 Time & Temp Guide
17 Recipes
23 Warranty
24 Marinades & Rubs
{½ Seals in natural juices and drains off unwanted fat as it cooks. About ¼ cup of animal fat drips
off a 4 lb. chicken.
{½ Roast a wide variety of meats and vegetables from a single kabob to 2 chickens (side-by-side), up
to a 10 lb. turkey or a leg of lamb.
{½ Evenly browns chicken, roasts, seafood, vegetables, chops, steaks, hamburgers, sausages, hams,
pork loin roasts, and, with the optional kabob rods – even ribs!

{½ Automatic timer makes it easy to use and automatically shuts off when the time is up.
{½ Dishwasher safe the non-stick parts and the glass door are all dishwasher safe.
{½ The optional basket allows you to enjoy greater variety of rotisserie & BBQ foods and wraps
(placing foods in foil, then in basket).
{½ See-through glass door is durable and dishwasher safe.
{½ Lighted oven makes it easy and fun to watch your food cook.
{½ 3-piece Steaming and Heating Tray (Optional Accessory) fits right on top for your favorite
vegetables, sauces, gravies, etc.
{½ Energy Efficient. Cooks faster than a conventional oven but still used about half the electricity!
INTRODUCTION
Try Honey Lime Marinade Chicken with Herbs. See Page 24
CONTENTS: Based on which model and which options you have, you will find some or all of the
following items:
{½ Glass Door
{½ Gear Wheels with Spit Rods
{½ Grate Cover
{½ Drip Tray
{½ Spit Loading Base (Also used as a Carving Stand)
{½ BBQ Gloves
{½ Flavor Injector (Optional)
{½ Lid
{½ Steaming Partition
{½ Warming Tray
{½ Steaming & Heating Tray 3 Pieces (Optional Accessory)
{½ Elastic Food Ties
{½ Meat Thermometer (Optional Accessory)

{½ Instructions & Recipe Booklet
{½ Kabob Rods (Up to 8 – Optional)
{½ Standard Compact Rotisserie Basket
{½ Instructional Video
Order Desk 818 772-6450
7AM – 7PM Pacific Time and 24-Hour Phone Message Center
FAX 818 775-4665 ●e-mail www.ShowtimeRotisserie.com
CONTENTS & ACCESSORIES
CAUTION: Keep at least 8”clearance all around from walls, cabinets and other objects when using the
rotisserie to prevent heat damage. Don’t put charcoal briquets, hickory chips or anything else in the machine
that is not authorized by Popeil Inventions, Inc. Do not use under cabinets.
Very Important: Always put the Drip Tray and Grate Cover in place before operating
Never operate the Rotisserie without the Drip Tray and Grate Cover in place.
Helpful Hint: Use a strip of aluminum foil on your counter top under the front door opening to collect any
grease or moisture from roast beef during cooking.
Gear Wheel fits on the spit rods after food or basket is loaded in place.
Careful! Use Caution. Tips are sharp. Please Keep Hands Clear.
Spit Rods are connected to one Gear Wheel. Place the other Gear Wheel on after loading food.
Plastic Spit Loading Base keeps the Spit Assembly in place so you can load food in upright position
on a countertop or in a sink.
Kabob Rods (Accessories) Fits right in the holes on the Gear Wheels. After loading with food, carefully
insert the sharp end in the Gear Wheel first. See page 14
A Squeak? Put a drop or two of vegetable oil or olive oil on the Gear Wheel nub before inserting the Spit
Rod Assembly into the machine – Or use a straw to drop oil on the nubs while turning. But be careful if you
do it when the machine is turning or if it is hot.
INSTRUCTIONS
Rotisserie Basket
Recommend for hamburgers, chicken pieces, vegetables, whole fish and fish fillets, steaks, chops, cutlets
tri-tip roasts and all kinds of wraps – fish, meat, and vegetables! Be sure small pieces like chicken wing
tips don’t fall out the ends and catch as basket rotates.
After putting food into the basket, compress the basket lid very tight so no food can move around while
rotating. Be sure nothing extends out between the wire –like chicken wings or any small bones, etc.

After the basket is loaded and closed, set the Spit Rods in the gray Plastic Spit Loading Base. Line up the two
small loops on the Basket with the Spit Rods. Drop the Basket down on the Spit Rods, and match it to the
corresponding loops on the other end of the Rotisserie Basket.
Place the other Gear Wheel on the Spit Rods and just push down.
For example, keep the small bones of chicken wings securely toward the middle so they can’t slip out and
hang up on Grate Cover or Heating Element.
Check baskets occasionally and be sure the food is still tight. If not, stop the machine and carefully take out
the basket and tighten the lid.
When the food in the basket is done, you cam remove the basket by keeping it in a horizontal position.
Remember the food, basket and the Spit Assembly are HOT – take precautions.
Burnt Edges on Food? You can put a small strip of aluminum foil on the top and bottom edges inside the
basket to prevent burnt edges as it cooks.
Always use Caution with Hot Food and Metal Parts. The food, Basket and the Spit Assembly get HOT!
Always wear protective gloves when removing the basket. If you feel the optional gloves are not adequately
insulated enough to protect you from the hot surfaces you are handling, set whatever you are holding
down. You may want to use a thicker oven glove or mitt.
INSTRUCTIONS / BASKETS
Elastic Food Ties For Chickens
Elastic Food Ties are designed to be an easy-to-use method of securing poultry on the Spit Rods. It is very
important when using your Showtime™ Rotisserie that food is securely tied, and fits onto the Spit Rods so that
the food will not touch the Heating Element and is evenly centered all around.
It is recommended that you first remove any excess fat or loose hanging parts, as well as cut off the tail from
the chicken.
The illustration shows how to tie a bird with one or two ties.
Using 1 Tie
With one tie you go behind each wing, cross overt the back and pull it over the bottom of the bird and up the
front to hold the legs together. Then tuck the wings inside the tie.
If a Food Tie is too long, you can shorten it by tying a knot in it and cut off the excess with scissors.
Using 2 Ties
Using two ties, shorten then both and put one over the wings and one over the legs. Very easy.

You can also use several Food Ties to secure any bird. If you run out of food ties you can use butcher’s twine
until you restock.
Placing Chickens on the Spit Rods
There are two ways to load the Spit Rods.
#1 Hold the tied poultry or meat down securely with one hand while firmly pushing the Spit Rods into the bird,
through the meaty portion of the breast area. The Spit Rods are sharp so always be careful not to puncture your
hand.
#2 Try putting the food on by using the Spit Rods in the Loading Base and put the chicken on breast first using
gravity to help. Be sure you center the food within the area of the tow Gear Wheels. Also balance the food so
the weight is evenly distributed. See details on page 11.
Be careful to keep your hands clear of the pointed rods as they exit through the meat.
After the food is held securely on the Spit Rods, put the other Gear Wheel in place. The Spit Assembly can now
be placed in the Rest Area just inside the door.
The Rest Area located just inside the machine so you can rest your loaded Spit Rods and easily adjust your
food and add kabob rods, etc.
ELASTIC FOOD TIES/LOADING THE SPIT RODS
Small Chickens or Game Hens Side-by-Side
You can also rotate two small chickens or game hens side-by-side. Place Spit Assembly in vertical position with
platform underneath. Push the birds on the Spit Rods through their centers, and pierce wing to wing. Place the
firs tied chicken on its side and run both Spit Rods through it. Duplicate this method for the second bird.
Leave a little space between the two birds so they can brown faster and more evenly. Keep all parts within the
Gear Wheels and centered all around.
Loading the Spit Rods
Important: Food Must Be Centered
Put Spit Rods through center of food so it will be balanced and the food does not touch the heating element as it
rotates. This is important for large foods like turkeys, standing rib roasts, 2 chickens side-by-side or any
large piece of meat that goes directly onto the spit rods. Small foods and pieces go in a basket.
TRIM OFF ANY EXCESS OR LOOSE PIECES
Trim turkeys, standing rib roasts and other large food to be sure noting (bones, meat or skin) hangs over or
extends beyond the Gear Wheels. Cut excess and tie it down with string as necessary. Only turkeys up to 10lbs.
in smaller/compact models.
Rib Bones Always to the Left and Parallel to the Spit Rods! –Up to 5 lb Roasts only. Always trim fat and
any loose pieces from roasts, turkeys, chickens, hams, etc.
Rib Roasts
Standing Rib Roasts should always be loaded with the bones on the left side opposite from the small turning gear
on the right side and the heavier meat on the right side. Also put the spit rods through the meat between the bones.

When loading a rib roast start through fat, meaty end and move the spit rods between (or on top of) the bones.
Keep the meat evenly distributed on the rods. You may have to make a couple of tries to not run into a bone.
If any food scrapes or hangs up, stop immediately. Trim with scissors and reload the spit rods so that nothing
touches the top, bottom, sides or heating element.
Helpful Hint: Late for Dinner?
No problem, just set the function switch to “No Heat Rotation” and keep your food warm and the juices evenly
distributed. Up to 15-20 minutes is okay, after that the food cools down.
LOADING THE SPIT RODS
6 Easy Steps to Great Rotisserie Chicken
1. Wash the chicken with warm water (so food is not cold when it goes in the Rotisserie) and remove any parts
from the cavity (giblets, etc). Cut away excess fat and skin so hot air can get into the cavity.
Tie the wings and legs down. Use one or two of the Elastic Food Ties (if they are too big for your chicken, knot
them smaller and cut off the excess).
2. Place the chicken on the Spit Rods breast first – be sure it’s centered and the weight is evenly distributed.
Careful to keep your hands clear of the sharp rod tips when loading Food vertically or horizontally
After loading the food on the Spit Rods, put the other Gear Wheel on.
Steaming & Heating Tray 3-Piece Optional Accessory.
Defrosts and heats frozen vegetables as well as heats and steams fresh vegetables, warms gravies, chili and sauces
– all while foods is rotating. Use no more than ½ cup water in each side of the bottom tray for steaming.
Glass door Shown open and tucked under the Rotisserie. Always keep the Door in up position when heating
element is on. The glass gets very hot – please don’t touch it.
3. Place the loaded Spit Rod Assembly in the “Rest” area just inside the rotisserie. Then slide it on back to the
cooking position. Pull up door up.
4. Set the 3-Position Switch to “Normal Rotation”. Set the Timer for15 min. per pound for a chicken (Example:
4 lbs. = 1 hour).
Problem? If a chicken wing comes free or any part touches the heating element or bottom grate during cooking,
simply turn the Timer to OFF. Let cool a bit. Please be careful – Both the food and the Rotisserie get hot. Make
any adjustments or retie your chicken. Then reset Timer.
5.When the chicken is done, carefully slide the door under the unit. But if you’re not ready to serve right away,
set the 3-Position Switch to “Heat Rotation” for 3-5 minutes help food cool down.
Standard Dial Timer
Automatically shuts off after the allotted time and a bell sounds. Use timer to turn on and off all functions.
Always turn to OFF (if unit is till running) before removing food.

3-Position Switch
Center: Normal Rotation for heat and rotation
Right: Pause to Sear allows you to stop food in front of the heating element (especially food in a basket). Char
or sear equal time on both sides. Try 3-5 minutes per side.
Left: No Heat Rotation use up to 20 minutes to keep the juices evenly distributed before serving.
SIX EASY STEPS CHICKEN
6.To Serve: Use the BBQ gloves and gently but quickly lift eh chicken and Spit Rod Assembly out while
supporting the chicken. You can place a bowl under the chicken. Remove end Gear Wheel, slide out Spit Rods
and serve.
These BBQ Gloves are intended only to help. They may not provide adequate heat protection. If food or
rotisserie parts feel hot, immediately put the item down and allow to cool. Use additional protection where
necessary.
Kabob Rods
Set Spit Assembly in the Rest Area (in place just inside the machine) before inserting the loaded Kabob Rods.
Load kabobs with Auto Turn Mechanism (spring ends) on the right so they will rotate. Turn the Spit Assembly
until all the kabobs are loaded in place. Slide the whole assembly back to the next notch – the cooking position.
When done carefully move the Spit Rod Assembly back to the Rest Area. Use BBQ Gloves to remove Kabob
Rods when done. Simply push the spring end inward and then pull the rods out one at a time.
Baby Back Ribs
Parboiling 15 minutes will make ribs more tender, less fat and easier to handle. To Rotisserie: Put the Spit Rods
in the Rest Area Position. Then place 4 empty kabob rods, next to each other in holes around the wheel, with the
spring ends on the left side. To place ribs on Kabob Rods, take the 1st rod and thread it through the end of one
side of the first rib. Take the 6th rod and thread it through the last rib. Wrap ribs around the 4 Kabob Rods
(already in position) until you come to the end. Then insert the 6th rod into the Gear Wheels. Repeat as needed if
doing more than one rack of ribs.
Rotisserie Turkey
When preparing a turkey, the wings and legs must be tied down securely to prevent them from touching the
Heating Element. You must use heavy string or twine instead of the Elastic Food Ties when fixing a turkey.
KABOB RODS & RIBS
As a turkey rotates, the wings and legs have tendency to bow out, so be sure to tie down four areas; twice on the
wings and twice on the legs. If any part of the turkey (or any game bird) touches the Heating Element,
immediately turn off the machine and retie the bird more securely. If the bird still touches the Heating Element
after the second tie-down, then the bird is too big and it must be trimmed down so that it doesn’t touch the
Heating Element and be sure it is centered.
Up to a 10 lb. Turkey
Be sure the turkey is tied with 4 heavy strings to tightly secure all loose parts. Do not use the elastic food ties
for turkeys.
Stuffing Poultry Is Not Recommended

Please note: The manufacturer does not recommend stuffing rotisserie poultry. It takes 50% (or more) longer to
cook. Be sure nothing hags over or extends beyond the Gear Wheels. Always center turkeys.
Additional Helpful Hints
Seasonings and spices should be sprinkled on or rubbed into the food before it goes into the Rotisserie. Try
Ron’s 3 great new Char Rubs and 5 wonderful Marinades. See page 24.
Once food is rotating, watch it to be sure nothing is touching the Heating Element as it goes
around.
Have food at room temperature when it goes in. Wash in warm water inside and out.
The steamer is a low steamer. Put frozen veggies on when chicken starts with ½ cup water in each side of tray.
Avoid burning – baste with sugared BBQ sauce only during the last 20 minutes. Try Ron’s great new BBQ
Sauce! It’s tasty and delicious.
Never use any aerosol sprays of any kind inside the unit.
Do not preheat the rotisserie. Add 2 minutes to the time (for heating up). Cut aluminum foil to cover bottom
drip (not Grate Cover) – easier cleanup.
Wrap fish, meat, poultry or vegetables with seasonings and marinade in aluminum foil (trip-fold the edges)
and put tightly in the basket and cook 25-30 min. delicious and easy!
Estimated Times and Temperature Chart
Please note that the times and temperatures given in this booklet are only a guide for your reference and are
based on temperatures of room temperature foods. Rotisserie times will vary due to differences in meat shape,
size, and amount of fat and bone. In addition, the most accurate method of determining if your food is done, is
by using a meat/poultry thermometer inserted into the center of the thickest portion of the meat. Note: Add 2
minutes for the oven to come up to temperature.
TIME & TEMPERATURE CHART
FOOD WEIGHT/QTY. INTERNAL TEMP. EST. TIME
CHICKEN
Whole Chicken or Duck 31/2 lbs. 180º 15 min./lb.
2 Cornish Hens (side by side) 11/2 lbs.ea.=3 lbs. 180º 15 min./lb.
Pause-to-Sear (breast stopped in front of heating element) @5 min. for browner breast if necessary
2 Small Chickens (side by side) 3 lbs. each 180º 10 min./lb.
Pause-to-Sear (breast stopped in front of heating element) @ 5 min. for browner breast if necessary
Turkey Up to 10 lbs. 180º 10-12 min./lb.
Chicken Pieces 3 lbs. 180º 45 min. total
Turkey Burgers 1 ¼ lbs. 165º 30-35 min. total
Chicken Kabobs 8 kabobs 180º well 30-35 min. total
PORK
Rolled Pork Loin 3-1/2 lbs. 160º med, 170 well 20 min./lb.
Pork Tenderloin 1-3/4 to 2 lbs. 160º med, 170 well 30 min./lb.
Pork Chops 3-4 chops 160º med, 170 well 30 min./lb.
Boneless Pork Chops 6 chops 160º med, 170 well 20 min./lb.
Boneless Ham (cooked) 3 lbs. 160º med 13 min./lb.
Italian Sausages
Uncooked Up to 16 30-35 min./lb.
Cooked Up to 16 20-25 min./lb.
Hot Dogs Up to 16 10-15 min./lb.

BEEF
Standing Rib Roast Up to 5 lbs. 145º medium rare 19 min./lb.
Roast 4 lbs. 140º rare 18 min./lb.
160º medium 20 min./lb.
170º well 22 min./lb.
Steaks 1 ¼” medium 20 min. total
Hamburgers Up to ½ lb. each medium-well 25-30 min. total
Beef Kabobs 6-8 kabobs medium 35 min. total
LAMB
Leg of Lamb 3 ½ to 5 lbs. 160º medium 18 min./lb.
SEAFOOD
Salmon Steaks (Basket) 3-4 steaks 20 min. total
Fish Fillets (Basket) ¾” 20 min. total
Fish Fillets (Basket) thin 18 min. total
Shrimp Kabobs 6 kabobs 20-25 min. total
Halibut Fillets (Basket) ¾ inch (bread with dill) 30 min. total
Temperature based on USDA Food Safety and Inspection Service Guidelines.
Recipes
For the best and easiest rotisserie food, try Ron’s Chicago Steakhouse Char Rubs and Ron’s Marinades for
Rotisserie Food. Call the Order Desk at 818-775-6450 and get the best there is.
Also ask for Ron’s Showtime™BBQ Sauce.
Apricot-Orange Glazed Game Hens
Two 1 ½ to 2 Pound Rock Cornish Hens
3 Tablespoons Fresh Orange Juice
3 Tablespoons Soy Sauce
½ Cup Apricot Preserves
Salt and Fresh Ground Pepper
Stir together the preserves, orange juice and soy sauce. Separate and reserve half of the sauce and serve it with
the hens. Wash and thoroughly and dry the game hens inside and out. Season inside cavity with salt and pepper
and brush the game hens with the other half of the sauce. Cook the game hens in the Rotisserie for 45 to 55
minutes or until the temperature reaches 180ºF on a meat thermometer inserted in the thigh meat. Serve hens
with warmed reserve sauce. Serves 2
to 4.
BBQ Beef Kabobs
2 Pounds Beef Top Sirloin
Ron’s Showtime BBQ Sauce
2 Bell Peppers; Cut in 1 Inch Pieces
1 Purple Onion, Cut in 1 Inch Pieces

Cut the beef into 1½ inch cubes and place in a medium bowl. Stir in BBQ sauce; cover and let marinate for 1 to
4 hours in the refrigerator. Remove the beef from the sauce and skewer on the Kabob Rods, alternating beef
with desired vegetables. Cook the kabobs for 20 to 25 minutes or until they reach desired doneness. Baste with
BBQ and slide the meat and vegetables off onto serving plates. Serves 6.
Roast Chicken with Lemon Herb Rub
One 3½ to 4-Pound Boneless Beef Rib Roast
2 Teaspoons Black Peppercorns
2 Teaspoons White Peppercorns
2 Teaspoons Green Peppercorns
1 Teaspoon Pink Peppercorns
1 Teaspoon Salt
Place the peppercorns in a heavy plastic bag and crush with a rolling pin. Stir in the salt. Coat the outside of the
roast with the pepper mixture. Rotisserie the roast on the Spit Rods 18 to 20 minutes per pound for rare or until
the internal temperature reaches 140ºF, 25 to 30 minutes per pound for well done or until the internal
temperature reaches 170ºF on the instant thermometer inserted in the center. Remove and slice into ¼ inch thick
slices or thinner. Serves 4 to 6.
Roast Turkey
One 6 to 10 Pound Turkey Fresh or Completely Thawed
1 Tablespoon Salt and 1 Tablespoon Poultry Seasoning if Desired
Thoroughly wash with warm water. Cut away all extra fat and skin so hot air can get into the cavity. Rub Salt
and Poultry Seasoning into the cavity. Tie with string in 4 places. Place centered on spit rods and cook for 10
minutes per pound. Enjoy the best turkey you can imagine.
Be sure nothing hangs over or extends beyond the Gear Wheels. Always center turkeys.
Jamaican Jerk Pork Tenderloin
2 Pork Tenderloin (About 1½ to 2 Pounds Total)
2 Tablespoons Chopped Fresh Cilantro
1 Tablespoon Finely Minced Fresh Ginger
¼ Cup Dark Rum
2 Tablespoons Fresh Lime Juice
2 Tablespoons Olive Oil
2 Tablespoons Light Brown Sugar
1 Cup Soy Sauce
½ Teaspoon Nutmeg
¼ Teaspoon Cayenne
¼ Teaspoon Ground Allspice
¼ Teaspoon Ground Cinnamon
¼ Teaspoon Salt
Combine all ingredients except the pork in a flat baking dish. Reserve ⅓of the marinade and keep it separate.
Trim all fat and skin from the pork tenderloins and place them in the marinade. Turn to coat well. Cover and
marinate for 15 to 30 minutes at room temperature. Place the pork in a basket for 30 minutes basting with the

marinade juices, often during the last 10 minutes, or until the internal temperature reaches 160ºF on a meat
thermometer. Slice the pork on the diagonal, place on a serving platter. Warm the reserved marinade and spoon
it over the pork slices and serve. Serves 4.
Beef Tenderloin Roast with Horseradish Sauce
One 3-Pound Beef Tenderloin Roast
Salt and Pepper To Rub On Roast
Horseradish Sauce: ¾ Cup Whipping Cream
4 Tablespoons Prepared Horseradish
2 Tablespoons Fresh Lemon Juice
½ Teaspoon Salt
Thoroughly coat the beef with salt and pepper. Place the beef tenderloin on Spit Rods. Rotate for 30 to 30
minutes or until the internal temperature reaches 140ºF for rate on the mat thermometer. Remove roast and slice
into ½ inch thick slices and serve with Horseradish Sauce. Serves 6.
Marinated Top Sirloin Steak
One 1¾ to 2 Pound Sirloin Steak
½ Cup Ketchup
2 Tablespoons Soy Sauce
1 Tablespoon Worcestershire Sauce
1 Tablespoon Brown Sugar
1 Clove Garlic, Minced
½ Teaspoon Chili Powder
Salt and Pepper to Taste
In a flat baking dish stir together the ketchup, soy sauce, Worcestershire sauce, brown sugar, garlic, chili
powder, salt and pepper. Add the steak and turn to coat. Cover and marinate in the refrigerator for 2 to 8 hours.
Remove the steak from the marinade. Place the steak in the Flat Standard Basket. Tighten lid and cook for 18
minutes for rare or 25 minutes for medium. If not brown enough, position the basket facing the Heating Element
and turn the switch to “Pause-to-Sear” for 2-3 minutes per side. Remove and slice thinly across the grain.
Serves 4.
Roasted Vegetables Skewers with Balsamic Basil Marinade
1 Red Bell Pepper, Cut Into 1 Inch Pieces
1 Yellow Summer Squash, Cut Into ¼ Inch Slices
1 Zucchini Cut Into ¼ Inch Slices
16 White Button Mushrooms, Stems Removed
8 Green Onions, Cut Into 1½ Inch Pieces
Marinade
½ Cup Bertolli Olive Oil
6 Tablespoons Balsamic Vinegar
2 tablespoons Minced Fresh Vinegar
2 Cloves Garlic

Prepare vegetables and place in a large bowl or food storage bag. Combine marinade ingredients and pour over
vegetables. Cover and marinate 1 to 2 hours at room temperature. Drain off marinade and skewer vegetables on
Kabob Rods. Rotate the skewered vegetables for 20 to 25 minutes until vegetables are slightly brown, but still
crunchy. Remove kabobs from Gear Wheels and slide the vegetables off onto serving plates. Serves 6.
Merlot Marinated Leg of Lamb
One Leg of Lamb (4½ to 5 Pounds) Boned and Tied
1 Cup Merlot or Other Dry Red Wine
4 Cloves Garlic; Minced
2 Tablespoons Dried Oregano
1 Tablespoon Dried Rosemary
1 Tablespoon Coarsely Ground Pepper
Combine soy sauce, merlot, garlic, oregano, rosemary, and pepper in a deep bowl. Add lamb and turn to coat
with marinade. Cove and chill at least 6 hours or up to a day, turning meat over several times. Remove lamb
from marinade, reserving to a day, turning meat over several times. Remove lamb from marinade, reserving
marinade for basting. Place the lamb on the Spit Rods. Cook for 1 hour, 15-30 minutes or until the internal
temperature reaches 160ºF for medium, basting several times during the last 10 minutes. Serves 6 to 8.
Ginger Teriyaki Chicken
One 3½ to 4 Pound Whole Chicken
½ Cup Soy Sauce
½ Cup Dry White Wine
¼ Cup Sake or Dry Sherry
¼ Cup Sugar
2 Slices Fresh Ginger Root
2 Tablespoons Water
1 Tablespoon Cornstarch
Ginger Teriyaki Sauce: Combine soy sauce, wine, sake or sherry, sugar and ginger in a small saucepan. Bring to
a boil and simmer over medium heat 3 minutes. Blend water with cornstarch; stir into sauce. Stir over medium
heat 1 minute or until thickened. Strain sauce. Makes about 1 cup. Set aside to cool or refrigerate up to 1 week.
Next, wash and dry chicken, inside and out. Loosen the skin across the breast and then down around the leg and
thigh using a chop stick or your fingers. Reserve ½ cup of the cooled teriyaki sauce and inject some of the
remaining sauce under the skin of the chicken. Work it over the breast, legs and thighs. Rub more sauce all over
the outside of the chicken and then marinate for 30 minutes. Place chicken on the Spit Rods for 55 to 60
minutes or until the internal temperature reaches 180ºF on meat thermometer inserted in the thigh. Remove
chicken and cut into pieces to serve. Serve with the remaining teriyaki sauce. (You could substitute a prepared
Teriyaki Marinade for the Ginger Teriyaki Sauce in this recipe. If you are fixing two small chickens at once,
skewer them side by side on the Spit Rods and increase the time to 1½ hours). Serves 2 to 3.
Mustard-Brown Sugar Glazed Pork Chops
Three or Four 1 Inch Thick Center Cut Pork Chops
½ Cup Brown Sugar
¼ Cup Dijon Mustard
Pinch Each of Dried Thyme and Dried Sage

Pat pork chops dry with a paper towel. Stir together mustard, thyme and sage. Coat pork chops well with the
herb mustard. Press brown sugar into herb mustard. Place the pork chops in the Rotisserie Basket for 30 to 35
minutes or until cooked through. If not brown enough, position the basket facing the Heating Element and turn
the switch to “Pause-to-Sear” for 2-3 minutes on each side. Serves 3 to 4.
Ronco
Six Month Limited Warranty Popeil Inventions, Inc., warrants to the this product that it is free from defects
in material and workmanship for a period of six months from date of purchase providing the Owner
Registration Card has been completed and returned to Popeil Inventions, Inc., within thirty (30) days from the
original purchase date.
The manufacture’s obligation will be limited to repairing or replacing F.O.B. Chatsworth, CA 19311 any part
of the product which is effective. Such warranty will not apply to defects resulting from tamper, cosmetic
damage, acts of God, accidental breakage, abuse, negligence, neglect or misuse. If you must return the
product for reasons of malfunction within the six-month warranty period, the following action and steps are
required:
1. The machine must be clean and packaged securely to protect from damage or breakage in shipment.
2. Call and obtain a Return Authorization Number. Then ship prepaid to Popeil Inventions, Inc., by the most
convenient method. Enclosed $27.80 to cover return shipping, handling and insurance. Popeil Inventions, Inc.,
will repair or replace your rotisserie unit and return it to you prepaid.
3. If you return the product after the six-month warranty period, enclose $45.00 plus $27.80 for shipping,
handling and insurance and Popeil Inventions, Inc., will replace/repair your machine and return it to you.
Even if not required, the rights in this warranty are granted to you. This warranty gives you specific legal
rights, and you may also have other rights which vary from state to state. Return of Owner Registration Car is
not a condition precedent to warranty coverage.
Popeil Inventions, Inc., will not be held liable for any special, incidental, or consequential damage, resulting
from possession, use or loss of use of this product either directly or indirectly.
No returns will be accepted without prior authorization.
To receive a Return Authorization Number
Call Customer Service at 818 775-6450
If all lines are busy, please contact us at the web site below
www.ShowtimeRotisserie.com
Popeil Inventions, Inc.
21344 Superior Street, Chatsworth, CA 91311●Fax 818-775-4665

The Finest Seasoning Make the Finest Food
Enjoy some of the greatest tasting rubs and marinades ever created FOR CHICKENS, STEAKS,
HAMBURGERS, ROASTS, FISH AND VEGETABLES
Ron created 3 Char Rubs™- and 5 incredible Marinades
Award-Wining
RON’S FAMOUS CHICAGO STEAKHOUSE FORMULAS™
RON’S CHAR RUBS All Fat Free! For use with the Showtime™ Flavor Injector. Your flavor injector makes
it extra easy. You could MARINATE 60 5-LB. CHICKENS WITH THIS 5-MARINADE PACK.
3-PACKCHAR RUBS™
1 Ron’s Original Char Rub™
Steakhouse Formula Just like World-Class Restaurants, serve juicy Steaks, Roasts, Hamburgers and Chops.
Hearty wood fir taste.
2 RON’S BBQ CHAR RUB™
Chicken Formula Enhances flavor of Chicken, Turkey, Cornish Game Hens, Kabob, Beef and Pork. Old
Southwest Flavor. Chef’s Choice. Aromatic Blend!
3 Ron’s CITRUS Char Rub™
Seafood Formula Fish, Shrimp, Scallops, Lobster – Any fish or seafood is guaranteed to taste better! Rated
Excellent. All 3 for Only $18.88, only $3.95 Shipping & Handling. Order Individual Rubs Each $11.95.
Special Variety Pack The 3 Great Basic Rubs.
5 INCREDIBLE MARINADES
1Honey Lime
Lively flavor for Poultry and Fish
2 Tangy Teriyaki
Great Flavor for Poultry, Beef, Pork and Vegetables
3Hickory Smoke Pineapple
Delicious Favorite for Poultry and Pork
4New England seafood Herb & Spice
Perfect on Fish, Shellfish, Shrimp and Lobster
5Charcoal Roasted Garlic
Ron’s Favorite! Exciting for Beef, Poultry and Chops!
This great Marinade Flavor Package is more than a $50 value. ONLY $18.88 FOR ALL 5 and just $3.95
shipping and handling.
Lemon Dill Salmon Steaks
3 Large or 4 Medium Salmon Steaks
¼ Cup Fresh Lemon Juice
2 Tablespoons Olive Oil
1 Tablespoon Minced Fresh Dill or 1 Teaspoon Dry Dill Weed
½ Teaspoon Salt
½ Teaspoon White Pepper

In a small bowl add all ingredients except the salmon. Brush on both sides of the salmon, wait 5 minutes and
repeat. Place the salmon steaks in the Rotisserie Basket Accessory. Cook for 15 to 20 minutes. Serve one
salmon steak per person.
Ron’s Spicy Lemon Pepper Chicken Wings
6 – 8 Chicken Wings
2 Eggs, Slightly Beaten
1½ Cups Plain Dry Breadcrumbs
5 Tablespoons Lemon Pepper
2 Tablespoons Crushed Red Chili Pepper
Beat eggs and set aside. Mix breadcrumbs, lemon pepper and crushed red chili pepper in a flat dish or on a sheet
of wax paper, aluminum foil or cutting board. Wash and thoroughly dry the chicken wings. Dip the wings in the
egg batter to coat and then roll them in the breadcrumb mixture. Place the chicken wings in the rotisserie basket
and cook for about 40 minutes or until crispy and slightly dark.
Be sure the wings are all secure inside the basket with no parts hanging out. You can use a small strip of
aluminum foil inside the basket on the top and bottom edges (the edges that rotate near the heating element) to
keep the tips of the wings from burning.
To reorder supplies call Customer Service at 818 775-6450
If all the lines are busy, or after hours, please contact us on the web at
www.ShowtimeRotisserie.com
Table of contents
Other Ronco Kitchen Appliance manuals

Ronco
Ronco Beef Jerky User manual

Ronco
Ronco Showtime 4000 NHR Quick guide

Ronco
Ronco Electric Dehydrator User manual

Ronco
Ronco Food Dehydrator 5-Tray User manual

Ronco
Ronco CHEF N GO User manual

Ronco
Ronco Pasta Maker Quick guide

Ronco
Ronco Pizza & More Operational manual

Ronco
Ronco gen2 User manual

Ronco
Ronco Showtime 3000 Series Quick guide
Popular Kitchen Appliance manuals by other brands

CASO DESIGN
CASO DESIGN Crema & Choco Black Original operating manual

SPM
SPM Frosty2Frosty3 Operator's manual

Eurotech
Eurotech ED-WD45BCSS instruction manual

Baumatic
Baumatic BCG620SS instruction manual

Parkinson Cowan
Parkinson Cowan CSIG 501 Owner's and installation guide

Brandt
Brandt KMT1255B Series instruction manual