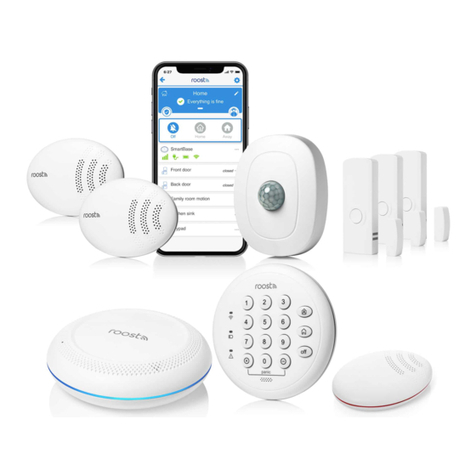
Roost Security360 User manual

Roost Security360
User Manual

1
What’s In Your Roost Security360 Kit? ........................................................................... 2
Getting Started ................................................................................................................ 3
SmartBase ...................................................................................................................... 5
Keypad ............................................................................................................................ 7
Motion Sensor ............................................................................................................... 10
Entry Sensors ................................................................................................................ 12
Water Leak/Temperature Sensors ................................................................................. 16
Connecting to Wi-Fi ....................................................................................................... 18
Testing Your System ...................................................................................................... 20
Roost 24/7 Professional Monitoring Service .................................................................. 22
How to Use Your Security360 System from Roost ........................................................ 25
Additional Support ......................................................................................................... 30
Table of Contents
TABLE OF CONTENTS


GETTING STARTED
4
Proceed to connect and install each sensor in your kit. Follow the steps in the User Manual
(see pages 4-17) for further details:
Connect Sensors – Pull out each red tab from the sensors while the SmartBase is in paring mode
(blinking green). The sensor should start blinking green (pairing mode). They will automatically
connect after a few seconds, and you hear an audible confirmation from SmartBase for each sensor.
Locate & Place – Proceed to place each sensor in appropriate locations around your home and test
connectivity.
Connect To Wi-fi – Follow the prompt in the app (see page 18).
Edit Sensor Name – Customize the default name for each sensor by following prompts in the app
and selecting the appropriate location name for each sensor.
Set PIN Codes – Follow the prompt in the app to change your PIN code for disarming system. You
can also add a guest PIN code and one for Hostage situation.
Activate Professional Monitoring – Follow the prompt in the app to activate the professional
monitoring service and to add emergency contact monitors to receive alerts and respond to
emergency alarm situations.


SMARTBASE
6
Connect
• Connect the power cord to SmartBase and then plug it into a wall power outlet. Make sure that
this is not a switched outlet. You will hear a confirming audio message (“I am connected”) and will
receive a notification on your smartphone. Pull the red tab from the battery door.
• Ensure that the SmartBase is in “Pairing mode” and the light ring is blinking green. If it is not,
push the gray button on the back of the SmartBase until the light ring starts blinking green. It will
remain in this connecting state for 10 minutes – plenty of time to connect the sensors one at a
time.
Placement
The SmartBase should be located in a central place in your home like the kitchen, entryway, office or
living room area. This will allow you to see visual cues and hear audible sounds and phrases from
the SmartBase when alarms are triggered and during the arming/disarming process.
Name Your SmartBase
Your SmartBase should appear in the app with a default name. If you would like to change this
name, go to the app and tap on the SmartBase tile and select “Change Name.” Then create a
custom name for your SmartBase and tap “Save.”


KEYPAD
8
Connect
• Make sure that the SmartBase is in pairing mode and is blinking green. If not, press the dark gray
button on the bottom of SmartBase and hold until it starts blinking green.
• Pull the red tab from the back-battery door of the Keypad to enable pairing mode. The three
“Home, Away and off” buttons on the Keypad will all blink green as a visual indicator of pairing
and will remain in this state for 5 minutes or until paired. If these buttons do not blink green,
please insert the included SIM popper or a small paper clip into the hole just above the “Pairing”
label on the back of the Keypad. Hold for two seconds and release. Pairing mode will begin.
• You will hear audio confirmation from your SmartBase (“Keypad connected”) and receive a
notification that your keypad is connected. The Keypad will also appear in your app after a few
seconds.
Placement
• Mount your Keypad on the wall or simply place on a
convenient surface near your most commonly utilized door
that you use for entry and exit to your home.
• If mounted, first position the included mounting plate that
attaches by the adhesive tape or the two screws included in
your kit. Then slip the keypad over the plate and snap down
until secure.

KEYPAD
9
Customization
Name Your Keypad
Your keypad should appear in the app with a default name. If you would like to change this name, go to
the app and tap on the keypad tile and select “Change Name.” Then select an appropriate location
name or create a custom name for your keypad and tap “Save.”
Create PIN Codes (requires Wi-Fi connection completion before proceeding)
When prompted in the app, follow the instructions to create your four-digit security PIN codes that are
required to be used with the keypad for disarming your system. To access, click the shield icon in the top
left corner of your app screen.
• Owner code: Change the default number (last 4 digits of your mobile
number) to a new number. This is the primary code that you will use to
disarm your system via the keypad.
• Guest code: This is a secondary code that can be given to other people
to utilize such as a babysitter, housekeeper or other house guest.
• Hostage code: This is a unique four-digit number that when entered into
the keypad during an emergency duress situation, will disarm the system
and immediately dispatch police without any notifications.


MOTION SENSOR
11
18 feet
45°
6 feet
• If the sensor does not blink green, please insert a paper clip into the hole labeled “Pairing” on the
back of the sensor near the battery door. Press and hold this button for 2 seconds. You will hear
audio confirmation from your SmartBase (“Motion sensor connected”) and receive a notification
that your sensor is connected. The Motion sensor will also appear in your app.
Placement
The ideal placement for the Motion Sensor is a central location in your home such as a wall pointed
towards the main hallway or a stairway that is a main traffic area.
• Locate a spot on the wall that is appx 6-8 feet above the floor and avoid placing the sensor near heating
or AC vents.
• Do not place the sensor facing a window as birds or cars passing by can trigger the sensor.
• If you have a pet, avoid placing in front of their favorite seats to perch on.
You should mount your motion sensor on the wall with the
included mounting plate. This plate can be attached to the
wall by adhesive tape or the two screws which are
included in your kit (a corner mounting bracket is also
available by contacting our customer care team).
Name Your Motion Sensor
Your motion sensor should appear in the app with a
default name. If you would like to change this name, go to
the app and tap on the motion sensor tile and select “Change Name.” Then select an appropriate
location name or create a custom name for your motion sensor and tap “Save.”


ENTRY SENSORS
13
• If the sensor does not blink green, push the round test button on the front of the sensor for 2
seconds and then release. The sensor will start blinking green indicating that it is ready to connect
to the SmartBase.
• You will hear audio confirmation from your SmartBase (“Entry sensor connected”) and receive a
notification that your sensor is connected. The Entry sensor will also appear in your app.
• Repeat connection process with each Entry Sensor.
Placement
• Choose the locations where you would like to mount your Entry Sensors. We suggest prioritizing
the primary doors in your home. This could be your front door, back door or even sliding glass
doors. Additional entry sensors can also be located on ground level windows.
• Position the larger sensor on the fixed door/window frame with the rounded end on top. The
smaller magnet sensor should be located near the bottom of the larger sensor and placed on the
moving window/door. When the door or window is opened, the separation of the two sensors
trigger an alarm event. When closed, the sensors should be less than 5/8” (15mm) apart. Each
sensor pair is also marked with two parallel “alignment marks” to assist in positioning. These
sensor marks should be mounted opposite to each other to ensure alarm activation when the
entry door/window is opened.

ENTRY SENSORS
14
• NOTE - For homes that have large or higher profile frames
around windows and doors, it may be easier to position the
larger sensor on the moving door/window (vs frame) and the
smaller magnet sensor on the frame. Position the magnet
sensor on the frame angled towards the larger sensor alignment
marks. We’ve also included optional thicker foam tape pieces to
be placed underneath the larger sensor to position the sensor
further away from the door and closer to the magnet sensor
alignment marks (see photos).
• Before you mount the Entry Sensors with the adhesive tape, test
the alignment between each piece. The larger Sensor LED will
blink red and you will hear a chime tone from the SmartBase
when the door or window is “opened” and the pair is positioned
correctly.
• To mount, peel the adhesive tape from the small magnet piece and the larger sensor. Adhere the
small magnet piece to the door or window and the larger sensor to the doorframe or window
frame. Make sure that the magnet piece is aligned with the bottom of the sensor. Hold for 15
seconds to ensure that the pieces are firmly in place.


WATER LEAK/TEMP SENSORS
17
• Upon connection, you will hear an audio confirmation from your SmartBase (“water leak sensor
connected”) and receive a notification on your phone. The water leak sensor will also appear in
your app.
• Repeat connection process with each Water Leak Sensor.
Placement
Place your water leak and temperature sensors on the floor near
areas of potential water leaks or frozen pipes such as:
• Under the kitchen sink, dishwasher, or ice maker
• Behind a toilet, sump pump, or washing machine
• Near a hot water heater (especially ones that are > 10 years)
• Near water pipes along an outside wall
To avoid water damage to the sensors, please do not submerge them in water.
Once positioned, test that your water leak sensors are still connected by touching a damp paper towel
to the 2 metal rings on the bottom of the sensor. Alarm will trigger on your app, notification received
on your phone and the red LED on top of the sensor will blink.
Name Your Water Leak/Temp Sensors
Your water leak and temperature sensors should appear in the app with default names. To change
these names, go to the app and tap on each water leak sensor tile and select “Change Name.” Then
select an appropriate location name or create a custom name for each water leak and temperature
sensor and tap “Save.”
Metal Rings
Reset Button

CONNECTING TO WI-FI
18
Connecting to Wi-Fi
Your Roost Security360 system is designed with cellular and Wi-Fi. The cellular will connect
automatically during initial set up. However, by adding Wi-Fi connectivity, your system features will be
significantly enhanced, and you will have a more robust wireless backup capability. We highly
recommend connecting your Security360 to Wi-Fi as an essential part of the setup process.
Key Features Enabled with Wi-Fi
• Remotely arm and disarm your system via the app
• Ability to perform full system test with all sensors
• Failsafe wireless connectivity – If Wi-Fi goes down, system switches over to cellular backup
• Setting PIN codes via app
• Activating professional monitoring via app
• Changing entry and exit delay periods via app
• Enabling or disabling entry sensor chime tone via app
How to Connect to Wi-Fi
• Follow the yellow “prompt” in the app that will pop up when it is time to connect to Wi-Fi.
• Click on the SmartBase icon in the app. Then select “Connect to Wi-Fi” and follow the steps in
the app.
• Make sure that you have your Wi-Fi password handy when going through these steps.
• Follow the step-by-step app instructions

CONNECTING TO WIFI
19
Other manuals for Security360
1
Table of contents
Other Roost Security System manuals
Popular Security System manuals by other brands

ADEMCO
ADEMCO VISTA-120 user guide

Rosslare
Rosslare HLX-40 user manual

ADEMCO
ADEMCO VIA-30PSE installation instructions

Swann
Swann SW351-WSA operating instructions

Alderon Industries
Alderon Industries Versa'larm VA02A Operation, maintenance and installation manual

MARS COMMERCE
MARS COMMERCE ZEUS4-MC Lite installation manual

Kane
Kane iD Safe KANE78 quick start guide

Imrita
Imrita IMT-P-ZL6 installation instructions

Linear
Linear REMOTE ACCESS SOFTWARE DVS-1200 Installation & programming instructions

DSC
DSC PC1550 installation manual

Legato
Legato SMS Basic user manual

First Alert
First Alert ONELINK CM2837 Frequently asked questions