Roper REP34800 User manual

ELECTRIC
ELECTRONIC
OVENCONTROL
SELF-CLEANING
0752620

A NOTE TO YOU
You have purchased aquality, world-class electric range. Years of engineering experience have gone
into its manufacturing. To ensure that you will enjoy many years of trouble-free operation, we have
developed this User Guide. It is full of valuable information on how to operate and maintain your range
properly and safely. Please read it carefully.
Also, please complete and mail the Ownership Registration Card provided with your range.
Your safety is important to us.
This guide contains safety symbols and statements. Please pay special attention to these symbols
and follow any instructions given. Here is a brief explanation of the use of each symbol
This symbol will help you to avoid such
dangers as personal injury, burns, fire and
electrical shock.
This symbol will help you avoid actions
which could cause product damage
(scratches, dents, etc.) and damage to your
personal property.
Should you ever require service for your range, you will need to know your appliance’s complete model
number and serial number. You can find this information on the model and serial number plate located
behind the storage drawer panel, in view when the storage drawer is open. Also, please record the date
the product was purchased/installed and the Builder or Store’s name, address and phone number.
Keep this book and the sales slip together in a safe place
for future reference.
NOTE: You must provide proof of purchase or installation date for
in-warranty service.
Model and
Serial Number 11
,i
Model Number ................................................. Store Name .....................................................................
Serial Number ................................................... Address ...........................................................................
Date Purchased.. .............................................. Phone ..............................................................................
Date Installed ...................................................
2

TABLE OF CONTENTS
A NOTE TO YOU ................................................. 2
IMPORTANT SAFETY INSTRUCTIONS ............. 4
ELECTRONIC OVEN CONTROL ........................ 6
Display/clock ................................................. 6
Using the control lock.. ................................. 6
Setting the clock.. ......................................... 7
Using the minute timer.. ................................ 8
Starting/Cancelling a function ...................... 9
Baking & Roasting ......................................... 10
Adjusting oven temperature control.. ............ 12
Broiling .......................................................... 14
Vari-Broil ....................................................... 16
ADDITIONAL RANGE FEATURES ..................... 17
Oven vent ...................................................... 17
Coil element cooktop models ................... 17
Glass ceramic cooktop models.. .............. 17
Broiler pan storage rack.. .............................. 17
Automatic oven light ..................................... 18
Fluorescent cooktop light ............................. 18
Appliance outlet ............................................ 18
USING THE SURFACE ELEMENTS ................... 19
Surface element controls .............................. 19
Power on lights ............................................. 19
Control setting guide ..................................... 19
Coil element cooktop models.. ..................... 20
Simmer element ........................................ 20
Glass ceramic cooktop models .................... 20
Glass ceramic cooktop elements ............. 20
Hot surface indicator lights.. ..................... 21
COOKWARE ........................................................ 22
Home canning information ................................... 22
3
COOKING TIPS.. ................................................. 23
Broiling.. ........................................................ 23
Air circulation ................................................ 24
Oven rack positions.. .................................... 24
For proper cooking,
follow these guidelines ............................. 25
Rack Placement for specific foods .......... 25
Using aluminum foil in the oven.. .................. 26
OVEN SELF-CLEANING CYCLE ........................ 27
How the self-cleaning cycle works ............... 27
Before you start.. .......................................... 27
For best cleaning results .............................. 28
Automatic door lock ..................................... 28
Setting the controls ...................................... 29
To stop the self-cleaning cycle
at any time ................................................ 30
CARING FOR YOUR RANGE.. ............................ 31
Coil element cooktop models ....................... 31
Coil element removal/replacement .......... 31
Lift up cooktop.. ....................................... 32
Glass ceramic cooktop models.. .................. 33
Cleaning tips ............................................ 34
Convenient cleaning features ....................... 35
Removable oven door.. ............................ 35
Sweep-through base ................................ 36
Removable control console glass ............ 36
Cleaning chart.. ............................................. 37
Replacing light bulbs
& resetting breakers ...................................... 39
Cooktop light replacement ....................... 39
Oven light replacement ............................ 39
Appliance outlet circuit breaker ............... 40
IF YOU NEED ASSISTANCE OR SERVICE.. ...... 41
Troubleshooting ............................................. 41
WARRANTY.. ....................................................... 44

To reduce the risk of fire, electrical shock, injury to
persons, or damage when using the range, follow
basic precautions, including the following:
L
General
l
Read all instructions before using the range.
l
Install or locate the range only in accordance
with the provided Anti-Tip Bracket and
Installation Instructions.
l
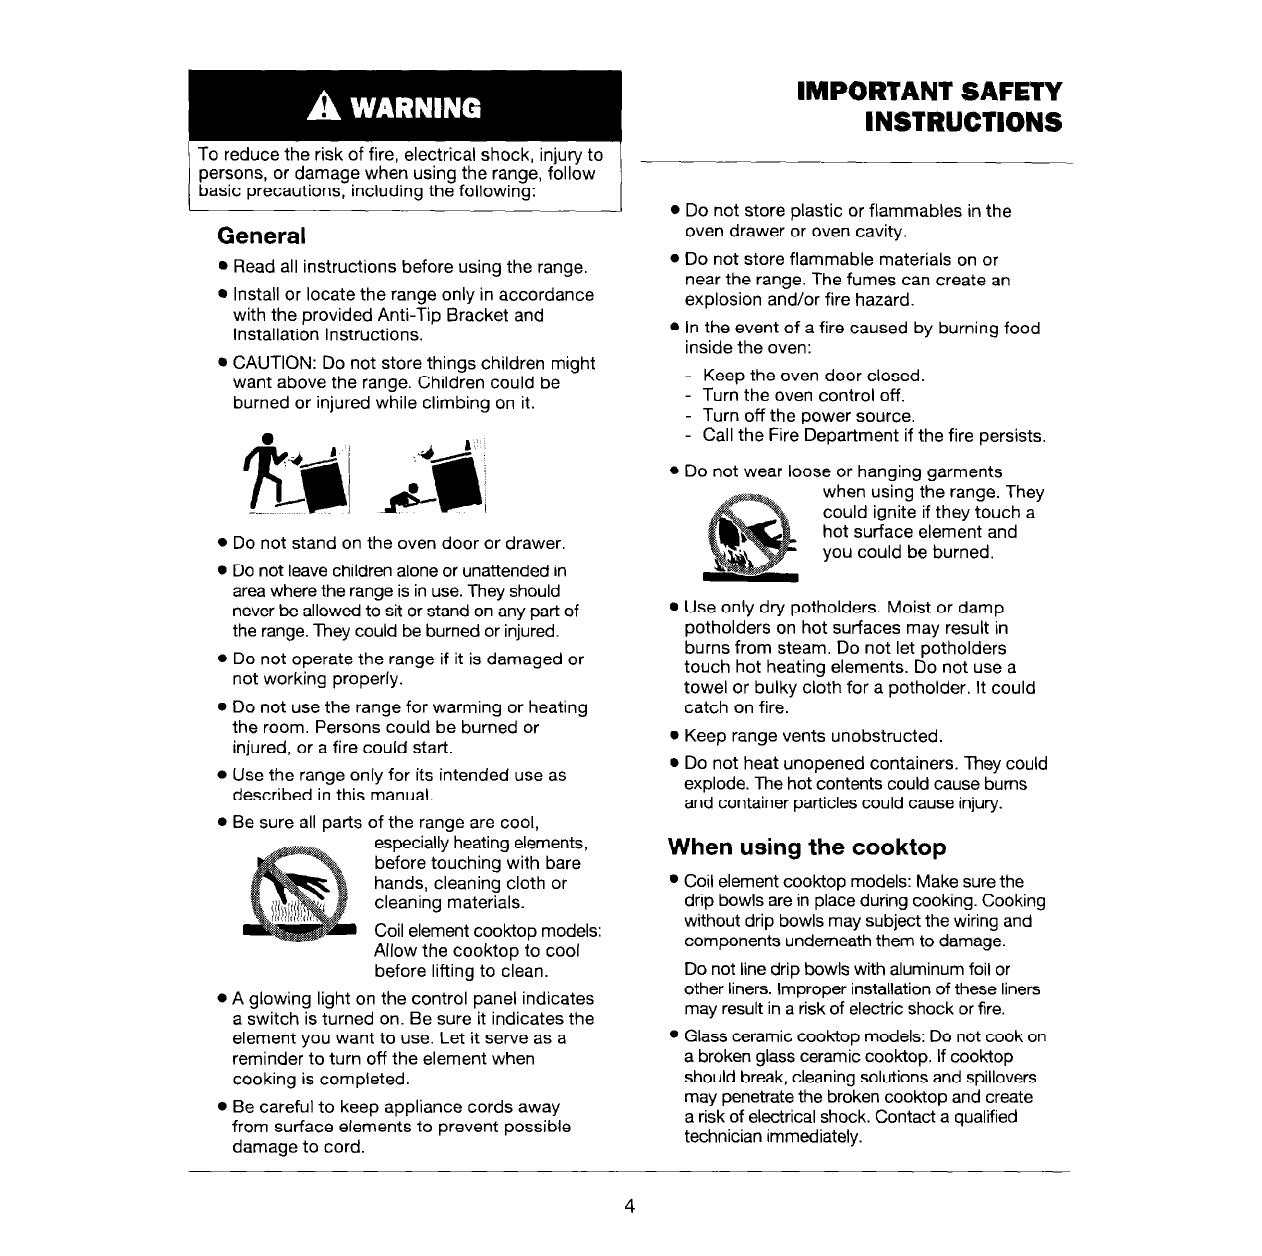
CAUTION: Do not store things children might
want above the range. Children could be
burned or injured while climbing on it.
l
Do not stand on the oven door or drawer.
l
Do not leave children alone or unattended in
area where the range is in use. They should
never be allowed to sit or stand on any part of
the range. They could be burned or injured.
l
Do not operate the range if it is damaged or
not working properly.
l
Do not use the range for warming or heating
the room. Persons could be burned or
injured, or a fire could start.
l
Use the range only for its intended use as
described in this manual.
l
Be sure all parts of the range are cool,
especiallyheating elements,
before touching with bare
hands, cleaning cloth or
cleaning materials.
Coil element cooktop models:
Allow the cooktop to cool
before lifting to clean.
l
A glowing light on the control panel indicates
a switch is turned on. Be sure it indicates the
element you want to use. Let it serve as a
reminder to turn off the element when
cooking is completed.
l
Be careful to keep appliance cords away
from surface elements to prevent possible
damage to cord.
IMPORTANT SAFETY
INSTRUCTIONS
l
Do not store plastic or flammables in the
oven drawer or oven cavity.
l
Do not store flammable materials on or
near the range. The fumes can create an
explosion and/or fire hazard.
l
In the event of a fire caused by burning food
inside the oven:
- Keep the oven door closed.
- Turn the oven control off.
- Turn off the power source.
- Call the Fire Department if the fire persists.
l
Do not wear loose or hanging garments
when using the range. They
could ignite if they touch a
hot surface element and
you could be burned.
l
Use only dry potholders. Moist or damp
potholders on hot surfaces may result in
burns from steam. Do not let potholders
touch hot heating elements. Do not use a
towel or bulky cloth for a potholder. It could
catch on fire.
l
Keep range vents unobstructed.
l
Do not heat unopened containers. They could
explode. The hot contents could cause bums
and container particles could cause injury.
When using the cooktop
. Coil element cooktop models: Make sure the
drip bowls are in place during cooking. Cooking
without drip bowls may subject the wiring and
components underneath them to damage.
Do not line drip bowls with aluminum foil or
other liners. Improper installation of these liners
may result in a risk of electric shock or fire.
l
Glass ceramic cooktop models: Do not cook on
a broken glass ceramic cooktop. If cooktop
should break, cleaning solutions and spillovers
may penetrate the broken cooktop and create
a risk of electrical shock. Contact a qualified
technician immediately.
4

IMPORTANT SAFETY
INSTRUCTIONS
l
Select a pan with a flat bottom that is about
the same size as the surface element. If pan
is smaller, some of the heating element will
be exposed and may result in the igniting of
clothing or potholders. Correct pan size also
improves cooking efficiency.
l
Check to be sure glass cooking utensils are
safe for use on the range. Only certain types
of glass, glass ceramic, ceramic, earthen-
ware or other glazed utensils are suitable for
cooktops without breaking due to the sud-
den change in temperature.
l
Never leave surface elements unattended at
high heat settings. A boilover could result
and cause smoking and greasy spillovers
that may ignite.
l
Do not heat fat quickly and always watch as
it heats.
l
Turn pan handles inward, but not over other
surface elements. This will help reduce the
chance of burns, igniting of flammable materials,
and spills due to bumping of the pan.
When using the oven
l
Always position oven rack(s) in desired
location while oven is cool. If a rack must be
removed while oven is hot, do not let
potholder contact hot heating element in oven.
l
Use care when opening oven door. Let hot
air or steam escape before removing or
replacing food.
l
When broiling, place meat at least 3” (7.4cm)
from the broil element. Meat placed too
close to the element may spatter, smoke,
burn or catch fire during broiling.
Grease
l
Grease is flammable. Do not allow grease to
collect around cooktop or in vent. Wipe
spillovers immediately.
l
To ensure adequate grease drainage, do not
use cookie sheets or similar pans for
broiling. Also, covering the broiler grid with
foil is not recommended. Poor drainage of
grease may result in fire.
l
Do not use water on grease fires. Never pick
up a flaming pan.
Smother flaming pan
on range by covering
with a well fitted lid,
/ cookie sheet or flat
metal tray.
Flaming grease outside of pan can be extin-
guished with baking soda or, if available, a
multi-purpose dry chemical or foam-type
extinguisher.
Care and cleaning
l
Coil element cooktop models: Do not soak
removable coil heating elements in water.
The element will be damaged and shock or
fire could result.
l
Glass ceramic cooktop models:
DO NOT CLEAN HOT GLASS CERAMIC
SURFACES. If spills occur, move them aside
- off the hot element as soon as possible
with a razor blade scraper (single edge razor
blade in a holder), wearing protective gloves.
After the element area is cool to the touch,
clean cooktop with Cooktop Polishing
Creme, then rinse with a damp paper towel
and wipe dry.
l
When the self-cleaning cycle is on, the range
exterior and cooking surface will become
hot. Keep children away from the range as a
safety precaution.
l
Do not repair or replace any part of the range
unless specifically recommended in this
manual. All other servicing should be
referred to a qualified technician.
l
Disconnect the electrical supply before
servicing the range.
5

ELECTRONIC OVEN CONTROL
Electronic Display
I
,,,’
TlMER.M-E
;<sz;; @+&j
SELF-CLEA;/NG OVEN
FOUR AlJTONEnOYANT
DmRLOClEu
m -,uE
SETllME
l
TEMP
AIUSTERCHEURE
l
TEMP
Display/clock
l
When you first plug in the range, “PF” will appear
on the display until you press any command
button. If “PF” again appears on the the display,
your electricity was off for a while. You will need to
reset the clock and reprogram any temperature
adjustments you may have made. See “Setting the
clock” on page 7; and “Adjusting oven temperature
control” on page 12.
l
When you are using the oven, the display WIII show
preheat times and temperature settings.
l
When you are not using the self-cleaning function
or cooking with the oven, the display will show
time of day.
l
When setting a function, if you do not press the
START
button within 5 seconds, the START?
indicator light will flash. If you do not press the
START
button within 5 minutes, the function will
be canceled.
Indicator lights
An indicator light to the left of the display lights up
when you are using an oven function, when the oven
door is locked, and when the oven is on.
Using the control lock
The control lock lets you disable the control panel
command buttons. The control lock comes in handy
when you want to prevent others from using the oven
NOTES :
You can only use the control lock when the oven is
not in use or the control has not been set.
Set the control lock when cleaning the control panel
to prevent yourself from accidentally turning on the
oven.
You must reset the control lock If the power goes out
for more than 1 second.
To lock the control panel :
Press and hold the
START
button for 5 seconds.
You will hear a single tone and “Lot” will
appear on the display for 5 seconds.
“Lot” and “START?” will then appear
whenever a command button is
pressed.
To unlock the control panel :
Press and hold the
START
button for 5 seconds.
You will hear a single tone and “Lot”
and “START?” will disappear from the
display.
6

ELECTRONIC OVEN CONTROL
Setting the clock
1. Press the CLOCK button.
PRESS
2. Set the time.
PRESS
YOU SEE
Flashmg colon
3. Start the clock.
PRESS YOU SEE
the power goes out for more
than 1 second.
7

ELECTRONIC OVEN CONTROL
Using the minute timer
The minute timer does not start or stop the oven. It
works like a kitchen timer. It can be set in hours or
minutes up to 12 hours, 59 minutes. The minute
timer will display minutes and seconds for settings
under 1 hour. You will hear four 1-second tones
when the set time is up.
1. Press the TIMER button.
PRESS
r-l
TIMER
MINUTERIE
2. Set the countdown time.
PRESS YOU SEE
Flashing colon
3. Start the minute timer.
PRESS YOU SEE
(display counts down)
8

When time is up :
You will hear four 1-second tones.
NOTE :
.
To see the countdown time when the minute timer is
not on the display, press the
TIMER
button.
4. Turn off the minute timer.
PRESS TWICE
5. To CANCEL the minute timer.
PRESS TWICE
TIMER
U
MINUTERIE
Starting/Canceling a function
YOU SEE
...previous display
YOU SEE
...previous display
F
After setting a function for the first time,
you must press the START button to
start the function. I
‘RESS
The
OFF button will cancel any function
except the clock, minute timer, and
control lock.
9

Baking & Roasting
1. Place the oven racks where you need
them in the oven. For more information,
see “Oven rack positions” on page 24.
,I:
Froni of rack
The bottom element operates
at full power and the top
element cycles whenever pre-
heating. During baking, the
top element cycles on and off
to provide balanced cookina
and even top browning. -
Use this setting for baking, roasting and heating
casseroles.
2. Choose the baking/roasting setting.
The BAKE indicator light will light up.
3. Set the temperature (optional).
Do this step if you want to set a
temperature other than 350°F. Press A
to raise the temperature or V to lower
the temperature in 5°F amounts. You
can set the temperature anywhere from
170°F to 500°F. Use these buttons until
the desired temperature is displayed.
4. When roasting or cooking casseroles...
Put your food in the oven.
You do not have to preheat the oven when
roasting or cooking casseroles.
PRESS YOU SEE ON. DEPART
I
PRESS YOU SEE ON
l
DEPART
I
(example for bake/roast at 375°F)
10

ELECTRONIC OVEN CONTROL
5. Press the START button.
A preheating time will count down on the
display. The HEAT and ON indicator
lights will light up. The oven control
automatically sets preheating time based
on the oven temperature you select.
l
For 245°F and less, the preheating time
is 4 minutes.
. For 25O”F-445”F, the preheating time
is IO minutes.
l
For 450°F and above, the preheating
time is 15 minutes.
PRESS YOU SEE ON
l
DEPART
When preheating is complete you hear a 1-second tone, the preheat
indicator light turns off, and the set temperature is displayed.
NOTES :
l
You can change the temperature setting any time after pressing the
START button. You do not have to press the START button again.
l
The preheating time will not change if you reset the temperature
before the countdown time ends.
l
If you are baking/roasting while the minute timer is counting down,
you can see the set baking/roasting temperature for 5 seconds by
pressing the BAKE button.
6. When baking...
Put your food in the oven after the
preheat countdown ends.
During baking/roasting the elements will
turn on and off to keep the oven
temperature at the setting.
NOTE
: The top element helps heat during
baking/roasting, but does not turn red.
(example
for
set temperature
of
350°F)
7. After cooking, turn off the oven.
YOU SEE
...
time of day or
minute timer countdown
11

ELECTRONIC OVEN CONTROL
Adjusting oven temperature control
If you are not satisfied with the baking/roasting
results, you can change the offset
temperature by following the steps below :
Although your new oven is properly adjusted NOTE : DO NOT measure the oven temperature with a
to provide accurate temperatures, it may thermometer. Opening the oven door will lower the
cook faster or slower than your old oven. oven temperature and give you an incorrect reading.
Also, the thermometer temperature will change as your
oven cycles.
1. Press and hold BAKE for 4 seconds.
PRESS
The display will show 350°F for
4 seconds. Then it will show the current
offset temperature, for example “OO”, if
you have not already adjusted the
temperature.
2. Set the new offset temperature.
PRESS
Press A to raise the temperature or V
to lower the temperature in 10°F
amounts. You can set the temperature
change as low as -30°F or as high as
+3O”F. A minus (-) sign will appear
before the number when decreasing
the temperature setting. The minus
sign indicates that the oven will be
cooler by the displayed amount. There
is no sign in front of the number when
increasing the temperature setting.
YOU SEE ON
n
DEPART
I
(factory setting of “0”)
(example when making oven
10°F cooler)
3. Enter the adjustment.
NOTE
: The offset temperature resets to
“00” if the power goes out for more
than 1 second.
PRESS YOU SEE
... time of day or
minute timer countdown
12

ELECTRONIC OVEN CONTROL
How to determine the amount of
temperature adjustment needed...
The chart at the right tells you how much to
adjust the offset temperature to get the
cooking results you want. You can figure out
cooking results by the amount of browning,
moistness, and rising times for baked foods.
Number of Degrees
“F
Adjust by this
To Cook Food...
a little more +I0
moderately more
+20
much more
a little less
+30
-10
moderately less
much less
-20
-30
13

Broiling
NOTES :
.
Do not preheat when broiling.
. Leave the door partly open when you
use the oven to broil. This lets the oven
stay at the proper temperatures.
1. Place the oven rack for broiling.
Place the oven rack so that the surface
of the food is at least 3” (7.5 cm) away
from the broil element. For more
information, see “Broiling” on page 23.
The top element (as set
by the Broil function )
operates at full power when
heating.
Use this setting for normal broiling and top
browning with the door open in the Broil Stop
position.
This setting can also be used for Vari-Broil with
the door closed. The element will cycle off and on
to maintain the preset temperature.
Rear of rack
2. Place your food on the broiler pan
and place the pan in the center of
the oven rack.
3. Close the oven door to the broil
stop position.
The broil stop position lets the door stay
open about 4” (10 cm) by itself.
14

ELECTRONIC OVEN CONTROL
4. Press the BROIL button.
PRESS YOU SEE ON
l
DEPART
The broil indicator light will light up.
5. Start broiling.
The ON and HEAT indicator lights will
light up.
NOTES :
l
You can change the temperature
setting any time after pressing the
START
button. To change the
setting, see “Vari-Broil” on the next
page. After changing the setting, you
do not have to press the START
button again.
l
If you are broiling while the minute
timer is counting down, you can
see the set broiling temperature for
5 seconds by pressing the
BROIL
button.
6. After broiling, turn off the oven.
PRESS
temperature) -
YOU SEE ON. DEPART
YOU SEE
...
time of day or
minute timer countdown
15

ELECTRONIC OVEN CONTROL
Vari-Broil
To custom broil at a lower temperature...
.
If the food is cooking too fast...
PRESS YOU SEE ON
l
DEPART
Press the
BROIL
button and press the
V button until “325°F” shows on the
display. After changing the setting, you
do not have to press the START button
again. I m
E
(example for broiling at 325°F)
.
If you want food to broil slower
from the start...
Close the oven door.
Press the
BROIL
button and press the
V button so a temperature between
“300°F” and “500°F” shows on the
display.
Press the
START
button.
Lower temperature settings let the broil
heating element cycle and slow
cooking down. The lower the
temperature, the slower the cooking.
NOTE
: Fish and chicken are some
foods that may cook better if you use
lower broiling temperatures.
PRESS YOU SEE ON
l
DEPART
I
(example for broiling at 400°F)
16

ADDITIONAL
RANGE FEATURES
Oven vent
Coil element cooktop models:
Hot air and moisture escape from the oven
through a vent under the left rear surface
element. You can cook on the element or keep
food warm on it while the oven is on.
Oven Vent
Burn Hazard
l
If you leave a utensil on the left rear
surface element, use potholders when
moving it. Pan handles can become hot
enough to burn.
l
Plastic utensils left over the vent can melt.
Glass ceramic cooktop models:
The oven vent, located on the lower left side of
the backguard, allows hot air and moisture to
escape when the oven is in use.
P
Oven Vent
/
Do not block the vent.
Poor baking/roasting may result
Use warm soapy water to clean the vent
Broiler pan storage rack
(on some models)
A handy rack has been designed at the top of
the storage drawer to hold the broiler pan and
broiler pan grid.
17

ADDITIONAL
RANGE FEATURES
Automatic oven light
The oven light will turn on automatically once the
oven door is opened and will remain on while the
door is open. Since it functions separately from
the electronic range control, the oven does not
need to be on for the light to come on.
The oven light may also be turned
on using the manual switch
located on the control console.
Fluorescent cooktop light
(on some models)
The cooktop light is in the top of the control console.
The switch is on the control
console. Push the switch to turn
the light on. The light may take a
few seconds to light up.
Appliance outlet
(on some models)
The 12Ov appliance outlet located on the control
console may be used to run portable appliances
placed on a counter top beside the range.
The outlet operates
independently and is not affected
by range control settings
/
l
Do not place appliances on the
Fire Hazard 1
cooktop. A fire could result If the
cooktop is hot or someone turns it on.
18

USING THE
SURFACE ELEMENTS
Surface element controls
Control knobs must be pushed in before
turning them to a setting. They can be set
anywhere between HI and “0” (OFF).
The controls for the surface elements provide
infinite heat settings. The numbers on the dial
serve as a reference. The control can be turned
to any setting to provide the exact heat required.
Glass ceramic cooktop models: The controls
work on the principle of percent on, percent
off. For example, when the control is turned to
the “5” setting, the element will be on only
50% of the time. Because of the fast heat-up
of radiant heat elements, you will notice, and
perhaps even hear, the element switching on
and off.
Power on lights
The Power On lights beside the control knobs
indicate which surface elements are turned on
by the knobs. A Power On light will glow when
its associated surface element is turned on.
Burn and Fire Hazard
l
Be sure all control knobs are turned
to “0” and the Power On light(s) is off
when you are not cooking.
l
Someone could be burned or a fire
could start if a surface element is
accidentally left ON.
Control setting guide
Until you get used to the settings, use the
following chart as a guide.
For best results, start cooking at the high
settinqsthen turn the control knob to a lower
setting tb continue cooking.
HI
l
To start foods cooking.
l
To bring liquids to a boil.
8-7
l
To hold a rapid boil.
6-5
l
To fry foods. ,,.^
l
For gravy, pudding and
4
icing
l
To cook large amounts of
vegetables.
3-2
1
l
To keep food cooking
after starting it on a higher
setting.
l
To keep foods warm until
ready to serve
19

USING THE
SURFACE ELEMENTS
Coil element cooktop
models:
The temperature of the cooktop surface
increases with the number of elements
that are on. With 3 or 4 elements turned
on, surface temperatures are high and
caution should be exercised when
around the cooktop.
l
Drip bowls should be used at all times. Do
not use aluminum foil to cover drip bowls.
Use of aluminum foil could result in a shock
hazard, improper cooking, or damage to the
element.
l
Prolonged use of elements without pots can
cause damage and early failure.
l
Use of round bottom woks is not
recommended.
See pages 31 and 32 for care and cleaning
instructions
Simmer element
(on some models)
Identified on the disc in the centre of the
element, this element can maintain lower
temperatures for preparation of foods which
require very low heat (e.g. sauces, chocolate,
cheese).
Gml~;;l~eramic cooktop
.
.
Glass ceramic cooktop elements
Quick light radiant heating elements
The quick light radiant heating elements are
designed for fast heat response. You can see
them light up in just seconds.
These elements consist of a set of special heater
coils embedded in a thermal insulation material.
Each element is fitted with a thermal limiter to
ensure the glass ceramic does not exceed the
maximum safe operating temperature specified by
the glass ceramic manufacturer. You may notice
the element going on and off a number of times
during use. This is a normal occurrence.
To maximize the efficiency of this type of heater,
we suggest you use it similarly to your previous
element type. Turn to maximum until the desired
temperature is reached, then turn it down to the
setting that best maintains the desired heat.
NOTE:
1. Sliding metal pans on the glass
ceramic cooktop surface may leave
marks. If the elements are not hot,
metal marks can be removed using
Cooktop Polishing Creme. Other marks
may be permanent. Wiping off the
cooktop after each use will eliminate
stains and provide the most even
heating.
2. Using a pan with a nicked or scratched
bottom may damage the glass ceramic
cooktop. Heating a soiled pan may
leave a stain on the cooktop.
See pages 33 and 34 for care and
cleaning suggestions.
20
Table of contents
Other Roper Range manuals

Roper
Roper FGP325G User manual

Roper
Roper F8858W0 User manual

Roper
Roper FGS337G User manual

Roper
Roper Range User manual

Roper
Roper FEP310VQ0 User manual

Roper
Roper FGP335Y User manual

Roper
Roper FGP210V User manual

Roper
Roper FEP310KW0 User manual

Roper
Roper FGP335B User manual

Roper
Roper FES340Y User manual

Roper
Roper SEC350X User manual

Roper
Roper Roper FEP210VL0 User manual

Roper
Roper 20" User manual

Roper
Roper FGS385B User manual

Roper
Roper FGP325Y User manual

Roper
Roper FEP350Y User manual

Roper
Roper FEP310KW4 User manual

Roper
Roper FGP31OE User manual

Roper
Roper FES385Y User manual

Roper
Roper FGP305KW User manual