Rorke Data GalaxyNASLX2 Quick setup guide

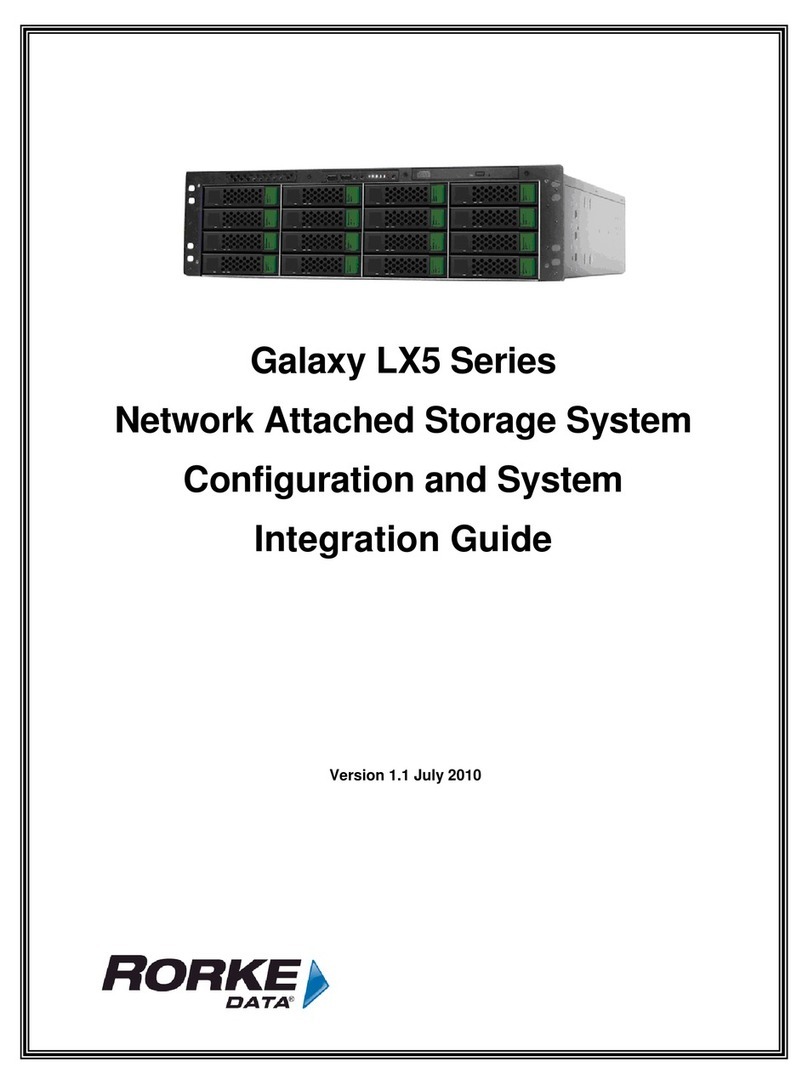
Galaxy LX2 Series
Network Attached Storage System
Configuration and System
Integration Guide

GALAXYNASLX CONFIGURATION AND SYSTEM INTEGRATION GUIDE
1 Section 2 Basic Setup
Rorke Data Inc
9700 W 76th Street
Eden Praitie , MN 55344
952 829 0300
This manual only applies to the GalaxyNASLX2
Version 1.1 October 20, 2006

GALAXYNASLX2 CONFIGURATION AND SYSTEM INTEGRATION GUIDE
2 Section 1 Intro and Overview
Table of Contents
SAFETY PRECAUTIONS.........................................................................................................................8
CONVENTIONS............................................................................................................................................9
GALAXYNASLX22 OS UPDATES.....................................................................................................10
1.1 Product Specifications ....................................................................................................................12
1.1.1 Overview..............................................................................................................................................12
1.1.2 Basic Features and Advantages ...................................................................................................13
1.2 Model Variations................................................................................................................................14
1.2.1 GalaxyNASLX22 Model Descriptions...........................................................................................14
1.3 Model Variations................................................................................................................................15
1.3.1 Description of Physical components...........................................................................................15
1.3.2 Component specifications..............................................................................................................15
1.3.3 Raid storage specifications............................................................................................................16
1.3.4 Embedded OS features....................................................................................................................17
1.4 Mounting / Securing GalaxyNASLX22.........................................................................................17
1.4.1 Rack Mounting the GalaxyNASLX22............................................................................................17
1.4.2 Installation Sequence.......................................................................................................................19
1.4.2.1 Ball Bearing Slide Rail Rack Installation.....................................................................................19
2.1 Configuring the NAS ........................................................................................................................23
2.1.1 Indicators and switch descriptions Figure 2.1.........................................................................23
2.1.2 Making connections and Power Up Figure 2.2.........................................................................23
2.2 Pre-configuration Setup..................................................................................................................24
2.2.1 First time operation of GalaxyNASLX22 Figure 2.3..................................................................24
2.3 Remote Administration....................................................................................................................24

GALAXYNASLX2 CONFIGURATION AND SYSTEM INTEGRATION GUIDE
3 Section 1 Intro and Overview
2.3.1 Logging into the GalaxyNASLX22 Figure 2.5 ............................................................................25
2.3.2 Setup of the Admin password Figure 2.6 ..................................................................................25
2.3.3 Changing the NAS network name Figure 2.7 ........................................................................26
2.3.4 Setting the NAS Date and Time Figure 2.8...............................................................................26
2.3.5 Preparing Raid volumes Figure 2.9............................................................................................27
2.3.6 Preparing NAS Shares Figure 2.10-2.11....................................................................................27
2.3.6.1 Assigning protocol and attributes Figure 2.12........................................................................29
2.3.6.2 Assigning Share protocol attributes Figure 2.13– 2.14.........................................................30
2.3.7 Access to Shares Figure 2.15.....................................................................................................31
2.3.8 Access Shares under Linux...........................................................................................................32
2.3.9 Access Shares under MAC OSX 10.4...........................................................................................32
2.3.10 User and Group Permissions / Privileges...................................................................................32
2.4 Example of Storage Capacity Usage............................................................................................32
3.0 GalaxyNASLX22 GUI Functions....................................................................................................34
3.1.0 “Resources” Menu Functions Figure 3.1...................................................................................34
3.1.1 Shares..................................................................................................................................................35
3.1.1.1 Creating a Share Figure 3.2...........................................................................................................35
3.1.1.2 Function “SMB Settings Function” Figure 3.3.......................................................................35
3.1.1.3 Function: “NFS share access” Figure 3.4.................................................................................36
3.1.1.4 Function: “FTP Settings” Figure 3.5...........................................................................................37
3.1.2 Users ....................................................................................................................................................39
3.1.2.1 Function: “Create new user” Figure 3.6.....................................................................................39
3.1.2.2 Function: Quota for users (import/export) Figure 3.6 ...........................................................39
3.1.2.3 Function: User ID [Uid] Mappings Figure 3.8.............................................................................41
3.1.3 Groups Figure 3.9..........................................................................................................................41
3.2.0 ‘Setup’ ‘server’ Functions Figure 3.10.......................................................................................42

GALAXYNASLX2 CONFIGURATION AND SYSTEM INTEGRATION GUIDE
4 Section 1 Intro and Overview
3.2.1 Function “NAS Server name“ Figure 3.10..................................................................................42
3.2.2 Function “Authentication method” Figure 3.10........................................................................42
3.2.3 Function “Clock settings” Figure 3.11........................................................................................44
3.2.4 Function “Set time” Figure 3.11....................................................................................................45
3.2.5 Function “NFS settings” Figure 3.12...........................................................................................45
3.2.6 Function “FTP settings” Figure 3.13............................................................................................45
3.2.7 Function “AppleTalk Settings” Figure 3.13................................................................................47
3.2.8 Function “SMB Settings” Figure 3.14..........................................................................................48
3.2.9 Function “Backup Client Settings” Figure 3.15........................................................................49
3.2.10 Function “Language Settings” Figure 3.15................................................................................51
3.3.0 ‘Setup’ ‘Network’ Functions...........................................................................................................51
3.3.1 Function “IP address” Figure 3.16...............................................................................................51
3.3.2 Function “NIC assignments” Figure 3.16...................................................................................51
3.3.3 Function “Create Ethernet team” Figure 3.16............................................................................52
3.4.0 ‘Setup’ ‘Administrator’ Functions.................................................................................................54
3.4.1 Function “Administrator Password ” Figure 3.17.....................................................................54
3.4.2 Function “Administrator Access ” Figure 3.17.........................................................................54
3.4.3 Function “E-mail notification” Figure 3.18.................................................................................55
3.4.4 Function “SSL Certificate Authority” Figure 3.18.....................................................................55
3.4.5 Function “SNMP Settings” Figure 3.18.......................................................................................55
3.5.0 ‘Setup’ ‘UPS’ Functions...................................................................................................................57
3.5.1 Function “UPS configuration ” Figure 3.19................................................................................57
3.6.0 ‘Setup’ ‘disk manager’ Functions.................................................................................................58
3.6.1 Function “Synchronize mode” Figure 3.20................................................................................58
3.6.2 Function “Synchronize options” Figure 3.20 ............................................................................59
3.6.2 Function “Choose Shares” Figure 3.20.......................................................................................60

GALAXYNASLX2 CONFIGURATION AND SYSTEM INTEGRATION GUIDE
5 Section 1 Intro and Overview
3.6.3 Function “Synchronize schedule” Figure 3.21..........................................................................60
3.6.4 Function “Unit Manager” Figure 3.22..........................................................................................61
3.6.4 Function “Units Assigned ” Figure 3.23......................................................................................62
3.6.5 Function “Share Volume/Logical Manager” Figure 3.23.........................................................62
3.6.6 Function “Snapshot definition” Figure 3.24 ..............................................................................62
3.7.0 ‘Setup’ ‘GUI’ Functions....................................................................................................................64
3.7.1 Function “Search preferences ”....................................................................................................64
3.8.0 ‘Maintenance’ ‘shutdown’ Functions..........................................................................................65
3.8.1 Function “System shutdown” Figure 3.25..................................................................................65
3.8.2 Function “Schedule for shutdown” Figure 3.25........................................................................65
3.8.3 Function “System restart” Figure 3.25........................................................................................65
3.8.4 Function “Schedule for restart” Figure 3.26..............................................................................65
3.8.5 Function “Connection reset” Figure 3.26...................................................................................66
3.9.0 ‘Maintenance’ ‘snapshot’ Functions............................................................................................66
3.9.1 Function “Snapshot access” Figure 3.27...................................................................................67
3.9.2 Function “NFS Snapshot access” Figure 3.27..........................................................................67
3.10.0 ‘Maintenance’ ’ resource misc’ Functions..................................................................................68
3.10.1 Function “Save resources” Figure 3.28......................................................................................68
3.10.2 Function “Restore resources” Figure 3.28.................................................................................68
3.10.1 Function “Remove resources” Figure 3.28................................................................................69
3.11.0 ‘Maintenance’ ’ software update’ Functions..............................................................................70
3.11.1 Function “System software update” Figure 3.29......................................................................70
3.12.0 ‘Maintenance’ ’ backup’ Functions..............................................................................................71
3.12.1 Function “Local backup” Figure 3.30..........................................................................................71
3.12.2 Function “Local backup schedule” Figure 3.30........................................................................71
3.12.3 Function “Restore from local backup” Figure 3.30..................................................................72

GALAXYNASLX2 CONFIGURATION AND SYSTEM INTEGRATION GUIDE
6 Section 1 Intro and Overview
3.12.4 Function “Tape backup” Figure 3.31...........................................................................................72
3.12.5 Function “Tape restore function” Figure 3.31...........................................................................73
3.12.6 Function “Tape drive utilities” Figure 3.32.................................................................................74
3.12.0 ’ Status’ Functions...........................................................................................................................74
3.12.1 Function “network” Figure 3.33....................................................................................................74
3.12.2 Function “share volume” Figure 3.34+ Figure 3.35..................................................................75
3.12.3 Function “connections” Figure 3.36............................................................................................76
3.12.4 Function “hardware” Figure 3.37+Figure 3.38...........................................................................77
3.13.0 ’Raid / FC’ Functions.......................................................................................................................78
3.13.1 Function “raid manager” raid administrations Figure 3.39....................................................78
3.14.0 ‘Help’ Functions ...............................................................................................................................79
3.14.1 Function “software license’ Figure 3.40 ....................................................................................79
3.14.2 Function “manual” Figure 3.41......................................................................................................80
3.14.2 Function “registration” Figure 3.42..............................................................................................80
3.14.3 Function “About GalaxyNASLX22” Figure 3.43........................................................................80
4.0. Troubleshooting................................................................................................................................81
4.1.0 GalaxyNASLX22 chassis.................................................................................................................81
4.1.1 Front panel indicators and alarms Figure 4.1............................................................................81
4.1.2 Raid Indicators and alarms.............................................................................................................83
4.1.2.1 Raid manager / GUI Figure 4.2.....................................................................................................83
4.2.0 GalaxyNASLX22 OS..........................................................................................................................84
4.3.0 Repairs / Replacements...................................................................................................................89
4.3.1 Replacing a Hard Disk Drive in the RAID Chassis....................................................................89
4.3.2 Replacing a defective internal fan in the GalaxyNASLX22 Chassis....................................90
4.3.3 Replacing a defective power supply in the GalaxyNASLX22 Chassis................................93

GALAXYNASLX2 CONFIGURATION AND SYSTEM INTEGRATION GUIDE
7 Section 1 Intro and Overview
Copyright 2005
This Edition First Published 2005 All rights reserved. This publication may
not be reproduced, transmitted, transcribed, stored in a retrieval system, or
translated into any language or computer language, in any form or by any
means, electronic, mechanical, magnetic, optical, chemical, manual or
otherwise, without the prior written consent of Rorke Data, Inc.
Disclaimer
Rorke Data makes no representations or warranties with respect to the contents
hereof and specifically disclaims any implied warranties of merchantability or
fitness for any particular purpose. Furthermore, Rorke Data reserves the right to
revise this publication and to make changes from time to time in the content
hereof without obligation to notify any person of such revisions or changes.
Product specifications are also subject to change without prior notice.
Trademarks
Rorke Data and the Rorke Data logo are registered trademarks of Rorke
Data, Inc. Rorke Data and other names prefixed with “GAL” and “Galaxy” are
trademarks of Rorke Data, Inc. in the United States, other countries, or both.
PowerPC® is a trademark of International Business Machines Corporation
and Motorola Inc. in the United States, other countries, or both
Windows® and Microsoft® are trademarks of Microsoft Corporation in the
United States, other countries, or both
Apple , MAC, Macintosh, OSX are trademarks of Apple Computer in the
United States, other countries, or both
Solaris and Java are trademarks of Sun Microsystems, Inc. in the United
States, other countries, or both
All other names, brands, products or services are trademarks or registered
trademarks of their respective owners.

GALAXYNASLX2 CONFIGURATION AND SYSTEM INTEGRATION GUIDE
8 Section 1 Intro and Overview
Safety Precautions
Precautions and Instructions
•Prior to powering on the subsystem, ensure that the correct power range is being used.
•The GalaxyNASLX22 RAID subsystem may come with up to twenty four (24) drive bays.
Leaving any of these drive bays empty will greatly affect the efficiency of the airflow within
the enclosure, and will consequently lead to the system overheating, which can cause
irreparable damage.
•If a module fails, leave it in place until you have a replacement unit and you are ready to
replace it.
•Airflow Consideration: The subsystem requires an airflow clearance, especially at the front
and rear.
•Handle subsystem modules using the retention screws, extraction levers, and the metal
frames/faceplates. Avoid touching PCB boards and connector pins.
•To comply with safety, emission, or thermal requirements, none of the covers or
replaceable modules should be removed. Make sure that during operation, all enclosure
modules and covers are securely in place.
•Be sure that the rack cabinet into which the subsystem chassis will be installed provides
sufficient ventilation channels and airflow circulation around the subsystem.
•Provide a soft, clean surface to place your subsystem on before working on it. Servicing
on a rough surface may damage the exterior of the chassis.
•If it is necessary to transport the subsystem, repackage all disk drives separately. If using
the original package material, other replaceable modules can stay within the enclosure.
•Dual redundant controller models come with two controller modules that must be installed
into the subsystem. Single controller models come with a single controller module and a
metal sheet is placed over the lower controller bay at the rear of the subsystem. Since
single controller models cannot be upgraded, this metal sheet should NEVER be removed.
ESD Precautions
Observe all conventional anti-ESD methods while handling system modules. The
use of a grounded wrist strap and an anti-static work pad is recommended. Avoid
dust and debris or other static-accumulative materials in your work area.

GALAXYNASLX2 CONFIGURATION AND SYSTEM INTEGRATION GUIDE
9 Section 1 Intro and Overview
Conventions
Naming
From this point on and throughout the rest of this manual, the GalaxyNASLX22 series is referred to as simply the
“subsystem” or the “system.”
LImportant Messages
Important messages appear where mishandling of components is possible or when work orders can be mis-conceived.
These messages also provide important information associated with other aspects of system operation. The word
“important” is written as “IMPORTANT,” both capitalized and bold, and is followed by text in italics. The italicized text is
the message to be delivered.
0Warnings
Warnings appear where overlooked details may cause damage to the equipment or result in personal injury. Warnings
should be taken seriously. Warnings are easy to recognize. The word “warning” is written as “WARNING,” both
capitalized and bold and is followed by text in italics. The italicized text is the warning message.
,Cautions
Cautionary messages should also be heeded to help you reduce the chance of losing data or damaging the system. Cautions
are easy to recognize. The word “caution” is written as “CAUTION,” both capitalized and bold and is followed by text in
italics. The italicized text is the cautionary message.
"Notes
These messages inform the reader of essential but non-critical information. These messages should be read carefully as any
directions or instructions contained therein can help you avoid making mistakes. Notes are easy to recognize. The word
“note” is written as “NOTE,” both capitalized and bold and is followed by text in italics. The italicized text is the cautionary
message.

GALAXYNASLX2 CONFIGURATION AND SYSTEM INTEGRATION GUIDE
10 Section 1 Intro and Overview
GalaxyNASLX22 OS Updates
Please contact your system vendor or visit Rorke’s FTP site (ftp.rorke.com) for the latest software or
firmware updates.
NOTE that the firmware version installed on your system should provide the complete functionality listed in
the specification sheet/user’s manual.
We provide special revisions for various application purposes. Therefore, DO NOT upgrade your firmware
unless you fully understand what a firmware revision will do. Problems that occur during the updating
process may cause unrecoverable errors and system down time. Always consult technical personnel before
proceeding with any firmware upgrade.

GALAXYNASLX2 CONFIGURATION AND SYSTEM INTEGRATION GUIDE
11 Section 1 Intro and Overview
This page left blank intentionall
y

GALAXYNASLX2 CONFIGURATION AND SYSTEM INTEGRATION GUIDE
12 Section 1 Intro and Overview
Section 1
GalaxyNASLX22
Introduction and Overview
1.1 Product Specifications
1.1.1 Overview
The GalaxyNASLX2 model GNAS3U-LX2-8000 is the newest member of Rorke Data’s
growing family of Network Attached Storage (NAS) products. It is a low profile (2U) rack
mount NAS solution designed for your network attached data storage needs.
As with the earlier GalaxyNASLX, the GalaxyNASLX2 is characterized by many of the same
outstanding features and attributes as those of other NAS family members. Those features
include preloaded Flash module Linux operating system, network connectivity load balancing,
integrated software functions that help ease configuration and use, ease of deployment in the
network, as well as built-in tools to facilitate remote management and systems management,
backup management, business continuance replication management, and upgradeable
storage capacities. The GalaxyNASLX2 supports the major industry-standard file protocols:
CIFS, SMB, NFS, Apple Talk , HTTP, and FTP.
Improvements to the GalaxyNASLX2 include
Up to 8TB per Logical Volume Server Administration via HTTPS Protocol
Built in Anti-virus protection Ext3 NFS v3 file system automatically defragments
Software RAID support OS Update via web
Built-in-Backup-Agent
The GalaxyNASLX2 is a high-performance network storage device designed for a variety of
Ethernet LAN storage applications in the Audio, Video, Print Graphics, Medical Imagery, and
Video Surveillance markets. Because of the unique way the storage and OS interact, large
file serving and streaming data becomes the real strength of the GalaxyNASLX2. Although
difficult to project how successful it will be with your specific usage, many of Rorke Data’s
customers are finding that the GalaxyNASLX2 fits a storage requirement that was recently
being filled by expensive direct attached work station storage.

GALAXYNASLX2 CONFIGURATION AND SYSTEM INTEGRATION GUIDE
13 Section 1 Intro and Overview
1.1.2 Basic Features and Advantages
GalaxyNASLX2 products provide these important features and advantages:
•Web-based Graphical User Interface
•Standard Network Gateway Support
•DHCP Server Support
•Built in Anti-Virus Protection
•Built in Business Continuance Replication Software
•Secured Administration Access
•Multiple Network Interface Card (NIC) Support
•Adaptive Load Balancing (ALB)
•Adapter Fault Tolerance (AFT)
•Up to 8TB logical volume support
•UPS Support and Network UPS Support
•Console Tool as well as Remote Console
•Email Alert Notification and Log Function
•Software RAID support
•Hardware RAID Controller Support
•Fibre Channel Support
•Snapshot and Snapshot with Scheduling Function
•Multi Logical Volume Expansion
•Online Logical Volume Expansion
•Multiple Management Level
•Target Password Protection
•IPsec
•10 Gb Ethernet Support with TCP/IP Offload Engine Support
•Up to 2 CPU Support
•Multi-CPU Support
•Built in Backup software

GALAXYNASLX2 CONFIGURATION AND SYSTEM INTEGRATION GUIDE
14 Section 1 Intro and Overview
1.2 Model Variations
1.2.1 GalaxyNASLX2 Model Descriptions
The GalaxyNASLX2 has 4 primary models with many storage variations:
1RU model PN GNAS1U-LX2-HEAD-FC or GNAS1U-LX2-HEAD-SCSI has riser cards that allow for
external RAID add-on capacity connected by SCSI or FC.
2RU model PN GNAS2U-LX2-CCCC has 8 internal SATA II hot swap drives in a RAID 5
configuration with capacities of 1TB up to 4TB.
3RU model PN GNAS3U-LX2-CCCC has 16 internal SATA II hot swap drives in a RAID 6
configuration with capacities of 2TB up to 8TB.
5RU model PN GNAS5U-LX2-CCCC has 24 internal SATA II hot swap drives in a RAID 6
configuration with capacities of 3TB up to 12TB
The GalaxyNASLX2 share the same basic setup, configuration, and administration so the main
portion of the manual will discuss these functions. Each Model will have an Appendix assigned at the
end of the manual to show differences and any uniqueness based on the model.
For ease of purpose, the main portion of the manual will
be based on the 3RU version of the GalaxyNASLX2.

GALAXYNASLX2 CONFIGURATION AND SYSTEM INTEGRATION GUIDE
15 Section 1 Intro and Overview
1.3 Model Variations
1.3.1 Description of Physical components
1.3.2 Component specifications
The GalaxyNASLX2 16 bay is a 3U 16-bay rack mountable network appliance server
and storage enclosure that supports up to sixteen hot-swappable hard disk drives. The
cpu board is an ATX, dual Zeon server mother board. This board supports:
•One 3.2Ghz ZEON CPU, option for two CPUs plus Dual core
•On board Linux OS Flash boot drive, Slim CD, Slim FDD
•On board externally connected printer, video, mouse, and keyboard
•On board dual 1Gb Ethernet ports
•Ships with 2GB DDR RAM
•Up to 6 PCI-X slots
•PCI-X SATA II RAID 6 controller
nFloppy drive oFront panel and system control
pCD Rom driveqRAID Disk drives and trays

GALAXYNASLX2 CONFIGURATION AND SYSTEM INTEGRATION GUIDE
16 Section 1 Intro and Overview
•Supports up to 16 x 3.5", 1.0" SATA II half-height hard disk drives
{storage size and speeds vary depending on NAS model]
•Sixteen hot-swappable hard disk drive bays [ number vary with NAS model]
•Two-piece integrated backplane design that supports Serial ATA interface
•Built-in environment controller
•Enclosure management controller
•Redundant power supply
•Advanced thermal design with hot-swappable fans
•Front panel LED Alarm and Function indicators
•Shock and vibration proof design for high reliability
•Dimensions 132.08mm (H) x 444.50mm (W) x 673.10mm D);
•5.2" (H) x 17.5" (W) x 26.5" (D)
•Weight 32.75 lbs
•Power Supply Input Range 90Vac - 264Vac; -48Vdc Optional up to 650W
•Ventilation 6 fans (4 front 80mm x 80mm x 25mm, 2 rear 60mm x 60mm x
25mm)
•Environment Controller Internal Temperature - visible and audio alarm
•Individual Cooling Fans - visible and audio alarm Ventilation 6 fans
1.3.3 Raid storage specifications
The GalaxyNASLX2 has a sophisticated built in SATA II Raid controller and drives that was
pre-configured and prepared for you so it would be plug and play for most users. By default,
the SATA RAID has been configured into 2TB RAID 6 logical volumes with the guest account
activated and one root level share named galaxynas1[unless otherwise instructed].
RAID 6 with its dual parity drive protection has been found to be the most protective and least
costly way of guarding against not only initially failed SATA disk drives but primarily against
the total loss of the RAID data because a second SATA drive detects an error during the
RAID rebuild process. A RAID 5 configuration in that scenario would cause the RAID to fail
and all data would be lost.
LImportant : the RAID controller must be setup to notify the administrator in cases
where errors occur. RAID errors are not posted to the GalaxyNASLX2. Certain RAID
controllers have an audible alarm but the most reliable way to be notified is with email.
This means that the RAID controller’s email notification needs to be setup to warn the
administrator. Follow the procedure in the attached RAID controller’s user guide for
email notification.

GALAXYNASLX2 CONFIGURATION AND SYSTEM INTEGRATION GUIDE
17 Section 1 Intro and Overview
1.3.4 Embedded OS features
LImportant: The GalaxyNASLX2 EULA restricts you, the user, from loading any
other software, such as application software, onto the GalaxyNASLX2. Loading or use
of any software voids the license agreement.
Each GalaxyNASLX2 is preloaded at the factory with its base operating system, installation
and administration software. The code is loaded onto the system's Flash module, a highly
reliable solid state Memory module that is directly connected to the NAS IDE port on the
server board.
In addition to the operating system and basic embedded application software, each unit
contains a web based browser interface which simplifies remote configuration and
administration tasks.
Specifically, the units come preconfigured with the following functions:
Linux OS:
Linux Redhat OS ver code optimized for the GalaxyNASLX2 series
Multiple file systems support:
SMB/ CIFS/ Samba
NFS
Apple Talk
FTP
Multiple network protocol support
TCP/IP
NetBEUI
SNMP
HTTP
Supported Clients
Microsoft Windows—all versions except NT
Linux
Mac OS 8.X, 9.X , OS X 10.4
Remote NAS system administration
Administrative tasks can be performed in the Web-based GUI
Alternate administrative task performed using Windows Terminal Service
Advanced management functions available via Windows Terminal Service
Simple point-and-click for restores using Windows NT Backup
NAS Backup Assistant MMC Snap-in Web page
1.4 Mounting / Securing GalaxyNASLX2
1.4.1 Rack Mounting the GalaxyNASLX2
The GalaxyNASLX2 is a rack mounted chassis. Mounting holes on the front panel are
set to RETMA spacing and will fit into any standard 19” equipment rack.

GALAXYNASLX2 CONFIGURATION AND SYSTEM INTEGRATION GUIDE
18 Section 1 Intro and Overview
Rack Equipment Precautions
These precautions and directions should be used only as an information source for
planning your GalaxyNASLX2 deployment. Avoid personal injury and equipment
damage by following accepted safety practices.
Floor Loading
,CAUTION: Ensure proper floor support and ensure that the floor loading
specifications are adhered to. Failure to do so may result in physical injury or damage
to the equipment and the facility.
Deployment of rack servers, related equipment, and cables exceeds 1800 pounds for a
single 42U rack.
External cable weight contributes to overall weight of the rack installation. Carefully
consider cable weight in all designs
Installation Requirement
,CAUTION: Be aware of the center of gravity and tipping hazards. Installation
should be such that a hazardous stability condition is avoided due to uneven loading.
Rorke Data recommends that the rack footings extend 10 inches from the front and
back of any rack equipments 22U or higher.
Adequate stabilization measures are required. Ensure that the entire rack assembly is
properly secured and that all personnel are trained in proper maintenance and
operation procedures.
Tipping hazards include personal injury and death.
Power Input and Grounding
,CAUTION: Ensure your installation has adequate power supply and branch circuit
protection.
Check nameplate ratings to assure there is no overloading of supply circuits that
could have an effect on over current protection and supply wiring. Reliable grounding
of this equipment must be maintained. Particular attention should be given to supply
connections when connecting to power strips, rather than direct connections to the
branch circuit.
Thermal Dissipation Requirement
,CAUTION: Thermal dissipation requirements of this equipment deployment
mandate minimum unrestricted airspace of three inches in both the front and the rear.
The ambient within the rack may be greater than room ambient. Installation should be
such that the amount of air flow required for safe operation is not compromised. The
maximum temperature for the equipment in this environment is 122°F (50°C).
Consideration should be given to the maximum rated ambient.

GALAXYNASLX2 CONFIGURATION AND SYSTEM INTEGRATION GUIDE
19 Section 1 Intro and Overview
1.4.2 Installation Sequence
,CAUTION It is strongly recommended to securely fasten the mounting rack to
the floor or wall to eliminate any possibility of tipping of the rack. This is especially
important if you decide to install several GalaxyNASLX2 chassis’ in the top of the
rack.
A brief overview of GalaxyNASLX2 installation follows:
1. Select an appropriate site for the rack.
2. Unpack the server and rack mounting hardware.
3. Attach the rack mounting hardware to the rack and to the server.
4. Mount the server into the rack.
5. Connect the cables.
6. Turn on and initialize the server.
1.4.2.1 Ball Bearing Slide Rail Rack Installation
Unpack the package box and locate the materials and documentation necessary for
rack mounting. All the equipment needed to install the server into the rack cabinet is
included.
Follow the instructions for each of these illustrations
Kit Contents: the rack mounting kit include:
This manual suits for next models
1
Table of contents
Other Rorke Data Network Hardware manuals