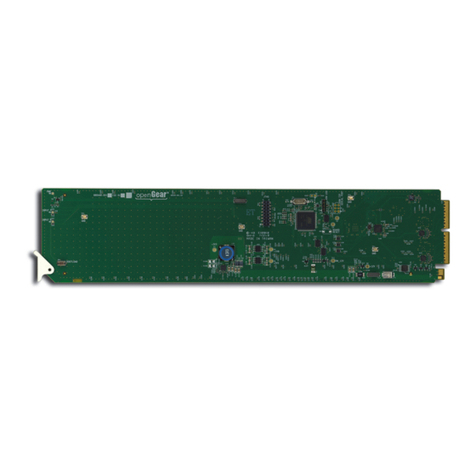
Ross OpenGear DRA-8902 Series User manual

DRA-8902 Series
Dual 12G/6G/3G/HD/SD Reclocking Distribution
Amplifier User Manual

Thank You for Choosing Ross
You've made a great choice. We expect you will be very happy with your purchase of Ross Technology.
Our mission is to:
1. Provide a Superior Customer Experience
• offer the best product quality and support
2. Make Cool Practical Technology
• develop great products that customers love
Ross has become well known for the Ross Video Code of Ethics. It guides our interactions and
empowers our employees. I hope you enjoy reading it below.
If anything at all with your Ross experience does not live up to your expectations be sure to reach out to
us at [email protected].
David Ross
CEO, Ross Video
Ross Video Code of Ethics
Any company is the sum total of the people that make things happen. At Ross, our employees are a
special group. Our employees truly care about doing a great job and delivering a high quality customer
experience every day. This code of ethics hangs on the wall of all Ross Video locations to guide our
behavior:
1. We will always act in our customers’ best interest.
2. We will do our best to understand our customers’ requirements.
3. We will not ship crap.
4. We will be great to work with.
5. We will do something extra for our customers, as an apology, when something big goes wrong and
it's our fault.
6. We will keep our promises.
7. We will treat the competition with respect.
8. We will cooperate with and help other friendly companies.
9. We will go above and beyond in times of crisis. If there's no one to authorize the required action in
times of company or customer crisis - do what you know in your heart is right. (You may rent
helicopters if necessary.)

DRA-8902 Series · User Manual
• Ross Part Number: 8902DR-004-02
• Release Date: January 26, 2018.
The information contained in this Guide is subject to change without notice or obligation.
Copyright
©2018 Ross Video Limited, Ross®, and any related marks are trademarks or registered trademarks of Ross Video
Limited. All other trademarks are the property of their respective companies. PATENTS ISSUED and PENDING.
All rights reserved. No part of this publication may be reproduced, stored in a retrieval system, or transmitted in any
form or by any means, mechanical, photocopying, recording or otherwise, without the prior written permission of
Ross Video. While every precaution has been taken in the preparation of this document, Ross Video assumes no
responsibility for errors or omissions. Neither is any liability assumed for damages resulting from the use of the
information contained herein.
Patents
Patent numbers US 7,034,886; US 7,508,455; US 7,602,446; US 7,802,802 B2; US 7,834,886; US 7,914,332; US
8,307,284; US 8,407,374 B2; US 8,499,019 B2; US 8,519,949 B2; US 8,743,292 B2; GB 2,419,119 B; GB
2,447,380 B; and other patents pending.
Notice
The material in this manual is furnished for informational use only. It is subject to change without notice and should
not be construed as commitment by Ross Video Limited. Ross Video Limited assumes no responsibility or liability
for errors or inaccuracies that may appear in this manual.
Safety Notices
Refer to the “Important Regulatory and Safety Notices” document that accompanied your product.
Statement of Compliance
This product has been determined to be compliant with the applicable standards, regulations, and directives for the
countries where the product is marketed.
Compliance documentation, such as certification or Declaration of Compliance for the product is available upon
request by contacting [email protected]. Please include the product; model number identifiers and serial
number and country that compliance information is needed in request.
EMC Notices
US FCC Part 15
This equipment has been tested and found to comply with the limits for a class A Digital device, pursuant to part 15
of the FCC Rules.
These limits are designed to provide reasonable protection against harmful interference when the equipment is
operated in a Commercial environment. This equipment generates, uses, and can radiate radio frequency energy
and, if not installed and used in accordance with the instruction manual, may cause harmful interference to radio
communications. Operation of this equipment in a residential area is likely to cause harmful interference in which
case the user will be required to correct the interference at his own expense.
Canada
This Class “A” digital apparatus complies with Canadian ICES-003 and part 15 of the FCC Rules.
Cet appareil numerique de la classe “A” est conforme a la norme NMB-003 du Canada.
European Union
This equipment is in compliance with the essential requirements and other relevant provisions established under
regulation (EC) No 765/2008 and Decision No 768/2008/EC referred to as the “New Legislative Framework”.
Australia/New Zealand
This equipment is in compliance with the provisions established under the Radiocommunications Act 1992 and
Radiocommunications Labeling (Electromagnetic Compatibility) Notice 2008.
Korea
This equipment is in compliance with the provisions established under the Radio Waves Act.
Class A equipment (Broadcasting and communications service for business use)
This device is a business-use (Class A) EMC-compliant device. The seller and user are advised to be aware of this
fact. This device is intended for use in areas outside home.
International
This equipment has been tested under the requirements of CISPR 22:2008 or CISPR 32:2015 and found to comply
with the limits for a Class A Digital device.
Maintenance/User Serviceable Parts
Routine maintenance to this openGear product is not required. This product contains no user serviceable parts. If
the module does not appear to be working properly, please contact Technical Support using the numbers listed
under the “Contact Us” section of this manual. All openGear products are covered by a generous 5-year warranty
Notice — Changes or modifications to this equipment not expressly approved by Ross Video Ltd. could
void the user’s authority to operate this equipment.
Warning — This equipment is compliant with Class A of CISPR 32. In a residential environment this
equipment may cause radio interference.
Notice — This is a Class A product. In domestic environments, this product may cause radio
interference, in which case the user may have to take adequate measures.
Type of Equipment User’s Guide
A
(߶הࡈ ؏ܞݦࢢ)
Class A Equipment
(Industrial Broadcasting &
Communication Equipment)
ࢇ Е ߶הࡈ(A)ࢷળࢶଢԻ۰ શ
ӖЕ یࡈЕ ࢇ ࢺࡶ ࣯ࢂଜݤ Ԃ
ֲ,ɼࢽ࠹ࢂ ࠇ߾۰ یࡈଜЕ ʨࡶ ּࢶࡳԻ
ଢТЬ.
This equipment is Industrial (Class A)
electromagnetic wave suitability equipment and
seller or user should take notice of it, and this
equipment is to be used in the places except for home.

and will be repaired without charge for materials or labor within this period. See the “Warranty and Repair
Policy” section in this manual for details.
Environmental Information
The equipment may contain hazardous substances that could impact health and the environment.
To avoid the potential release of those substances into the environment and to diminish the need for the extraction
of natural resources, Ross Video encourages you to use the appropriate take-back systems. These systems will reuse
or recycle most of the materials from your end-of-life equipment in an environmentally friendly and health
conscious manner.
The crossed-out wheeled bin symbol invites you to use these systems.
If you need more information on the collection, reuse, and recycling systems, please contact your local or regional
waste administration. You can also contact Ross Video for more information on the environmental performances of
our products.
Company Address
Ross Video Limited Ross Video Incorporated
8 John Street P.O. Box 880
Iroquois, Ontario, K0E 1K0 Ogdensburg, New York
Canada USA 13669-0880
General Business Office: (+1) 613 • 652 • 4886
Fax: (+1) 613 • 652 • 4425
Technical Support: (+1) 613 • 652 • 4886
After Hours Emergency: (+1) 613 • 349 • 0006
E-mail (Technical Support): [email protected]
E-mail (General Information): solu[email protected]
Website: http://www.rossvideo.com


DRA-8902 Series User Manual (Iss. 02) Contents • i
Contents
Introduction 1
Overview.............................................................................................................................. 1-2
Features.................................................................................................................. 1-2
Functional Block Diagrams ................................................................................................. 1-3
User Interfaces ..................................................................................................................... 1-4
DashBoard Control System ................................................................................... 1-4
Card-edge Monitoring ........................................................................................... 1-4
SNMP Monitoring and Control............................................................................. 1-4
Documentation Terms and Conventions.............................................................................. 1-5
Installation 2
Before You Begin ................................................................................................................ 2-2
Static Discharge..................................................................................................... 2-2
Unpacking.............................................................................................................. 2-2
Installing the DRA-8902...................................................................................................... 2-3
Supported Rear Modules ...................................................................................... 2-3
Installing a Card .................................................................................................... 2-3
Cabling................................................................................................................................. 2-5
Software Upgrades............................................................................................................... 2-6
Configuration 3
Card Overview..................................................................................................................... 3-2
Monitoring Features............................................................................................................. 3-3
Status LEDs........................................................................................................... 3-3
Using DashBoard................................................................................................................. 3-4
Configuring the DRA-8902 ................................................................................................. 3-5
Configuring the Reclocker .................................................................................... 3-5
Assigning an Input to an Output Channel ............................................................. 3-5
Enabling the Failover Feature ............................................................................... 3-6
Muting an Output .................................................................................................. 3-6
Configuring the Invalid Signal Alarms ................................................................. 3-6
Enabling the Failover Alarm ................................................................................. 3-7
DashBoard Menus 4
Status Tabs........................................................................................................................... 4-2
Signal Tab.............................................................................................................. 4-2
Product Tab ........................................................................................................... 4-3
Hardware Tab ........................................................................................................ 4-4
Setup Tab ............................................................................................................................. 4-5
Alarms Tab .......................................................................................................................... 4-7
Specifications 5
Technical Specifications ...................................................................................................... 5-2

ii • Contents DRA-8902 Series User Manual (Iss. 02)
Service Information 6
Troubleshooting Checklist ................................................................................................... 6-2
Bootload Button..................................................................................................... 6-2
Warranty and Repair Policy ................................................................................................. 6-3

DRA-8902 Series User Manual (Iss. 02) Introduction • 1–1
Introduction
In This Chapter
This chapter contains the following sections:
• Overview
• Functional Block Diagrams
• User Interfaces
• Documentation Terms and Conventions
A Word of Thanks
Congratulations on choosing an openGear DRA-8902 Dual 12G/6G/3G/HD/SD Reclocking
Amplifier. Thank you for joining the group of worldwide satisfied Ross Video customers!
Should you have a question pertaining to the installation or operation of your DRA-8902, please
contact us at the numbers listed on the back cover of this manual. Our technical support staff is
always available for consultation, training, or service.

1–2 • Introduction DRA-8902 Series User Manual (Iss. 02)
Overview
Your DRA-8902 is a Dual 12G/6G/3G/HD/SD Reclocking Amplifier, capable of equalizing and
reclocking all common serial digital signals. An LED indicator for each channel, at the front of
the card, identify the presence of incoming video, simplifying system troubleshooting.
The DRA-8902 series includes two products: the DRA-8902-10 and the DRA-8902-16. Refer to
Table 1.1 for details.
Features
The DRA-8902 includes the following features:
• Equalizes and reclocks SDI signals of 270Mbps, 1.485Gbps, 2.97Gbps, 5.94Gbps, and
11.88Gbps
• Supports DVB-ASI (EN 50083-9), MADI (AES10), and SMPTE 310 signals
• Configure and monitor via DashBoard
• Automatic detection of incoming data rate
• Automatically mutes the channel output when a loss of input occurs
• Automatically performs a fail-over switch between the two SDI inputs (configurable via
DashBoard)
• LED indicators for input signal presence
• Excellent input and output return loss
• Fits OG3-FR series frames
• Fully compliant with openGear specifications
• 5 year transferable warranty
Table 1.1 DRA-8902 Series Products
Product Number of Inputs Number of Outputs
DRA-8902-10 2 10
DRA-8902-16 2 16

DRA-8902 Series User Manual (Iss. 02) Introduction • 1–3
Functional Block Diagrams
Figure 1.1 describes the signal flow of the DRA-8902-10.
Figure 1.1 Simplified Diagram — DRA-8902-10
Figure 1.2 describes the signal flow of the DRA-8902-16.
Figure 1.2 Simplified Diagram — DRA-8902-16
Equalizer
and
Reclocker
SDI IN A
Equalizer
and
Reclocker
SDI IN B
SDI OUT 1
SDI OUT 2
SDI OUT 3
SDI OUT 4
SDI OUT 5
SDI OUT 6
SDI OUT 7
SDI OUT 8
SDI OUT 9
SDI OUT 10
Crosspoint
Equalizer
and
Reclocker
SDI IN A
Equalizer
and
Reclocker
SDI IN B
SDI OUT 1
SDI OUT 2
SDI OUT 3
SDI OUT 4
SDI OUT 5
SDI OUT 6
SDI OUT 7
SDI OUT 8
SDI OUT 9
SDI OUT 10
SDI OUT 11
SDI OUT 12
SDI OUT 13
SDI OUT 14
SDI OUT 15
SDI OUT 16
Crosspoint

1–4 • Introduction DRA-8902 Series User Manual (Iss. 02)
User Interfaces
The following interfaces are available for control and monitoring of your DRA-8902.
DashBoard Control System
DashBoard enables you to monitor and control openGear frames and cards from a computer.
DashBoard communicates with other cards in the openGear frame through the Network
Controller Card.
For More Information on...
• menus in DashBoard, refer to the chapter “DashBoard Menus” on page 4-1.
• installing and using DashBoard, refer to the DashBoard User Manual.
Card-edge Monitoring
The card-edges provide LEDs for monitoring the status of the input signal.
For More Information on...
• card-edge LEDs, refer to the section “Monitoring Features” on page 3-3.
SNMP Monitoring and Control
The Network Controller card in the openGear frame provides optional support for remote
monitoring and control of your frame and openGear cards using Simple Network Management
Protocol (SNMP), which is compatible with many third-party monitoring and control tools.
For More Information on...
• SNMP controls on your card, refer to your DRA-8902 Management Information Base
(MIB) file.
• SNMP Monitoring and Control, refer to your MFC-OG3 Series User Manual.

DRA-8902 Series User Manual (Iss. 02) Introduction • 1–5
Documentation Terms and Conventions
The following terms and conventions are used throughout this manual.
Terms
The following terms are used:
•“Board” and “Card” both refer to the card, including all components and switches.
•“DashBoard” refers to the DashBoard Control System.
•“DRA-8902” refers to both the DRA-8902-10 and DRA-8902-16 unless otherwise noted.
•“DRA-8902-10” refers to the DRA-8902 with two inputs and ten outputs.
•“DRA-8902-16” refers to the DRA-8902 with two inputs and sixteen outputs.
•“Network Controller Card” refers to the MFC-8322-N, and MFC-OG3-N Series
Network Controller Cards unless otherwise indicated.
•“OG3-FR series” refers to the OG3-FR series frames and all available options unless
otherwise indicated.
•“openGear frame” refers to all versions of the OG3-FR series frames unless otherwise
indicated.
•“Operator” and “User” both refer to the person who uses the DRA-8902.
•“System” and “Video system” both refer to the mix of interconnected production and
terminal equipment in which the card operates.
Conventions
The following conventions are used:
•The “Operating Tips” and “Note” boxes are used to provide additional user information.

1–6 • Introduction DRA-8902 Series User Manual (Iss. 02)

DRA-8902 Series User Manual (Iss. 02) Installation • 2–1
Installation
In This Chapter
This chapter provides instructions for installing the rear module for your DRA-8902, installing
the card in the openGear frame, cabling details, and how to upgrade the software on your card(s).
The following topics are discussed:
• Before You Begin
• Installing the DRA-8902
•Cabling
• Software Upgrades

2–2 • Installation DRA-8902 Series User Manual (Iss. 02)
Before You Begin
Before proceeding with the instructions in this chapter, ensure that your openGear frame is
properly installed according to the instructions in the manual that accompanied it.
Static Discharge
Throughout this chapter, please heed the following cautionary note:
Unpacking
Unpack each card you received from the shipping container and ensure that all items are included.
If any items are missing or damaged, contact your sales representative or Ross Video directly.
ESD Susceptibility — Static discharge can cause serious damage to sensitive
semiconductor devices. Avoid handling circuit boards in high static environments such as
carpeted areas and when synthetic fiber clothing is worn. Always exercise proper grounding
precautions when working on circuit boards and related equipment.

DRA-8902 Series User Manual (Iss. 02) Installation • 2–3
Installing the DRA-8902
The DRA-8902 can be installed in the OG3-FR series frames using one of the supported rear
modules.The procedure for installing the rear module and card in your openGear frame is the
same regardless of the card model.
Supported Rear Modules
The rear module depends on the configuration you wish to use.
•DRA-8902-10 — The 8322AR-313 Rear Module is required.
•DRA-8902-16 — The 8322AR-314 Rear Module is required.
Installing a Card
You must first install the rear module in the frame and then install the card in the appropriate slot
within an openGear frame. This section outlines how to perform both tasks.
To install the rear module in the openGear frame
1. Ensure that the openGear frame is properly installed.
2. On the rear of the frame, locate the card frame slot.
3. Remove the Blank Plate from the rear of the slot you have chosen for card installation.
4. As shown in Figure 2.1, seat the bottom of the rear module in the seating slot at the base
of the frame’s back plane.
Figure 2.1 Rear Module Installation in an OG3-FR Series Frame (Cards not shown)
5. Align the top hole of the rear module with the screw hole on the top edge of the frame
back plane.
Notice — Ensure that you install the DRA-8902 using one of the supported rear modules
listed below. Installing the DRA-8902 with an unsupported rear module can damage the card,
the rear module, or both.
Screw Hole
Module Seating Slots

2–4 • Installation DRA-8902 Series User Manual (Iss. 02)
6. Using a Phillips screwdriver and the supplied screw, fasten the rear module to the back
plane. Do not over-tighten.
7. Ensure proper frame cooling and ventilation by having all rear frame slots covered with
rear modules or blank metal plates.
To install the card in the openGear frame
1. Locate the Rear Module you installed in the procedure “To install the rear module in
the openGear frame” on page 2-3
2. Hold the card by the edges and carefully align the main card edges with the slots in the
frame.
3. Fully insert the card into the frame until you feel the bullet connectors on the card edge
come into contact with the rear module.
4. Continue to slide the card until the bullet connectors are fully seated into the BNCs of
the rear module. You will feel a click when the bullet connectors fully mates into the rear
module.
Notice — Ensure all the bullet connectors on the card-edge are aligned correctly to the edge
of the main card before inserting the card into a frame slot. Inserting misaligned bullet
connectors into the rear module backplane can damage the connectors, the rear module, or
both.
Figure 2.2 Example — Mis-alignment of Bottom
Three Connectors
Figure 2.3 Bullet Connectors — Example of
Correct Alignment
Card-edge
Bullet
Connectors
Bullet
Connectors
Card-edge

DRA-8902 Series User Manual (Iss. 02) Installation • 2–5
Cabling
This section provides Belden 1694A cabling details based on the card model.
DRA-8902-10 Cabling
The 8322AR-313 Full Rear Module is required for the DRA-8902-10. Each rear module occupies
two slots and accommodates one card. This rear module provides two SDI inputs, and ten SDI
outputs.(Figure 2.4)
Figure 2.4 Cable Connections for the DRA-8902-10
DRA-8902-16 Cabling
The 8322AR-314 Full Rear Module is required for the DRA-8902-16. Each rear module occupies
two slots, and accommodates one card. This rear module provides two SDI inputs, and sixteen
SDI outputs. (Figure 2.5)
Figure 2.5 Cable Connections for the DRA-8902-16
Note — It is recommended to terminate unused outputs. You can also mute an unused output
via the Mute Outputs options available in the Setup tab of DashBoard.
OUT 1
OUT 2
OUT 3
OUT 4
INPUT A
INPUT B
OUT 5
OUT 6
OUT 7
OUT 8
OUT 9
OUT 10
BH
CHANNEL A
CHANNEL B
CHANNEL C
OUT 2
OUT 1
OUT 3
OUT 4
INPUT A
INPUT B
OUT 11
OUT 12
OUT 13
OUT 14
OUT 15
OUT 16
BI
CHANNEL C
CHANNEL D CHANNEL A
CHANNEL B
OUT 10
OUT 9
OUT 8
OUT 7
OUT 6
OUT 5

2–6 • Installation DRA-8902 Series User Manual (Iss. 02)
Software Upgrades
The DRA-8902 can be upgraded in the field via DashBoard. Note that DashBoard version 8.0 or
higher is required.
To upgrade the software on a card
1. Contact Ross Technical Support for the latest software version file.
2. Display the Device View of the card by double-clicking its status indicator in the Basic
Tree View.
3. From the Device View, click Upload to display the Select file for upload dialog.
4. Navigate to the *.bin upload file you wish to upload.
5. Click Open.
6. If you are upgrading a single card, click Finish to display the Uploading to Selected
Devices dialog. Proceed to step 8.
7. If you are upgrading multiple cards:
•Click Next > to display the Select Destination menu. This menu provides a list of
the compatible cards based on the card selected in step 2.
• Specify the card(s) to upload the file to by selecting the check box(es) for the cards
you wish to upload the file to.
• Verify that the card(s) you wish to upload the file to. The Error/Warning fields
indicate any errors, such as incompatible software or card type mismatch.
•Click Finish to display the Uploading to Selected Devices dialog.
8. Monitor the upgrade.
• The Uploading to Selected Devices dialog enables you to monitor the upgrade
process.
•Click OK to complete the upgrade.
• The card(s) are temporarily taken off-line during the re-boot process. The process is
complete once the status indicators for the Card State and Connection fields return
to their previous status.
This manual suits for next models
2
Table of contents
Other Ross Amplifier manuals

Ross
Ross TRA-8206 User manual

Ross
Ross openGear SEA-8203 User manual

Ross
Ross ADA-8503 User manual

Ross
Ross openGear SRA-8201A User manual

Ross
Ross SEA-8203A User manual

Ross
Ross openGear SRA-8201 User manual

Ross
Ross DRA-8604 User manual

Ross
Ross DRA-8204 User manual

Ross
Ross OpenGear HDC-8223A User manual

Ross
Ross GearLite CMA-9011-R User manual

Ross
Ross OpenGear DEA-8805 User manual

Ross
Ross HDC-8223 User manual

Ross
Ross VEA-8707A User manual

Ross
Ross SEA-8008 User manual

Ross
Ross SMA-8018 User manual

Ross
Ross ADA-8504 User manual

Ross
Ross HDC-8222A User manual

Ross
Ross ADA-7802 User manual

Ross
Ross RSA-7806 User manual

Ross
Ross AMA-8511 User manual