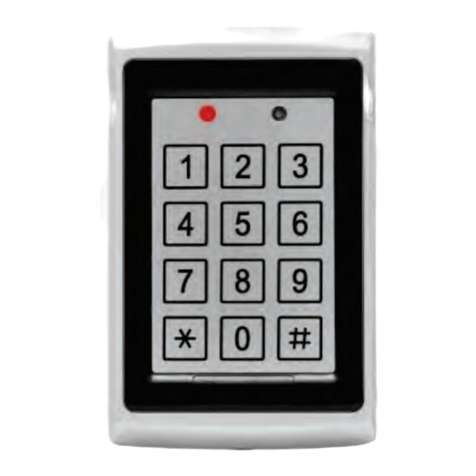
Rosslare AYC-W6500 User manual

AYC-W6500
Fingerprint, Pin & Prox
Convertible Reader/Controller
Installation and User Manual
June 2006


Table of Contents
AYC-W6500 Installation Manual Page ii
Table of Contents
1. General Information .................................................3
1.1 Introduction...........................................................................3
1.2 Reader/Controller Types.......................................................4
1.3 Box Content ..........................................................................4
1.4 Ancillary Equipment.............................................................4
2. Technical Specifications ..........................................5
2.1 Key Features .........................................................................6
3. Installation .................................................................8
3.1 Mounting the AYC-W6500 ..................................................8
4. Wiring Instructions .....................................................9
5. Reader Functionality...............................................12
5.1 Modes of Operation ............................................................12
5.2 Enrolling a Fingerprint........................................................13
5.3 Programming the AYC-W6500 ..........................................14
6. Controller Functionality ..........................................28
6.1 Introduction.........................................................................28
6.2 Modes of Operation ............................................................29
6.3 Enrolling a Fingerprint........................................................30
6.4 Auxiliary Input Functions ...................................................31
6.5 Door Alarms .......................................................................31
6.6 Case and Back Tamper .......................................................31
6.7 Request to Exit (REX) Function .........................................32
6.8 AC-C15T or PS-C15T Unit ................................................32
6.9 Programming the AYC-W6500 ..........................................33
Appendix A. Limited Warranty.................................45
Appendix B. Technical Support...............................47
General Information
AYC-W6500 Installation Manual
Page 3
1. General Information
1.1 Introduction
The AYC-W6500 is a, standalone, integrated reader and
controller. The AYC-W6500 automatically determines whether
to function as a reader or as a controller. If the unit is
connected to a standard access controller, then it functions as
a reader. If the unit is connected to the AC-C15T or PS-C15T, it
functions as a secured controller.
When the unit operates as a reader, transmission of a Card ID
or PIN ID entered by the user will take place only after
successful fingerprint verification.
When the unit operates as a controller, door output will open
after a Card ID or PIN ID is entered followed by successful
fingerprint verification.
For information on how the unit functions as a reader, see
Reader Functionality on page 12.
For information on how the unit functions as a controller, see
Controller Functionality on page 28.
The AYC-W6500 can optionally work with BioTrax software. For
more information on BioTrax software see the BioTrax Software
Manual.
The unit is suitable for indoor mounting. The unit accepts up to
500 users, and allows entry via a personal identification number
(PIN) and/or by presenting a proximity card.
The PIN code length has several options. The PIN code length
can be a set number of 4, 5 or 6 digits or it can be a 4-8 digit
option.
This manual contains the following information:
•Installation
•Wiring instructions
•Operation Instructions

General Information
AYC-W6500 Installation Manual Page 4
1.2 Reader/Controller Types
Upon power-on reset, the AYC-W6500 searches for the
presence of the AC-C15T or PS-C15T power supply. If the power
supply is detected, then the AYC-W6500 is automatically
configured as a secure access control unit. Two short beeps
(one second apart) are generated on power-on reset. If the
power supply is not detected, it is automatically configured as
a reader indicated by one short beep generated on power-on
reset.
1.3 Box Content
Before beginning, verify that all of the following is in the box. If
anything is missing, please report the discrepancy to your
nearest Rosslare office.
•One AYC-W6500 unit
•CD with the BioTrax software
•Installation kit
•Installation and operating instructions
•Software manual
•RS-232 cable
1.4 Ancillary Equipment
The following equipment is required to complete installation:
Reader
•Compatible host controller (not supplied)—UL listed access
control unit, i.e., AC-215U
Controller
•AC-C15T or PS-C15T power supply (for controller
applications only, optional)—this unit connects to the
following:
oElectric lock output mechanism or a magnetic lock
device, which implements fail safe (power to lock)
or fail secure (power to open) functions.
oRequest to Exit (REX) button—normally open type.
Switch is closed when pressed.
oDoor Monitor Contact.
Rosslare accessories can be found on
www.rosslaresecurity.com.

Technical Specifications
AYC-W6500 Installation Manual
Page 5
2. Technical Specifications
Electrical Characteristics
Power supply type Linear type – recommended
Operating voltage range 10 - 16VDC (provided by the PS-C15T
or AC-C15TU when used as a
controller)
Input current standby (12VDC)
140mA
Input current max (16VDC) 330mA
Outputs Open Collector Tamper Output
Input Dry contact, Normally Open.
0-5V
Operational Characteristics
Cable distance to host
controller
Up to 500ft (150 meters) using an
18AWG cable
Normal PIN or Proximity Card + Fingerprint
Verification
Operation Modes
Secure PIN + Proximity Card + Fingerprint
Verification
Fingerprint Templates Up to 1000 templates
Verification Time Less Than 1.5 Seconds
Verification Method 1:1
Max proximity card read
range*
3 Inches (7.5 cm)
Proximity card modulation ASK at 125 KHz
Proximity card compatibility EM cards
Card Transmit format (Reader)
26-bit Wiegand, or Clock & Data
Keypad 3 x 4 Key, Backlit
Keypad Transmit Format
(Reader)
Programmable PIN code formats
LED indicators Tri-colored LED

Technical Specifications
AYC-W6500 Installation Manual Page 6
Operational Characteristics
Communication Data1/C1, Data0/C2—open
collector, 5V termination
Output format Wiegand 26 Bits, RS-232 (Host Only)
Sensor ESD Rating ±15KV (Fingerprint Sensor)
Environmental Characteristics
Operating Environment -5ºC to +60ºC, 10% - 90% RH (Non-
Condensing), Indoor
Size and Weight Characteristics
Dimensions: 5.16" x 4.92" x 1.38" (131x125x35 mm)
Weight: 270g (0.595lbs)
*Measured using Rosslare proximity card (AT-14) or equivalent. Range also depends
on the electrical environment and proximity to metal.
2.1 Key Features
The key features for the AYC-W6500 are:
•Built-In Proximity Card Reader (125 KHz ASK Modulation)
•Built-in Fingerprint Capacitive Sensor
•PIN, Proximity card & a dual fingerprint template per user
•1:1 fingerprint verification
•1 second verification time
•BioTrax™PC software for complete management of the
fingerprint database and fast configuration of the reader
•Up to 500 users
•Optical back tamper sensor and open controller tamper
output
•Programmable Keypad backlight options (On, Off, 10
Second activation on key touch)
•Internal buzzer provides audible interface feedback
•One tri-colored Indication LED
•Two User Levels
oNormal User
oSecure User
•Code Search feature that helps make maintaining user
codes easier

Technical Specifications
AYC-W6500 Installation Manual
Page 7
•Plastic case for indoor use
•Comes with mounting template for easier installation
•Comes with an installation kit that includes a security
screw and a security screw tool
Additional features for the AYC-W6500 series include the
following:
Reader
•Programmable keypad transmission format
•LED control input
•Programmable facility code
•Two Modes of Operation
oNormal Mode
oSecure Mode
•Built-In Proximity Card Reader (125 KHz ASK Modulation)
•Programmable Proximity Card Transmission Format
oClock & Data
o26-Bit Wiegand
Controller
•Bi-directional secure communication with secure AC-
C15T or PS-C15T secure controller
•Two User Levels
oNormal User
oSecure User
•Code Search feature that helps make maintaining user
codes easier
•Request-to-Exit (REX) signal from AC-C15T or PS-C15T
power supply
•Two Modes of Operation
oNormal Mode
oSecure Mode
•Programmable Lock Output Release, Siren, and Alarm
Delay timers
•Auxiliary input

Installation
AYC-W6500 Installation Manual Page 8
3. Installation
3.1 Mounting the AYC-W6500
When installing the reader, remove the cover using the Security
Spline key, to access the screw holes on the back plate.
Figure 1 AYC-W6500 Assembly and mounting
Before starting, select the location to mount the AYC-W6500.
This location should be at shoulder height.
Peel off the back of the self-adhesive installation label
template and locate it at the required location.
Using the template as a guide, drill four holes (based on the
size indicated in the template).
Drill a 7/16” (10mm) hole for the cable. In the event that you
are installing the unit on metal, place a grommet or electrical
tape around the edge of the hole.
When the unit is used as a reader, route the interface cable
from the AYC-W6500 to the controller. When the unit is used as
a secured controller, route the interface cable from the AYC-
W6500 to the AC-C15T or PS-C15T. A linear type power supply is
recommended, when using the unit as a controller. The power
supply is part of Rosslare's AC-C15T or PS-C15T unit.
The AYC-W6500 fits US and UK gang boxes for easy installment.
Note:
The unit can also be mounted using strong epoxy glue. After
application, hold in place firmly until the glue dries.

Wiring Instructions
AYC-W6500 Installation Manual
Page 9
4. Wiring Instructions
The unit is supplied with a 16-inch pigtail, having a
10-conductor cable. To connect the unit to the controller,
perform the following steps:
Prepare the unit’s cable by cutting the cable jacket back 1¼
inches and strip the wire ½ inch. Prepare the controller cable
by cutting the cable jacket back 1¼ inches and strip the wire
½ inch.
Splice the unit’s pigtail wires to the corresponding controller
wires and cover each connection.
Refer to the wire color table below, and to the wiring diagrams
provided on the following pages.
Controller Reader Color Functionality
5~16 VDC 5~16 VDC Red +DC Input
Shield / Ground Shield / Ground Black Ground
C1 Data 1 White Communication
C2 Data 0 Green Communication
LEDCTL LED Control Brown Auxiliary Input
Tamper Tamper Purple Tamper
Tx Tx Blue RS-232 Transmit
Rx Rx Grey RS-232 Receive
Ground Ground Orange RS-232 Ground
N/A N/A Yellow N/A
If the tamper output is used, connect the purple wire to the
correct input on the controller when used as reader, or to the
zone input of an intruder alarm system when used as a
controller.
Trim and cover all unused conductors.

Wiring Instructions
AYC-W6500 Installation Manual Page 10
Note:
•The individual wires from the unit are color-coded
according the Wiegand standard.
•When using a separate power supply for the unit, this
supply and that of the controller, must have a common
ground.
•The unit’s cable shield wire should preferably be
attached to an earth ground, or a signal ground
connection at the panel, or power supply end of the
cable. This configuration is best for shielding the unit
cable from external interference
Figure 2: Controller Application Wiring Diagram #1
Wiring diagram #2 (below) shows the door monitor and the
tamper input to an external alarm system.
Figure 3: Controller Application Wiring Diagram #2
AYC-W6500

Wiring Instructions
AYC-W6500 Installation Manual
Page 11
Wiring diagram #3 shows the auxiliary signal input to the
external alarm system.
Figure 4: Controller Application Wiring Diagram #3
The wiring diagram #4 (below) shows the wiring for the reader
application.
Figure 5: Reader Application Wiring Diagram #3
Figure 6: PC Connection Using RS-232 Cable
AYC-W6500

Reader Functionality
AYC-W6500 Installation Manual Page 12
Red
Red
5. Reader Functionality
The AYC-W6500 series can function both as a reader and as a
controller. If the unit is connected to a standard access
controller, it functions as a reader.
This is indicated by one beep generated on resetting the unit.
The keypad can be programmed to output four different data
formats.
The following explains how the AYC-W6500 functions as a
reader.
5.1 Modes of Operation
The AYC-W6500 has two modes of operation:
1. Normal Mode
•Indication LED is red.
Normal Mode is the default mode. In Normal Mode the
door is locked until a PIN code or card and the user’s finger
is presented to the controller.
Present the proximity card or enter the PIN code, the finger
LED will flash green, place your finger on the sensor for
verification. In the event that no fingerprint was enrolled
the finger LED will flash orange.
2. Secure Mode
•Indication LED flashes red.
In secure mode a User must present his Proximity card then
enter his/her PIN code and then after fingerprint
verification to gain entry.
After presenting the proximity card the Indication LED
flashes green for ten seconds, during which the PIN code
must be entered, after entering the PIN code, the
indication LED will turn green and the finger LED will flash
green, place your finger on the sensor for verification. In
the event that no fingerprint was enrolled the finger LED will
flash orange.

Reader Functionality
AYC-W6500 Installation Manual
Page 13
Red
Green
Orange
Red
Green
Changing the Modes of Operation
Changing from Normal Mode to Secure Mode
The default factory setting for Normal / Secure code is 3838.
1. Enter the 4-digit Normal / Secure code.
•Indication LED flashes green.
2. Press the “#” key to confirm the mode
change.
•Indication LED flashes red.
Changing from Secure Mode to Normal Mode
The default factory setting for Normal / Secure code is 3838.
1. Enter the 4-digit Normal/Secure code.
•Indication LED flashes green.
2. Press the “#” key to confirm the mode change.
•Indication LED turns red.
5.2 Enrolling a Fingerprint
Users must complete a one-time procedure to enroll their
fingerprint.
To enroll fingerprints in Normal Mode:
1. Present an enrolled proximity card or PIN code.
•The finger LED flashes orange.
2. Place the user’s finger on the sensor.
•You will hear a short beep followed by an
additional three short beeps.
•The finger LED flashes red.
3. Place the user’s finger on the sensor again.
•You will hear a short beep.
•The fingerprint LED turns off.
•You will hear three short beeps to indicate the fingerprint
has been successfully enrolled.
•If the fingerprint is not successfully enrolled, you will hear
a long beep. Repeat the process from the beginning.
Red

Reader Functionality
AYC-W6500 Installation Manual Page 14
Green
Orange
Red
To enroll fingerprints in Secure Mode:
1. Present an enrolled proximity card.
•The indication LED flashes green.
2. Enter the PIN code of the same user.
•The indication LED turns green.
•The finger LED flashes orange.
3. Place the user’s finger on the sensor.
•You will hear a short beep followed by an
additional three short beeps.
•The finger LED flashes red.
4. Place the user’s finger on the sensor again.
•You will hear a short beep.
•The fingerprint LED turns off.
•You will hear three short beeps to indicate the fingerprint
has been successfully enrolled.
•If the fingerprint is not successfully enrolled, you will hear
a long beep. Repeat the process from the beginning.
5.3 Programming the AYC-W6500
Programming the AYC-W6500 is done solely via the unit's
keypad driven Programming Menu System. To reach the
Programming Menu System the AYC-W6500 must first be
placed into Programming Mode. See Entering Programming
Mode on page 15 for more information.
During the AYC-W6500's manufacturing process certain codes
and settings are pre-programmed. These settings are the
called the "Default Factory Settings".
The table below shows the names of all the AYC-W6500 Menus.
Programming Menu
Default Factory Settings are marked by a "*" sign.
Green

Reader Functionality
AYC-W6500 Installation Manual
Page 15
Orange
Orange
DefaultMenu Description
4
digit
5
digit
6
digit
4-8 digits
1 Selecting PIN Codes Transmission Format
1.Multiple keys, 26-Bit Wiegand
2.Single Key, 6-Bit Wiegand (Rosslare Format)
3.Single Key, 6-Bit Wiegand
4.Single Key, 8-Bit Wiegand
*
2 Selecting Card Transmission Format
1.26-Bit Wiegand
2.Clock & Data
*
3 Changing Program Code 1234 12341
123412
12341234
4 Setting Secure Mode Code 3838 38383
383838
38383838
5 Changing the Facility Code
6 General Settings 0004
Set Lockout 4000
Keypad Backlight Options 5000
7 Enrolling PIN Code
8 Deleting PIN Code
0 Return to Factory Default and Set PIN
Code Length
0 - 4 digit PIN code
5 - 5 digit PIN code
6 - 6 digit PIN code
8 - 4-8 digit PIN code
*
Entering Programming Mode
1. Press the “#” key twice.
•The Indication LED flashes orange.
2. Enter your Programming Code.
If the Programming Code is valid the
Indication LED turns orange and the AYC-
W6500 is in Programming Mode.
Note:
The factory default Programming Code is 1234.
If a Programming Code is not entered within 60 seconds, the
AYC-W6500 will return to Transmit Mode.

Reader Functionality
AYC-W6500 Installation Manual Page 16
Red
Exiting Programming Mode
1. To exit the Programming Mode at any time press the “#”
key twice.
•You will hear three short beeps.
•The Indication LED turns red.
•This indicates that the AYC-W6500 has returned to
Normal Access Mode.
Selecting Keypad Transmission Format
The AYC-W6500 has four different keypad transmission formats
to select from. Follow the steps below to select the appropriate
keypad transmission format that you wish to use.
1. Enter Programming Mode.
2. Press “1”.
3. Enter the appropriate option number for the
keypad transmission format that you wish to
select.
•If an incorrect option number is entered the reader
returns to Normal Access Mode and the keypad
transmission format will remain unchanged.
•See below for more information on the keypad
transmission formats.
Note:
Only one keypad transmission format can be active at any time
Keypad Transmission Format Option Number
See the table below to determine the Option Number for the
Keypad Transmission Format you wish to select. Keys are
transmitted only after the fingerprint is verified and not after
each key press.

Reader Functionality
AYC-W6500 Installation Manual
Page 17
Keypad Transmission Format Option Number
Multiple keys, Wiegand 26 bit 0
Single keys, Wiegand 6 bit Rosslare format 1*
Single keys, Wiegand 6 bit 2
Single keys, Wiegand 8 bit 3
* Option 1 is the default factory setting.
More information on each of the different keypad transmission
formats is available below and on the following pages.
Option 0: Multiple Keys, Wiegand 26 bit
Note:
This option is invalid whenever pin code length 4-8 is selected
(programming menu 0-8)
The number of keys and frame contents sent with each key
press depends on the PIN code length and on the Facility
Code settings.
•PIN Code 4 Keys – PIN Code and Facility Code
Bit 1 Even Parity Bit 10
MSB bit of PIN Hex value
Bit 2-9 Facility Code Bit 25
LSB bit of PIN Hex value
Bit 10-25 PIN code Hex value
Bit 26
Odd Parity
The PIN number range is 0000 to 9999 (270Fh).
•PIN Code 5 Keys - PIN code and Facility Code
Bit 1 Even Parity Bit 10
MSB bit of PIN Hex value
Bit 2-9 Facility Code Bit 25
LSB bit of PIN Hex value
Bit 10-25 PIN code Hex value
Bit 26
Odd Parity
The maximum PIN number is 65535 (0FFFFh). A higher PIN
number is not transmitted.
•PIN Code 6 Keys – The PIN code is sent as entered
Bit 1 Even Parity Bit 14-17 4th digit of PIN
Bit 2-5 1st digit of PIN Bit 18-21 5th digit of PIN
Bit 6-9 2nd digit of PIN
Bit 22-25 6th digit of PIN
Bit 10-13 3rd digit of PIN
Bit 26 Odd Parity
The PIN number range is 000000 to 999999 (0F423Fh)
•PIN Code 4-8 Keys – Not a valid setting
Option 1: Single Key, 6-Bit Wiegand (Rosslare Format)
Transmission of 4 bits with 2 parity bits added occurs after
fingerprint verification in several frames 50mSec apart, the

Reader Functionality
AYC-W6500 Installation Manual Page 18
number of frames depend on the PIN code length.
Even parity for the first 3 bits and odd parity for the last 3 bits.
0= 1 1010 0 ="A" in Hexadecimal 6= 1 0110 0
1= 0 0001 0 7= 1 0111 1
2= 0 0010 0 8= 1 1000 1
3= 0 0011 1 9= 1 1001 0
4= 1 0100 1 *= 1 1011 1 ="B" in Hexadecimal
5= 1 0101 0 #= 0 1100 1 ="C" in Hexadecimal
•PIN Code 4 Keys
4 Wiegand 6 bit frames - 4 digits entered.
•PIN Code 5 Keys
5 Wiegand 6 bit frames, 5 digits entered.
•PIN Code 6 Keys
6 Wiegand 6 bit frames, 6 digits entered.
•PIN Code 4-8 Keys
4 to 7 Wiegand 6 bit frames, 4-7 keys entered.
Or, 8 Wiegand 6bits frames, 8 keys entered.
Option 2: Single Key, 6-Bit Wiegand with Parities
Transmission of 4 bits with 2 parity bits added occurs after
fingerprint verification in several frames 50mSec apart, the
number of frames depend on the PIN code length.
Even parity for the first 3 bits and odd parity for the last 3 bits.
0 = 0 0000 1 6 = 1 0110 0
1 = 0 0001 0 7 = 1 0111 1
2 = 0 0010 0 8 = 1 1000 1
3 = 0 0011 1 9 = 1 1001 0
4 = 1 0100 1 * = 1 1010 0 = "A" in Hexadecimal
5 = 1 0101 0 # = 1 1011 1 = "B" in Hexadecimal
“*”and “#” keys are not sent.
•PIN Code 4 Keys
4 Wiegand 6 bit frames - 4 digits entered.
•PIN Code 5 Keys
5 Wiegand 6 bit frames, 5 digits entered.
•PIN Code 6 Keys
6 Wiegand 6 bit frames, 6 digits entered.
•PIN Code 4-8 Keys
4 to 7 Wiegand 6 bit frames, 4-7 keys entered.
Or, 8 Wiegand 6bits frames, 8 keys entered.

Reader Functionality
AYC-W6500 Installation Manual
Page 19
Option 3: Single Key, 8-Bit Wiegand Complemented
Transmission of 4 bits complementing the value of the key
pressed sent in Wiegand 8-bit frames occurs after fingerprint
verification in several frames 50mSec apart, the number of
frames depend on the PIN code length.
0 = 1111 0000 6 = 1001 0110
1 = 1110 0001 7 = 1000 0111
2 = 1101 0010 8 = 0111 1000
3 = 1100 0011 9 = 0110 1001
4 = 1011 0100 * = 0101 1010
5 = 1010 0101 # = 0100 1011
“*”and “#” keys are not sent.
•PIN Code 4 Keys
4 Wiegand 8 bit frames - 4 digits entered.
•PIN Code 5 Keys
5 Wiegand 8 bit frames, 5 digits entered.
•PIN Code 6 Keys
6 Wiegand 8 bit frames, 6 digits entered.
•PIN Code 4-8 Keys
4 to 7 Wiegand 8 bit frames, 4-7 keys entered.
Or, 8 Wiegand 6bits frames, 8 keys entered.
Selecting Proximity Card Transmission Format
The AYC-W6500 has two proximity card transmission formats to
select from. Follow the steps below to select the appropriate
Proximity Card reader transmission format you wish to use.
1. Enter Programming Mode, press “2” to enter Menu 2.
2. Enter the appropriate option number for the proximity card
transmission format you wish to select. (See below).
If an incorrect option number is entered the reader will
return to Transmit Mode and will remain unchanged.
3. System returns to Normal Access Mode.
•You will hear three beeps.
Proximity Card Transmission Format Option Number:
Option 1: 26-Bit Wiegand
Option 2: Clock & Data
Other manuals for AYC-W6500
2
Table of contents
Other Rosslare Gateway manuals

Rosslare
Rosslare AC-020 User manual

Rosslare
Rosslare MD-N32 Troubleshooting guide

Rosslare
Rosslare MD-N32 Installation guide

Rosslare
Rosslare AY-B1663 User manual

Rosslare
Rosslare AC-215 User manual

Rosslare
Rosslare AY-M26 Manual

Rosslare
Rosslare AY-Q64 Assembly instructions

Rosslare
Rosslare AY-Q65 Assembly instructions

Rosslare
Rosslare AC-B3x Assembly instructions

Rosslare
Rosslare AC-525 User manual