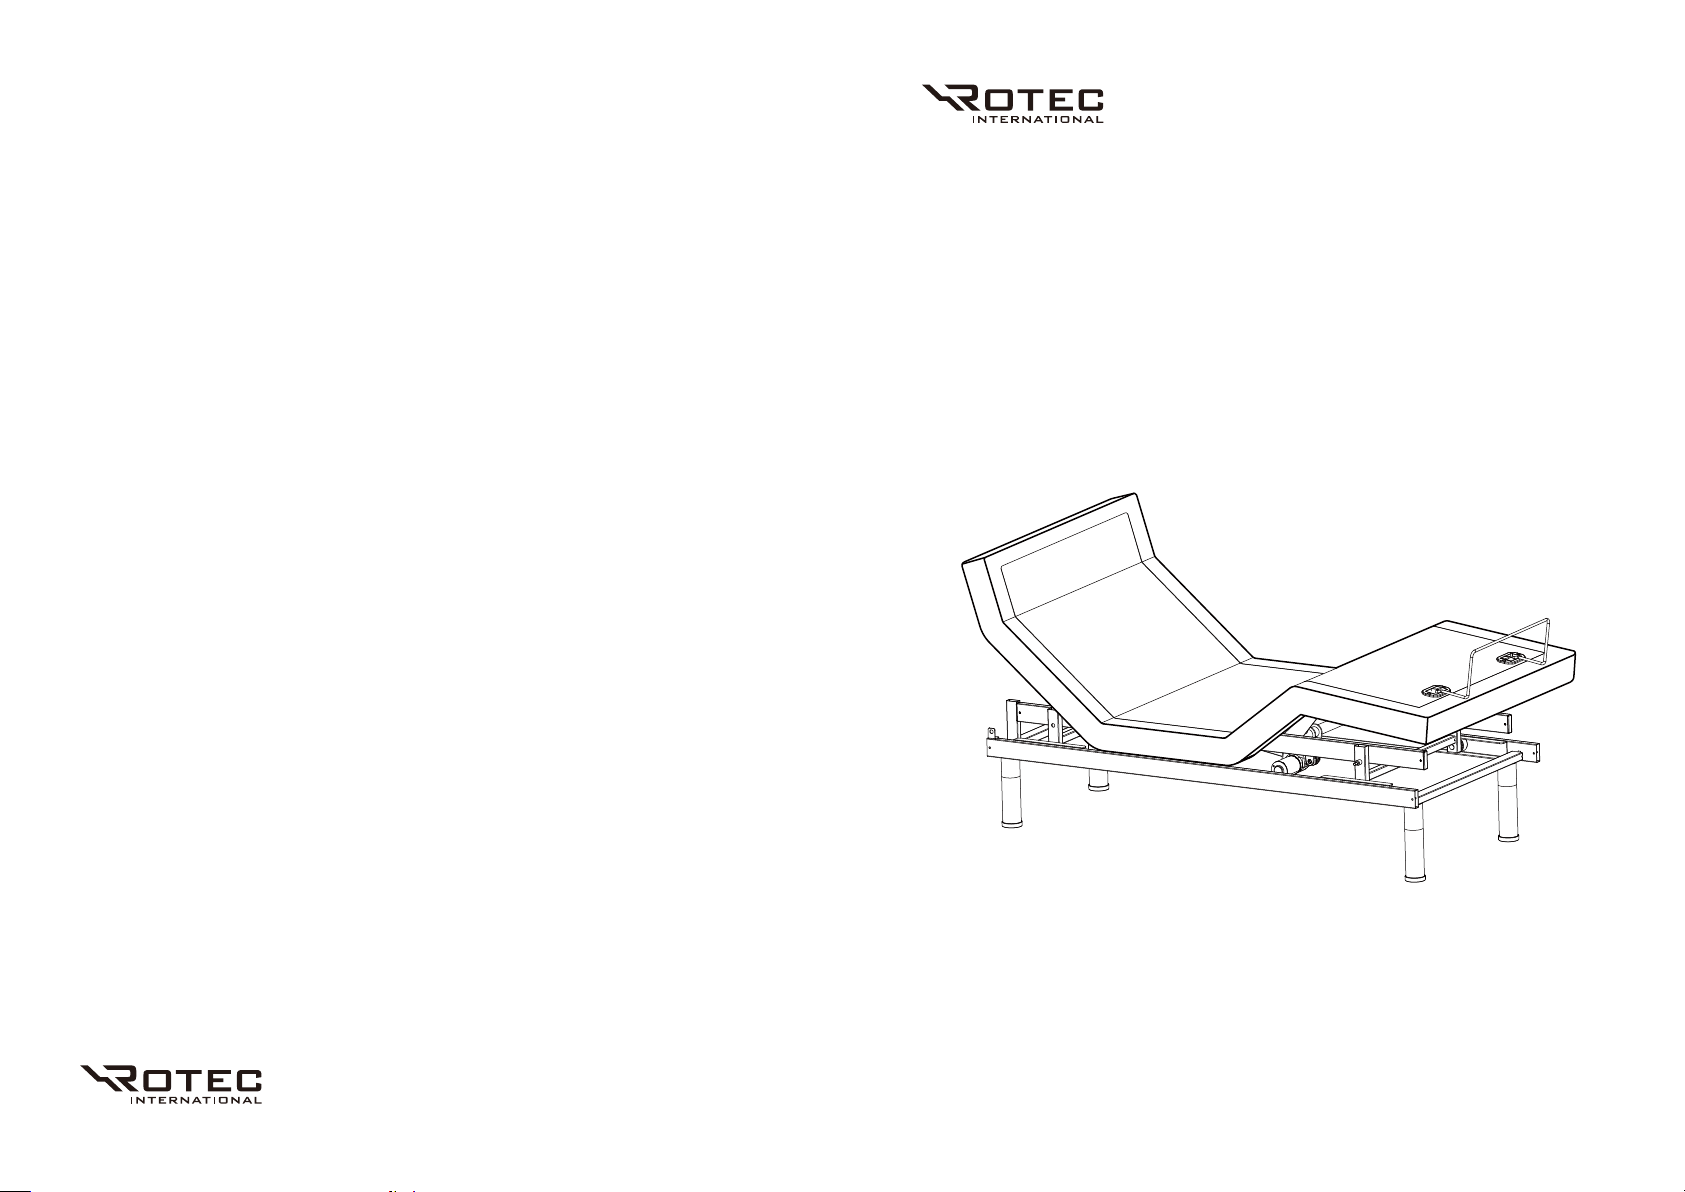
Rotec GEMINI 300M 2.0 User manual

GEMINI 300M 2.0
Rev 1.0
ROTEC INTERNATIONAL
123,RUE DE L'ÉGLISE BAIE-DU-FEBVRE
QC,CANADA J0G 1A0
Owner’s Manual
Adjustable Bed Base
All Rights Reserved.

CONTENTS
Safety & Warranty Warning....................................01
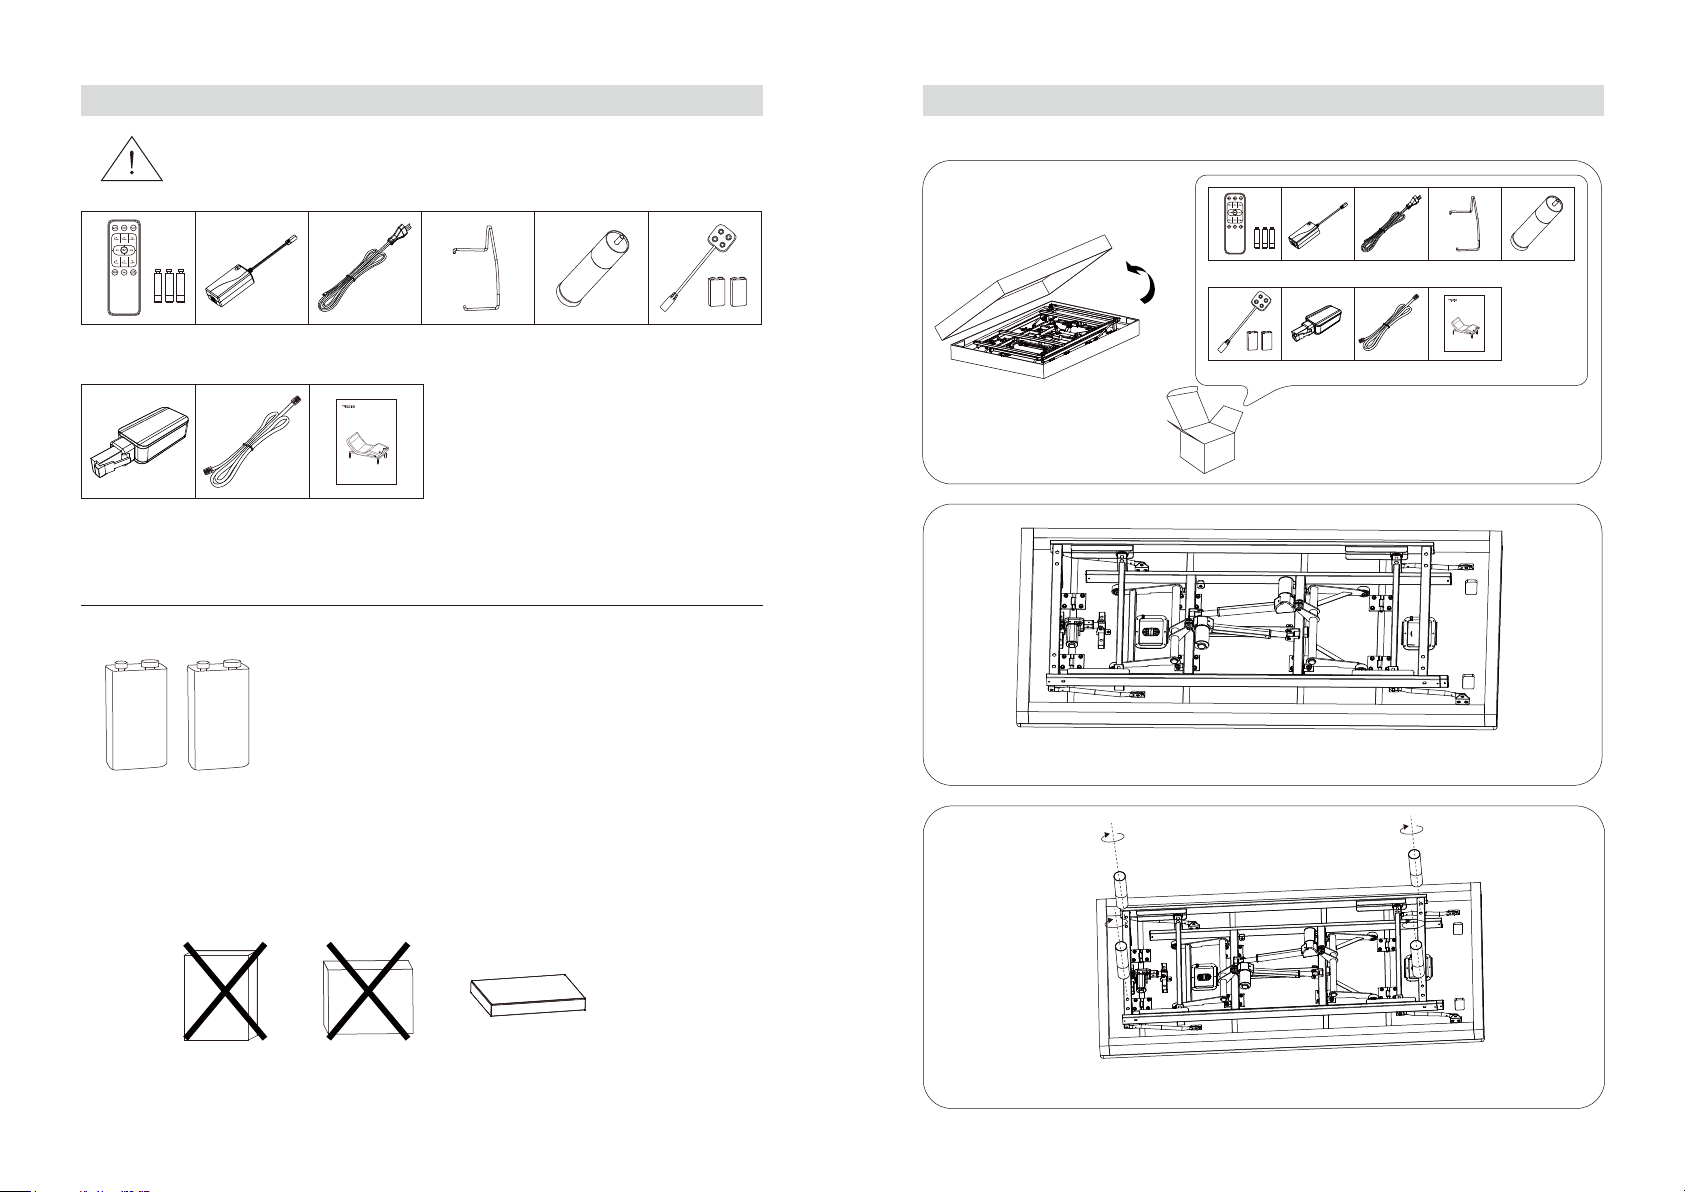
Parts List................................................................02
Base Installation Guide..........................................03
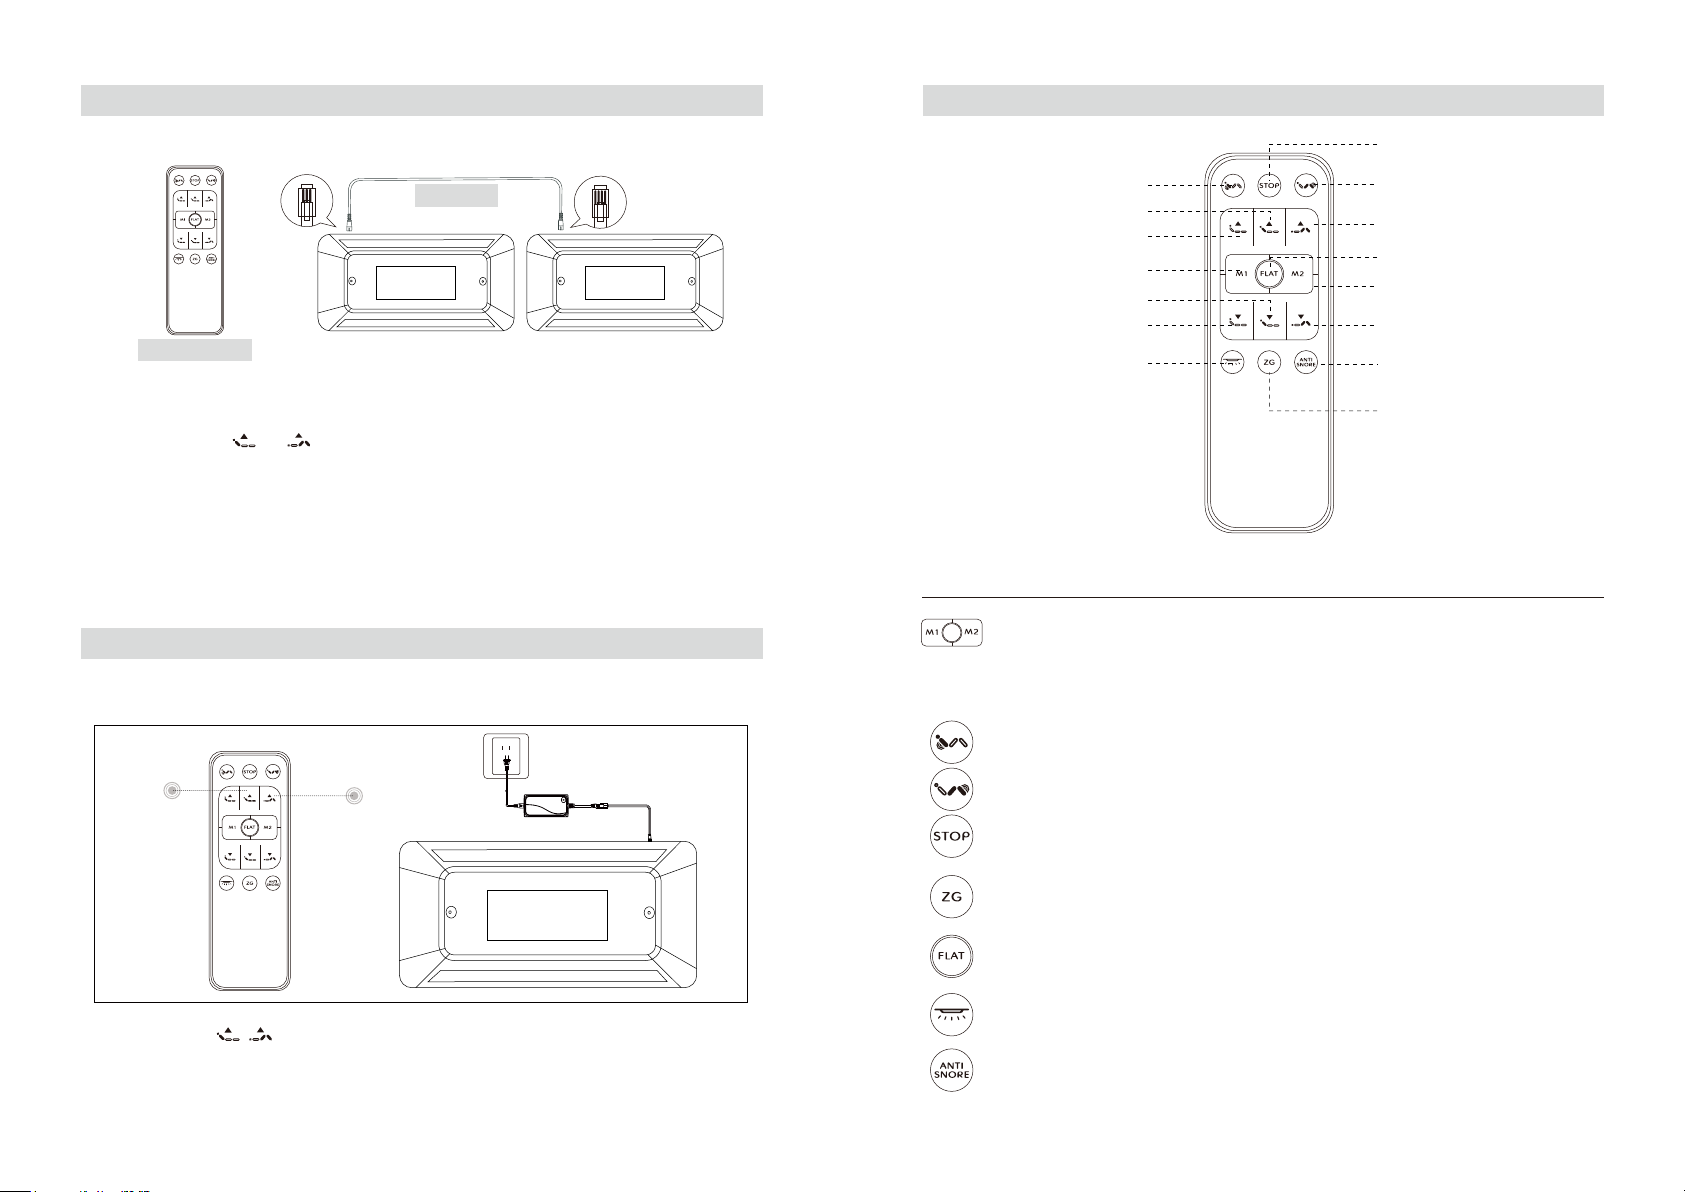
Electronics Quick Reference Guide.......................05
Synchronizing Twin XL Bases...............................06
Remote Control Pairing.........................................06
Backlight Remote Control Guide...........................07
Device in Case of Power Failure...........................08
APP Control Guide (iPhone & Tablet)...................08
Troubleshooting.....................................................09
Warranty................................................................10
01
FREQUENCY: 2.4 GHz
FCC COMPLIANCE:This device complies with Part 15 of the FCC Rules. Operation is subject to the following two conditions: (1) This device
may not cause harmful interference; (2) this device must accept any interference received, includinginterference that may
cause undesired operation.
To comply with the FCC RF exposure requirements, no change to the antenna or the device is permitted. Any change
to the antenna or the device could result in the device exceeding the RF exposure requirement and void user’s right to
operate the device.
When using electric equipment, basic precautions should always
be followed, including the following:
DANGER – To reduce the risk of electric shock
Always unplug this adjustable bed base (base) from the electrical
outlet before cleaning or servicing.
WARNING – To reduce the risk of burns, fire, electric shock,
or injury:1. Unplug from outlet before putting on or taking off parts.
2. Close supervision is necessary when this base is used by,
or near children, invalids, or disabled persons.
3. Use this base only for its intended use as described in these
instructions. Do not use attachments not recommended by the
manufacturer.
4. Never operate this base if it has a damaged cord or plug, if it is
not working properly, if it has been dropped or damaged, or dropped
in water. Return the base to a service center for examination and
repair.
5. Keep the cord away from heated surfaces.
6. Do not use this base outdoors.
7. Do not use this base near explosives.
8. Using the base with oxygen administering equipment other
than the nasal masked type creates a possible fire hazard.
9. Do not operate where aerosol (spray) products are being used
or where oxygen is being administered.
10. To disconnect, turn all controls to the off position, then remove
plug from outlet.
11. Use caution when there are liquids in or around the base
to ensure no spilling occurs. In case of spillage, stand in a dry,
clean area of the floor and unplug the base immediately. Clean
up the spill and allow the area around base to dry thoroughly
before using the electric controls again. Do not eat or drink
hot liquids while operating the base.
12. Do not allow any person or pet under the base at any time.
13. During base operation, make sure body is well positioned
within the confines of the bed. Do not place extremities over
the sides of the bed when operating base functions.
14. Only for household and similar use.
Weight Restrictions: The recommended weight limit on this
adjustable bed base is 750 pounds. The base will structurally
support this weight, provided it is evenly distributed across
thebase. The power base is not designed to support or lift the
total weight in the head or foot sections alone. Exceeding this
weight restriction could damage the base and/or cause injury
and will void the warranty.
IMPORTANT SAFETY INSTRUCTIONS
SAVE THESE INSTRUCTIONS
WEIGHT LIMITS
Anyopening or tampering with the control box, motors, or hand
controls (with the exception of the battery compartment if
equipped) will result in a void of the warranty.
WARRANTY WARNINGS
The motors are not designed to operate continuously for more
than 2 minutes in a 20 minute-time period or approximately
10% duty cycle. Attempting to circumvent or exceed this rating
will shorten the life expectancy of the base and may void the
warranty.
PRODUCT RATING
1. After base assembly is completed, operate remote control
to ensure proper functions.
2. Keep moving parts free of obstruction during base operation
(including sheets, clothing, tubing, wiring, and products using
electric power cords).
3. Do not place entire weight on head or foot sections of the
base, during repositioning and entering or exiting bed.
OPERATING INFORMATION
This base is NOT designed for hospital use and is NOT designed
to meet hospital standards.
HOSPITAL DISCLAIMER
Read BEFORE using this product
15. Never operate the base with the ventilation openings blocked.
Keep the ventilation openings free of lint, hair, and the like.
16. Never drop or insert any object into any opening.
17. Remove remote control when not in use, and store out of
reach of children.

02 03
All electronics and components that need to be installed are placed in boxes under the base
or attached to the frame. Before discarding the packing materials, ensure that all the parts
are accounted for.
Parts List
Remote Control
x1
Power Supply
(29V 2.0A)x1
AC Power Cord
x1
Synchronisation Cord
x1
Adjustable Legs
x4
Mattress
Retainer Bar
x1
3"+6"
x1
9V 9V
Device in case of
Power Failure
(Not included )Bluetooth Receiver
2 9V batteries for the device in case
of power failure
x1 x1
Owner’s Manual
(single bed only)
Not Included
9V 9V
NOTE: To avoid damage to the base, always open the carton while the base
is in the flat position.
3 AAA batteries
for remote control
Two people are required to set up the adjustable bed base.
1.
2.
Base Installation Guide
Open the box, take out all the packing components.
Remove the base from the box. Make sure the floor is clean. Lay the base flat on the floor.
Remote Control
x1
Power Supply
(29V 2.0A)
x1
AC Power Cord
x1
Adjustable Legs
x6
Mattress Retainer Bar
x1
3"+6"
x1 x1 x1
Device in case of
Power Failure
9V 9V
(Not included)Bluetooth Receiver Synchronisation Cord
x1
Owner’s Manual
(single bed only)
Install legs and tighten by hand.
3.
GEMINI 300M
Rev3.0
Owner’s Manual
AdjustableBed Base
AllRights Reserved.
GEMINI 300M
Rev3.0
Owner’s Manual
AdjustableBed Base
AllRights Reserved.
3 AAA batteries
for remote control

Decorative Headboard
For efficiency, cost savings and safety reasons, Rotec recommends that users fix their headboard directly to
the wall (material not included).
4. 5.
Carefully turn the base over so it is resting
on its legs.
Slide the left side of the mattress retainer bar
into the bracket. Pull the retainer bar to the
opposite bracket and secure the right side.
AC Power Cord
DC Power Cord Power Supply
AC Power Source
Connect the DC power cord to the power supply, uncoil the AC power cord
and then connect it to the AC power source.
Connect the connectors as illustrated.
6.
DONE!
+
Insert 3 AAA batteries into the remote control.
7.
Electronics Quick Reference Guide
04 05
Head Motor
Power Supply
AC Power Cord
USB Charger
Foot Massage
Back Massage
Neck Motor
Foot Motor
Under-Bed Lighting
Head
Motor Foot
Motor Neck
Motor Lumbar
Motor
Power USB Foot
Massage Head
Massage LED APP Sync
Remote Control
DC Power Cord
Y-cable
Control Box
(under the base)
Bluetooth Receiver
Mattress Retainer Block
2
1

Remote Control Pairing
Synchronizing Twin XL Bases
If simultaneous operation of two twin XL bases is desired, use the synchronisation cord to connect the
electronics of both bases together.
Backlight Wireless Remote Control Guide
06 07
Sync Cord
Remote control
Head
Motor Foot
Motor Neck
Motor Lumbar
Motor
Power USB Foot
Massage Head
Massage LED APP Sync
Head
Motor Foot
Motor Neck
Motor Lumbar
Motor
Power USB Foot
Massage Head
Massage LED APP Sync
Quadruplex Cable
Triplex Cable
Head
Motor Foot
Motor Neck
Motor Lumbar
Motor
Power USB Foot
Massage Head
Massage LED APP Sync
Head Lifting
Head Lowering
Zero Gravity
Back Massage
Deactivate Massage
Foot Massage
Memory 2
Memory 1
Foot Lifting
Foot Lowering
Flat
Under-bed Lighting Anti-snore
Neck Lifting
Neck Lowering
One Touch Buttons
Attention: (1) If you want to toggle from "A" or "B" to "Central" position to realize sync control, please press
and hold "Flat" again until you reach a flat position. (2) The quadruplex cable is in master control
when synchronizing and the Bluetooth must be plugged in the master control box. (3) The interval
must be more than 4 s between plug in and plug out the sync cord.
STEP 1: Unplug bases from the power source.
STEP 2: Connect the male ends of the sync cord to the female sync plugs of the control boxes (Refer to illustration
above).
STEP 3: Plug bases back into the power source.
STEP 4: Press and hold and buttons; a beep of the buzzer will be heard, and the backlight of the remote
control will flash twice. Open the battery box and toggle the switch to “Central” position first, next press
and hold “FLAT” until you hear a beep from each buzzer on the control box, which means the two bases
can be synchronized with one remote control.
NOTE: To control the two bases separately without removing the sync cord, open the control remote battery box
and flip the switch to the “A” or “B” position.
Press to adjust the base to "Memory 1" or "Memory 2".
STEP 1: Operate the remote to your desired position.
STEP 2: Press and hold "M1" or "M2" for more than 3s till hearing a beep sound of the buzzer on
the control box and the backlit light of the wireless remote flashes two times, which means
the memory position is saved.
Press to turn on the Back/Foot Massage.
Press to turn off the massage.
Press the button once to increase one intensity level, there are 3 intensity levels available. When
it is in the 3rd level, press the button again and the massage will turn off. The massage motor will
turn off automatically after 30 min.
Press to elevate the foot section slightly higher than the chest, in effect, allowing the blood to flow
back to the heart to help reduce stress and fatigue.
Press to adjust the base to the flat position.
Press to turn on the under-bed lighting. The light will turn off if the button is not pressed within 10
min.
Press to adjust the base to the pre-programmed anti-snore position that let you get a restful night.
The original remote that comes in the box is already paired to the adjustable base. Just wait 30s after the
adjustable base is powered on, then the remote can be used normally. In the event that the remote is not
paired with the adjustable base, follow the steps below.
1. Unplug the adjustable base from the power source, wait 60s, then power it on.
2. Press and hold at the same time.
3. You will hear a beep sound of the buzzer and the backlit light of the wireless remote flashes two times,
which means the pairing is successful.
NOTE: Please complete the repairing within 30s after the foundation is powered on.

Device in Case of Power Failure
To use if needed
DC power cord
1. 2.
9V 9V
9V 9V
APP Control Guide (Dream Motion)
Download free to control the bed from a smartphone or a tablet.
Please follow the instructions for use in the APP.
IOS
ANDROID
Open the APP Store, search for the keyword "Dream Motion" to download the app.
Open the Google Play to search for the keyword "Dream Motion" and download the app. Dream Motion
Dream Motion
Device with 2 9V batteries
08 09
Head
Motor Foot
Motor Neck
Motor Lumbar
Motor
Power USB Foot
Massage Head
Massage LED APP Sync
HEAD UP/DOWN BUTTONS
Press and hold to lift or lower the HEAD section.
FOOT UP/DOWN BUTTONS
Press and hold to lift or lower the FOOT section.
NECK UP/DOWN BUTTONS
Press and hold to lift or lower the NECK section.
Adjustment
• Make sure the remote control is paired with the base.
• Check that the power cord is plugged into a working and grounded
electrical outlet. Unplug the power cord from the outlet. After 30
seconds, plug it back in. Press any button on the remote control
and hold until light on the remote control turns on.
• Check that the surge protection device or electrical outlet is not
defective. Test the outlet by plugging in anotherworking appliance.
• Your base may be obstructed, preventing smooth operation. Remove
obstructions from around and under the base.
• Check that the head section is not too close to the wall.
• If a headboard is installed, check that it is not too close to the edge
of the mattress. Make sure there is enough distance between the
headboard bracket and themattress.
•
Check the batteries in the remote control. Replace with new batteries,
if necessary.
• Make sure that you are following the duty cycle of the motors. Do
not operate for more than two minutes over a 20-minute period or
approximately 10% duty cycle.
• Press the lift buttons firmly andaccurately.
• The remote control may be experiencing common radio frequency
interference from other radio transmitting devices. Wait several
seconds and then try pressing the lift buttons again.
• This is normal. The lift motors click when they are engaged. No
action is required.
The adjustable base does not respond
when the remote control is used.
Remote control led light is on and
appears to be normal.
None of the features or functions
of the base activates.
Head or foot lift function works to
lift the base, but it does not return
it to the flat position.
Head or foot lift function has minor
interference during operation.
A clicking noise is heard under the
base when raising or lowering the
sections.
Excessive massage motor noise.
• If the base is located on hard surface flooring, place carpet pieces
or rubber pieces (not included) under each leg.
• Using the remote control, raise the head, foot or neck section slightly
to realign the lift/lower mechanisms with the base support platform.
• Make sure that your base is not positioned against a wall, nightstand,
or other object that may cause the vibration or noise.
•
If the base is installed over a base frame, make sure that the massage
motors arenotcausing the base frame (or base frame components)
to vibrate.
• Make sure that the headboard attachment hardware isproperly
tightened (if used).
Troubleshooting
When there is an electric power failure, the included device and two batteries 9V 2.0A (not included) can be
used to flatten the base.
(1) Put the batteries in the device.
(2) Unplug the power cord from the outlet and plug the power cord into the device.
(3) Adjust the base.
How To Reset
STEP 1:Unplug adjustable base from the power source.
STEP 2:Plug adjustable base back into the power source after 60 seconds.
STEP 3:Automatic reset is completed.
If the adjustable base fails to operate, search for the symptoms and possible solutions below.

10
Warranty
Congratulations! You have made an excellent choice by purchasing a Rotec electric adjustable
bed base.
To honor the warranty, please keep your proof of purchase (invoice).
For a service call, please provide the information requested on the invoice and the serial number
located under the bed (sequence of 3 letters and multiple numbers under the bar code).
Full One (1) Year Warranty
Our product is warranted against defects in materials or workmanship for a period of one year from the date
of purchase by the original purchaser. During the first year, Rotec or its distributor will repair or replace, at no
cost to the original purchaser, any defective part. This includes all authorized labor costs incurred with the
repair or replacement of any part found to be defective.
Two (2) Year Warranty – Hand Control and Electronic Components
Our product has a two-year, full replacement warranty on parts, labor and authorized transportation on the
hand control and electronic components following the purchase date.
Five (5) Year Warranty – Electric and Massage Motors
Our product has a five-year, full replacement warranty on parts, labor and authorized transportation on the
electric and massage motors following the purchase date.
Twenty-five (25) Year Warranty – Frame
Our product has a twenty-five-year warranty on the steel frame (structural defects) following the purchase date.
Other terms and conditions
• Rotec International reserves the right to substitute equal or superior quality materials during repairs or
replacements. The material replaced and covered by this warranty does not allow one to benefit from a new
warranty. It only benefits from the original warranty. For further information, contact our technical services.
• This warranty does not cover damages caused by negligence or inappropriate use. Rotec International will
not be held responsible for any other warranty offered by any person, firm or company, to the exclusion of
the one stipulated above.
• This warranty gives you specific legal use rights and is only valid for the original purchaser or for anyone
Table of contents
Other Rotec Medical Equipment manuals
Popular Medical Equipment manuals by other brands

Chattanooga Group
Chattanooga Group Intelect TRANSPORT Vectra Genisys 2782 Service manual

Avante
Avante Volumax Quick reference guide

Mindray
Mindray PM-9000 Operation manual

kENDALL
kENDALL SCD SEQUEL tyco Healthcare 6325 Operation & service manual

UP3D
UP3D UP500 user manual

ASTS Enterprises
ASTS Enterprises A310 user manual