Rotel S14 User manual

S14
Integrated Network Streamer
Ampli-Intégré Streamer Réseau
Integrierter Netzwerk-Streamer
Transmisor de red integrado
Geïntegreerde netwerkstreamer
Streamer di rete integrato
Streamingenhet med integrerat nätverk
Интегрированный сетевой плеер и стример
Owner’s Manual
Manuel de l’utilisateur
Bedienungsanleitung
Manual de Instrucciones
Gebruikershandleiding
Manuale di istruzioni
Instruktionsbok
Инструкция пользователя

2S14 Integrated Network Streamer
You must allow a minimum 10 cm or 4 inches of unobstructed
clearance around the unit.
WARNING: The rear panel power cord connector is the mains power
disconnect device. The device must be located in an open area that
allows access to the cord connector.
The unit must be connected to a power supply only of the type and
voltagespecifiedontherearpanel.(USA:120V/60Hz,EC:230V/50Hz)
Connect the component to the power outlet only with the supplied
power supply cable or an exact equivalent. Do not modify the supplied
cable. Do not use extension cords.
The mains plug is the disconnect of the unit. In order to completely
disconnect the unit from the supply mains, remove the main plug from
the unit and the AC power outlet. This is the only way to completely
remove mains power from the unit.
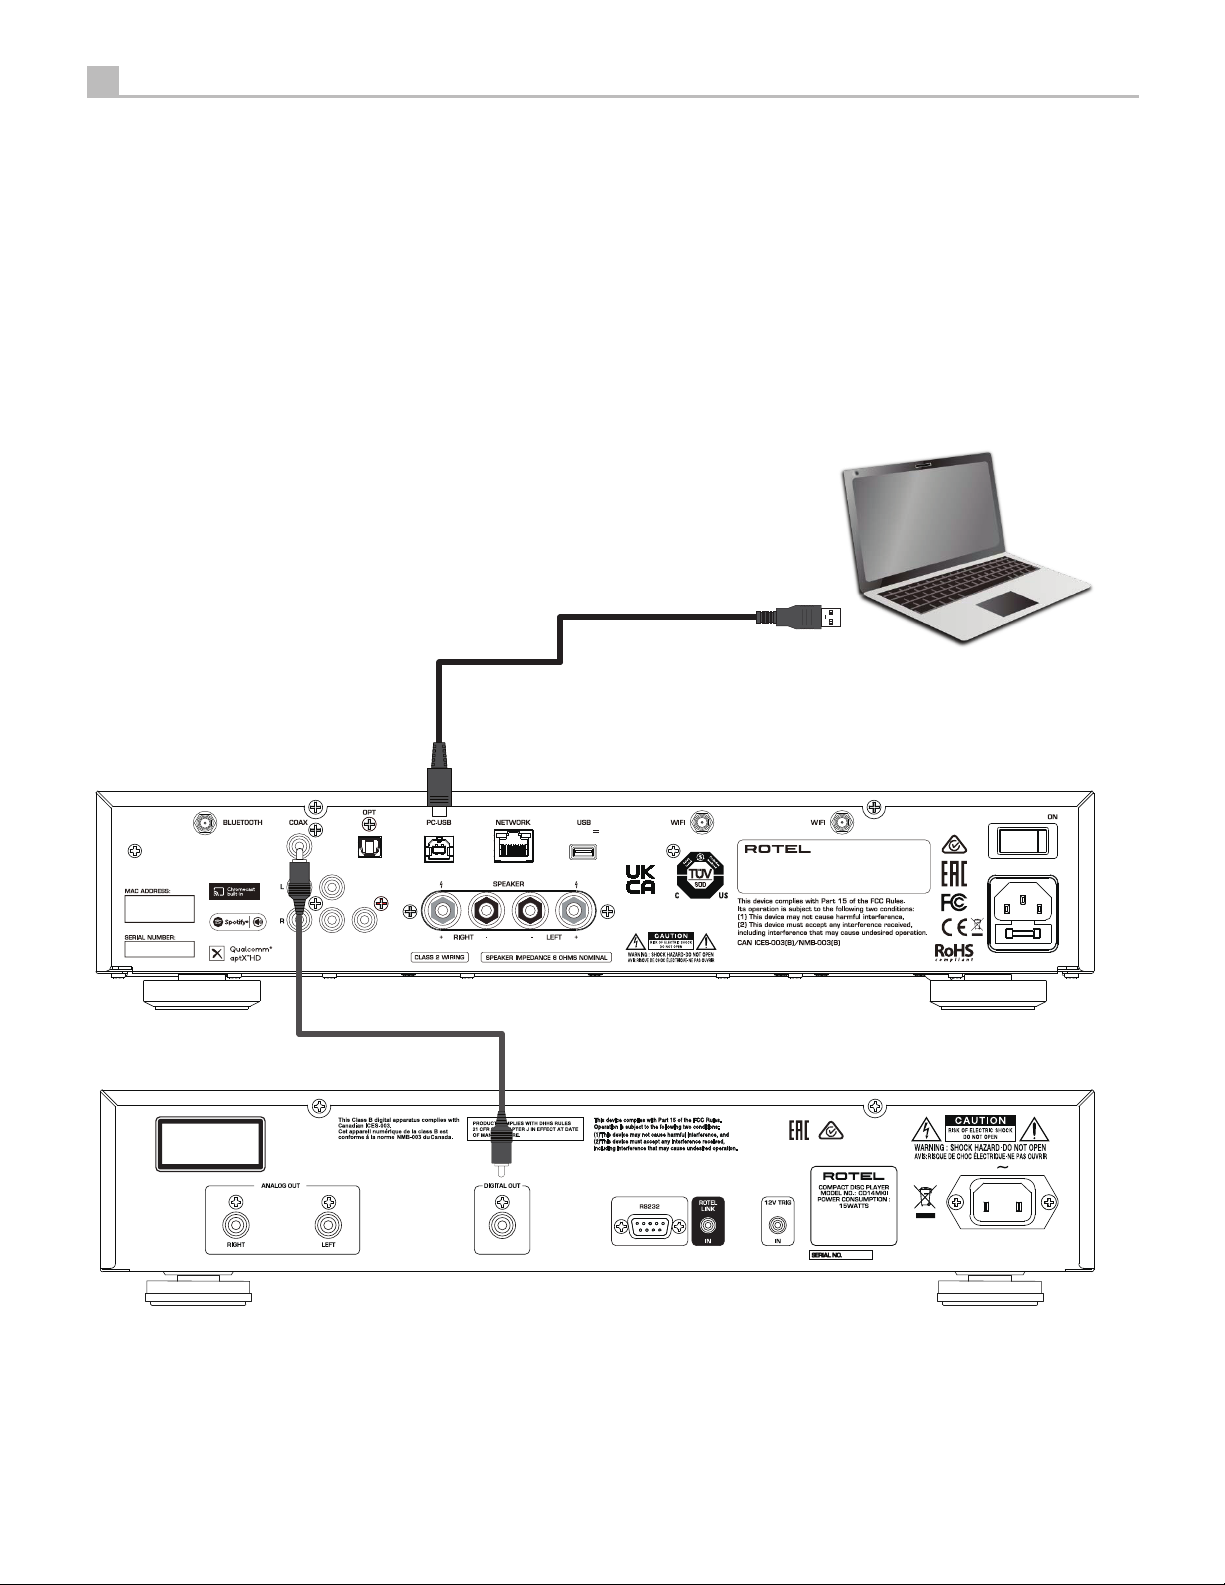
Use Class 2 wiring for speaker connections to ensure proper installation
and minimize the risk of electrical shock.
The batteries in the remote control should not be exposed to excessive
temperature such as sunshine, re or other heat sources. Batteries
should be recycled or disposed as per state and local guidelines.
This device complies with Part 15 of the FCC Rules. Operation is
subject to the following to conditions: (1) This device may not cause
harmful interference, and (2) this device must accept any interference
received, including interference that may cause undesired operation.
Notice
The RS232 connection should be handled by authorized persons only.
WARNING: There are no user serviceable parts inside. Refer all
servicing to qualified service personnel.
WARNING: To reduce the risk of fire or electric shock, do not expose
the unit to moisture or water. Do not expose the unit to dripping or
splashing. Do not place objects filled with liquids, such as vases, on
the unit. Do not allow foreign objects to get into the enclosure. If the
unit is exposed to moisture, or a foreign object gets into the enclosure,
immediately disconnect the power cord from the wall. Take the unit
to a qualified service person for inspection and necessary repairs.
Read these instructions.
Keep these instructions.
Heed all warnings.
Follow all instructions.
Do not use this apparatus near water.
Clean only with dry cloth.
Do not block any ventilation openings. Install in accordance with the
manufacturer’s instructions.
Do not install near any heat sources such as radiators, heat registers,
stoves, or other apparatus (including amplifiers) that produce heat.
Do not defeat the safety purpose of the polarized or grounding-type
plug. A polarized plug has two blades with one wider than the other.
A grounding type plug has two blades and a third grounding prong.
The wide blade or the third prong are provided for your safety. If
the provided plug does not fit into your outlet, consult an electrician
for replacement of the obsolete outlet.
Protect the power cord from being walked on or pinched particularly
at plugs, convenience receptacles, and the point where they exit
from the apparatus.
Only use attachments/accessories specified by the manufacturer.
Use only with the cart, stand, tripod, bracket, or
table specified by the manufacturer, or sold with
the apparatus. When a cart is used, use with caution
when moving the cart/apparatus combination to
avoid injury from tip-over.
Unplug this apparatus during lightning storms or when unused for
long periods of time.
Refer all servicing to qualified service personnel. Servicing is required
when the apparatus has been damaged in any way, such as power-
supply cord or plug is damaged, liquid has been spilled or objects
have fallen into the apparatus, the apparatus has been exposed to
rain or moisture, does not operate normally, or has been dropped.
The apparatus should be used in non tropical climate.
The ventilation should not be impeded by covering the ventilation
openings with items, such as newspapers, table-cloths, curtains, etc.
No naked flame sources, such as lighted candles, should be placed
on the apparatus.
Touching uninsulated terminals or wiring may result in an unpleasant
sensation.
Rotel products are designed to comply with
international directives ontheRestrictionofHazardous
Substances (RoHS) in electrical and electronic
equipment and the disposal of Waste Electrical and
Electronic Equipment (WEEE). The crossed wheelie bin
symbol indicatescomplianceandthattheproductsmust
be appropriately recycled or processed in accordance
with these directives.
Important Safety Instructions
This symbol means that this unit is double insulated.
An earth connection is not required.

3
Figure 1: Controls and Connections
Commandes et Branchements
Bedienelemente und Anschlüsse
Controles y Conexiones
Controlli e connessioni
De bedieningsorganen en aansluitingen
Kontroller och anslutningar
Органы управления и разъемы
100-120V/220-240V~50/60Hz
MODEL: S14
PRODUCT NAME: INTEGRATED NETWORK STREAMER
POWER CONSUMPTION: 280W
MADE IN CHINA
OFF
5V/2.0A
OUT OUTIN
PRE
SUB
AC FUSE: T8AL/250V
CAUTION :
Replace with same type
T8AL/250V fuse
Contains FCC ID: 2ADBM-LS10 Contains IC: 20276-LS10
Contains FCC ID: XCO-HSBT075 Contains IC: 7756A-HSBT075
890 - = q
ru
o
i
12 3 4 5 6
7
w e
yt
1: Power Button
Activate the unit or put it into standby mode
2: Power LED
3: Headphone Output
Connect headphones for private listening.
4: Source Button
Selects the input signal source.
5: Display
6: Volume Knob
Adjust the volume output level.
7: MENU and - / + buttons
Access the various menus and operate the
Amplier settings.
8: Bluetooth Antenna
Use for wireless streaming via Bluetooth.
9: COAX Input
0: OPTICAL Input
-: PC-USB input
=: NETWORK port
q: USB Power Port
Use for audio playback via Flash Drive.
w: Wi-Fi Antenna
Use for wireless connection.
e: Master Power Switch
r: AUX input
Analog “line level” input.
t: PRE Output
Connect to the integrated amplier
or power amplier.
y: SUB Output
Connect to a subwoofer.
u: Speaker Connectors
i: Fuse holder
o: AC Power Inlet

4S14 Integrated Network Streamer
OPT/COAX AUX
STREAM
PRESET
OK
VOLUME
PC-USB
USB
BT
1 2 3
A
B
C
D
E
H
G
I
F
Figure 2: Remote Control
Télécommande infra-rouge
Fernbedienung
Mando a Distancia
Telecomando
De afstandsbediening
Fjärrkontroll
Пульт ДУ
A: Power Button
Activate or deactivate the unit.
B: Navigation and OK Buttons
Access the various menus and operate
the Amplier settings.
C: Mute Button
Mute the audio.
D: Volume Buttons
Adjust the volume output level.
E: Source Buttons
Selects the input signal source.
F: Preset Buttons
Station preset and recall buttons.
G: Setup button
Activates the setup menu on the
front display.
H: Back Button
Return to the previous selection
screen.
I: Playback Control Buttons
Control the play, pause, next track
and previous track of the audio.

5
Figure 3: Antennas, Analog Input and Speaker Output Connections
Branchements d’antennes, entrée analogique et sorties enceintes acoustiques
Anschlussdiagramm
Conexiones para las antenas, Entrada analógica y Salida a las Cajas Acústicas
Aansluitingen van Antennes, Analoge ingang en de luidsprekeruitgangen
Collegamenti di antenne, ingresso analogico e diffusori
Antenner-, Signal- och högtalaranslutningar
Подсоединение Антенны, источников сигнала и акустических систем
100-120V/220-240V~50/60Hz
MODEL: S14
PRODUCT NAME: INTEGRATED NETWORK STREAMER
POWER CONSUMPTION: 280W
MADE IN CHINA
OFF
5V/2.0A
OUT OUTIN
PRE
SUB
AC FUSE: T8AL/250V
CAUTION :
Replace with same type
T8AL/250V fuse
Contains FCC ID: 2ADBM-LS10 Contains IC: 20276-LS10
Contains FCC ID: XCO-HSBT075 Contains IC: 7756A-HSBT075
Rotel S14
Audio Player
Speakers

6S14 Integrated Network Streamer
Figure 4: Digital Input Connections
Branchements Entrées numériques
Digitaleingänge-Anschlüsse
Conexiones Entradas Digitales
Digitale ingang verbinding
Collegamenti ingressi digitali
Anslutningar för digitala ingångar
Подсоединение к цифровым входам
100-120V/220-240V~50/60Hz
MODEL: S14
PRODUCT NAME: INTEGRATED NETWORK STREAMER
POWER CONSUMPTION: 280W
MADE IN CHINA
OFF
5V/2.0A
OUT OUTIN
PRE
SUB
AC FUSE: T8AL/250V
CAUTION :
Replace with same type
T8AL/250V fuse
Contains FCC ID: 2ADBM-LS10 Contains IC: 20276-LS10
Contains FCC ID: XCO-HSBT075 Contains IC: 7756A-HSBT075
CLASS 1
LASER PRODUCT
APPAREIL LASER
DE CLASSE 1
RP-600A
Computer
(Supplied)
Rotel S14
Rotel CD14MKII

7
Important Notes
When making connections be sure to:
4Turn off all the components in the system before hooking up any components, including loudspeakers.
4Turn off all components in the system before changing any of the connections to the system.
It is also recommended that you:
4Turn the volume control of the unit all the way down before the unit is turned on or off.
Remarques importantes
Pendant les branchements, assurez-vous que :
4Tous les maillons sont éteints avant leur branchement, quels qu’ils soient, y compris les enceintes acoustiques.
4Éteignez tous les maillons avant de modier quoi que ce soit au niveau de leurs branchements, quels qu’ils soient.
Il est également recommandé de :
4Toujours baissez le niveau sonore via le contrôle de volume, avant d’allumer ou d’éteindre l’amplicateur.
Wichtige Hinweise
Achten Sie beim Herstellen der Verbindungen auf Folgendes:
4Schalten Sie alle Komponenten im System ab, bevor Sie Geräte (einschließlich Lautsprecher) anschließen.
4Schalten Sie alle Komponenten im System ab, bevor Sie Anschlüsse im System verändern.
Ferner empfehlen wir, dass
4Sie die Lautstärke herunterdrehen, bevor Sie die Endstufe ein- oder abschalten.
Notas Importantes
Cuando realice las conexiones, asegúrese de que:
4Desactiva todos los componentes del equipo, cajas acústicas incluidas, antes de conectar cualquier nuevo componente en el mismo.
4Desactiva todos los componentes del equipo antes de cambiar cualquier conexión del mismo.
También le recomendamos que:
4Reduzca el nivel de volumen de su amplicador a cero antes de activarlo o desactivarlo.
Héél belangrijk
Bij het maken van de verbindingen:
4Zorg dat niet alleen de S14, maar de gehele installatie uitstaat, als nog niet alle verbindingen gemaakt zijn.
4Zorg dat niet alleen de S14, maar de gehele installatie ook uitstaat, als u verbindingen gaat wijzigen.
Wij raden u ook aan om
4de volumeregelaar van de voorversterker geheel dicht te draaien (volkomen naar links) wanneer u uw eindversterker aan- of uitzet.
Note importanti
Quando effettuate i collegamenti assicuratevi di:
4Spegnere tutti i componenti del sistema prima di collegare qualsiasi componente, inclusi i diffusori.
4Spegnere tutti i componenti del sistema prima di modicare qualsiasi connessione nel sistema.
Vi raccomandiamo inoltre di:
4Portare il volume a zero prima di accendere o spegnere l’amplicatore.
Viktigt
Tänk på följande när du gör anslutningar:
4Stäng av alla komponenter i anläggningen innan du ansluter nya komponenter, inklusive högtalare.
4Stäng av alla komponenter i anläggningen innan du ändrar någon anslutning i anläggningen.
Vi rekommenderar också föjlande::
4Vrid ner volymen på förstärkaren helt och hållet innan förstärkaren slås på eller av.
Важные замечания
Перед подсоединением:
4Выключите все компоненты, включая колонки.
4Выключите все компоненты в вашей системе, прежде чем что-то в ней менять.
Рекомендуется также:
4Вывести громкость усилителя на минимум, перед тем как включать или выключать его.

8S14 Integrated Network Streamer
About Rotel
Our story began over 60 years ago. Over the decades, we have received
hundreds of awards for our products and satised hundreds of thousands
of people who take their entertainment seriously – like you.
Rotel was founded by a family whose passionate interest in music led them
to manufacture high-delity components of uncompromising quality.
Through the years, that passion has remained undiminished and the family
goal of providing exceptional value for audiophiles and music lovers,
regardless of their budget, is shared by all Rotel employees.
Rotel’s engineers work as a close team, listening to, and ne tuning, each
new product until it reaches their exacting musical standards. They are
free to choose components from around the world in order to make that
product the best they can. You are likely to nd capacitors from the United
Kingdom and Germany, semiconductors from Japan or the United States,
while toroidal power transformers are manufactured in Rotel’s own factory.
We all have concerns about our environment. And, as more and more
electronics are produced it is especially important for a manufacturer to do all
it can to engineer products that have a minimum impact on the environment.
At Rotel, we are proud to do our part. We have reduced the lead content
in our products by using special lead-free ROHS solder and components.
Our engineers continually strive to improve power supply efciency without
compromise to quality. When in standby mode Rotel products use minimal
power to meet global Standby Power Consumption requirements.
The Rotel factory is also doing their part to help the environment through
constant improvements to product assembly methods for a cleaner and
greener manufacturing processes.
All of us at Rotel thank you for buying this product. We are sure it will bring
you many years of enjoyment.
Getting Started
Thank you for purchasing the Rotel S14 Integrated Network Streamer. When
used in a high-quality music audio system, Rotel products will provide years
of musical enjoyment.
This unit is a full featured, high performance component. All aspects of the
design have been optimized to retain the full dynamic range and subtle
nuances of your music. The unit has a highly regulated power supply
incorporating a Rotel custom-designed toroidal power transformer. This
low impedance power supply has ample power reserves, which enables
the unit to easily reproduce the most demanding audio signals. This type
of design is more expensive to manufacture, but it is better for the music.
The printed circuit boards (PCB) are designed with Symmetrical Circuit
Traces. This ensures that the precise timing of the music is maintained and
faithfully recreated. The circuitry uses metal lm resistors and polystyrene
or polypropylene capacitors in important signal paths. All aspects of this
design have been examined to ensure the most faithful music reproduction.
The main functions of the S14 are easy to install and use. If you have
experience with other stereo systems, you shouldn’t nd anything perplexing.
Simply plug in the associated components and enjoy.
Contents
Important Safety Instructions ..........................................2
Figure 1: Controls and Connections 3
Figure 2: Remote Control 4
Figure 3: Analog Input and Speaker Output Connections 5
Figure 4: Digital Input Connections 6
Important Notes 7
About Rotel.......................................................8
Getting Started ....................................................8
A Few Precautions 9
Placement 9
Cables 9
The Remote Control .................................................9
Remote Control Batteries 9
AC Power and Control ...............................................9
AC Power Input o 9
Master Power Switch e10
Power Switch 1Aand Power Indicator 2 10
Protection Indicator 2.............................................10
Input Signal Connections ............................................10
Aux Input r10
Digital Inputs 90 10
Output Connections ................................................10
PRE Output t10
SUB Output y10
Headphone Output 310
Speaker Outputs u...............................................10
Speaker Wire Selection 10
Polarity and Phasing 11
Speaker Connection 11
Display 5.......................................................11
aptX™ HD Bluetooth Connection 8....................................11
Rear USB port q.................................................11
PC-USB Input -..................................................11
Network Connection =w ..........................................11
Streaming ......................................................12
Wi-Fi Stream Connection 12
Audio Streaming 13
Roon Ready .....................................................13
Spotify®.......................................................13
Overview of Buttons and Controls. . . . . . . . . . . . . . . . . . . . . . . . . . . . . . . ......13
Main Menu ......................................................14
Troubleshooting ...................................................14
Power Indicator Is Not Illuminated 14
Network Does Not Work 15
Fuse Replacement 15
No Sound 15
Cannot Connect via Bluetooth 15
Playable Audio Formats 15
Specications.....................................................16

9
A Few Precautions
WARNING: To avoid potential damage to your system, turn off ALL
the components in the system when connecting or disconnecting the
loudspeakers or any associated components. Do not turn the system
components back on until you are sure all the connections are correct
and secure. Pay particular attention to the speaker wires. There must
be no loose strands that could contact the other speaker wires, or the
chassis of the unit.
Please read this manual carefully. It provides information on how to
incorporate the unit into your system as well as information that will help
you get optimum sound performance. Please contact your authorized Rotel
dealer for answers to any questions you might have. In addition, all of us
at Rotel welcome your questions and comments.
Save the shipping carton and all enclosed packing material for future use.
Shipping or moving the unit in anything other than the original packing
material may result in severe damage to your unit.
If included in the box please complete the owner’s registration card or
register on line. Also be sure to keep the original sales receipt. It is your best
record of the date of purchase, which you will need in the event warranty
service is ever required.
Placement
Like all audio components that handle low level signals, this unit can be
affected by its environment. Avoid placing the unit on top of other components.
Also avoid routing audio signal cables near power cords. This will minimize
the chance it will pick up hum or interference.
The unit generates heat as part of its normal operation. The heat sinks and
ventilation openings in the unit are designed to dissipate this heat. The
ventilation holes in the top cover must be open. There should be 10 cm (4
inches) of clearance around the chassis, and reasonable airow through
the installation location, to prevent the unit from overheating.
Remember the weight of the unit when you select an installation location.
Make sure that the shelf or cabinet can support it. We recommend installing
the unit in furniture designed to house audio components. Such furniture is
designed to reduce or suppress vibration which can adversely affect sound
quality. Ask your authorized Rotel dealer for advice about component
furniture and proper installation of audio components.
Cables
Be sure to keep the power cords, digital signal cables and analog audio
signal cables in your installation away from each other. This will minimize
the chance of the analog audio signal cables picking up noise or interference
from the power cords or digital cables. Using only high quality, shielded
cables will also help to prevent noise or interference from degrading the
sound quality of your system. If you have any questions see your authorized
Rotel dealer for advice about the best cable to use with your system.
The Remote Control
Some functions can be done with either the front panel controls, or the
supplied the remote control. When these operations are described, the
square call out numbers refer to the main unit, while the encircled letters
refer to the remote control.
Remote Control Batteries
To change the battery of the remote control, rst remove the two screws shown
as gure 1. Then remove the battery holder by pulling it downwards. Insert
a new CR 2035 battery into the battery holder according to the marking
(+ on the battery facing downwards). Now insert the holder as shown and
use two screws to fasten the holder.
Figure 1
NOTE: Use only the tool supplied with the unit to remove the screw to
avoid damage to the hex screw.
NOTE: Do NOT over-tighten the screw to avoid damage to the screw
or remote control.
AC Power and Control
AC Power Input o
Your unit is congured at the factory for the proper AC line voltage in the
country where you purchased it (either 120 volts AC or 230 volts AC with
a line frequency of either 50 Hz or 60 Hz). The AC line conguration is
noted on the back panel.

10 S14 Integrated Network Streamer
NOTE: Should you move your unit to another country, the unit will detect
and reconfigure for use on a different line voltage. Consult a qualified
service person or the Rotel factory service department for information.
NOTE: Some products are intended for sale in more than one country
and as such are supplied with more than one AC cord. Please only use
the one appropriate for your country/region.
The unit does not draw high levels of current from the power outlet. However,
it should be plugged directly into a polarized wall outlet using the supplied
cable or other compatible cable as recommended by your authorized Rotel
dealer. Do not use an extension cord. A heavy duty multi-tap power outlet
strip may be used if it (and the wall outlet) can handle the current demanded
by the unit and all the other components connected to it.
If you are going to be away from home for an extended period of time
such as a month-long vacation, it is a sensible precaution to unplug your
unit (as well as other audio and video components) while you are away.
Master Power Switch e
The large rocker switch on the rear panel is a master power switch. When it
is in the OFF position, power to the unit is completely off. When it is in the
ON position, the front panel POWER and remote control ON/OFF buttons
can be used to activate the unit or put it into standby mode.
Power Switch 1Aand Power Indicator 2
Press the front panel Power Switch button 1, to turn the unit on. The Power
Indicator light 2is illuminated when the unit is on. Press Power Switch
button again to turn the unit off.
When the power switch is in the ON position, the remote control button
may be used to activate the S14. In Standby mode the power light is red,
but the display is turned OFF.
Protection Indicator 2
The unit has both thermal and over-current protection circuitry that protects the
unit against damage in the event of extreme or faulty operating conditions.
The protection circuits are independent of the audio signal and have no
impact on sonic performance. Instead, the protection circuits monitor the
temperature of the output devices and shut down the unit if temperatures
exceed safe limits.
Most likely, you will never see this protection circuitry in action. However,
should a faulty condition arise, the unit will stop playing and will display
“PROTECTION“ on the front panel. The power indicator 2on the front
panel will turn red.
If this happens, turn the unit off. Let it cool down for several minutes, and
attempt to identify and correct the problem that caused the protection
circuitry to engage. When you turn the unit back on, the protection circuit
will automatically reset and the power indicator 2should turn blue.
In most cases, the protection circuitry activates because of a fault condition
such as shorted speaker wires, or inadequate ventilation leading to an
overheating condition. In very rare cases, highly reactive or extremely
low impedance speaker loads could cause the protection circuit to engage.
If the protection circuitry triggers repeatedly and you are unable to isolate
and correct the faulty condition, contact your authorized Rotel dealer for
assistance in troubleshooting.
Input Signal Connections
NOTE: To prevent loud noises that neither you nor your speakers will
appreciate, make sure the system is turned off when you make any
signal connections.
AUX Input r
See Figure 3
The Aux input of the streamer is for connecting components such as CD
players or other audio playback devices with an analog audio output.
The Left and Right channels are labeled and should be connected to the
corresponding channels of the source component. The Left connectors
are white, the Right connectors are red. Use high quality RCA cables for
connecting input source components to the unit. Ask your authorized Rotel
dealer for advice about cables.
Digital Inputs 90
See Figure 4
There is one set of digital inputs labeled COAX and OPT respectively.
Connect the COAXIAL or OPTICAL outputs of your source component into
these sockets. The digital signals will be decoded and played by the unit.
The unit is capable of decoding PCM signals up to 24 bit, 192kHz.
Output Connections
PRE Output t
The unit has a set of preamp outputs labeled PRE OUT. The currently selected
source input is available from this output. Typically the PRE OUT output is
used to connect to an external power amplier for either a 2nd zone or to
drive higher output power from the unit.
NOTE: Changes to the settings of the Volume, Balance or Tone controls
affect the signal from the PRE OUT output.
SUB Output y
There is a connector for subwoofer output to connect to the subwoofer.
This sub output is summed with both the left and right audio signal. The
subwoofer output is full range relying on the subwoofer to lter the signal.
Headphone Output 3
The headphone output allows you to connect headphones for private listening.
This output accepts a standard 3.5mm (1/8”) mini stereo headphone
connector. Plugging in a set of headphones cuts off the signal to the speakers,
PRE output and SUB output.
NOTE: Because the sensitivity of speakers and headphones can
vary widely, always reduce the volume level before connecting or
disconnecting headphones.

11
Speaker Outputsu
See Figure 3
Speaker Wire Selection
Use insulated two-conductor stranded wire to connect the unit to the speakers.
The size and quality of the wire can have an audible effect on the performance
of the system. Standard speaker wire will work, but can result in lower
output or diminished bass response, particularly over longer distances. In
general, heavier wire will improve the sound. For best performance, you
may want to consider special high-quality speaker cables. Your authorized
Rotel dealer can help in the selection of cables for your system.
Polarity and Phasing
The polarity - the positive/negative orientation of the connections - for every
speaker and streamer connection must be consistent so all the speakers will
be in phase. If the polarity of one connection is reversed, bass output will
be very weak and stereo imaging degraded. All wire is marked so you can
identify the two conductors. There may be ribs or a stripe on the insulation
of one conductor. The wire may have clear insulation with different color
conductors (copper and silver). There may be polarity indications printed
on the insulation. Identify the positive and negative conductors and be
consistent with every speaker and streamer connection.
Speaker Connection
Turn off all the components in the system before connecting the speakers.
The unit has color-coded binding post type speaker connectors on the back
panel. These connectors accept bare wire, connector lugs, or dual banana
type connectors. (Except in European Community countries where their use
is not permitted.)
Route the wire from the unit to the speakers. Give yourself enough slack so
you can move the components to allow access to the speaker connectors. If
you are using dual banana plugs, connect them to the wires and then plug
into the backs of the binding posts. The thumbscrews of the binding posts
should be screwed in all the way (clockwise).
If you are using terminal lugs, connect them to the wires. If you are attaching
bare wires directly to the binding posts, separate the wire conductors and
strip the insulation from the end of each conductor. Be careful not to cut
into the wire strands. Unscrew (turn counterclockwise) the binding post
thumbscrews. Place the connector lug or wire around the binding post
shaft. Turn the thumbscrews clockwise to clamp the connector lug or wire
rmly in place.
NOTE: Be sure there are no loose wire strands that could touch adjacent
wires or connectors.
Display 5
The front panel display shows the current unit status and streaming source
information. Album artwork is also display on supported source inputs. The
display provides access to the setup and conguration menu options of the unit.
aptX™ HD Bluetooth Connection 8
The Bluetooth Antenna 8on the S14’s back panel is for wireless streaming
via Bluetooth, from your device (i.e. mobile phones, tablets or computers).
From your device, look for “Rotel S14 / XXX--XXXXXX (series number)”
and connect to it. Connection is normally automatic, but if prompted for a
password, please enter “0000” on your device. The S14 supports traditional
Bluetooth, AAC and aptX™ HD Bluetooth audio streaming.
Rear USB Port q
The rear USB port allows playback of audio from a USB Flash device. The
maximum support size of the USB ash drive is 32 GB. Supported le types
include MP3, AAC (mp4), FLAC, WAV and OGG. All les should be in
the root folder of the ash drive and are played back in sequential order.
PC-USB Input -
See Figure 4
Connect this input using a USB cable to the PC-USB socket of your computer.
The S14 supports USB Audio Class 2.0 modes. To use the PC-USB connection
you will need to install the Windows driver supplied on the USB stick
included with the S14.
Many audio playback applications do not support 384kHz sampling rate.
Please conrm your audio player supports 384kHz audio and you have
384kHz audio les to properly playback this sample rate. Also, you may
need to congure the audio driver in your PC to output 384kHz or your
computer may “down sample” to a lower audio sample rate. For more
information please refer to your audio player or operating system information.
NOTE: USB Audio Class 2.0 requires installation of the Windows PC
driver on the USB stick included with the S14.
NOTE: MAC computers do not require a driver to support PC-USB
Audio Class 2.0.
NOTE: Upon successful installation of the driver, you may need to select
the ROTEL audio driver from the audio/speaker setup of your computer.
Network Connection =w
This unit can connect to a wired or wireless network. If using a wired network,
connect your network cable to the socket marked NETWORK =then the
front panel will display the wired icon . If using a wireless network,
please connect the Wi-Fi antennas (supplied) to the connector marked
Wi-Fi wthen the front panel will display the Wi-Fi icon or the
depending on the wireless connection status.
The NETWORK connection allows software updates to automatically be
downloaded from the Internet.

12 S14 Integrated Network Streamer
Streaming
The S14 supports the wireless streaming of audio from network attached
storage devices and multiple Internet based audio streaming services.
Wi-Fi Stream Connection
To utilize the Streaming services you will need to do the following:
Connecting S14
For hardwire connections attach the network cable to the rear panel Network
port on the unit.
For wireless connections ensure the Wi-Fi antennas have been installed and
power on the S14 unit. The Wi-Fi icon will be displayed on the front panel.
This means the S14 is ready to connect to your Wi-Fi network.
Streaming
From your devices (phones, tablets), download the free Google Home App
or Apple Home App from an App store, such as the Google Play or Apple
Home App store. After download, launch and run the Google Home App
on your devices, following the relevant steps below, dependent on your
device type:
For iOS devices (using Wi-Fi Setup):
1. Go to the SETTINGS menu on your iOS device.
2. Select the Wi-Fi settings menu and ensure Wi-Fi is enabled.
3. Wait for up to 90 seconds for the list of available Wi-Fi networks to be
refreshed and nd the S14 enabled Streaming device listed at the bottom
of the list under the “SET UP NEW AIRPLAY SPEAKER” option.
<Settings Wi-Fi
Wi-Fi
√Network
CHOOSE A NETWORK
Network
Other...
SET UP NEW AIRPLAY SPEAKER...
S14-XXXX >
Ask to Join Networks
Known networks will be joined automatically. If no known
networks are available, you will have to manually select a
network.
i
i
10:17 AM 32%
4. Select the new Streaming device and conrm to add to the current Wi-Fi
network by choosing the desired Network listed and selecting Next.
√
Cancel AirPlay Setup Next
Network
Show Other Network
Speaker Name S14-XXXX
SPEAKER PASSWORD
Password Optional
Verify Verify Password
10:17 AM 32%
This AirPlay speaker will be set up to join “Network”.
NETWORK
5. Wait for 60-90 seconds for the Streaming device to congure the settings
and attach to the wireless network. When connected, the Wi-Fi icon
will show on the front display.
Streaming
6. You’re connected!
For iOS devices (using Apple Home):
1. Open the Apple Home App.
2. Press the “Add Accessory” button or “+” button and select “Accessory”.
3. Select the “More options” option.
4. Select the S14 unit and follow the setup wizard instructions to congure
the Wi-Fi settings.
5. Wait for 60-90 seconds for the Streaming device to congure the settings
and attach to the wireless network. When connected, the Wi-Fi icon
will show on the front display.
Streaming

13
6. You’re connected!
For Android device:
1. Launch the Google Home App on your device.
2. Press the “+” icon in the top left corner and select “Set up device” -->
“New devices”. The App will search for the S14. Select the unit to begin
the setup wizard.
3. If prompted, enter the Wi-Fi encryption key of your wireless network and
then wait for the unit to congure and connect to the network.
4. Wait for 60-90 seconds for the unit to congure the settings and attach
to the wireless network. When connected, the Wi-Fi icon will show
on the front display.
Streaming
5. You’re connected!
Audio Streaming
Once properly congured, you can begin streaming audio to the S14.
Open your music App and select the device or multiple devices you want
to control. Then select an audio service to begin streaming audio.
Roon Ready
The unit has been certied as Roon Ready and compatible with Roon software.
Being Roon Ready means that Rotel uses Roon streaming technology, for an
incredible user interface, simple setup, rock-solid daily reliability, and the
highest levels of audio performance, without compromise.
To use Roon setup the S14 in the Roon software as a streaming endpoint
and follow the instructions in Roon.
Spotify ®
How to use Spotify Connect
You’ll need a Spotify premium account to use Spotify connect using the
steps as shown below:
1. Add your new device to the same Wi-Fi network as your phone, tablet
or PC (see product user instructions for details).
2. Open the Spotify app on your phone, tablet or PC, and play any song.
3. Tap the image in the bottom of the screen.
4. Pick your device from the list. If you can’t see it, just check it’s connected
to the same Wi-Fi network as your phone, tablet or PC.
5. Select your favorite music and start streaming.
All done! Happy listening.
Licenses:
The Spotify Software is subject to third party licenses found here:
www.spotify.com/connect/third-party-licenses.
There are multiple streaming services available with the S14 including the
ability to use Airplay 2 and Google Cast to stream your favorite music.
Internet radio services can be utilized on the S14 using the supported Apps
and various streaming methods.
The S14 may also include additional streaming services in the future. For the
latest information on streaming services please check the Owner’s Manual
on the www.rotel.com website under the Support tab.
For more information on the offerings available from each streaming service
please check with the service provides.
Overview of Buttons and Controls
This section provides a basic overview of the buttons and controls on the
front panel and remote control. Detailed instructions on the use of these
buttons are provided in the more complete operating instructions in the
following sections.
Navigating and OK BButtons: Use the navigation buttons ///
Band the “OK“ on the remote control to access the various menus and
operate the unit settings.
MENU and — / + 7Buttons : Use the MENU button and the --/+ buttons
on the front panel to access the various menus and operate the unit settings.
MENU button - To access the menu setting, move the next setting and save
the desired settings.
—/+ buttons - To change the value.
Power 1A: The Power button on the front panel and on the remote
control activate or deactivate the unit. To power on the unit, the rear panel
master POWER switch must be in the ON position for the front panel and
the remote standby function to operate.
Power On - To power on the unit push and release the Power 1 button
on the front panel or PUSH-HOLD the remote control Power A button for
2 seconds until the unit powers on (up to 7 seconds).

14 S14 Integrated Network Streamer
Power Off/Standby - To power off the unit to standby push and release the
front panel Power 1 button or PUSH-HOLD the remote control Power A
button for 2 seconds until the unit powers off (up to 3 seconds).
Button C:Push the button once to mute the audio. An indication
appears in the front panel display. Press the button again to restore the
previous volume level.
VOLUME Knob 6and VOL +/- Buttons D: The VOLUME +/— buttons
on the remote and the rotary control on the front panel provide the master
VOLUME control, adjusting the output level.
Source Button 4E: Press the corresponding input button on the front panel
4or remote control Eto select the desired listening source.
Push the front panel source buttons to select STREAMING, BLUETOOTH,
PC-USB, COAX/OPT, AUX and USB or use the dedicated source button
on the remote control. The COAX/OPT is a toggle source input and will
switch between the Coaxial and Optical inputs when pressed repeatedly.
Preset Buttons F: The Preset buttons are used to memorize and recall a
station. To save a station PUSH-HOLD the preset button for 3 seconds. To
recall a station simply push and release the desired button.
NOTE: Preset functions are not available for all streaming services.
Button G: The SETUP button activates the setup menu on the front
display. Push the SETUP button again to move to the next setup menu option.
Button H: Pressing briey returns to the previous selection screen or
exits the setup menu if you are in the top menu level.
Playback Control Buttons I: Press the Play /Pause button to start
playing or stop. and buttons are used to select tracks of the selected
audio source.
Main Menu
You can enter the Setup menu from the front panel by pressing the H
button on the remote control or the MENU 7button on the front panel.
To select the desired menu, use the MENU 7button on the front panel or
the /Barrow buttons on the remote control to toggle between the
menus and press + button 7on the front panel or the “OK“ button on the
remote control to conrm. You can change the values of the selected setting
by pressing the — or + button on the front panel or the /Barrow
buttons on the remote control then press the “OK” button on the remote
control or the MENU button 7on the front panel to save and to return to
the previous menu.
Setup
Bass
Treble
Balance
MENU for Next, + to change
Bass: Bass level can be changed to desired settings.
Options include: -10 - +10.
Treble: Treble level can be changed to desired settings.
Options include: -10 - +10.
Balance: Adjusts the left-to-right balance of the sound output. The factory
default is the center position or “0”.
Options include: L15 - R15.
Dimmer: Sets the brightness of the front display. The Menu Setup will always
activate at the brightest level regardless of the Dimmer setting to ensure the
unit conguration options can easily be accessed and modied.
Options include: High (Default), Medium, Low.
LED Dimmer: Sets the brightness of the ON level of the front panel Power LED.
Options include: High (Default), Medium, Low.
Power On Max Volume: This sets the maximum volume level when the unit
is turned on. “45” is the factory default.
Options include: 0-96.
Auto Power Off: Set the amount of time the units stays powered on when
there is no audio signal. The unit will automatically go to standby mode
if audio is not detected for the specied timer period. Default: 20 MINS.
Options include: 20 Minutes (Default), Disable, 1 Hour, 2 Hours, 5 Hours,
12 Hours.
Network Info:Shows the network connection status and network settings,
Wi-Fi MAC, Bluetooth MAC and Ethernet MAC.
Software Info: Shows the current software version loaded into the unit.
Wi-Fi Reset: This option erases all current Wi-Fi settings in the unit.
Factory Reset: This option sets the unit back to the original setting as when
it left the factory including resetting the Wi-Fi settings. All user settings will
be erased.
NOTE: Use caution when resetting the unit to factory defaults as all user
configured options will be erased and reset to original factory settings.
EXIT: Exits this setting menu.

15
Troubleshooting
Most difculties in audio systems are the result of incorrect connections, or
improper control settings. If you encounter problems, isolate the area of the
difculty, check the control settings, determine the cause of the fault and
make the necessary changes. If you are unable to get sound from the unit,
refer to the suggestions for the following conditions:
Power Indicator Is Not Illuminated
The Power Indicator and the basic items in the Display window should be
illuminated whenever the unit is plugged into the wall power outlet and the
Power button is pushed in. If it does not illuminate, test the power outlet with
another electrical device, such as a lamp. Be sure the power outlet being
used is not controlled by a switch that has been turned off.
Network Does Not Work
If you have trouble connecting to your wired/wireless network, check your
network setting carefully, these steps may help to resolve the problem.
1. Conrm that the network works, ie, PC can access the Internet using the
same network.
2. Check that a DHCP server is available. Please refer to Network Cong
section.
3. Check that your network’s rewall is not blocking any outgoing ports.
4. Do a hard power off (unplug the AC mains) and let the unit restart the
network scanning cycle.
5. If using Wi-Fi connection, make sure the placement of your unit allows
it to receive the Wi-Fi signal.
Fuse Replacement
If another electrical device works when plugged into the power outlet, but
the Power Indicator still will not illuminate when the unit is plugged into the
wall outlet, it indicates that the power fuse may have blown. If you believe
this has happened, unplug the unit removing the AC power and use the tool
to open the fuse holder ion the rear panel then replace the blown fuse
with a new one of the exact type and rating, or contact your authorized
Rotel dealer to get the fuse replaced.
No Sound
Check the signal source to see if it is functioning properly. Make sure the
cables from the signal source to the unit inputs are connected properly. Be
sure the Input Source is set to the proper input. Check the wiring between
the unit and the speakers.
Cannot Connect via Bluetooth
If you cannot pair your Bluetooth enabled device to the unit, delete the
memory of the previous connection on your device. On your device this is
often listed as “Forget this Device”. Then try to make the connection again.
Playable Audio Formats
aptX™ HD and AAC Bluetooth
Format Notes
Any format supported
by the sending device. May exclude Apps designed to play formats not originally
supported by the sending device.
PC-USB
Format Notes
Format determined
by the Media Player/
Server software that
you use.
Any supported format by the PC software
PCM Audio:
44.1k, 48k, 88.2k, 96k, 176.4k, 192k, 352.8k,
384k (16 bit, 24 bit)
MQA, MQA Studio (24 bit / 384k)
Coax/Optical
Format Notes
SPDIF LPCM 44.1k, 48k, 88.2k, 96k, 176.4k, 192k
16 bit, 24 bit
USB Flash Drive
Format Notes
MP3, AAC (MP4),
FLAC, WAV, OGG 64k, 128k, 192k, 256k, 320k, HQ.

16 S14 Integrated Network Streamer
Specications
Maximum Power OutputMaximum Power Output 150 watts/ch, 4 ohms
Continuous Power OutputContinuous Power Output 80 watts/ch, 8 ohms
Total Harmonic DistortionTotal Harmonic Distortion < 0.04%
Intermodulation DistortionIntermodulation Distortion (60 Hz : 7k Hz, 4:1) < 0.03%
Frequency ResponseFrequency Response
Line Level Inputs 10 Hz - 100k Hz, ± 0.5 dB
Damping FactorDamping Factor (20 Hz – 20k Hz, 8 ohms) 400
Input Sensitivity / ImpedanceInput Sensitivity / Impedance
Line Level Inputs 200 mV / 47k Ohms
Input OverloadInput Overload
Line Level Inputs 4.5 V
Tone Controls – Bass / TrebleTone Controls – Bass / Treble ±10 dB at 100Hz / 10k Hz
Signal to Noise RatioSignal to Noise Ratio (A weighting)
Line Level Inputs 100 dB
Digital SectionDigital Section
Frequency ResponseFrequency Response 10Hz - 90k Hz (± 2dB, MAX)
Signal to Noise RatioSignal to Noise Ratio (A weighting) 98 dB
Input Sensitivity / ImpedanceInput Sensitivity / Impedance - 20 dBFS / 75 ohms
Digital InputsDigital Inputs SPDIF LPCM
(up to 192k Hz/24 bit)
PC-USBPC-USB USB Audio Class 2.0
(up to 384k Hz/24 bit)*
*Driver installation required
Support MQA and MQA Studio
(up to 384k Hz/24 bit)
GeneralGeneral
Power RequirementsPower Requirements
USA 120V, 60 Hz
EC 230V, 50 Hz
Standby Power ConsumptionStandby Power Consumption
Normal < 0.5 watts
Power ConsumptionPower Consumption 280 watts
BTUBTU (4 ohms, 1/8th power) 733 BTU/h
DimensionsDimensions (W, H, D) 430 x 93 x 345 mm
17” x 3 5/8” x 13 1/2”
Panel HeightPanel Height 80 mm / 3 1/8”.
WeightWeight (net) 9.15 kg, 20.17 lbs.
All specications are accurate at the time of printing.
Rotel reserves the right to make improvements without notice.
Rotel and the Rotel HiFi logo are registered trademarks of The Rotel Co., Ltd.
Tokyo, Japan.
“Made for iPod,” and “Made for iPhone,” means that an electronic accessory
has been designed to connect specically to iPod or iPhone, respectively, and
has been certied by the developer to meet Apple performance standards.
Apple is not responsible for the operation of this device or its compliance with
safety and regulatory standards. Please note that the use of this accessory
with iPod, or iPhone may affect wireless performance.
iPhone, iPod, iPod classic, iPod nano, and iPod touch are trademarks of
Apple Inc., registered in the U.S. and other countries.
Use of the Works with Apple badge means that an accessory has been
designed to work specically with the technology identied in the badge and
has been certied by the developer to meet Apple performance standards.
To control this AirPlay 2–enabled speaker, iOS 11.4 or later is required.
Apple, AirPlay, Apple TV, Apple Watch, iPad, iPad Air, iPad Pro, iPhone,
and Lightning are trademarks of Apple Inc., registered in the U.S. and
other countries.
‘MQA’ or ‘MQA Studio’ indicates that the product is decoding and playing
an MQA stream or le, and denotes provenance to ensure that the sound is
identical to that of the source material. ‘MQA Studio’ indicates it is playing
an MQA Studio le, which has either been approved in the studio by the
artist/producer or has been veried by the copyright owner.
‘OFS’ conrms that the product is receiving an MQA stream or le. This
delivers the nal unfold of the MQA le and displays the original sample rate.

17
Français
Vous devez réserver un espace libre d’une dizaine de
centimètres minimum autour de l’appareil.
ATTENTION : La prise d’alimentation située à l’arrière constitue le
principal moyen pour déconnecter l’appareil du secteur. Cet équipement
doit être positionné dans un espace ouvert qui permet de garder l‘accès
au câble d’alimentation.
Cet appareil doit être branché sur une prise d’alimentation secteur, d’une
tension et d’un type conformes à ceux qui sont indiqués sur la face arrière
de l’appareil (USA : 120 V/60 Hz, CE : 230 V/50 Hz).
Brancher l’appareil uniquement grâce au cordon secteur fourni, ou à
un modèle équivalent. Ne pas tenter de modifier ou changer la prise.
Ne pas utiliser de cordon rallonge.
La prise d’alimentation secteur constitue le moyen radical de déconnexion
de l’appareil. Elle doit donc rester en permanence accessible, car sa
déconnexion constitue la seule assurance que l’appareil n’est plus
alimenté par le secteur.
Utilisez uniquement descâbles deClasse 2pour réalise les connexions aux
enceintes acoustiques et offrant une isolation suffisante pour minimiser
les risques de chocs électriques.
Les piles de la télécommande infra-rouge ne doivent en aucun cas
exposées à une chaleur excessive notamment au feu ou au soleil
direct. Les batteries doivent être recyclées ou éliminées selon les
directives nationales et locales.
Cet appareil répond aux normes de l’article 15 de la FCC sous les
conditions suivantes : 1) Cet appareil ne doit pas causer d’interférence
très sensible. 2) Cet appareil doit pouvoir accepter n’importe quelle
interférence externe, y compris celles dues à une utilisation fortuite.
Remarque
La prise RS232 ne doit être utilisée que par une personne qualifiée.
ATTENTION : Il n’ya à l’intérieur aucunepièce susceptible d’être modifiée
par l’utilisateur. Adressez-vous impérativement à une personne qualifiée.
ATTENTION : Pour réduire tout risque d’électrisation ou d’incendie, ne
pas exposer l’appareil à une source humide, ou à tout type de risque
d’éclaboussure ou de renversement de liquide. Ne pas poser dessus
d’objet contenant un liquide, comme un verre, un vase, etc. Prenez
garde à ce qu’aucun objet ou liquide ne tombe à l’intérieur de l’unité
par ses orifices de ventilation. Si l’appareil est exposé à l’humidité ou
si un objet tombe à l’intérieur, débranchez-le immédiatement de son
alimentation secteur, et adressez-vous immédiatement et uniquement
à une personne qualifiée et agréée.
Tous les conseils de sécurité et d’installation doivent être lus.
Conservez soigneusement ce livret.
Tous les conseils de sécurité doivent être soigneusement respectés.
Respectez les procédures d’installation et de fonctionnement indiquées
dans ce manuel.
Ne pas utiliser cet appareil près d’un point d’eau.
L’appareil doit être nettoyé uniquement avec un chiffon sec ou un
aspirateur.
Il ne doit pas être posé sur un fauteuil, un canapé, une couverture ou
toute autre surface susceptible de boucher ses ouïes d’aération ; ou
placé dans un meuble empêchant la bonne circulation d’air autour des
orifices d’aération.
Cet appareil doit être placé loin de toute source de chaleur, tels que
radiateurs, chaudières, bouches de chaleur ou d’autres appareils
produisant de la chaleur.
Notamment, ne pastenter desupprimer la prise de terre(troisième broche
de la prise) si celle-ci est présente. Si la prise n’est pas conforme à celles
utilisées dans votre installation électrique, consultez un électricien agréé.
Prendre garde à ce que ce cordon d’alimentation ne soit pas pincé,
écrasé ou détérioré sur tout son trajet, et à ce qu’il ne soit pas mis en
contact avec une source de chaleur. Vérifiez soigneusement la bonne
qualité des contacts, à l’arrière de l’appareil comme dans la prise murale.
N’utilisez que des accessoires préconisés par le constructeur.
N’utilisez que des meubles, supports, systèmes de
transport suffisamment solide pour supporter l’appareil.
Procédez toujours avec la plus extrême précaution
lorsque vous déplacezl’appareil, afind’éviter tout risque
de blessure ou des dommages à l’appareil.
Débranchez le câble d’alimentation en cas d’orage, ou si l’appareil ne
doit pas être utilisé pendant une longue période.
L’appareil doit être immédiatement éteint, débranché puis retourné au
service après-vente agréé dans les cas suivants :
le câble d’alimentation
secteur ou sa prise est endommagé; un objet est tombé, ou du liquide
a coulé à l’intérieur de l’appareil; l’appareil a été exposé à la pluie;
l’appareil ne fonctionne manifestement pas normalement; l’appareil
est tombé, ou le coffret est endommagé.
L’appareil doit être utilisé dans un climat non tropical.
Veuillez ne pas obstruer les orifices de ventilation par des journaux,
magazines, tissus, nappes ou rideaux, etc…
Aucune source de flamme nue, telle que des bougies allumées, ne doit
être placé sur l’appareil.
Toucher des bornes ou des câbles non isolés peut provoquer une
sensation désagréable.
L’éclair dans un triangle équilatéral indique
la présence interne de tensions électriques
élevées susceptibles de présenter des
risques graves d’électrocution.
Le point d’exclamation dans un triangle
équilatéral indique à l’utilisateur la
présence de conseils et d’informations
importantes dans le manuel d’utilisation
accompagnant l’appareil. Leur lecture est
impérative.
Tous les appareils Rotelsontconçus entotale conformité
avec les directives internationales concernant les
restrictions d’utilisation de substances dangereuses
(RoHS) pour l’environnement, dans les équipements
électriques et électroniques,ainsi quepour le recyclage
des matériaux utilisés (WEEE, pour Waste Electrical
and Electronic Equipment). Le symbole du conteneur
à ordures barré par une croix indique la compatibilité
avec ces directives, et le fait que les appareils peuvent
être correctement recyclés ou traités dans le respect
total de ces normes.
Remarques importantes concernant la sécurité
Ce symbole signifie que cet appareil bénéficie d’une
double isolation électrique. Le branchement d’une
mise à la masse ou à la terre n’est pas nécessaire.

18 S14 Ampli-Intégré Streamer Réseau
A propos de Rotel
Notre histoire commence il y a environ 60 ans. Depuis, au l des années,
nous avons reçu des centaines de prix et de récompenses, et satisfait des
centaines de milliers de personnes – comme vous !
Rotel a été fondée par une famille passionnée de musique, qui a décidé de
fabriquer des maillons Haute Fidélité sans compromis aucun.
Depuis sa création, cette passion est restée intacte, et cette famille s’est
xée comme objectif de proposer à tous les audiophiles et mélomanes
les meilleurs appareils possibles, quel que soit leur budget. Une volonté
partagée par tous les employés de Rotel.
Les ingénieurs Rotel travaillent comme une équipe très soudée, écoutant,
peaunant chaque nouveau modèle jusqu’à ce qu’il atteigne exactement
leurs standards – très élevés – de musicalité. Ils sont libres de choisir des
composants en provenance du monde entier, an de concevoir le meilleur
produit possible. C’est ainsi que vous trouverez dans nos appareils des
condensateurs d’origine britannique ou allemande, des transistors japonais
ou américains, tandis que les transformateurs toriques sont toujours fabriqués
dans nos propres usines Rotel.
Nous sommes tous concernés par la qualité de l’environnement. Et, comme de
plus en plus de produits électroniques sont fabriqués puis éliminés quelques
années plus tard, il est désormais essentiel qu’un constructeur fabrique tous
ses produits en veillant à ce qu’ils aient un impact minimum sur la planète.
Chez Rotel, nous sommes très ers d’apporter notre pierre à ce nouvel édice.
Nous avons réduit la teneur en plomb de nos électroniques, en utilisant
notamment des composants et une soudure spéciale ROHS. Nos ingénieurs
travaillent en permanence pour améliorer le rendement des alimentations de
puissance sans compromettre leur qualité. C’est ainsi qu’en mode Standby,
les appareils Rotel consomment moins pour se conformer aux exigences
de la « Standby Power Consumption » qui limite la consommation en veille
des appareils électroniques.
L’usine Rotel participe également de façon active à la protection de
l’environnement au travers d’un processus de fabrication général amélioré
et toujours plus écologique et plus propre.
Tous les membres de l’équipe Rotel vous remercient pour l’achat de cet
appareil. Nous sommes persuadés qu’il vous offrira de nombreuses années
d’intense plaisir musical.
Mise en route
Merci d’avoir acheté cet Streamer réseau intégré Rotel S14. Associé à
un ensemble audio de qualité, il vous offrira de nombreuses années de
plaisir musical.
Cet streamer est un élément hautes performances doté de fonctionnalités
avancées. Tous les aspects de sa conception ont été optimisés pour garantir
une dynamique sans faille et restituer les nuances les plus subtiles de votre
musique. L’appareil dispose d’une alimentation hautement régulée intégrant
un transformateur de puissance toroïdal spéciquement conçu par Rotel. Cette
alimentation basse impédance dispose de réserves d’énergie importantes
et permet à l’streamer de prendre facilement en charge tous les types de
signaux audio, même les plus exigeants. Ce type de composant est plus
cher à fabriquer, mais il est d’une qualité supérieure sur le plan musical.
Sommaire
Figure 1: Commandes et Branchements 3
Figure 2: Télécommande infrarouge 4
Figure 3: Branchements des entrées analogiques et sorties enceintes acoustiques 5
Figure 4: Branchements Entrées numériques 6
Remarques importantes 7
Remarques importantes concernant la sécurité .............................17
A propos de Rotel .................................................18
Mise en route ....................................................18
Quelques précautions préalables 19
Installation 19
Câbles 19
Télécommande infrarouge ............................................19
Piles de la télécommande 19
Alimentation secteur et commandes.....................................20
Prise secteur o 20
Interrupteur principal de mise sous tension e20
Interrupteur de mise sous tension/veille Standby 1Aet indicateur Power 2 20
Indicateur de protection 2..........................................20
Connexions d’entrée du signal ........................................20
Entrées Aux r21
Entrées Numériques 90 21
Connexion des sorties ..............................................21
Sorties Préampli t21
Sortie SUB y21
Sortie Casque 321
Sorties pour enceintes acoustiques u..................................21
Choix des câbles d’enceintes acoustiques 21
Polarité et Phase 21
Branchement des enceintes 21
Afcheur 5.....................................................21
Connexion Bluetooth aptX™ HD 8....................................21
Entrée USB face avant q...........................................22
Entrée pour PC-USB -.............................................22
Connexion réseau =w ............................................22
Streaming ......................................................22
Connexion Wi-Fi pour la diffusion en continu 22
Streaming audio 23
Roon Ready .....................................................23
Spotify®.......................................................24
Vue d’ensemble des touches et des commandes . . . . . . . . . . . . . . . . . . . . . . . . . . . . 24
Menu Principal (Main Menu) ..........................................25
Problèmes de fonctionnement .........................................25
L’indicateur de mise sous tension n’est pas allumé 25
Le réseau ne fonctionne pas 25
Remplacement du fusible 26
Pas de son 26
Le réseau ne fonctionne pas 26
Formats de lecture compatibles 26
Spécications.....................................................27

19
Français
Les cartes électroniques (PCB) sont conçues sur le principe de circuits
symétriques (Symmetrical Circuit Traces), pour garantir une synchronisation
parfaite du signal musical, et donc une restitution optimale. Les circuits
utilisent des résistances à ls métalliques, et des condensateurs polystyrènes
ou polypropylènes sur les circuits les plus critiques. Tous les aspects de la
conception de l’appareil ont été rigoureusement étudiés pour garantir une
reproduction musicale la plus dèle possible.
Toutes les fonctions principales du S14 sont faciles à congurer et à utiliser.
Si vous avez déjà l’expérience d’autres systèmes stéréo, vous ne devriez pas
rencontrer de difcultés particulières. Connectez simplement les composants
associés, et protez de votre musique.
Quelques précautions préalables
AVERTISSEMENT : Pour éviter d’endommager potentiellement votre
système, veillez à bien mettre hors tension TOUS les éléments lorsque
vous branchez ou vous débranchez les enceintes acoustiques et les
composants associés. Ne mettez pas les appareils en marche tant vous
n’êtes pas certain que tous les branchements sont corrects et sécurisés.
Prêtez une attention particulière aux câbles des enceintes acoustiques.
Il ne doit y avoir aucun l qui puisse entrer en contact avec les autres
câbles d’enceintes ou avec le châssis de l’streamer.
Merci de lire soigneusement ce manuel. Il vous donne des renseignements
utiles sur la meilleure façon d’intégrer votre S14 au sein de votre système ainsi
que des informations qui vous aideront à obtenir les meilleures performances
sur le plan sonore. N’hésitez pas à contacter votre revendeur agréé Rotel
pour obtenir les réponses à toutes les questions que vous pourriez vous
poser. En outre, nous sommes toujours heureux, chez Rotel, de recevoir
vos toutes vos remarques et commentaires.
Conservez soigneusement le carton de votre streamer intégré et tous les
éléments servant à l’emballage pour un usage futur éventuel. En effet,
expédier ou déménager votre appareil dans quoique ce soit d’autre que son
carton d’origine peut avoir pour conséquence d’endommager gravement
votre streamer.
Si inclus dans la boîte, veuillez compléter la carte d’enregistrement du
propriétaire ou vous inscrire en ligne, et conservez en lieu sûr la facture
originale. Elle constitue votre meilleure preuve de date d’achat au cas où
vous auriez besoin de faire appliquer la garantie constructeur.
Installation
Comme tous les appareils audio faisant transiter des signaux de faible
niveau, le S14 pourra être affecté par son environnement. Évitez de disposer
l’streamer sur d’autres éléments du système. Éviter également de faire passer
les câbles transportant le signal audio à proximité des cordons secteur. Cela
réduira au minimum les problèmes potentiels de parasites ou de bruit de fond.
L’appareil génère de la chaleur pendant son fonctionnement normal. Les ouïes
de refroidissement et la ventilation interne de l’streamer sont conçues pour
dissiper la chaleur. Les ouïes de refroidissement sur le dessus de l’appareil
doivent rester libres. Il doit y avoir environ 10 cm de dégagement tout autour
de lui pour permettre le bon fonctionnement de sa ventilation et une bonne
circulation d’air tout autour du meuble qui le supporte.
Prenez en compte le poids et les dimensions de l’appareil lorsque vous le
disposez sur une étagère, un meuble ou dans un rack, et vériez que ceuxci
sont bien en mesure de supporter son poids. Nous vous conseillons de
disposer le S14 dans un meuble conçu pour recevoir des appareils audio
domestiques. De tels meubles sont spécialement fabriqués pour réduire
ou supprimer les vibrations qui peuvent affecter la qualité sonore. Prenez
conseil auprès de votre revendeur agréé Rotel sur un choix du meuble et
pour une installation correcte de vos éléments audio.
Câbles
Les cordons secteur, les câbles numériques et les câbles de modulation
transportant le signal audio devront être si possible éloignés les uns des
autres. Cela pour réduire au minimum le risque que le signal audio puisse
être affecté par des interférences ou du bruit de fond provenant des câbles
secteur ou numériques. Utilisez uniquement des câbles de haute qualité.
Les câbles blindés sont particulièrement indiqués pour réduire le bruit de
fond et les parasites qui viendraient dégrader la qualité sonore de votre
système. Pour toutes ces questions, consultez votre revendeur agréé Rotel,
qui pourra vous conseiller sur le choix du meilleur câble à utiliser avec
votre système audio.
Télécommande infrarouge
Les commandes peuvent être effectuées depuis les boutons de la face avant,
ou via la télécommande qui est fournie avec l’appareil. Dans ce manuel, les
lettres et nombres entourés d’un carré se réfèrent aux commandes exécutables
au niveau de la face avant de l’appareil et, respectivement, celles qui sont
entourés d’un rond par la télécommande.
Piles de la télécommande
Pour changer la pile de la télécommande, retirez d’abord les deux vis
comme indiqué sur la gure 1. Retirez ensuite le support de la pile en le
tirant vers le bas. Insérez une nouvelle pile CR 2035 dans le support de
pile en respectant les indications de polarité (+ vers le bas). Insérez ensuite
le support comme indiqué et xez-le avec les deux vis.

20 S14 Ampli-Intégré Streamer Réseau
Figure 1
REMARQUE: Utilisez uniquement l’outil qui est fourni avec l’appareil
pour retirer la vis pour ne pas endommager la vis hexagonale.
REMARQUE: Ne forcez pas le serrage de manière à ne pas
endommager la vis de la télécommande.
Alimentation secteur et commandes
Prise secteur o
Votre appareil est conguré en usine pour fonctionner avec la tension
d’alimentation secteur en vigueur dans le pays où vous l’avez acheté (États-
Unis : 120 volts/60 Hz ou Communauté Européenne : 230 volts/ 50 Hz). La
conguration d’alimentation secteur est inscrite à l’arrière de votre appareil.
REMARQUE: Au cas où vous seriez amené à déménager votre dans
un pays étrange, l’ détectera et reconfigurera pour une utilisation sur
une tension de ligne différente. Adressez-vous un technicien qualifié,
ou au service après-vente Rotel pour plus d’informations.
REMARQUE: Certains produits sont destinés à être commercialisés
dans plusieurs pays et sont par conséquent fournis avec plusieurs
cordons secteur. Choisissez bien le câble secteur qui correspond à
votre pays de résidence.
Votre appareil ne requiert par des niveaux de puissance électriques très
élevés depuis la prise secteur. Toutefois, il devrait être branché directement
dans une prise murale polarisée à l’aide du câble fourni ou d’un autre
câble compatible, comme recommandé par votre revendeur Rotel agréé.
N’utilisez pas de rallonge. Vous pouvez toutefois utiliser un bloc multiprises
de qualité, mais en étant sûr qu’à la fois le bloc multiprises et la prise murale
seront capables de supporter la totalité de la puissance requise par l’ et
celle des autres éléments connectés
Si vous prévoyez de vous absenter pendant une période de temps assez
longue, c’est une bonne précaution de débrancher votre (ainsi que les
autres éléments audio) pendant votre absence.
Interrupteur principal de mise sous tension e
Le gros interrupteur basculant sur la face arrière est la commande principale
de mise sous tension. Quand il est sur la position OFF, l’alimentation de
l’appareil est complètement coupée. Quand il est sur la position ON, les
bouton de mise en POWER de la façade et ON/OFF de la télécommande
peuvent être actionnés pour allumer l’appareil ou le mettre en veille.
Interrupteur de mise sous tension/veille Standby 1Aet indicateur
Power 2
Appuyez sur le bouton Power Switch 1sur la face avant pour mettre
l’appareil en marche. La diode indicatrice de mise sous tension 2va
s’allumer, indiquant que est désormais sous tension. Appuyez de nouveau
sur le bouton pour repasser l’appareil sur arrêt.
Quand le bouton Power Switch a été mis sur la position ON, les bouton
de la télécommande peuvent être utilisées pour activer le S14. En mode
Standby la diode LED reste allumée, mais l’afcheur est éteint.
Indicateur de protection 2
Votre dispose d’un circuit de protection, à la fois thermique et contre les
surcharges de courant, qui protège l’appareil des dommages pouvant
survenir dans des conditions extrêmes d’utilisations ou non-conformes.
Ce circuit est indépendant du signal audio et n’a aucune inuence sur
les performances de votre appareil. Le circuit de protection mesure en
permanence la température des composants de sortie et coupe l’ si elle
dépasse les valeurs de fonctionnement normal.
En usage courant, vous ne devriez jamais voir le circuit de protection s’activer.
Toutefois, si un problème survient, l’ va cesser de fonctionner et « AMP
PROTECTION » apparaisse à l‘écran. La diode (LED) 2va devenir rouge.
Si cela se produit, débranchez immédiatement l’. Laissez le refroidir pendant
quelques minutes, et essayez de déterminer l’origine du problème qui a causé
l’activation du circuit de protection. Lorsque vous remettrez l’appareil sous
tension de nouveau, le circuit de protection va se réinitialiser automatiquement
et la diode indicatrice de mise sous tension va devenir bleu.
Dans la plupart des cas, le circuit de protection s’active en présence d’un
défaut majeur tel qu’un court-circuit au niveau des sorties de puissance
(enceintes acoustiques), ou d’un problème de ventilation insufsante ayant
entrainé une surchauffe. Dans de très rares cas, des enceintes ayant une
impédance instable ou extrêmement basse peuvent être la cause de l’activation
du circuit de protection.
Si le circuit de protection se met en marche de manière répétée et intempestive,
et que vous ne parvenez pas à déterminer l’origine du problème, contactez
votre revendeur agréé Rotel pour assistance.
Connexions d’entrée du signal
REMARQUE: Pour éviter de forts bruits parasites, que vous ou vos
enceintes pourraient de ne pas apprécier, assurez-vous que les éléments
de votre système sont sur arrêt avant de faire les connexions.
Table of contents
Languages:
Other Rotel Media Player manuals
Popular Media Player manuals by other brands

Philips
Philips GoGear SA3ARA04 quick start guide

Philips
Philips GoGEAR SA4VBE 16 quick start guide

X4-TECH
X4-TECH ClipStar XXL instruction manual

Panasonic
Panasonic SVSD85 - SD AUDIO PLAYER operating instructions

Lynx
Lynx Yellobrik PEC 1864 Reference manual

Voice Systems
Voice Systems RD-80e operating manual