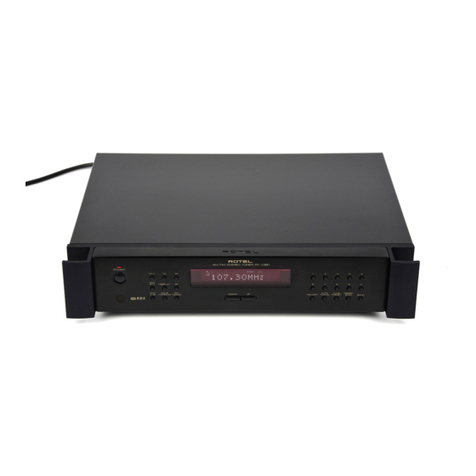
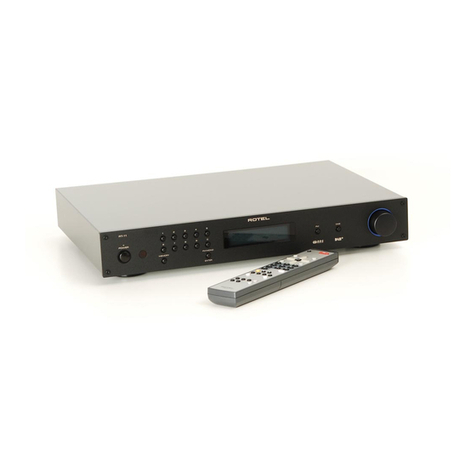
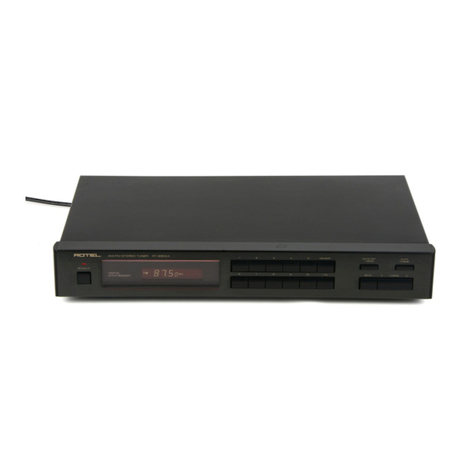
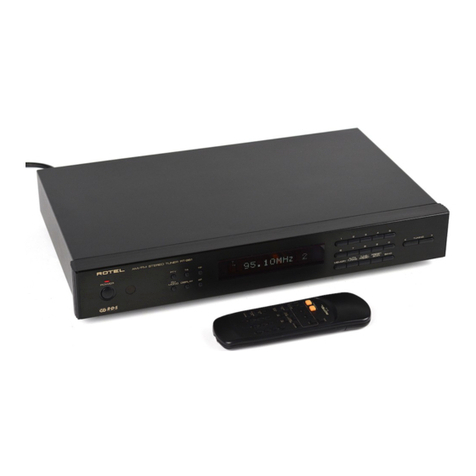
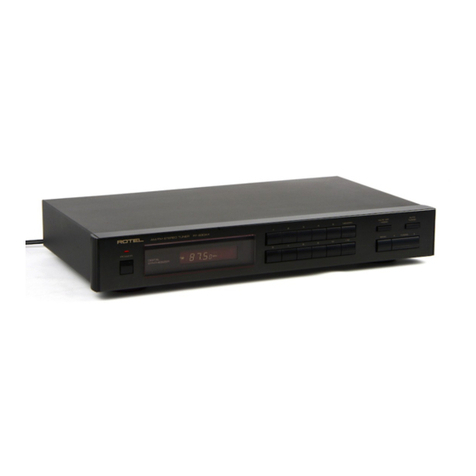
Rotel RT-06 User manual

Owner’s Manual
Manuel de l’utilisateur
Bedienungsanleitung
Manual de Instrucciones
Gebruiksaanwijzing
Manuale di istruzioni
Instruktionsbok
àÌÒÚÛ͈Ëfl ÔÓθÁÓ‚‡ÚÂÎfl
RT-06
DAB/AM/FM Stereo Tuner
Tuner stéréo DAB/AM/FM
DAB/AM/FM-Stereo-Tuner
Sintonizador Estereofónico de AM/FM/DAB
DAB/Middengolf/FM-Stereo Afstemeenheid
Sintonizzatore Stereo DAB/AM/FM
DAB/FM/AM-radio
DAB/AM/FM ÒÚÂÂÓ Ú˛ÌÂ
Register your product at
www.Rotel.com/register

2
RT-06 DAB/AM/FM Stereo Tuner
Important Safety Information
WARNING: There are no user serviceable parts inside. Refer
all servicing to qualified service personnel.
WARNING: To reduce the risk of fire or electric shock, be
sure that the apparatus shall not be exposed to dripping
or splashing and that no objects filled with liquids, such as
vases, shall be placed on the apparatus.
Do not allow foreign objects to get into the enclosure. If the
unit is exposed to moisture, or a foreign object gets into the
enclosure, immediately disconnect the power cord from the
wall. Take the unit to a qualified service person for inspection
and necessary repairs.
Read all the instructions before connecting or operating the component.
Keep this manual so you can refer to these safety instructions.
Heed all warnings and safety information in these instructions and on the
product itself. Follow all op erating instructions.
Clean the enclosure only with a dry cloth or a vacuum cleaner.
You must allow 10 cm or 4 inches of unobstructed clearance
around the unit. Do not place the unit on a bed, sofa, rug, or similar
surface that could block the ventilation slots. If the component is placed in
a bookcase or cabinet, there must be ventilation of the cabinet to allow
proper cooling.
Keep the component away from radiators, heat registers, stoves, or any
other appliance that produces heat.
The unit must be connected to a power supply only of the type and voltage
specified on the rear panel of the unit.
Connect the component to the power outlet only with the supplied power
supply cable or an exact equivalent. Do not modify the supplied cable in any
way. Do not attempt to defeat grounding and/or polarization provisions.
Do not use extension cords.
Do not route the power cord where it will be crushed, pinched, bent at severe
angles, exposed to heat, or damaged in any way. Pay particular attention
to the power cord at the plug and where it exits the back of the unit.
Main plug is used as the mains disconnect device and shall remain ready
accessible.
The power cord should be unplugged from the wall outlet if the unit is to
be left unused for a long period of time.
The apparatus shall be connected to a mains socket outlet with a protective
earthing connection.
Immediately stop using the component and have it inspected and/or serviced
by a qualified service agency if:
• The power supply cord or plug has been damaged.
• Objects have fallen or liquid has been spilled into the unit.
• The unit has been exposed to rain.
• The unit shows signs of improper operation
• The unit has been dropped or damaged in any way
Please use Class 2 Wiring when connecting the speaker terminals
of the unit to ensure proper insulation and minimize the risk of
electrical shock.
Place the unit on a fixed, level surface strong enough to
support its weight. Do not place it on a moveable cart
that could tip over.
This symbol means that this unit is double
insulated. An earth connection is not required.
Rotel products are designed to comply with international
directives on the Restriction of Hazardous Substances
(RoHS) in electrical and electronic equipment and
the disposal of Waste Electrical and Electronic
Equipment (WEEE). the crossed whieelie bin symbol
indicates compliance and that the products must be
appropriately recycled or processed in accordance
with these directives.

3English
1: Front Panel Controls
Commandes de la face avant
Bedienelemente an der Gerätefront
Controles del Panel Frontal
De bedieningsorganen op de voorkant
Controlli sul pannello frontale
Kontroller på fronten
鄇Ì˚ ÛÔ‡‚ÎÂÌËfl ̇ Ô‰ÌÂÈ Ô‡ÌÂÎË

4
RT-06 DAB/AM/FM Stereo Tuner
2: RR-T95 Remote Control
Télécommande RR-T95
Fernbedienung RR-T95
Mando a Distancia RR-T95
De RR-T95 afstandsbediening
Telecomando RR-T95
RR-T95 fjärrkontroll
èÛÎ¸Ú Ñì RR-T95
PRESET UP
PRESET DOWN
FREQUENCY MEMORY
DISPLAYP SCAN
PTY AF TP TA
AM
DAB
FM MONO
AUTO
TUNE
FREQ
DOWN
FREQ
UP
FM
DIM
ON
OFF
1 2 3
4 5 6
7 8
0
9
D M
RR-T95

5English
3: Rear Panel Connections
Branchements en face arrière
Anschlussmöglichkeiten an der Geräterückseite
Conexiones del Panel Posterior
De aansluitingen op de achterkant
Connessioni sul pannello posteriore
Anslutningar på baksidan
ê‡Á˙ÂÏ˚ ‰Îfl ÔÓ‰ÒÓ‰ËÌÂÌËfl ̇ Á‡‰ÌÂÈ Ô‡ÌÂÎË
4: Connection Illustration
Schéma des différents branchements
Anschlussdiagramm
Ilustración de las Conexiones
De verbindingen
Collegamenti
Anslutningar
ëıÂχ ÔÓ‰ÒÓ‰ËÌÂÌËfl
Amplifier
FM Antenna AM Antenna
DAB Antenna
RT-06
1
Antenne FM
FM-Antenne
Antena de FM
FM-antenne
Antenna FM
FM-antenn
FM ‡ÌÚÂÌ̇
2
Antenne AM
AM-Antenne
Antena de AM
Middengolfantenne
Antenna AM
AM-antenn
AM ‡ÌÚÂÌ̇
3
Antenne DAB
DAB-Antenne
Antena para DAB
DAB-antenne
Antenna DAB
DAB-antenn
DAB ‡ÌÚÂÌ̇
1 2
3
4
4
Amplificateur
Verstärker
Amplificador
Versterker
Amplificatore
Förstärkare
ìÒËÎËÚÂθ

6
RT-06 DAB/AM/FM Stereo Tuner
Important Notes
When making connections be sure to:
✔ Turn off all the components in the system before hooking up any components, including loudspeakers.
✔ Turn off all components in the system before changing any of the connections to the system.
It is also recommended that you:
✔ Turn the volume control of the amplifier all the way down before the amplifier is turned on or off.
Remarques importantes
Pendant les branchements, assurez-vous que :
✔ Tous les maillons sont éteints avant leur branchement, quels qu’ils soient, y compris les enceintes acoustiques.
✔ Éteignez tous les maillons avant de modifier quoi que ce soit au niveau de leurs branchements, quels qu’ils soient.
Il est également recommandé de :
✔ Toujours baissez le niveau sonore via le contrôle de volume, avant d’allumer ou d’éteindre l’amplificateur.
Wichtige Hinweise
Achten Sie beim Herstellen der Verbindungen auf Folgendes:
✔ Schalten Sie alle Komponenten im System ab, bevor Sie Geräte (einschließlich Lautsprecher) anschließen.
✔ Schalten Sie alle Komponenten im System ab, bevor Sie Anschlüsse im System verändern.
Ferner empfehlen wir, dass
✔ Sie die Lautstärke herunterdrehen, bevor Sie die Endstufe ein- oder abschalten.
Notas Importantes
Cuando realice las conexiones, asegúrese de que:
✔ Desactiva todos los componentes del equipo, cajas acústicas incluidas, antes de conectar cualquier nuevo componente en el mismo.
✔ Desactiva todos los componentes del equipo antes de cambiar cualquier conexión del mismo.
También le recomendamos que:
✔ Reduzca el nivel de volumen de su amplificador a cero antes de activarlo o desactivarlo.
Héél belangrijk:
✔ Zorg dat niet alleen de RT-06, maar de gehele installatie uitstaat, als nog niet alle verbindingen gemaakt zijn.
✔ Zorg dat niet alleen de RT-06, maar de gehele installatie ook uitstaat, als u verbindingen gaat wijzigen.
Wij raden u ook aan om
✔ de volumeregelaar van de voorversterker geheel dicht te draaien (volkomen naar links) wanneer u uw eindversterker aan- of uitzet.
Note importanti
Quando effettuate i collegamenti assicuratevi di:
✔ Spegnere tutti i componenti del sistema prima di collegare qualsiasi componente, inclusi i diffusori.
✔ Spegnere tutti i componenti del sistema prima di modificare qualsiasi connessione nel sistema.
Vi raccomandiamo inoltre di:
✔ Portare il volume a zero prima di accendere o spegnere l’amplificatore.
Viktigt
Tänk på följande när du gör anslutningar:
✔ Stäng av alla apparater i anläggningen innan du ansluter nya apparater eller högtalare.
✔ Stäng av alla apparater i anläggningen innan du ändrar någon anslutning.
Vi rekommenderar också att du:
✔ Vrider ner volymen på förförstärkaren helt och hållet innan förstärkaren slås på eller av.
è‰ ÔÓ‰ÒÓ‰ËÌÂÌËÂÏ:
✔ Ç˚Íβ˜ËÚ ‚Ò ÍÓÏÔÓÌÂÌÚ˚, ‚Íβ˜‡fl ÍÓÎÓÌÍË.
✔ Ç˚Íβ˜ËÚ ‚Ò ÍÓÏÔÓÌÂÌÚ˚ ‚ ‚‡¯ÂÈ ÒËÒÚÂÏÂ, ÔÂʉ ˜ÂÏ ˜ÚÓ-ÚÓ ‚ ÌÂÈ ÏÂÌflÚ¸.
êÂÍÓÏẨÛÂÚÒfl Ú‡ÍÊÂ:
✔ Ç˚‚ÂÒÚË „ÓÏÍÓÒÚ¸ ÛÒËÎËÚÂÎfl ̇ ÏËÌËÏÛÏ, Ô‰ ÚÂÏ Í‡Í ‚Íβ˜‡Ú¸ ËÎË ‚˚Íβ˜‡Ú¸ „Ó.

7English
About Rotel
A family whose passionate interest in music led
them to manufacture high fidelity components
of uncompromising quality founded Rotel
45 years ago. Over the years that passion
has remained undiminished and the goal of
providing exceptional value for audiophiles
and music lovers regardless of their budget,
is shared by all Rotel employees.
The engineers work as a close team, listening
to, and fine tuning each new product until it
reaches their exacting musical standards. They
are free to choose components from around
the world in order to make that product the
best they can. You are likely to find capacitors
from the United Kingdom and Germany, semi-
conductors from Japan or the United States,
and toroidal power transformers manufactured
in Rotel’s own factory.
Rotel’s reputation for excellence has been
earned through hundreds of good reviews
and awards from the most respected review-
ers in the industry, who listen to music every
day. Their comments keep the company true
to its goal – the pursuit of equipment that is
musical, reliable and affordable.
All of us at Rotel thank you for buying this
product and hope it will bring you many hours
of enjoyment.
Getting Started
Thank you for purchasing the Rotel RT-06
DAB/AM/FM Stereo Tuner. Rotel’s Balanced
Design Concept combines advanced circuit
board layout, comprehensive parts evaluation
and extensive listening tests for superior sound
and long term reliability. The Rotel RT-06 will
provide years of listening enjoyment.
Contents
Important Safety Information ........................ 2
1: Front Panel Controls 3
2: RR-T95 Remote Control 4
3: Rear Panel Connections 5
4: Connection Illustration 5
About Rotel .................................................. 7
Getting Started ............................................. 7
A Few Precautions 8
Key Features 8
Unpacking 8
Placement 8
Rear Panel Connections ................................. 8
FM Antenna t 8
AM Loop Antenna y 8
DAB Antenna u 8
RCA Outputs i 8
DAB Digital Outputs o 8
Computer I/O p 9
EXT REMOTE IN Jack [ 9
12V TRIGGER Connection ] 9
AC Input \ 9
Basic Operating Controls ................................ 9
Standby Button 1 and
Standby LED 2 9
ON Button S 9
OFF Button A 9
Remote Sensor 3 9
Front Panel Display 6 9
MEMORY Button qO 9
ENTER Button w 9
SETUP Button e 9
DIMMER Button rF 9
Basic Tuning Controls ................................... 10
TUNING Controls 8EP 10
BAND Button 9BCD 10
FREQUENCY TUNING Mode 10
PRESET TUNING Mode 10
RDS PTY search mode 10
Numeric Buttons ......................................... 10
Station Presets 7G 10
Direct Access Tuning 0N 11
Auto Tuning Button =R 11
TUNE/PRESET Button - 11
PRESET SCAN Button H 11
FM MONO 4Q 11
RDS and RBDS Broadcast Reception ............. 12
DISPLAY Button 5M 12
PTY Button 5I 12
TP Button 5K 12
TA Button 5L 12
AF Button 5J 13
Digital Audio Broadcast (DAB) ...................... 13
DAB Basic Information 13
BAND, DAB Buttons 9C 13
UP / DOWN Buttons 8 13
ENTER Button w 13
DISPLAY Button 6M 13
MEMORY Button qO 13
NUMERIC Button 7G 13
TUNE/PRESET Button - 13
Setup Operation .......................................... 13
SETUP Button e 13
SETUP Menu 13
Searching for a DAB station 14
AUTO TUNE button =R 14
How to store DAB stations 14
How to call a PRESET 14
Specifications ............................................. 15

8
RT-06 DAB/AM/FM Stereo Tuner
A Few Precautions
Please read this manual carefully. In addition
to installation and operating instructions, it
provides valuable information on various
RT-06 system configurations as well as general
information that will help you get optimum
perfomance for your system. Please contact
your authorized Rotel dealer for answers to
any questions you might have. In addition,
all of us at Rotel welcome your questions and
comments.
Save the RT-06 packaging material for future
use. Shipping or moving the RT-06 in anything
other than the original packaging material may
result in severe damage that is not covered by
the warranty.
Register online at www.rotel.com/register
and keep your original sales receipt. It is your
proof of purchase in the event that warranty
service is required.
Key Features
• AM, FM and DAB tuning capabilities.
• User-friendly Fluorescent Display.
• 30 Station Presets for memorizing you
favorite AM/FM stations; 99 presets for
DAB stations.
• Manual frequency and preset tuning,
auto-search tuning, preset scanning and
frequency direct tuning.
• RDS (Radio Data System) capability for
Europe and RBDS (Radio Broadcast Data
Service) capability for the USA.
• DAB (Digital Audio Broadcast); a digital
transmission available throughout Europe
and Canada as well as many other sup-
ported regions.
• Stereo/mono switching.
• 12-volt trigger connections for remote turn
on/off by Rotel preamplifiers and surround
processors.
• Full- function wireless remote control.
Unpacking
Remove the unit from its packing. Look for
the handheld remote control and other ac-
cessories. Install the supplied batteries in the
remote control. Save the packing and box as
it will protect the RT-06 if you move or need
to return it for maintenance.
Placement
Place the RT-06 on a solid, dry, level surface
away from direct sunlight, exsessive heat, high
humidity or strong vibrations. The RT-06 can
generate some heat during normal operation.
If installed in a cabinet, make sure that there is
adequate ventilation. Make sure there is enough
room behind the RT-06 for easy hookup. Place
the unit close to the other components in your
audio/video system and, if possible, place it on
its own shelf. This will make initial cable routing,
hookup, and any subsequent system changes
easier. It also minimizes potential interference
or heat buildup from other components.
Don’t stack heavy objects on top of the RT-06.
Do not expose the unit to moisture; this could
damage the circuitry and cause a safety
hazard.
Rear Panel Connections
The RT-06 provides rear panel connections
for audio line level output, an FM antenna, on
AM antenna, a DAB antenna, a 12V Trigger,
a remote IR sensor, DAB digital outputs and
AC power input.
NOTE: Do not plug any system component
into an AC source until system hookup is
complete and you are confident that all
component-to-component connections have
been properly made.
FM Antenna t
The RT-06 is supplied with a T-shaped indoor
FM antenna. Remove this antenna from the box
and connect its attached coax F-type plug to
the FM antenna connector on the RT-06. For
best reception, unfold the T-shaped antenna.
Eyelets at both ends of the T allow tacking the
antenna to a wall if desired. Experiment with
positioning for best reception.
NOTE: To use an outdoor antenna, connect
its 75 ohm coax lead wire to the FM con-
nector in place of the indoor wire antenna,
only after a professional contractor has in-
stalled the antenna system in accordance
with local electrial codes. In the USA, you
will need to use the supplied F-type convert-
er to connect the 75 ohm coax cable to the
antenna input.
AM Loop Antenna y
The RT-06 includes a loop antenna to receive
AM radio signals. Remove this antenna from
the box and locate it near the RT-06.
Connect the 300 ohm twin-conductor wire
from the loop antenna to the pair of screw
terminals labeled AM LOOP, attaching one
wire to each terminal. It does not matter which
wire attaches to which terminal, but make sure
that the connections are solid and that the two
wires do not touch
You may need to rotate or otherwise reorient
the antenna to find the best position.
NOTE: To use an outdoor antenna, connect
its 300 ohm twin-conductor wire to the G
and AM terminals in place of the loop an-
tenna, only after a professional contractor
has installed the antenna system in accor-
dance with local electrcal codes.
DAB Antenna u
Included is a DAB indoor antenna. If you
cannot obtain good reception using this sup-
plied antenna, it is recommended to use an
outdoor DAB antenna. The outdoor antenna
can be connected with a F-Type connector
(male) then to the “Antenna DAB” connection
on the rear panel.
RCA Outputs i
Line level RCA audio outputs send a fixed-
level stereo signal from the RT-06 to your
pre-amplifier, system controller, or integrated
amplifier.
Use a standard RCA audio cable to connect
the LEFT OUTPUT jack to the left channel tuner
input on your system controller and the RIGHT
OUTPUT jack to the right channel tuner input
on your system controller.
DAB Digital Outputs o
One coaxial and one S/PDIF output capable
of outputting available DAB (Digital Audio
Broadcast) stations. DAB provides interference
free, near CD quality audio as well as well as
any corresponding broadcast data.

9English
Computer I/O p
The RT-06 can be operated from a computer
with audio system control software from third-
party developers. This control is accomplished
by sending operating codes from the computer
via a hardwired RS-232 serial connection
In addition, the RT-06 can be updated using
special software from Rotel.
The COMPUTER I/O input provides the neces-
sary network connections on the rear panel. It
accepts standard RJ-45 8-pin modular plugs,
such as those commonly used in 10-BaseT UTP
Ethernet cabling. For additional information
on the connections, cabling, software, and
operating codes for computer control or up-
dating of the RT-06, contact your authorized
Rotel dealer or Rotel Tech Support.
EXT REMOTE IN Jack [
This 3.5mm mini-jack receives command codes
from industry standard infrared receivers
(Xantech, etc.) via hard-wired connections.
This feature could prove useful when the unit
is installed in a cabinet and the front panel
sensor is blocked. Consult your authorized
Rotel dealer for information on these external
repeaters and the proper wiring of a jack to
fit the mini-jack receptacle.
12V TRIGGER Connection ]
The RT-06 can be activated by a 12 volt trigger
signal from a Rotel preamplifier.
The trigger input accepts any control signal (AC
or DC) ranging from 3 volts to 30 volts. When
a cable is connected to the input and a trigger
signal is present, the tuner is activated.
When the trigger signal is interrupted, the tuner
goes into standby mode. The front panel indicator
light remains lit, but the display goes dark and
the unit will not operate.
The RT-06 will also pass a 12V trigger signal to
associated equipment using a trigger. The signal
will remain 12V in normal operation.
AC Input \
Your RT-06 is configured at the factory for the
proper AC line voltage in the country where
you purchased it (120 volts AC at 60Hz in the
USA and 230 volts AC at 50Hz in Europe).
The AC line configuration is noted on a de-
cal on the back of your unit. Make sure that
your unit is configured properly for your AC
line voltage.
Plug the supplied cord into the AC INPUT
receptacle on the back of the unit. Once all
other rear panel connections are completed,
plug the power cord into an AC wall outlet
or switched AC outlet on another system
component.
Basic Operating Controls
The following explanations will help you get
familiar with the features and controls. When
a function is available on both the front panel
and the remote, a number (see front panel
illustration) and a letter (see remote control
illustration) are shown in the instructions. For
example, to change from the AM to FM band,
you can either press the front panel button or
use the button on the remote. When only one
identifier appears, that control is available
only on the front panel or the remote, but
not both.
NOTE: Controls used for tuning the DAB/
AM/FM receiver are described in the next
sections of this manual.
Standby Button 1 and
Standby LED 2
The STANDBY button is located on the front
panel of the RT-06 and is not duplicated on
the remote control.
The STANDBY LED will be lit when the AC
input line is connected.
ON Button S
Remote only
Pressing the ON button deactivates the standby
mode and places the RT-06 into normal
operation.
OFF Button A
Remote only
Pressing the OFF button places the RT-06 into
standby mode. Power is still supplied to the
unit, but functions are disabled
Remote Sensor 3
This front panel sensor receives infrared signals
from the remote control. Make sure you do
not accidentally block this sensor with cables
of accessories.
Front Panel Display 6
The large fluorescent display in the center por-
tion of the RT-06 provides status information
used in operating the DAB/AM/FM receiver
(such as station frequency display, band preset
memory, RDS information, etc.).
MEMORY Button qO
The MEMORY button is used to confirm and
memorize various settings in the setup and
operation of the RT-06, including tuner station
presets. Its use is described in detail in the
relevant sections below.
ENTER Button w
Pressing the ENTER button selects the high-
lighted parameter in the SETUP display.
SETUP Button e
Opens and closes the RT-06 setup menu. This
provides the RT-06 setup menus as well as the
ability to change country modes by using the
front panel ENTER, UP/DOWN BUTTONS.
DIMMER Button rF
Available on the front panel and remote con-
trol, this button selects four display brightness
settings. Press the button to cycle through the
four settings.
NOTE: When the tuner is turned off then
back on, the display reverts to its normal
setting. The dimmer setting is also available
in the SETUP menu for memory setup until
the AC line is disconnected.

10
RT-06 DAB/AM/FM Stereo Tuner
Basic Tuning Controls
The RT-06 features a digital synthesized
AM/FM tuner with RDS or RBDS capability,
30 station presets and a DAB tuner with a
maximum of 99 station presets.
• Manual frequency tuning lets you tune up
or down to the next station frequency. Set
the TUNE/PRESET mode to TUNE. Turn off
AUTO TUNING. Use the TUNING controls
to tune up or down.
• Direct frequency tuning lets you enter the
desired station frequency digits. Press the
FREQUENCY DIRECT button on the remote
or front panel and enter the digits using
the NUMERIC buttons.
• Automatic frequency search tuning lets you
search up or down to find the next avail-
able broadcast signal. Set the TUNE/
PRESET mode to TUNE. Turn on AUTO
TUNING. Use the TUNING controls to
search up or down.
• Memory station preset tuning lets you
directly enter the number of a memorized
station preset number. Enter the number of
the memorized preset using the NUMERIC
buttons for the AM/FM or DAB band.
• Preset scan tuning lets you scan up/down
through the memorized station presets.
Press the PRESET SCAN button to begin
scanning the AM/FM bands.
• RDS (Europe) or RBDS (USA) tuning pro-
vides a range of special tuning and search
features based on data codes encoded with
the broadcast signal. See the RDS section
of this manual for detailed information.
TUNING Controls 8EP
A pair of buttons, labeled <TUNING> on the
front panel and the FREQ UP/DOWN and
PRESET UP/DOWN buttons on the remote,
serve as the main tuning controls for the RT-06.
You can use either the front panel or remote
buttons; their function is identical. These controls
provide different tuning functions, depending
on the mode of operation.
BAND Button 9BCD
The BAND button selects whether the tuner will
receive DAB, AM or FM broadcast signals.
Press the button to toggle back and forth
between DAB, AM and FM. A corresponding
indicator will light at the left portion of the
front panel DISPLAY to confirm your choice.
The currently tuned station frequency will be
shown.
FREQUENCY TUNING Mode
• With AUTO TUNING off, press a TUN-
ING button to manually jump to the next
frequency, regardless of whether or not a
station is broadcasting on that frequency.
[See the TUNE/PRESET button and AUTO
TUNING button sections for details on
changing the tuning modes.]
• With AUTO TUNING on, press a TUN-
ING button to start auto tuning. The tuner
begins automatically scanning up or down
through the frequencies until the next
receivable signal is detected. If this is not
the desired station, repeat the automatic
tuning procedure to find the next station.
Weak stations will be skipped during auto
tuning. If no receivable signal is detected,
the tuner will revert to the last previously
tuned station. (See the TUNE/PRESET but-
ton and AUTO TUNING button sections for
details on changing the tuning modes.)
PRESET TUNING Mode
Press a TUNING button to advance to the next
memorized station preset. [See the TUNE/PRE-
SET button section for details on changing the
tuning modes.]
RDS PTY search mode
Press a TUNING button to select the desired
program type from the scrolling list in the
display. See the section on RDS tuning for
more details. [See the RDS PTY button section
for details.]
NOTE: Several indicators in the front panel
display assist tuning. A large display shows
the tuned frequency and increases or de-
creases during tuning. A signal strength in-
dicator shows the strength of an incoming
signal. A TUNED indicator lights when a
sufficiently strong signal is received. An ST
indicator lights when a stereo FM signal is
received. In addition, indicators show the
currently selected tuning mode.
Numeric Buttons
Station Presets 7G
The RT-06 can store up to 30 station presets for
recall at any time using the NUMERIC keypad.
These station presets can be used for any
combination of AM stations and FM stations
as well as 99 station presets for DAB.
The RT-06 is delivered from the factory with a set
of generic station presets that may or may not
match any available stations in your area.
To memorize a new station preset:
1. Tune to the desired station, AM or FM.
2. Press the MEMORY button on the front
panel. A MEMORY indicator will flash in
the front panel display.
3. While the MEMORY indicator is flashing,
press the number of the preset where you
wish to store the station frequency. For
example, to memorize the station as preset
3, press the 3 button. To memorize preset
15, press the 1 button followed by the 5
button.
4. A previously stored frequency is erased
from memory when a new frequency is
memorized for the same preset number.
To tune to a previously memorized station
preset, press the preset number using the
NUMERIC buttons. For example, to tune to
preset 3, press the 3 button. To tune to preset
30, press the 3 button and then press the 0
button within 5 seconds.
NOTE: The NUMERIC buttons can also be
used for FREQUENCY DIRECT tuning with
the AM/FM band.

11 English
Direct Access Tuning 0N
If you know the exact frequency of the de-
sired station, you may tune it directly using
the FREQUENCY DIRECT button and the
NUMERIC buttons.
1. Press the FREQUENCY DIRECT button to
change the NUMERIC buttons from station
preset to direct access mode. The station
frequency in the front panel display will
change to a series of bars, representing the
digits of a station frequency, with the first bar
blinking.
2. Enter the first digit of the station frequency
using the NUMERIC buttons. The digit will
appear in the frequency display and the next
bar will flash. Enter the remaining digits of the
frequency. When all of the digits have been
entered, the tuner will automatically tune to
the displayed station frequency.
NOTE: On the USA version only, pressing
1 in the FM mode will enter 10 as the digit
in the frequency display. On the European
version, it is necessary to press 1 and then
0 to enter 10. For US FM stations, press
only one digit following the decimal point as
shown in the first example following. For
European FM stations, press two digits after
the decimal point as shown in the second
example.
EXAMPLES:
• (USA FM) 87.50MHz Press 8>7>5
• (Europe FM) 87.50MHz Press 8>7>5>0
• (USA AM) 1610kHz Press 1>6>1
• (Europe AM) 1611kHz Press 1>6>1>1
If no frequency is entered within 5 seconds,
the tuner will cancel FREQUENCY DIRECT
tuning mode and revert to the last previously
tuned station.
Auto Tuning Button =R
The AUTO TUNING button toggles between
the frequency search tuning feature and
manual frequency tuning. When using the
TUNING controls on the front panel or remote
in AUTO TUNING mode, the tuner will begin
automatically scanning up or down through the
frequencies until the next receivable broadcast
signal is detected. If this is not the desired sta-
tion, use the TUNING controls again to find
the next station. Weak stations will be skipped
during auto tuning. If no receivable signal is
detected, the tuner will revert to the previously
tuned station. To toggle between FREQUENCY
TUNING mode and AUTO TUNING mode,
press the AUTO TUNING button. An AUTO
indicator will appear in the display.
NOTE: AUTO TUNING mode is disen-
gaged when the TUNE/PRESET button is set
to PRESET tuning mode. See the following
section.
TUNE/PRESET Button -
The TUNE/PRESET button toggles between
FREQUENCY TUNING mode (the TUNING
controls advance to the next station frequency)
and PRESET TUNING mode (the TUNING
controls advance to the next memorized station
preset). To toggle between the two modes, press
the TUNE/PRESET button. A PRESET indicator
in the front panel DISPLAY will light when the
PRESET mode is active.
NOTE: AUTO TUNING mode is disen-
gaged when the TUNE/PRESET button is set
to PRESET tuning mode.
PRESET SCAN Button H
This button activates a preset scanning feature.
When you press the button, the tuner will
automatically scan through all memorized
station presets, playing each for five seconds
before moving to the desired station preset,
press the button again.
NOTE: If a PRESET station is currently
tuned when the PRESET SCAN button is
pressed, scanning will start with the next
higher preset number and continue through
all preset stations, stopping on the initial
preset. If a PRESET station is not currently
tuned when the button is pressed, scanning
will start from PRESET 1 and contunue to
PRESET 30.
FM MONO 4Q
The FM MONO button changes the FM mode
from stereo reception to mono reception. In
stereo mode, a stereo signal will be heard if the
station is broadcasting a stereo signal and there
is sufficient signal strength. A stereo indicator
will light in the front panel display. In mono
mode, a mono signal will be heard even if the
station is broadcasting a stereo signal.
NOTE: Switching to mono mode can be a
useful way to improve the reception of weak
or distant FM signals. Less signal strength is
required for clean mono reception than for
stereo reception.

12
RT-06 DAB/AM/FM Stereo Tuner
RDS and RBDS Broadcast
Reception
The Rotel RT-06 is equipped with RDS (Radio
Data Systems) reception capabilities for Europe
and RBDS (Radio Broadcast Data Service) ca-
pabilities for the United States. These broadcast
systems provide additional functionality to
FM radio reception by transmitting encoded
information along with the radio signal. This
signal is decoded by an RDS or RBDS receiver
and can provide a range of informational
features including:
1. A display of the station’s identifying name
(e.g. BBC1)
2. A display of the station’s program content
(e.g. ROCK or NEWS).
3. Traffic information broadcasts.
4. A scrolling text display for announcements
or information.
In addition, RDS provides several advanced
search features including
1. The ability to search for a station with the
desired program content (PTY).
2. The ability to search for traffic information
(TP).
3. The ability to automatically search stations
broadcasting special traffic announcements
(TA).
RDS broadcasting has been widely available
in many European markets for years. There
are a large number of RDS stations and most
users will be familiar with the features and
operation. In the USA, implementation of the
RBDS system is more recent. Fewer stations are
currently broadcasting RBDS signals and the
features may be less familiar to many users.
Consult your authorized Rotel dealer for more
information on RDS or RBDS broadcasting in
your market.
NOTE: The RDS and RBDS features are en-
tirely dependent on the broadcaster sending
properly encoded signals. Thus, they will
only be available in markets where RDS or
RBDS is currently implemented and where
stations are broadcasting these data sig-
nals. If there are no RDS or RBDS stations,
the RT-06 will function as a standard radio
receiver.
NOTE: RDS and RBDS services are only
available on FM broadcasts. The features
and buttons described below are only op-
erational in FM mode.
DISPLAY Button 5M
There are five display options when the
currently tuned station is broadcasting RDS
information and the RDS indicator in the front
panel display is lit. Press the DISPLAY button
to step sequentially through the five available
display options:
1. Standard FREQUENCY display.
2. PROGRAM SERVICE name. This is typically
the station’s call letters, such as BBC1). If
the current station is not broadcasting an
RDS signal, the display will show a blinking
PS indication.
3. PROGRAM TYPE. This is a description of
the station’s content from a standardized list
of program types in each market (for ex-
ample: NEWS, CURRENT AFFAIRS, INFO,
SPORT, EDUCATION, DRAMA, CULTURE,
SCIENCE, VARIED, POP, ROCK, EASY
LISTENING, LIGHT CLASSICAL, SERIOUS
CLASSICAL, OTHER MUSIC, WEATHER,
FINANCE, CHILDREN, SOCIAL AFFAIRS,
RELIGION, PHONE IN, TRAVEL, LEISURE,
JAZZ, COUNTRY, NATIONAL MUSIC,
OLDIES, FOLK, and DOCUMENTARY). If
the current station is not broadcasting an
RDS signal, the display will show a blinking
PT indication.
4. CLOCK TIME. A time and date display
broadcast by the station. If the current
station is not broadcasting an RDS signal,
the display will show a blinking CT indica-
tion.
5. RADIO TEXT. Additional scrolling text
messages broadcast by the station. If the
current station is not broadcasting an RDS
signal, the display will show a blinking RT
indication.
PTY Button 5I
The PTY search function permits you to scan
available signals for RDS stations broadcasting
a particular type of program content.
1. Press the PTY button. The current RDS
program content type will appear in the
display.
2. If desired, change to a different PROGRAM
TYPE using the TUNING controls to scroll
through the list.
3. Press the PTY button a second time within
5 seconds. The tuner will attempt to find
an RDS station broadcasting the selected
type of program. If the button is not pressed
within 5 seconds after selecting a program
type, the PTY function will be cancelled.
4. If no station is located for the desired
content type, the tuner will return to the
last previously tuned station.
5. Cancel the PTY function by pressing any
button (except DIMMER or FM MONO).
TP Button 5K
Searches for an RDS station broadcasting
traffic information programming:
1. Press the TP button. The tuner will attempt
to find an RDS station broadcasting the
traffic programming.
2. If no station is located, the tuner will return
to the last previously tuned station.
3. Cancel the TP function by pressing any
button (except DIMMER or FM MONO).
TA Button 5L
Searches for an RDS station broadcasting
special traffic announcements:
1. Press the TA button. The tuner will attempt
to find an RDS station broadcasting traffic
announcements.
2. If no station is located, the tuner will return
to the last previously tuned station.
3. Cancel the TA function by pressing any
button (except DIMMER or FM MONO).

13 English
AF Button 5J
1. Press the AF button. The tuner will scan
each of the alternate frequencies for the
same programming in the stored list and
tune to the strongest signal.
2. If no station is located, the tuner will return
to the last previously tuned station.
3. If the signal strength of the new station is
weaker, the tuner will revert to the previ-
ously tuned station.
Cancel the AF function by pressing any button
(except DIMMER or FM MONO).
Digital Audio Broadcast
(DAB)
DAB Basic Information
DAB is short for ‘Digital Audio Broadcast’ and
is a new form of radio broadcasting which
utilizes digital technology. DAB is capable of
providing near CD quality audio with virtually
interference free reception.
DAB operates in frequency band III (174
– 240MHz). Band III is divided into 41 chan-
nels labeled 5A to 13F.
DAB channels are categorized into ensembles,
which are also known as multiplexes. Each
multiplex provides a number of stations and
each service contains a primary service that
can contain secondary services. DAB technol-
ogy allows broadcasters to transmit additional
data along with the audio, which can include
other audio channels, text and in the future,
even images and computer data.
NOTE: When the DAB tuner is used for the
first time the FL display will ask whether you
want to auto-tune to find the available ser-
vice in your area. For most applications
auto-tune should only need to be carried out
once. Select <YES> to confirm the selection.
The tuner will then search automatically for
available stations on the DAB network. The
number of stations received will depend on
the location of your aerial and the available
multiplexes in your area. For optimal recep-
tion we recommend using a dedicated out-
door aerial.
MEMORY Button qO
The RT-06 can store up to 99 DAB preset
stations. When you want to save a selected
station, press the memory button on the front
panel, then one of the numerical buttons of
the front panel that you wish to save the sta-
tion to. FM and DAB memorized stations are
separate meaning that a station can be saved
to ‘1’ on DAB and another station with the
same number for DAB.
NUMERIC Button 7G
The numerical buttons can be used to store to
a PRESET station or recall a PRESET.
TUNE/PRESET Button -
The RT-06 has two operating modes:
• DAB Manual Mode: When the tuner is
selected to this mode you can scroll through
all the available stations using the up and
down keys.
• DAB Preset Mode: Use the preset but-
ton to enable you to use the up and down
keys to scroll through your saved stations.
Preset is displayed in the FL display when
you are selected to this operating mode.
Setup Operation
NOTE: The set-up menu features advanced
settings. In most installations the factory de-
fault will be the optimal required setting for
the RT-06.
SETUP Button e
The SETUP button on the front panel accesses
the Setup menu used for the advanced settings
of the RT-06.
SETUP Menu
Press the SETUP button on the front panel to
view the menu settings in the FL display. The
operation can be cancelled by pressing set-
up again. The menu will also automatically
be exited after a short period of when there
is no key press.
Use the UP and DOWN keys of the front panel
to scroll through the different menu settings.
Press the enter button to confirm a selection.
BAND, DAB Buttons 9C
The RT-06 receives AM, FM and DAB signals.
DAB mode is selected by pressing the BAND
key on the front panel. Direct access to DAB
mode can be selected using the DAB button
on the remote control
UP / DOWN Buttons 8
The UP and DOWN keys available on the front
panel and remote control can be used to change
between stations and also for selecting options
in the set-up menu (see SETUP MENU).
ENTER Button w
Press the ENTER button on the front panel to
confirm a selected parameter.
DISPLAY Button 6M
The RT-06 displays service identification in the
upper portion. This is information received
from the network. The RT-06 allows for several
display modes which are shown in the lower
portion of the FL display. Press <DISPLAY> but-
ton to toggle through the different modes:
• Program type: Displays genre or other
program information.
• Ensemble name: Multiplex identification
is displayed.
• Frequency: Indicates the frequency that
the selected multiplex is transmitted on.
• Bit rate: The rate at which bits (informa-
tion) are transmitted. This is expressed
in thousands of bits per second (Kbps),
which effectively shows the quality of the
broadcast. The higher the bit rate is the
better the sound quality is.
• Dynamic label segment: This is the
text that scrolls across the FL display giving
information on the play list and current
program content. This feature is subject
to the service provider and station.
• Signal strength: Indicates the input
signal level to the DAB module in block
format.

14
RT-06 DAB/AM/FM Stereo Tuner
The following options are available: Use of
these features will require knowledge of your
local DAB transmitter.
DAB DAC VOLUME – The RT-06 allows
level adjustments to the DAC volume. The DAC
volume can be adjusted between 0 – 255 using
the up and down keys. This feature can be
used to match the output signal level of other
equipment in your set-up.
DIMMER – Select to change the FL display
brightness using the up and down keys. This
can be adjusted to your preference.
FACTORY DEFAULT – Select when you
wish to return the RT-06 to its factory settings.
Confirm factory default by pressing the ENTER
button. WARNING: Selecting factory default
will erase all saved settings.
TUNER AREA – Your tuner should be set to
operate within the country of purchase. The
tuner area can be set to either <EUROPE> or
<N_AMERICA>.
VERSION – This feature will confirm the main
software version of the RT-06.
Front CPU Upgrade – select this option
to upgrade the front CPU. Note: this menu
selection is used only with the factory so there
is no need for you to use this feature.
EXIT – Select to exit the set-up menu.
Searching for a DAB station
NOTE: When using the DAB tuner for the
first time the FL display will ask whether you
want to auto-tune to find the available ser-
vice in your area. For most applications
auto-tune should only need to be carried out
once. Select YES to confirm the selection.
The tuner will then search automatically for
available stations on the DAB network. The
number of stations received will depend on
the location of your aerial and the available
multiplexes in your location. For optimal re-
ception we recommend using a dedicated
outdoor antenna.
AUTO TUNE button =R
You may also wish to repeat the search periodi-
cally to discover if any new multiplexes (i.e.
group of services) have gone on air, or if you
move the tuner to a different area.
NOTE: Auto tune will erase any preset sta-
tions saved to memory.
1. Select the DAB tuner by keying BAND
on the front panel or DAB of the remote
control.
2. Press AUTO TUNE to search for first en-
semble stations. The FL display will change
to [ DAB Auto Tuning ] and <No>, <Yes>
to perform.
3. Choose <No> by keying the UP/DOWN
buttons on the front panel, press ENTER if
you do not wish to retune. Choose <Yes>
by keying the UP/DOWN buttons of the
front panel, press ENTER to search new
ensembles and replace current stations
automatically.
How to store DAB stations
When auto tune is finished the service iden-
tification will be displayed. Use the up/down
buttons to select the desired station.
To memorize the station press MEMORY
followed by your numbered preference.
Example: “Memory” + “1” + “2”
Repeat this process for saving additional
stations.
How to call a PRESET
After a station has been saved to memory it
can be recalled using the number keys.
Example: “1” + “2”

15 English
Specifications
FM Tuner
Usable Sensitivity 14.2 dBf
50dB Quieting Sensitivity 20.2 dBf (mono)
45.3 dBf (stereo)
Signal to Noise Ratio (at 65 dBf) 73 dBf (mono)
70 dBf (stereo)
Harmonic Distortion (at 65 dBf) 0.2% (mono)
0.3% (stereo)
Frequency Response 10 Hz-15kHz, +-3 dB
Capture Ratio 2.0 dB
Alternate Channel Selectivity 47 dB (+-400 kHz)
Spurious Response Ratio 90 dB
Image Rejection Ratio 80 dB
IF Rejection Ratio 80 dB
AM Suppression Ratio 55 dB
Stereo Separation (100Hz/1kHz/10kHz) 40 dB/45 dB/35 dB
Output level 1V
Antenna Input 75 ohms unbalanced
AM Tuner
Usable Sensitivity 500 mV/m
Selectivity 25 dB
Harmonic Distortion 0.5%
Image Rejection Ratio 45 dB
Signal to Noise Ratio 40 dB
Output level 500 mV
Antenna Input Loop Antenna
DAB Tuner
Sensitivity -96dBm
Tuning Range Band III (174-240MHz)
Audio Data Rate 224Kbps (Max)
Frequency Response 20-20KHz
Analog Output 2.0V at 0dBFS
Antenna Output 50 ohms F connector
Digital Output S/PDIF Coaxial/Optical
Format/Sample Rate PCM/48KHz
General
Power Consumption 15 watts
Standby Power Consumption 5 watts
Power Requirements (AC) 120 volts, 60Hz (USA version)
230 volts, 50Hz (European version)
Weight 3.9 Kg/8.6lb
Dimensions (W x H x D) 437 x 72 x 319mm
171/8” x 27/8” x 109/16”
Panel Height 60 mm / 23/8”
All specifications are accurate at the time of printing.
Rotel reserves the right to make improvements without notice.
Rotel and the Rotel HiFi logo are registered trademarks of The Rotel Co, Ltd., Tokyo Japan.

16
RDV-1092
16
RT-06 Tuner stéréo DAB/AM/FM
Instructions importantes concernant la
sécurité
ATTENTION : Il n’y a à l’intérieur aucune pièce susceptible d’être modifiée
par l’utilisateur. Veuillez toujours consulter un technicien agréé pour toute
intervention interne, quelle qu’elle soit.
ATTENTION : Pour réduire tout risque d’électrocution, ne pas exposer l’ap-
pareil à l’humidité. Éloignez l’appareil de toute source de ruissellement ou
éclaboussure. Ne pas poser dessus des objets remplis de liquide, comme
un vase, etc.
Ne laissez aucun objet étranger pénétrer à l’intérieur. Si cela était le cas,
débranchez immédiatement l’appareil de son alimentation secteur. Faites-le
ensuite immédiatement vérifier par un technicien qualifié et agréé.
Tous les conseils de sécurité et d’installation doivent être lus avant de faire fonctionner l’appareil.
Conservez soigneusement ce livret pour le consulter à nouveau pour de futures références.
Tous les conseils de sécurité doivent être soigneusement respectés. Suivez les instructions.
Respectez les procédures d’installation et de fonctionnement indiquées dans ce manuel.
L’appareil doit être nettoyé uniquement avec un chiffon sec ou un aspirateur.
Ne pas utiliser cet appareil près d’une source d’eau ou humide.
L’appareil doit être placé de telle manière que sa propre ventilation puisse
fonctionner, c’est-à-dire avec un espace libre d’une dizaine de centimètres
autour de lui. Il ne doit pas être posé sur un fauteuil, un canapé, une couverture ou toute
autre surface susceptible de boucher ses ouïes d’aération ; ou placé dans un meuble empê-
chant la bonne circulation d’air autour des orifices d’aération.
Cet appareil doit être placé loin de toute source de chaleur, tels que radiateurs, chaudières,
bouches de chaleur ou d’autres appareils (y compris amplificateurs de puissance) produi-
sant de la chaleur.
Cet appareil doit être branché sur une prise d’alimentation secteur, d’une tension et d’un
type conformes à ceux qui sont indiqués sur la face arrière de l’appareil (USA : 120 V/60
Hz, CE : 230 V/50 Hz).
Brancher l’appareil uniquement grâce au cordon secteur fourni, ou à un modèle équivalent.
Ne pas tenter de modifier ou changer la prise. Notamment, ne pas tenter de supprimer la
prise de terre si celle-ci est présente. Ne pas utiliser de cordon rallonge.
Prendre garde à ce que ce cordon d’alimentation ne soit pas pincé, écrasé ou détérioré
sur tout son trajet, à ce qu’il ne soit pas mis en contact avec une source de chaleur. Véri-
fiez soigneusement la bonne qualité des contacts, à l’arrière de l’appareil comme dans la
prise murale.
La prise d’alimentation secteur constituant le moyen radical pour débrancher totalement l’ap-
pareil du secteur, elle doit être laissée facilement accessible en permanence.
Si l’appareil ne doit pas être utilisé pendant une longue période, la prise secteur sera dé-
branchée.
L’appareil doit être branché sur une prise d’alimentation secteur principale, avec mise à la
terre effective.
L’appareil doit être immédiatement éteint, débranché puis retourné au service après-vente
agréé dans les cas suivants :
• Le câble d’alimentation secteur ou sa prise est endommagé.
• Un objet est tombé, ou du liquide a coulé à l’intérieur de l’appareil.
• L’appareil a été exposé à la pluie.
• L’appareil ne fonctionne pas normalement
• L’appareil est tombé, ou le coffret est endommagé.
Veuillez utiliser un câble de type Classe 2 pour la liaison avec les enceintes acoustiques, afin
de garantir une installation correcte et de minimiser les risques d’électrocution.
Installez l’appareil sur une surface plane et rigide, suffisamment solide pour supporter son
poids. Ne l’installez pas sur un support mobile qui pourrait basculer.
Ce symbole signifie que cet appareil bénéficie d’une
double isolation électrique. Le branchement d’une mise
à la masse ou à la terre n’est pas nécessaire.
Rotel product are designed to comply with international directives on the
Restriction of Hazardous Substances (RoHS) in electrical and electronic
equipment and the disposal of Waste Electrical and Electronic Equipment
(WEEE). The crossed wheelie bin symbol indicates compliance and that
the products must be appropriately recycled or processed in accordance
with these directives.
The symbol means that this unit is double insulated. An earth ground
connection is not required
2
MISE À LA TERRE DE L’ANTENNE SUIVANT
L’ARTICLE 810 « APPAREILS RADIO ET TÉLÉVISION »
DES NORMES NATIONALES ÉLECTRIQUES
CÂBLE D’ANTENNE SOUS GAINE
PRISE DE TERRE
CÂBLES DE MISE
À LA TERRE (NEC
SECTION 810-820)
BOÎTIER DE
RACCORDEMENT
ÉLECTRIQUE
BOÎTIER DE COUPURE CÂBLE
ANTENNE (NEC SECTION 810–20)
DÉRIVATIONS PRISE DE TERRE
SYSTÈME GÉNÉRAL DE MISE À LA
TERRE CONFORME AUX NORMES
ÉLECTRIQUES EN VIGUEUR
ATTENTION :
RISQUE D’ÉLECTROCUTION.
NE PAS OUVRIR
ATTENTION : POUR RÉDUIRE LE RISQUE D’ÉLECTROCUTION, NE PAS
RETIRER LE CAPOT. IL N’Y A À L’INTÉRIEUR AUCUNE PIÈCE
SUSCEPTIBLE D'ÊTRE MODIFIÉE PAR L’UTILISATEUR. EN CAS DE
PROBLÈME, ADRESSEZ-VOUS À UN RÉPARATEUR AGRÉÉ.
L’éclair dans un triangle équilatéral indique
la présence interne de tensions électriques
élevées susceptibles de présenter des
risques graves d’électrocution.
Le point d’exclamation dans un triangle
équilatéral indique à l’utilisateur la
présence de conseils et d’informations
importantes dans le manuel d’utilisation
accompagnant l’appareil. Leur lecture est
impérative.
Tous les appareils Rotel sont conçus en totale conformité
avec les directives internationales concernant les res-
trictions d’utilisation de substances dangereuses (RoHS)
pour l’environnement, dans les équipements électriques
et électroniques, ainsi que pour le recyclage des maté-
riaux utilisés (WEEE, pour Waste Electrical and Electro-
nic Equipment). Le symbole du conteneur à ordures barré
par une croix indique la compatibilité avec ces directi-
ves, et le fait que les appareils peuvent être correctement
recyclés ou traités dans le respect total de ces normes.

1717
Français
Sommaire
1 : Commandes de la face avant ..........................3
2 : Télécommande RR-T95 ...................................4
3 : Branchements en face arrière .........................5
4 : Schéma des différents branchements ...............5
Instructions importantes concernant la
sécurité ................................................ 16
Au sujet de Rotel .................................. 18
Démarrage ...........................................18
Précautions .......................................................18
Caractéristiques principales ................................18
Déballage ..........................................................18
Installation ........................................................18
Branchements en face arrière .................18
Antenne FM t ...............................................19
Antenne AM y ...............................................19
Antenne DAB u ..............................................19
Sorties RCA i ................................................19
Sorties numériques DAB o .............................19
Prise ordinateur I/O p ...................................19
Prise d’entrée télécommande EXT REMOTE IN
[ ..................................................................19
Prise de commutation TRIGGER 12 V ] ...........19
Entrée câble secteur \ ...................................19
Fonctionnement de base .........................20
Touche de mise en veille STANDBY 1
et diode LED de veille 2 .................................20
Touche ON S ..................................................20
Touche OFF A .................................................20
Capteur de télécommande 3 ..........................20
Afficheur de la face avant 6 ..........................20
Touche de mise en mémoire MEMORY qO ....20
Touche de confirmation ENTER w ....................20
Touches de réglage SETUP e ...........................20
Touche d’atténuation de luminosité DIMMER
rF .............................................................20
Fonctionnement de base du tuner ........... 20
Commandes d’accord TUNING 8EP ..........21
Sélection gamme BAND 9BCD ...............21
Mode d’accord par fréquence
FREQUENCY TUNING ..........................................21
Mode d’accord par présélection PRESET TUNING ..21
Mode d’accord RDS PTY .....................................21
Clavier numérique .................................21
Présélection des stations 7G ........................21
Touche fréquence directe
FREQUENCY DIRECT 0N
Accord par accès direct sur la fréquence de
réception ...........................................................22
Touche d’accord automatique =R .................22
Touche d’accord/présélection TUNE/PRESET - 22
Touche de balayage des présélections
PRESET SCAN H ..............................................22
Touche FM MONO 4Q ..................................23
Réception des stations RDS et RBDS ......23
Touche affichage DISPLAY 5M ......................23
Touche PTY 5I ...........................................23
Touche TP 5K .............................................23
Touche TA 5L .............................................24
Touche AF 5J .............................................24
Réception Digital Audio Broadcast (DAB) 24
Informations de base concernant la réception
DAB ..................................................................24
Fonctionnement de base tuner DAB ......... 24
Touches BAND, DAB 9C ...............................24
Touches haut/bas UP/DOWN 8 ......................24
Touche de confirmation ENTER w ....................24
Touche d’affichage DISPLAY 6M ...................24
Touche de mise en mémoire MEMORY qO ....24
Clavier numérique 7G .................................25
Touche accord/présélection TUNE/PRESET - ...25
Réglage SETUP .....................................25
Touche SETUP e .............................................25
MENU SETUP .....................................................25
Recherche d’une station DAB : ............................25
Touche de recherche automatique
AUTO TUNE =R ...........................................25
Comment mettre en mémoire des stations DAB ...26
Comment rappeler une station DAB
présélectionnée (PRESET) ...................................26
Spécifications ........................................ 26

18
RDV-1092
18
RT-06 Tuner stéréo DAB/AM/FM
Au sujet de Rotel
C’est une famille de passionnés de musique
qui a fondé Rotel, il y a maintenant plus de
quarante-cinq ans. Pendant toutes ces années,
leur passion ne s’est jamais émoussée et tous
les membres de la famille se sont toujours bat-
tus pour fabriquer des appareils présentant
un exceptionnel rapport musicalité-prix, suivis
en cela par tous les employés.
Les ingénieurs travaillent toujours en équipe
réduite, écoutant et peaufinant soigneusement
chaque appareil pour qu’il corresponde par-
faitement à leurs standards musicaux. Ils sont
libres de choisir n’importe quels composants
dans le monde entier, uniquement en fonction
de leur qualité. C’est ainsi que vous trouvez
dans les appareils Rotel des condensateurs
britanniques ou allemands, des transistors
japonais ou américains, tandis que tous les
transformateurs toriques sont directement fa-
briqués dans une usine Rotel.
L’excellente réputation musicale des appareils
Rotel a été saluée par la plupart des magazi-
nes spécialisés ; ils ont reçu d’innombrables
récompenses, et sont choisis par de nombreux
journalistes critiques du monde entier, parmi
les plus célèbres, ceux qui écoutent de la mu-
sique quotidiennement. Leurs commentaires
restent immuables : Rotel propose toujours
des maillons à la fois musicaux, fiables et
abordables.
Mais plus que tout, Rotel vous remercie pour
l’achat de cet appareil, et souhaite qu’il vous
apporte de nombreuses heures de plaisir
musical et visuel.
Démarrage
Nous vous remercions pour l’acquisition de ce
tuner DAB/AM/FM Rotel RT-06. Il bénéficie
intégralement de l’application de la célèbre
philosophie Rotel « Balanced Design », qu’il
s’agisse du schéma de ses circuits, du choix de
tous ses composants, de sa conception après
de très longues heures de tests d’écoute, de
sa musicalité remarquable ou de sa fiabilité
exceptionnelle. Le Rotel RT-06 a été conçu
pour vous offrir de très nombreuses années
de plaisir musical.
Précautions
Veuillez lire très soigneusement ce manuel
d’utilisation. Il vous indique tout ce qu’il faut
savoir pour utiliser parfaitement votre nou-
veau tuner. Si vous vous posez ensuite en-
core des questions, veuillez contacter votre
revendeur agréé Rotel, qui se fera un plaisir
d’y répondre.
Conservez le carton d’emballage du RT-06. Il
constitue le meilleur moyen pour transporter
l’appareil dans le futur, sans risque de dé-
térioration. Des détériorations provenant de
conditions de transport défectueuses ne sont
pas couvertes par la garantie.
Veuillez enregistrer en ligne votre nouvel
achat, sur www.rotel.com. Conservez soi-
gneusement votre facture d’achat. Elle cons-
titue en effet la meilleure preuve au cas bien
improbable où vous devriez faire jouer la
garantie.
Caractéristiques principales
• Réception des gammes et modes AM, FM
et DAB
• Afficheur fluorescent très pratique
• 30 stations présélectionnées dans les
gammes AM et FM ; 99 présélections de
stations DAB.
• Recherche d’accord manuelle ou par
présélections, recherche automatique,
balayage des présélections et recherche
directe par la fréquence de réception.
• Compatibilité totale RDS (Radio Data
System) pour l’Europe et RBDS (Radio
Broadcast Data Service) pour les USA.
• Tuner DAB (Digital Audio Broadcast), sys-
tème de transmission numérique disponi-
ble en Europe et au Canada, ainsi que
régulièrement dans de nouveaux pays.
• Commutation possible mono/stéréo.
• Commutation par tension externe Trigger
12 V pour allumage/extinction couplée
des préamplificateurs et processeurs
Surround Rotel.
• Télécommande sans fil intégrale de toutes
les fonctions.
Déballage
Retirez l’appareil de son carton. N’oubliez
pas de sortir la télécommande et les autres
accessoires. Installez les piles fournies dans
la télécommande. Conservez soigneusement
le carton d’emballage et les éléments de pro-
tection internes du RT-06 ; ils constituent le
meilleur moyen de transporter votre RT-06,
dans le futur.
Installation
Posez le RT-06 sur une surface plane, sèche,
capable de supporter son poids, éloignée
des rayons directs du soleil et de toute source
de chaleur, de la présence d’humidité trop
élevée ou de vibrations importantes. Si vous
l’installez dans un meuble assurez-vous qu’un
minimum de ventilation soit présent. Vérifiez
qu’il y ait assez de place derrière le RT-06
pour tous les branchements. Disposez-le le
plus près possible des autres maillons et, si
possible, sur sa propre étagère. Tout cela
rendra plus aisé d’éventuelles modifications
dans les branchements, et une disposition
des câbles optimale. Cela réduira aussi la
présence d’éventuelles interférences entre
les appareils, ou les méfaits de la chaleur
dégagée par les autres maillons.
N’empilez pas d’objets lourds sur le capot
du RT-06. N’exposez jamais l’appareil à
l’humidité : cela pourrait endommager irré-
médiablement ses circuits internes, et pré-
senter de graves risques quant à la sécurité
des personnes.
Branchements en face
arrière
Le RT-06 dispose sur sa face arrière de tous
les branchements pour une sortie modulation
audio, une antenne FM, une antenne AM,
une antenne DAB, une commutation Trigger

1919
Français
12 V, un capteur infrarouge externe, les sor-
ties numériques de réception DAB, et enfin
le câble d’alimentation secteur.
NOTE : Ne brancher aucun maillon dans sa
prise d’alimentation secteur tant que tous les
branchements entre les maillons n’ont pas été
correctement et définitivement réalisés.
Antenne FM t
Le RT-06 est fourni avec une antenne FM d’in-
térieur en « T ». Sortez l’antenne de l’embal-
lage et branchez la prise coaxiale de type
« F » sur la prise d’antenne correspondante
du RT-06. Pour une réception optimale, dé-
pliez complètement le « T » formé par l’an-
tenne. Des œillets à l’extrémité de chaque
branche du T permettent éventuellement de
fixer l’antenne au mur. Plusieurs positions
doivent être essayées afin de déterminer la
position optimale pour une bonne qualité
de réception.
NOTE : Pour utiliser une antenne FM externe,
branchez son câble 75 ohms sur la prise en
lieu et place de l’antenne FM d’intérieur. Une
antenne externe doit être installée en respec-
tant les normes en vigueur dans votre pays,
de préférence par un installateur profession-
nel. Dans certaines installations, utilisez la
prise de conversion type F fournie pour relier
le câble d’antenne 75 ohms à la prise.
Antenne AM y
Le RT-06 est livré avec une antenne cadre
en plastique pour recevoir les signaux radio
AM (modulation d’amplitude). Retirez cette
antenne de la boîte et placez-la près du
RT-06. Elle peut être plaquée contre un mur,
en utilisant le support fourni. Vous pouvez
aussi plier la portion centrale de l’antenne
pour former un support de table.
Branchez le double câble 300 ohms sor-
tant de l’antenne sur les prises repérées AM
LOOP, en reliant chaque conducteur sur une
des deux prises. Il n’y a ici aucune polarité
à respecter ; vérifiez simplement que la fixa-
tion est correcte et que les deux conducteurs
ne se touchent pas.
Vous devrez certainement orienter ou déplacer
l’antenne pour trouver la meilleure position
pour la réception correcte.
NOTE : Si vous utilisez une antenne extérieure,
branchez celle-ci en lieu et place de l’antenne
cadre fournie, sur la double prise 300 ohms
(broches repérées G et AM). Assurez-vous
que toutes les normes électriques en vigueur
sont bien respectées, notamment en faisant
appel à un installateur agréé.
Antenne DAB u
Une antenne DAB intérieure est fournie d’ori-
gine. Si vous ne parvenez pas à obtenir une
réception correcte avec cette antenne inté-
rieure, nous vous recommandons d’acquérir
une antenne DAB extérieure. Celle-ci sera
branchée via une prise type F sur la prise
repérée « Antenna DAB » sur le panneau
arrière du tuner.
Sorties RCA i
Ces prises de sortie audio fournissent un signal
stéréo de niveau fixe, pour le préamplificateur,
le processeur de commande de votre instal-
lation ou un amplificateur intégré.
Utilisez un câble de liaison RCA standard, en
respectant les canaux gauche (LEFT OUTPUT)
et droit (RIGHT OUTPUT).
Sorties numériques DAB o
Une prise coaxiale et une prise type S/PDIF
permettent de sortir directement le signal nu-
mérique reçu des stations DAB (Digital Audio
Broadcast, ou réseau audio numérique). Ce
type de réception DAB est totalement exempt
de parasites. Il est également capable de
fournir une qualité musicale proche de celle
des disques CD audio, plus des données
spécifiques aux émissions de radio.
Prise ordinateur I/O p
Le RT-06 peut être contrôlé à partir d’un ordi-
nateur, grâce à des logiciels de commande
d’appareils audio-vidéo spécialement déve-
loppés par des constructeurs tierce partie.
Ce contrôle se fait par des codes de com-
mandes envoyés depuis l’ordinateur sur un
réseau câblé avec connexions de type série
RS-232. De plus, le RT-06 peut ainsi être mis
à jour via cette prise, en ce qui concerne son
logiciel de fonctionnement interne.
La prise COMPUTER I/O en face arrière
fournit toutes les connexions nécessaires pour
cette liaison. Elle accepte une prise standard
de type RJ-45 8 broches, comme celles cou-
ramment utilisées dans les liaisons Ethernet
10 Base-T UTP. Pour de plus amples informa-
tions concernant ce type de branchements,
les logiciels disponibles pour la commande
de l’installation, les codes utilisés ou la mise
à jour du RT-06, consultez votre revendeur
agréé ou le support technique Rotel.
Prise d’entrée télécommande
EXT REMOTE IN [
Cette prise jack 3,5 mm reçoit les codes de
commande de n’importe quel récepteur infra-
rouge du commerce (Xantech, etc.) placé dans
la pièce principale, via des câbles spéciaux.
Cette caractéristique est très utile si l’appareil
est placé dans un meuble rendant invisible
son capteur intégré. Consultez votre revendeur
agréé Rotel pour de plus amples informations
sur ces récepteurs-émetteurs infrarouge exter-
nes, et pour connaître le câblage correct de
la prise d’entrée correspondante.
Prise de commutation TRIGGER
12 V ]
Le RT-06 peut être activé par une tension de
commutation envoyée par exemple par un
préamplificateur Rotel.
L’entrée Trigger accepte n’importe quelle
tension de contrôle (courant continu ou cou-
rant alternatif) comprise entre 3 et 30 volts.
Lorsqu’un câble est branché sur cette prise,
et qu’une telle tension est présente dans ce
câble, le tuner s’allume.
Lorsque la tension de commutation disparaît,
le tuner se remet en mode de veille Standby.
La diode LED en façade reste allumée, mais
l’afficheur s’éteint et l’appareil ne fonctionne
plus.
Le RT-06 est également capable de laisser
passer la tension de commutation 12 V, pour
association avec un autre maillon compatible
avec ce mode de fonctionnement. Le signal
12 V reste présent en fonctionnement nor-
mal.
Entrée câble secteur \
Votre RT-06 est configuré en usine pour
fonctionner sur la tension secteur de l’instal-
lation de votre domicile, suivant le pays où
vous l’avez acheté (USA : 120 V/60 Hz ou
Europe : 230 V/50 Hz). Ce réglage est in-
diqué sur une étiquette collée à l’arrière de
l’appareil. Vérifiez que la valeur indiquée

20
RDV-1092
20
RT-06 Tuner stéréo DAB/AM/FM
correspond bien à celle de votre installation
électrique.
Branchez le câble d’alimentation secteur fourni
dans la prise repérée AC INPUT à l’arrière
de l’appareil. Branchez l’autre extrémité du
câble dans une prise secteur murale, ou dans
une prise de renvoi secteur d’un autre maillon
de votre installation audio.
Fonctionnement de base
Les explications qui suivent vous permettent
de vous familiariser avec les caractéristiques
et commandes de votre nouveau tuner. Lors-
qu’une fonction est accessible à la fois sur la
face avant et sur la télécommande, un nombre
(voir illustration de la face avant) et une lettre
(voir illustration de la télécommande) sont
notés dans les instructions correspondantes.
Par exemple, pour passer de la gamme AM
à la gamme FM, vous pouvez presser une
touche de la face avant du tuner ou utiliser
une touche de la télécommande. Lorsqu’un
seul identifiant apparaît, c’est que la fonction
correspondante n’est accessible qu’à partir
de la face avant, ou de la télécommande,
mais jamais des deux à la fois.
NOTE : Les commandes concernant la récep-
tion radio numérique DAB font l’objet de
chapitres spécifiques, plus loin dans ce ma-
nuel d’utilisation.
Touche de mise en veille
STANDBY 1 et diode LED de
veille 2
La touche de la face avant STANDBY se trouve
en face avant du RT-06 est n’est pas reprise
sur la télécommande.
La diode STANDBY LED s’allume dès que
l’appareil est branché sur l’alimentation
secteur.
Touche ON S
Télécommande uniquement
Une pression sur la touche ON désactive
le mode de mise en veille Standby, et met
le RT-06 dans son mode de fonctionnement
actif normal.
Touche OFF A
Télécommande uniquement
Une pression sur la touche OFF enclenche
le mode de mise en veille Standby. Le tuner
est encore relié à l’alimentation secteur, mais
ses fonctions principales sont volontairement
désactivées.
Capteur de télécommande 3
Ce capteur en façade reçoit les codes infra-
rouge (IR) envoyés par la télécommande. Il ne
doit donc pas être obstrué ou caché, notam-
ment par des câbles ou des accessoires.
Afficheur de la face avant 6
Au centre de la face avant du RT-06 se trouve
un grand afficheur fluorescent. Cet afficheur
fournit les informations de fonctionnement de
l’appareil en temps réel, suivant le mode de
fonctionnement DAB/AM/FM (indication de
la fréquence de réception, présélection mé-
morisée, indication de gamme de réception,
information RDS, etc.).
Touche de mise en mémoire
MEMORY qO
La touche repérée MEMORY est utilisée pour
confirmer ou mettre en mémoire les différents
réglages ou modes de fonctionnement du
RT-06, y compris les stations présélectionnées.
Son utilisation précise est décrite en détail
dans les chapitres qui suivent.
Touche de confirmation
ENTER w
Une pression sur cette touche ENTER sélec-
tionne les paramètres précédemment mis en
surbrillance dans l’affichage des réglages
SETUP.
Touches de réglage SETUP e
Permet d’ouvrir et de fermer le menu de régla-
ge Setup du RT-06. Elle permet donc d’accéder
aux menus de réglage du RT-06, notamment
pour les modifications liées au pays d’utilisa-
tion de l’appareil, en utilisant conjointement
les touches de la face avant ENTER (confir-
mation) et UP/DOWN (haut/bas).
Touche d’atténuation de
luminosité DIMMER rF
Disponible aussi bien en face avant que sur
la télécommande, cette touche permet de
choisir parmi quatre luminosités différentes
de l’afficheur de la façade. Des pressions suc-
cessives sur la touche permettent de passer
d’un degré de luminosité à un autre.
NOTE : Lorsque le tuner est éteint puis rallumé,
la luminosité de l’afficheur revient automati-
quement à son mode d’éclairement normal.
Ce réglage de luminosité est également ac-
cessible dans le menu SETUP, afin de mémo-
riser une luminosité donnée, qui restera en
mémoire tant que l’appareil reste branché
sur l’alimentation secteur.
Fonctionnement de base
du tuner
Le RT-06 intègre un tuner à synthèse numéri-
que AM/FM, avec fonctions RDS ou RBDS,
doté de 30 présélections de stations, et un
tuner numérique DAB, permettant la mise
en mémoire de 99 stations présélectionnées
maximum.
• L’accord manuel vous permet de pas-
ser d’une fréquence de réception donnée
d’une station à la fréquence d’accord
immédiatement inférieure ou supérieure.
Placez le mode d’accord TUNE/PRESET
sur sa position TUNE. Coupez la fonction
d’accord automatique AUTO TUNING.
Utilisez les touches TUNING pour passer
d’une fréquence à une autre.
• L’accord direct par choix de la fré-
quence vous permet d’entrer directement
les chiffres correspondant à la fréquence
de réception de la station voulue. Pressez
la touche repérée FREQUENCY DIRECT
sur la télécommande ou la face avant du
tuner, puis entrez la fréquence désirée via
le clavier numérique.
• La recherche automatique de fré-
quence fait défiler les fréquences vers
le haut ou le bas, jusqu’à ce que le tuner
rencontre un signal de réception suffisam-
ment fort. Placez le mode d’accord TUNE/
PRESET sur sa position TUNE. Activez la
fonction d’accord automatique AUTO
TUNING. Utilisez les touches TUNING
Table of contents
Languages:
Other Rotel Tuner manuals

Rotel
Rotel RT-1080 User manual

Rotel
Rotel RT-950BX User manual

Rotel
Rotel RT-02 User manual

Rotel
Rotel RT-2100 User manual

Rotel
Rotel HIFI RT-970BX User manual

Rotel
Rotel RT-1570 User manual

Rotel
Rotel RT-1082 User manual

Rotel
Rotel RT-224 User manual

Rotel
Rotel RT-824 User manual

Rotel
Rotel RT-940AX User manual