manuals.online logo
Brands
  1. Home
  2. •
  3. Brands
  4. •
  5. Rowlett
  6. •
  7. Toaster
  8. •
  9. Rowlett 2 User manual

Rowlett 2 User manual

PREMIER TOASTER INSTRUCTION BOOK
(all models)
Please ensure that all packaging materials have been removed before you use
your toaster.
SAFETY – PLEASE READ!
The temperature of accessible surfaces may be high when the appliance is
operating.
Bread may burn. Therefore toasters must not be used near or below curtains
and other combustible materials. They must be watched.
Do not leave toasters plugged into a live socket when not in use.
Always switch off at the plug.
This appliance is not intended to be operated by means of external timer or
separate remote-control system.
Always allow a toaster to cool before putting away - allow 15 minutes.
Never move a toaster whilst in use.
Before doing any maintenance ensure that the toaster is unplugged from the
electrical supply. Cleaning and user maintenance shall not be made by children
without supervision.
Never use a knife or other sharp instrument to clear jammed slots or burnt
crumbs (not only can this be dangerous but it can damage the elements).
If the power supply cable is damaged then the whole toaster must be returned
to the supplier or other qualified person for replacement.
This appliance can be used by children aged from 8 years and above and
persons with reduced physical, sensory or mental capabilities or lack of
experience and knowledge if they have been given supervision or instruction
concerning use of the appliance in a safe way and understand the hazards
involved. Children shall not play with the appliance.
Keep the appliance and its cord out of reach of children less than 8 years when
it is switched on or cooling down.
NEVER IMMERSE A TOASTER IN WATER
Ensure your toaster is plugged in before turning it on. There is no separate on/off switch on the toaster as it forms part
of the timer mechanism. Your toaster is "off" when the number "0" is on the top of the dial. All Rowlett Rutland Ltd
toasters have a switch that enables you to control which slots are in use, saving on element wear and electricity.
Choose how many slots you need and adjust the control switch accordingly.
Load bread into toaster with ejector lever (C) up. Lower to toast. Do not use bread that is too thick. Set the timer
switch (B) between settings 1 and 2 according to your taste. It is better to use 1 day old bread. The neon indicator (A)
will light and the timer will start. Power will be automatically turned off shortly before the timer completes its task. The
toast can be removed immediately by using the ejector lever, or left in the machine to keep warm for several minutes.
E
A
B
C
D
2-slice ,4-slice and 6-slice models
On 2-slice models the switch (E) in position “1” energises the left hand slot only; position “2” energises both
switches. On 4-slice models the switch (E) in position “1” energises the slot 1 on the left; position “2” energises slot 2;
position “3” energises slot 3; position “4” energises slot 4. On the six-slice model the switch (E) permits sequential
powering of each pair of slots from the LH side (2/4/6).
8 slice, 10 slice and 12 slice models
Slot selection is made by a rotary switch (E) which permits sequential powering of each pair of slots from the LH side
(2/4/6/8/10/12).
2, 4, 6, 8, 10 & 12 SLICE TOASTERS
(4 slice bread illustrated)
APower indicator
B On /Off and
Ping timer
C Ejector lever
D Crumb tray
E Rotary switch
Thick 'n Thin models
On the Thick 'n Thin model the left hand switch (E) energises the 2 bread slots (those on the left) whilst the right
hand switch (F) energises the 2 thick slots on the right which should be used for toasting buns, teacakes or thicker
slices of bread. Turning both switches on powers all four slots.
E
F
A
B
C
D
USE SANDWICH CARRIER IN RH SLOT ONLY
Brunch models
On Brunch models the left hand switch (E) energises the 2 bread slots (those on the left) whilst the right hand
switch (F) energises the sandwich slot. Turning both switches on powers all three slots. When making toasted
sandwiches, using the Brunch toaster’s special compartment, use a timer setting of between 4 and 5. Sandwiches
should be made in the normal way (ie buttered on the inside). A wide variety of fillings can be used but all
ingredients should be chopped or shredded to assist the cooking process. Hard cheese should always be grated.
Meat, fish, eggs etc should always be pre-cooked. Suitable toasting bags are very useful if using a runny or thick
filling (the sandwich should be placed wrapped inside the carrier but allow a vent for steam - slightly reduce cooking
time).
For the Brunch model sandwich slot you must use the carrier provided even if only using it to toast one slice of
bread. Do not use the carrier in the bread slots, it must only be used in the special sandwich slot.
DESIGNATION OF APPLIANCE INFORMATION
Number Type Finish Electrical Model
Ofslots Specification
&Model
2 AT-Bread S-Stainless/Polished (3 nos) E-Esprit
3 BT-Brunch W-White e.g.-100
4 DB-Double Brunch BL-Blue
6 SAND-Sandwich B-Black
8 TT-Thick N Thin CR-Cream
10 TTS-Family Brunch CL-Claret
12 WT-Wide slot
THICK ’N THIN & BRUNCH TOASTERS
(Brunch model illustrated)
APower indicator
B On /Off and timer
C Ejector lever
D Crumb tray
E
F
Bread or “thin” se-
Lector switch
Sandwich or “thick”
Selector switch
ELECTRICAL CONNECTION
Premier 2, 4 and 6-slot toasters operate from a standard electrical supply socket and are fitted with the appropriate
plug. An 8-slot toaster requires a 20 amp service, whilst 10 and 12-slot toasters require a 30 amp service.
CARE & MAINTENANCE
Wipe down with a damp cloth and proprietary multi-surface cleaner to remove any grease. Never use a scouring
agent as this will scratch the finish. Always empty your crumb tray at frequent intervals as this aids toasting
performance and reduces the risk of smell, smoke and burning. On the Brunch model after each use ensure any spilt
filling is removed from carrier and crumb tray.
Bread containing fruit or nuts can be toasted but natural sugars present may cause them to stick to the guard rails on
your toaster. Such debris should not be left on the guard rails as it will char and possibly smoke and can swell so as
to damage the element.
Once the timer has started an element gives out heat from both sides, so the first “unpowered” slot will always give
out heat on one side. On the Brunch and Thick ‘n Thin toasters once you turn the timer on, the middle slot always
has one element working, even if both selector switches are “off”.
SERVICING & REPAIRS
Elements wear out with use and it is impossible to predict their life as this is affected by the amount and type
of use and the quality of electrical supply. They can easily be damaged by careless handling. Your toaster has
been designed that should anything go wrong all major components such as elements and switches can easily be
replaced. Repairs or replacement of components should be undertaken only by a competent electrician. All
components and fitting instructions can be obtained either from your supplier or directly from the manufacturer.
Rowlett Rutland Ltd
32 Bookham Industrial Park, Church Road,
Bookham, Surrey, UK. KT23 3EU
Tel: +44 (0)1372 453633/450855 Fax: +44 (0)1372 453536/453671
Issue 3 for 220-240V ~ Feb 2011

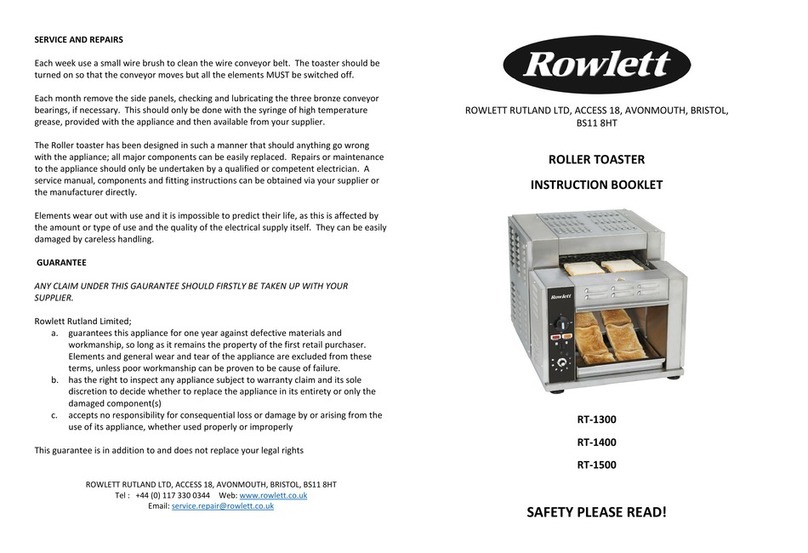
This manual suits for next models

6

Other Rowlett Toaster manuals

Rowlett REGENT SANDWICH TOASTER User manual

Rowlett

Rowlett REGENT SANDWICH TOASTER User manual

Rowlett Regent Retro Thick & Thin User manual

Rowlett

Rowlett Regent Retro Thick & Thin User manual

Rowlett RT-1300 User manual

Rowlett

Rowlett RT-1300 User manual

Rowlett 3 Slot Brunch Esprit User manual

Rowlett

Rowlett 3 Slot Brunch Esprit User manual

Rowlett Premier User manual

Rowlett

Rowlett Premier User manual

Rowlett Premier User manual

Rowlett

Rowlett Premier User manual

Rowlett Premier User manual

Rowlett

Rowlett Premier User manual

Rowlett Premier User manual

Rowlett

Rowlett Premier User manual

Popular Toaster manuals by other brands

Scarlett SC-1119 instruction manual

Scarlett

Scarlett SC-1119 instruction manual

ENKHO 139401.01 user manual

ENKHO

ENKHO 139401.01 user manual

Villaware 5555-14 user manual

Villaware

Villaware 5555-14 user manual

Philips HD2626 instruction manual

Philips

Philips HD2626 instruction manual

Krups ToastControl Instructions for use

Krups

Krups ToastControl Instructions for use

Krups KH442D manual

Krups

Krups KH442D manual

Bartscher A151.300 manual

Bartscher

Bartscher A151.300 manual

KING K 2175 R Crispy instruction manual

KING

KING K 2175 R Crispy instruction manual

APW Wyott AT Express Installation and operating instructions

APW Wyott

APW Wyott AT Express Installation and operating instructions

TEFAL EXPRESS - TOASTER manual

TEFAL

TEFAL EXPRESS - TOASTER manual

Vitek VT-1574 Manual instruction

Vitek

Vitek VT-1574 Manual instruction

MPM MOP-48M user manual

MPM

MPM MOP-48M user manual

Morphy Richards 44333 instruction manual

Morphy Richards

Morphy Richards 44333 instruction manual

Orava HR-111 instruction manual

Orava

Orava HR-111 instruction manual

Bosch TAT6A913 instruction manual

Bosch

Bosch TAT6A913 instruction manual

Sunbeam TA4520 user guide

Sunbeam

Sunbeam TA4520 user guide

Philips HD2683 manual

Philips

Philips HD2683 manual

emerio TO-123924.5 instruction manual

emerio

emerio TO-123924.5 instruction manual

manuals.online logo
manuals.online logoBrands
  • About & Mission
  • Contact us
  • Privacy Policy
  • Terms and Conditions

Copyright 2025 Manuals.Online. All Rights Reserved.