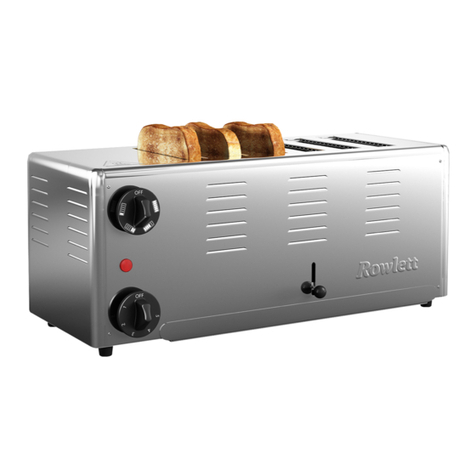
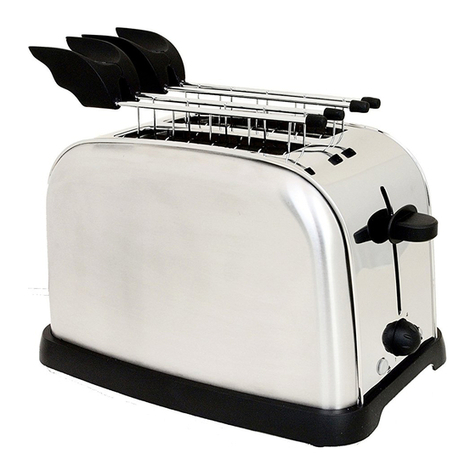
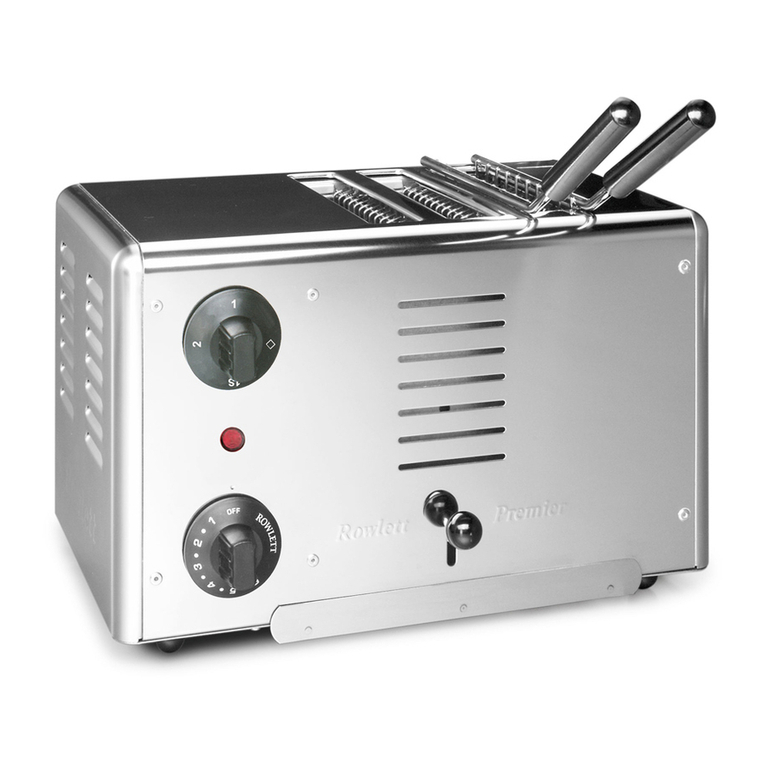
Rowlett Premier User manual

Model:
Premier/Regent/Esprit
Toaster
Instruction manual
Rowlett Toaster IM_ANZ_A5_v2_20211207.indb 1Rowlett Toaster IM_ANZ_A5_v2_20211207.indb 1 2021/12/7 10:572021/12/7 10:57

2
AU Telephone Helpline: 1300225960
Safety Instructions
Please take a few moments
to carefully read through this
manual. Correct maintenance
and operation of this machine
will provide the best possible
performance from your Rowlett
product.
• Position on a flat, stable
surface.
• A service agent/qualified
technician should carry out
installation and any repairs if
required. Do not remove any
components on this product.
• Consult Local and National
Standards to comply with the
following:
- Health and Safety at Work
Legislation
- Fire Precautions
- Wiring Regulations
- Building Regulations
• This is an Attended
Appliance.
• Caution: Hot surfaces!
• Danger of burns!
DO NOT touch the top and
sides of the appliance when
in use.
• DO NOT immerse the
appliance in water.
• DO NOT obstruct or cover
the appliance in any way
when in use.
• DO NOT insert any metallic
objects in to the appliance
when connected to a power
supply.
• Always switch off the
appliance, disconnect the
power supply and allow to
cool before cleaning, carrying
out maintenance, or when
not in use.
• Keep all packaging away
from children. Dispose of
the packaging in accordance
to the regulations of local
authorities.
• DO NOT use if damaged.
• This appliance can be used
by children aged from 8 years
and above and persons with
reduced physical, sensory
or mental capabilities or
lack of experience and
knowledge if they have
been given supervision or
instruction concerning use of
the appliance in a safe way
and understand the hazards
involved.
• Children shall not play with
the appliance.
Rowlett Toaster IM_ANZ_A5_v2_20211207.indb 2Rowlett Toaster IM_ANZ_A5_v2_20211207.indb 2 2021/12/7 10:572021/12/7 10:57

3
AU
Telephone Helpline: 1300225960
• Cleaning and user
maintenance shall not be
made by children without
supervision.
• Keep the appliance and its
cord out of reach of child
less than 8 years.
• This appliance is not intended
to be operated by means of
an external timer or separate
remote-control system.
• Fire hazard! Bread
can burn! The appliance
should not come into contact
or be covered with easily
flammable materials, like
curtains, textiles, walls and
the like. Always ensure
sufficient safety distance to
flammable materials.
• This appliance is intended
to be used in household and
similar applications such as:
- staff kitchen areas in
shops, offices and other
working environments;
- farm houses;
- by clients in hotels, motels
and other residential type
environments;
- bed and breakfast type
environments.
• Rowlett recommend that
this appliance should be
periodically tested (at least
annually) by a Competent
Person. Testing should
include, but not be limited
to: Visual Inspection, Polarity
Test, Earth Continuity,
Insulation Continuity and
Functional Testing.
Introduction
Engineered for reliability, Rowlett toaster range
enjoys huge success in pubs, restaurants,
leisure outlets, hotels, institutions and caring
establishments. Select from a wide choice of Bread
toasters available with variable settings for toasting
perfection.
Pack Contents
The following is included:
• Toaster
• Instruction manual
• Sandwich cage: For
Esprit range only
(Models CH177-A to
CH188-A)
• Replacement
element set AL994
(1 x AK232 Middle
element, 1 x AK231
End element)
Rowlett prides itself on quality and service,
ensuring that at the time of packaging the contents
are supplied fully functional and free of damage.
Should you find any damage as a result of transit,
please contact your Rowlett dealer immediately.
Rowlett Toaster IM_ANZ_A5_v2_20211207.indb 3Rowlett Toaster IM_ANZ_A5_v2_20211207.indb 3 2021/12/7 10:572021/12/7 10:57

4
AU Telephone Helpline: 1300225960
Ejector lever
Power indicator light
Timer knob with
On/Off function
Crumb tray
Model: CH171-A
Slot selector knob
Operation
Toasting
1. Remove the appliance from the packaging. Make
sure that all protective plastic film and plastic
coatings are thoroughly removed from all surfaces.
2. Ensure the Timer knob is set to ‘OFF’.
Note: There is no separate on/off switch
on the toaster as it forms part of the timer
mechanism. Your toaster is “off” when the
timer knob is set to “OFF”. Ensure your
toaster is plugged in before turning it on.
3. The slot selector knob is used to determine
which slots are energised.
Note: All Rowlett toasters (excluding 2-slot
toasters) have a slot selector knob that
enables you to control which slots are in
use, saving on element wear and electricity.
Choose how many slots you need and
adjust the selector knob accordingly.
Slots are energised from the left.
4. Load bread into toaster with ejector lever up.
Lower to toast. Do not use bread that is too thick.
5. Set the timer knob to desired time setting
according to your taste. It is better to use 1
day old bread.
6. The power indicator light will illuminate and
the timer will start.
7. Power will be automatically turned off shortly
before the timer completes its task.
8. The toast can be removed immediately by
using the ejector lever, or left in the machine
to keep warm for several minutes.
Cleaning, Care & Maintenance
Always switch off the appliance, disconnect
the power supply and allow to cool before
cleaning or performing maintenance.
• If necessary wipe the exterior with a soft cloth
and warm soapy water.
• Never use a scouring agent as this will scratch
the finish.
• Dry thoroughly after cleaning.
Crumb Tray
• Periodically empty the crumb tray (located at
the bottom of the appliance).
• Slide the tray out to empty.
• Slot back in securely when replacing the tray.
Notes on maintenance
• Bread containing fruit or nuts can be toasted
but natural sugars present may cause them to
stick to the guard rails on your toaster. Such
debris should not be left on the guard rails as
it will char and possibly smoke and can swell
so as to damage the element.
• Elements wear out with use and it is impossible
to predict their life as this is affected by the
amount and type of use and the quality of
electrical supply. They can easily be damaged
by careless handling. Your toaster has been
designed that should anything go wrong all
major components such as elements and
switches can easily be replaced.
• Repairs or replacement of components should
be undertaken only by a competent electrician.
• All components and fitting instructions can be
obtained from your supplier.
Rowlett Toaster IM_ANZ_A5_v2_20211207.indb 4Rowlett Toaster IM_ANZ_A5_v2_20211207.indb 4 2021/12/7 10:572021/12/7 10:57
5
AU
Telephone Helpline: 1300225960
Troubleshooting
If your Rowlett appliance develops a fault, please check the following table before making a call to the
Helpline. A Rowlett agent or qualified technician must carry out repairs if required.
Fault Probable Cause Solution
The unit is not
working
The unit is not switched on Check the unit is plugged in correctly and switched
on
Plug or lead is damaged Replace plug or lead
Mains power supply fault Check mains power supply
Heating element has expired Refer to replacing instructions (on Pages 7-8)
Thermal cut-out activated Check your machine is safe with no obvious damage.
Disconnect from power supply and let it cool down,
then remove the bottom cover and press the re-set
switch (white-coloured)
Electrical Wiring
The plug is to be connected to a suitable mains socket.
This appliance is wired as follows:
• Live wire (coloured brown) to terminal marked L
• Neutral wire (coloured blue) to terminal marked N
• Earth wire (coloured green/yellow) to terminal marked E
This appliance must be earthed.
If in doubt consult a qualified electrician.
Electrical isolation points must be kept clear of any obstructions. In the event of any emergency
disconnection being required they must be readily accessible.
Compliance
The product must not be disposed of as household waste. To help prevent possible harm to human
health and/or the environment, the product must be disposed of in an approved and environmentally safe
recycling process. For further information on how to dispose of this product correctly, contact the product
supplier, or the local authority responsible for waste disposal in your area.
EAZYZAP parts have undergone strict product testing in order to comply with
regulatory standards and specifications set by international, independent, and federal
authorities.
EAZYZAP products have been approved to carry the following symbol:
All rights reserved. No part of these instructions may be produced or transmitted in any form or by any means, electronic,
mechanical, photocopying, recording or otherwise, without the prior written permission of Rowlett.
Every effort is made to ensure all details are correct at the time of going to press, however, Rowlett reserves the right to
change specifications without notice.
Reset switch
Rowlett Toaster IM_ANZ_A5_v2_20211207.indb 5Rowlett Toaster IM_ANZ_A5_v2_20211207.indb 5 2021/12/7 10:572021/12/7 10:57

6
AU Telephone Helpline: 1300225960
Technical Specifications
Model Voltage Power Slots H x W x D mm Weight
(Kg)
CH170-A: Stainless steel
220-240V~,
50-60Hz
1800W 4 210 x 410 x 210
6.00
CH181-A: Chrome
CH182-A: White
CH183-A: Jet Black
CH184-A: Traffic Red
CH172-A: White
6.50 kg
CH173-A: Jet Black
CH174-A: Quartz Grey
CH175-A: Traffic Red
CH171-A: Stainless steel
2600W 6 210 x 500 x 210
7.50 kg
CH185-A: Chrome
CH186-A: White
CH187-A: Jet Black
CH188-A: Traffic Red
CH176-A: White 8.50 kg
CH177-A: Chrome
1000W 2 200 x 310 x 210 4.50
CH178-A: White
CH179-A: Jet Black
CH180-A: Traffic Red
Rowlett Toaster IM_ANZ_A5_v2_20211207.indb 6Rowlett Toaster IM_ANZ_A5_v2_20211207.indb 6 2021/12/7 10:572021/12/7 10:57
7
AU
Telephone Helpline: 1300225960
Pressing plate
Screw set
Step2: Use the screwdriver to remove all the screw sets that are fixing the pressing plate.
2
Step1: Use the screwdriver to remove the screws on the bottom cover, then remove the bottom cover.
Bottom cover
Screw
1
Replacing the heating element AL994
Tools needed (not supplied)
6mm spanner
Before taking action, ensure to identify the
damaged heating element, then disconnect toaster
from power supply and let it cool down sufficiently.
Element replacement to be conducted by an
electrically competent person!
Rowlett Toaster IM_ANZ_A5_v2_20211207.indb 7Rowlett Toaster IM_ANZ_A5_v2_20211207.indb 7 2021/12/7 10:572021/12/7 10:57
8
AU
Telephone Helpline: 1300225960
Step3: Lift the damaged heating element. Then use the spanner to hold the nut whilst using the
screwdriver to loosen the screw, thus the heating element can be released.
3
Heating element
Spanner
Electric wire
Step5: Insert a new heating element into the slot, then mount the electric wire and heating element
in place with the previously removed nuts and screws.
Step6: Install back the previously removed pressing plate and bottom cover with the screws.
4
Step4: Take out the damaged heating element.
Rowlett Toaster IM_ANZ_A5_v2_20211207.indb 8Rowlett Toaster IM_ANZ_A5_v2_20211207.indb 8 2021/12/7 10:572021/12/7 10:57
DECLARATION OF CONFORMITY
• Conformiteitsverklaring • Déclaration de conformité • Konformitätserklärung • Dichiarazione di conformità •
• Declaración de conformidad • Declaração de conformidade
Equipment Type • Uitrustingstype • Type d'équipement • Gerätetyp
• Tipo di apparecchiatura • Tipo de equipo • Tipo de equipamento
Model • Modèle • Modell • Modello
• Modelo • Malli
2 Slot
4 Slot
6 Slot
2 Slot
4 Slot
6 Slot
Premier
Stainless Steel
CH170 (&-A)
CH171 (&-A)
Regent
Quartz Grey
CH174 (&-A)
Jet Black
CH173 (&-A)
Traffic Red
CH175 (&-A)
White
CH172 (&-A)
CH176 (&-A)
Esprit
Chrome
CH177 (&-A)
CH181 (&-A)
CH186 (&-A)
White
CH178 (&-A)
CH182 (&-A)
CH187 (&-A)
Jet Black
CH179 (&-A)
CH183 (&-A)
CH188 (&-A)
Traffic Red
CH180 (&-A)
CH184 (&-A)
CH185 (&-A)
Application of Territory
Legislation & Council
Directives(s)
Toepassing van Europese
Richtlijn(en) •
Application de la/des
directive(s) du Conseil •
Anwendbare EU-
Richtlinie(n) •
Applicazione delle
Direttive
• Aplicación de la(s)
directiva(s) del consejo •
Aplicação de directiva(s)
do Conselho
Low Voltage Directive (LVD) - 2014/35/EU
Electrical Equipment (Safety) Regulations 2016
EN 60335-1:2012 +A11:2014 +A13:2017
EN 60335-2-9:2003 +A1:2004 +A2:2006 +A12:2007
+A13:2010 +AC:2012
EN 62233:2008
Electro-Magnetic Compatibility (EMC) Directive
2014/30/EU - recast of 2004/108/EC
Electromagnetic Compatibility Regulations 2016 (S.I.
2016/1091)
EN55014-1:2017
EN55014-2:2015
EN 61000-3-2: 2014
EN 61000-3-3: 2013
Restriction of Hazardous Substances Directive (RoHS)
2015/863 amending Annex II to Directive 2011/65/EU
Restriction of the Use of Certain Hazardous Substances in
Electrical and Electronic Equipment Regulations 2012 (S.I.
2012/3032)
Electrical Safety
AS/NZS 60335.1:2011 +A1:2012 +A2:2014
+A3:2015 +A4:2017
AS/NZS:60335.2.9:2014 +A1:2015 +A2:2016
+A3:2017
Electromagnetic Compatibility
EN55014-1:2017
EN55014-2:2015
EN 61000-3-2: 2014
EN 61000-3-3: 2013
Producer Name • Naam fabrikant • Nom du producteur • Name des Herstellers
• Nome del produttore • Nombre del fabricante • Nome do fabricante
Rowlett
I, the undersigned, hereby declare that the equipment specified above conforms to the above Territory Legislation, Directive(s) and Standard(s).
Ik, de ondergetekende, verklaar hierbij dat de hierboven gespecificeerde uitrusting goedgekeurd is volgens de bovenstaande Richtlijn(en) en Standaard(en).
Je soussigné, confirme la conformité de l'équipement cité dans la présente à la / aux Directive(s) et Norme(s) ci-dessus
Ich, der/die Unterzeichnende, erkläre hiermit, dass das oben angegebene Gerät der/den oben angeführten Richtlinie(n) und Norm(en) entspricht.
Il sottoscritto dichiara che l'apparecchiatura di sopra specificata è conforme alle Direttive e agli Standard sopra riportati.
El abajo firmante declara por la presente que el equipo arriba especificado está en conformidad con la(s) directiva(s) y estándar(es) arriba mencionadas.
Eu, o abaixo-assinado, declaro que o equipamento anteriormente especificado está em conformidade com a(s) anterior(es) Directiva(s) e Norma(s)
Date • Data • Date • Datum • Data •
Fecha • Data
2nd November 2021
Signature • Handtekening • Signature
• Unterschrift Firma • Firma •
Assinatura
Full Name • Volledige naam • Nom et
prénom • Vollständiger Name • Nome
completo • Nombre completo • Nome
por extenso
Ashley Hooper
Eoghan Donnellan
Nerida Pearse
Position • Functie • Fonction • Position
• Qualifica • Posición • Função
Technical & Quality
Manager
Commercial
Manager/ Importer
Commercial Manager/ Responsible
Supplier
Producer Address • Adres fabrikant •
Adresse du producteur • Anschrift des
Herstellers • Indirizzo del produttore •
Dirección del fabricante • Morada do
fabricante
Fourth Way,
Avonmouth,
Bristol,
BS11 8TB
United Kingdom
42 North Point
Business Park
New Mallow Road
Cork
Ireland
15 Bagdally Road,
Campbelltown
NSW 2560
DocuSign Envelope ID: 918FD93A-E517-4530-8ED2-CFA1894DEC11
Rowlett Toaster IM_ANZ_A5_v2_20211207.indb 9Rowlett Toaster IM_ANZ_A5_v2_20211207.indb 9 2021/12/7 10:572021/12/7 10:57
Rowlett Toaster IM_ANZ_A5_v2_20211207.indb 10Rowlett Toaster IM_ANZ_A5_v2_20211207.indb 10 2021/12/7 10:572021/12/7 10:57
Rowlett Toaster IM_ANZ_A5_v2_20211207.indb 11Rowlett Toaster IM_ANZ_A5_v2_20211207.indb 11 2021/12/7 10:572021/12/7 10:57

Rowlett Toaster IM_ANZ_A5_v2_20211207
Rowlett Toaster IM_ANZ_A5_v2_20211207.indb 12Rowlett Toaster IM_ANZ_A5_v2_20211207.indb 12 2021/12/7 10:572021/12/7 10:57
Other manuals for Premier
3
This manual suits for next models
2
Table of contents
Other Rowlett Toaster manuals

Rowlett
Rowlett Regent Retro Thick & Thin User manual

Rowlett
Rowlett RT-1300 User manual

Rowlett
Rowlett 2 User manual

Rowlett
Rowlett 3 Slot Brunch Esprit User manual

Rowlett
Rowlett REGENT SANDWICH TOASTER User manual

Rowlett
Rowlett Premier User manual

Rowlett
Rowlett Premier User manual

Rowlett
Rowlett Premier User manual