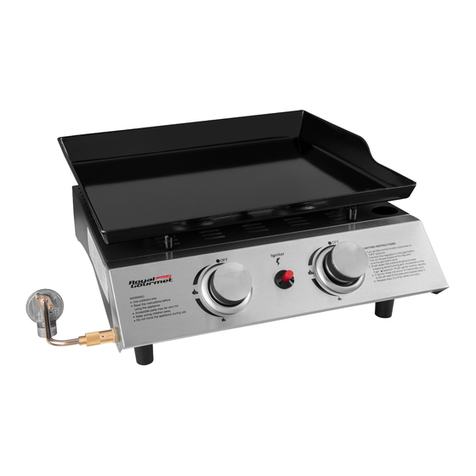
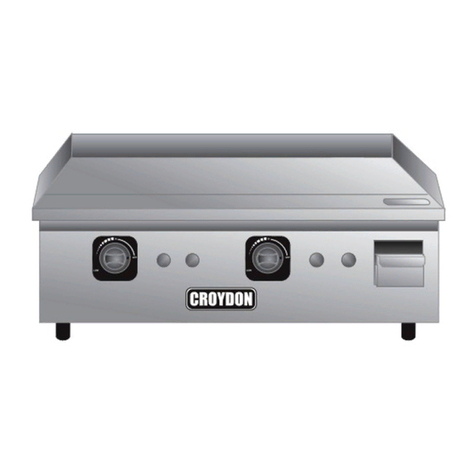
ROYAL GOURMET PD1201 User manual

Customer Service
1-800-618-6798
OWNER’S MANUAL
Use outdoors only! Do not use it in a building,garage or any other enclosed area.
Read the instructions before assembling and using the appliance.
DO NOT use the grill unless it is completely assembled and all the parts are securely fastened.
This grill will become very hot, do not move it during operation.Keep children and pets away.
FOR YOUR SAFETY!
This grill has been made to high quality standards. If you have any questions nor
addressed in this manual, or if you need parts, please call our customer service department,
or send an email to service royalgourmetusa.com..
CONTACT US FIRST!
Learn more at:
@
PORTABLE 2-BURNER GAS GRIDDLE
US
MODEL: PD1201
WWW.ROYALGOURMETUSA.COM

1
TABLE OF CONTENTS
……………………………………………… 2
……………………………4
5
………
6
…………………………………… 7
………………………………………3
………………………
FOR YOUR SAFETY
ASSEMBLY INSTRUCTION
GENERAL SAFETY INSTRUCTIONS
CONNECTING THE GAS CYLINDER
……………………………
CLEANING AND CARE
……………………………………
TROUBLESHOOTING GUIDE
CUSTOMER SERVICE
8
……………………
……………………………8
WARRANTY
………………………

2
1. DO NOT store or use gasoline or any other flammable vapours or liquids within 8m (25’) of the grill.
2. When cooking with oil/grease, do not allow the oil/grease to exceed 177℃350℉Do not store extra
cooking oil in the vicinity of the grill.
3. A liquid propane (LP) tank (cylinder) not connected for use should be stored a minimum of 3m(10
’) away
from this or any appliance. Never fill the gas cylinder beyond 80 percent full. If the above information is not
followed exactly, a fire causing death or series injury may occur.
NOTE: The assembly and use of this grill must conform to local codes. In absence of local codes, use the
National Gas and Propane Instruction Code.
IMPROTANT NOTICE: Read all instructions prior to assembly and use.
Read and understand all warnings and precautions prior to operate your grill.
CAUTION:
1. This grill is for use with propane gas only (propane gas cylinder not included).
2. Never attempt to attach this grill to the self-contained propane system of a camper trailer, motor home or
house.
3. Never use charcoal or lighter fluid with gas grill.
4. Do not use gasoline, kerosene or alcohol for lighting. The LP gas cylinder must be constructed and marked
in accordance with the specifications for propane gas cylinders of National Standard of
CAN/CSA-B339, Cylinder, Spheres and Tubes for Transportation of Dangerous Goods. This grill is not
intended to be used in or on recreation vehicles and/or boats.
5. Do not attempt to move the grill while it is lit.
6. Do not use the grill unless it is completely assembled and all parts are securely fastened and tightened.
7. Keep all combustible items and surfaces at least 91cm (36”) away from the grill at all times.
8. DO NOT use this grill or any gas product near unprotected combustible buildings and materials.
9. Do not use in the presence of gases or vapours. Keep grill area clear and free from combustible materials,
gasoline and other flammable vapours and liquids.
10. Do not touch metal parts of the grill until it is completely cooled (about 45 minutes) to avoid burns, unless
you are wearing protective gear (oven mitts, pot holders, etc.).
11. Do not alter this grill in any manner.
12. Clean and inspect the hose before each use. If there is evidence of abrasion, wear, cuts, or leaks, the
13. Move gas hoses as far away as possible from hot surfaces and dripping hot grease.
14. Never keep a filled gas cylinder in a hot car or car truck. Heat will cause the gas pressure to increase,
which may open the relief valve and allow the gas to escape.
15. Keep the grill’s valve compartment, burners and circulating air passages clean. Inspect the grill before
each use.
hose must be replaced before operating the grill. The replacement hose assembly must be as specified by
the manufacturer.
()
America
This grill has been made to high quality standards. If you
or if you need parts, please call customer service
the
have any questions nor addressed in this manual,
1-800-618-6798, or send an email to
FOR YOUR SAFETY

123
4
12
34
1
2
3
4
1
2
Soap
Foot 4pcs Main body 1pc Grease cup 1pc
Griddle 1pc 5Regulator 1pc
5
Consider to use a match if fail to light the burner.
ASSEMBLY INSTRUCTION
3

GB
4
1. The grill is safe and easy to use.
2. Please ensure you only use the grill at the correct pressure which the appliance is designed for.
3. With a grease tray and a grease cup under the case.
4. Adequate ventilation is vital for combustion and effciency performance of the barbecue.
This will ensure the safety
of the user and other people in the vicinity of the area where the appliance is being used. Never use the appliance
in any enclosed covered area.
5. When the wind speed is above 2m/s, don’t use gas grill facing to the wind.
6. The appliance is designed for use outdoors only.
7. Warning! Accessible parts may be very hot. Keep young children away.
8. Read the instructions before using the grill.
9. Do not move the grill while in use.
10. Turn off the grill at the cylinder valve or regulator after use.
11. Any modifcation to the grill may be dangerous and may cause injury or property damage.
12. Any unauthorised modifcation of the appliance will invalidate the guarantee on this appliance.
13. The grill must not have any overhead obstruction. E.g. trees, shrubs, lean to roofs. The grill must be installed with
a clearance of 1m around the grill.
14. The grill must not be used near fammable materials. (Petroleum based products, thinners or any other solid object
that carries a fammable warning label.)
15. Close the valve of the gas cylinder or the regulator after use.
16. The use of this grill in enclosed areas can be dangerous and is PROHIBITED.
INSTRUCTIONS FOR USE
Follow these instructions carefully to avoid seriously damaging your grill and causing injury to yourself and to property.
1. Assemble the grill following the assembly instructions carefully.
2. Connect the 1 lb propane tank to the grill.
3. Turn all of the control knobs to the ‘OFF’ position before turning on the gas supply to the grill.
4. Operate the regulator in accordance with the instructions supplied with the regulator.
LIGHTING YOUR GRILL
Lighting Instructions
2. Connect the regulator to the gas bottle. Turn the gas supply “ON” at the regulator. Check with the use of soapy
water for any gas leakage between the bottle and the regulator.
3. Push down the control knob and keep pressing while turning it anti-clockwise to the “Full rate” position.
4. If the burner has not lit in 3-5 seconds, turn knob off, wait 5 minutes and repeat step 3.
5. Repeat step 3 to 4 for other burner.
6. Adjust the heat by turning the knob to the High/Low position.
7. To turn the grill OFF: turn the cylinder valve or regulator switch to the "OFF"position and then turn all control knobs
on the grill clockwise to the "OFF"position.
If the burner fails to ignite, turn all control knobs off (clockwise) and also turn the cylinder valve off.
Wait ve minutes before attempting to relight with ignition sequence.
GENERAL SAFETY INSTRUCTIONS
Push ignitor button rapidly.
WARNING
1. Turn the control knob clockwise to “OFF” position.
“OFF”

GB
5
CONNECTING THE GAS CYLINDER
This appliance is only suitable for use with low-pressure butane or propane gas and ftted with the appropriate low-
pressure regulator via a fexible hose. The hose should be secured to the regulator and the appliance with hose clips.
Please consult your LPG dealer for information regarding a suitable regulator for the gas cylinder.
TO CHECK FOR LEAKS
1. Make 2-3 fuid ounces of leak detecting solution by mixing one part washing up liquid with 3 parts water.
2. Ensure the control valve is “OFF”.
3. Connect the regulator to the cylinder and ON/OFF valve to the burner, ensure the connections are secure then
turn ON the gas.
4. Brush the soapy solution on to the hose and all joints. If bubbles appear you have a leak, which must be rectifed
before use.
5. Retest after fxing the fault. Turn off the gas at the cylinder after testing.
6. If detected leakage can not be rectifed, do not attempt to cure leakage but consult your gas dealer.
.
REGULATOR AND HOSE
-Use only regulators and hose approved for LPG at the above pressures. The life expectancy of the regulator is
estimated as 10 years. It is recommended that the regulator is changed within 10 years of the date of manufacture.
-The use of the wrong regulator or hose is unsafe, always check that you have the correct items before operating
-
the barbecue.
-The hose used must conform to the relevant standard for the country of use. The length of the hose must be
1.5 meters (maximum). Worn or damaged hose must be replaced. Ensure that the hose is not obstructed, kinked,
or in contact with any part of the barbecue other than at its connection.
-The hose should not be twisted or kinked when attached to the gas cylinder.
-No part of the hose should touch any part of the appliance. So site the cylinder out to the left hand side of the
appliance at the maximum distant permitted by the hose length.
Storage of an appliance indoors is only permissible if the cylinder is disconnected and removed from the appliance.
When the appliance is not to be used for a period of time it should be stored in its original packaging and stored in
a dry dust free environment.
-The appliance must be used with 1 LB gas cylinder.
-The gas cylinder should not be dropped or handled roughly! If the appliance is not in use, the cylinder must be
-
disconnected. Replace the protective cap on the cylinder after disconnecting the cylinder from the appliance.
-Cylinders must be stored outdoors in an upright position and out of the reach of children.
-Do not store the cylinder near fames, pilot lights or other sources of ignition.
BEFORE USE PLEASE CHECK FOR LEAKS
Never check for leaks with a naked ame, always use a soapy water solution
STORAGE OF THE APPLIANCE
GAS CYLINDER
-The cylinder must never be stored where temperatures can reach over 50°C.
-DO NOT SMOKE. The cylinder should be changed away from any source of ignition.

GB
6
CLEANING AND CARE
CAUTION: All cleaning and maintenance should be carried out when the barbecue is cool and with the fuel supply
turned OFF at the gas cylinder.
CLEANING
“ Burning off ” the barbecue after every use (for approx 15 minutes) will keep excessive food residue to a minium.
OUTSIDE SURFACE
Use mild detergent or baking soda and hot water solution. Non-abrasive scouring powder can be used on
stubborn stains, then rinse with water.
If the inside surface of the barbecue lid has the appearance of pealing paint, baked on grease build-up has
turned to carbon and is faking off. Clean thoroughly with strong hot soapy water solution. Rinse with water and
allow to completely dry. NEVER USE OVEN CLEANER.
INTERIOR OF BARBECUE BOTTOM
Remove residue using brush, scraper and/or cleaning pad then wash with a soapy water solution.
Rinse with water and allow to dry.
PLASTIC SURFACES
Wash with a soft cloth and hot soapy water solution. Rinse with water. Do not use abrasive cleaners,
degreasers or a concentrated barbecue cleaner on plastic parts.
COOKING GRATE OR GRIDDLE
Use a mild soapy water solution. Non-abrasive scouring power can be used on stubborn stains then rinse with water.
GREASE CUP
1. Please do not open the grease tray during use.
2. Please check the grease cup on time and take away the oil when 1/3 full.
Method: after the grease cup cold, make grease cup up in horizontal line and move it with hook reverse horizontally,
this could take out the grease cup.
CLEANING THE BURNER ASSEMBLY
1. Turn the gas OFF at the control knob and disconnect the cylinder.
2. Remove cooking grate.
3. Clean the burner with a soft brush or blow clean with compressed air and wipe with a cloth.
4. Clean any clogged ports with a pipe cleaner or stiff wire (such as an opened paper clip).
5. Inspect burner for any damage (cracks or holes). If damage is found, replace with a new burner.
6. Reinstall the burner check to ensure that the gas valve orifces are correctly positioned and secured
7. In some cases your barbecue will light back because of an insect crawling inside the burner venturi or a spider
spinning its web inside the burner. This can be rectifed by using a bottle brush inserted through the burner
venturi and pushing into the burner over the burner length.
inside the burner inlet (venturi).
8. If condition persists consult your gas dealer.

7
BURNER WILL NOT LIGHT
1. Gas supply is turned off. Turn on gas at propane tank.
2. Out of propane. Fill or replace the propane tank.
3. Regulator is not properly seated into the tank valve. Remove and reattach. Hand tighten only.
4. Crimped fuel supply hose
that needs to be straightened.
5. Regulator failure or damaged hose. Order replacement part and replace.
6. Blockage in the gas system. Remove insects , spider webs or other blockage Clean if necessary.
Inspect under the control panel to be sure the burners are aligned properly with
the valves.
IRREGULAR FLAME OR YELLOW FLAME
1. New burner may have residual oil, which will burn off.
2. Tubes in burners are blocked. Remove and clean.
3. Burners have a high grease or dirt build -up. Remove and clean.
4. Burners are not aligned properly with the valves. Adjust under the control panel.
SUDDEN DROP IN GAS PRESSURE OR FLAMES BLOW OUT
1. Out of gas. Refill or replace the propane tank.
2. Your excessive fuel flow valve has tripped, thereby reducing the flo w of gas. Turn off all burners,
wait 30
seconds, and relight grill. If problem persists, turn off all burners. Disconnect regulator from
tank.
Wait 10 minutes. Reconnect regulator and perform the Leak Test. Slowly turn on the propane
tank
and relight
grill. Other ways the flow limiting device can be activated include:
a. A ruptured gas hose. Inspect, perform a Leak Test, and replace as necessary.
b. Opening the control knobs before turning on the propane at the tank. Turn on the gas at the tank before
turning on a control knob to light.
c. Improper purging of tank before it was filled. See your gas dealer.
3.) Wind could be blowing out your burners. Turn front of grill to face wind or move out of the wind.
FIRE BEHIND CONTROL PANEL
Immediately shut off the propane tank valve and allow grill to cool.
1. Check burners for obstructions and clean.
2. Inspect under the control panel to be sure the burners are aligned properly with the valves.
3. Gas is leaking from a faulty connection or damaged hose. Per form a Leak Test to inspect for leaks.
Tighten
or replace parts as necessary.
TROUBLESHOOTING GUIDE

8
Thanks for purchasing this Royal Gourmet PD1201. We are here to help you maximize your enjoyment and
appreciation of your new grill. We provide a warranty for your products within the framework and warranty
conditions under normal use of 12 months from the date of purchase for all components covering defects and
manufacturing errors.
Please note, this warranty does not include malfunction or user difficulties resulting from wilful damage, misuse,
modification, incorrect use, careless use, wear and tear, improper assembly or poor maintainance.
Please do not hesitate to contact out customer service when you have any questions regarding assembly, warranty,
or accessories. We will be happy to offer any replacement parts you need during the time of warranty period.
Table of contents
Other ROYAL GOURMET Griddle manuals

ROYAL GOURMET
ROYAL GOURMET GG4302S User manual

ROYAL GOURMET
ROYAL GOURMET PD1300 User manual

ROYAL GOURMET
ROYAL GOURMET GG3302S User manual

ROYAL GOURMET
ROYAL GOURMET GB5000S User manual

ROYAL GOURMET
ROYAL GOURMET PD1300 User manual

ROYAL GOURMET
ROYAL GOURMET GB4000 User manual

ROYAL GOURMET
ROYAL GOURMET GB2000 User manual

ROYAL GOURMET
ROYAL GOURMET GB4001 User manual

ROYAL GOURMET
ROYAL GOURMET PD1300 User manual

ROYAL GOURMET
ROYAL GOURMET PD1200 User manual