Royal London OBSB-0600 User manual

Royal London
Instruction Manual


Assembling Handlebar
1. Insert the handlebar stem into the main frame neck.
2. Tighten screw with hexagonal key.

Assembling Front Wheel
Firmly insert the wheel between the forks so that it rests securely in place. Replace the tab washers and axle nuts and
fasten securely ensuring that the tab washers locate into the holes provided. Using the spanner, re-tighten the nut on
the front brake to secure the front brake cable. Brake pads should be between 1.5 –2.0mm away from rim.
Assembling the Brake System
1. Attach the front brake through the fork.
2. Put the inner brake cable through the holes of the bolts.

3. Tighten the cable and fix the brake arm.
4. Adjust the brake pad and screws, make sure the pad in the right position.
Attaching the Saddle

If not already attached, firmly push the narrow end of the seat post into the hole on the
Under side of the saddle, and tighten using the quick release.
Note: the minimum insertion mark must not be visible.
Attaching the Pedals
Ensuring that you are inserting the pedal into the correct side, firstly stand your bicycle in the upright,
then screw each pedal by hand into the cranks and tighten using the spanner.
REMEMBER that the left pedal should be fitted anti-clockwise while the right pedal should be fitted
clockwise.

CHECKING AND ADJUSTING YOUR BICYCLE
Keeping your bicycle in the upright position; stand with a leg either side of the front wheel, holding the
wheel firmly in position. Loosen the handlebars using the Hexagonal key, and adjust to the right height
and position for use. Note: the minimum insertion mark must not be visible. The mid-section of the
handlebars must be aligned with the front wheel. Tighten into place.
Sit on your bicycle to gauge a suitable position use. The ideal height will allow your toes to touch the
ground comfortably.
To adjust the position of the saddle, loosen the nut on the main unit situated at the bottom of the seat
post and adjust and tighten.
Note: the minimum insertion mark must not be visible.
Before riding your bicycle for the first time ensure that your brakes work. Gently roll your bicycle
backwards and forwards and test that each brake works individually.
When you sit on your bicycle with your hands on the handlebar, your left brake lever operates the rear
brake system and your right lever operates the front brake system.
To obtain the best performance from your bicycle, check the tyre pressure by squeezing each tyre
between your index and middle finger and thumb. The tyre should feel firm and if necessary pump air
into it. Refer to the manufacturer’s recommendation as shown on the tyre sidewall.

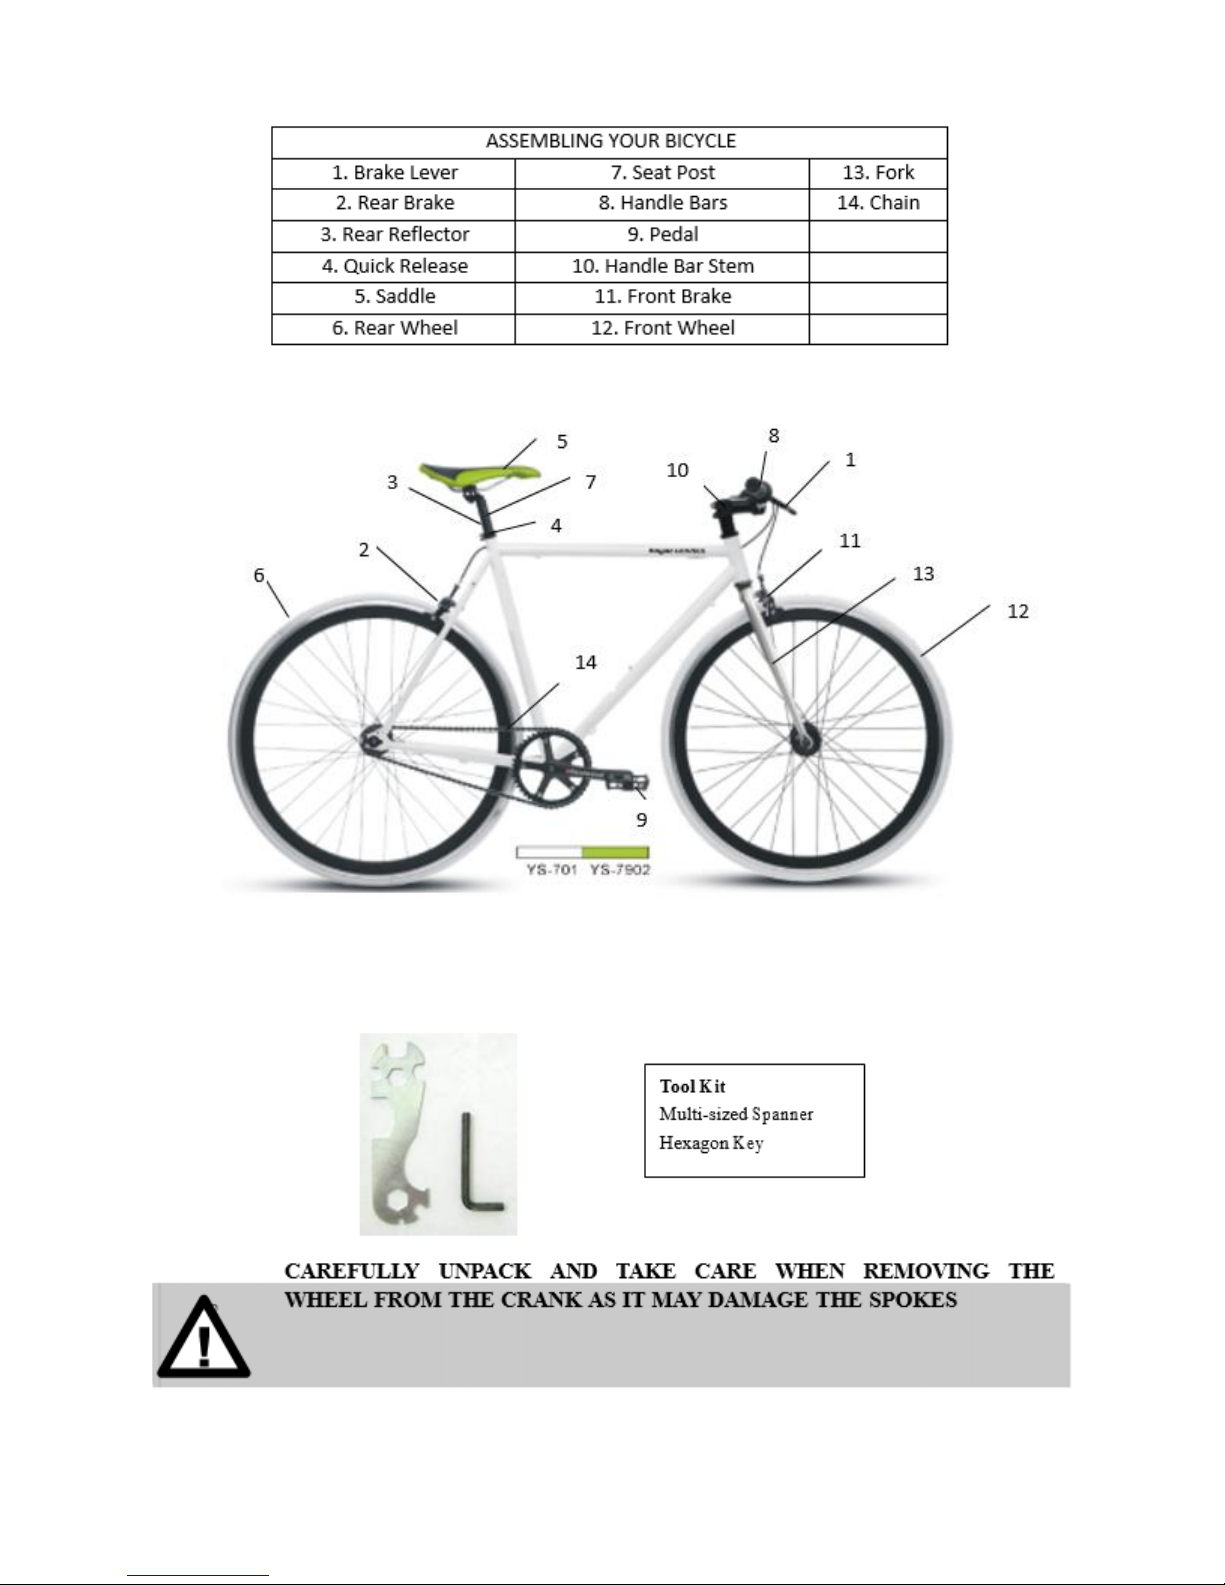
MECHANICAL MAINTENANCE:
It is extremely important that your bicycle is checked and serviced at regular intervals to
ensure its reliability and especially that it is safe to ride.
Cleaning and lubrication also forms an important tool in the proper maintenance of your
Bicycle and this is covered in more detail immediately after this section.
The following checks are suggested:
Before your ride –check:
When you are riding, please use a bicycle helmet for your safety.
Set reflectors on your bicycle for possible national legal requirements when you ride on the public
road.
The maximum total weight is 100kg. (bicycle+rider+luggage)
Wheels are tightly secured.
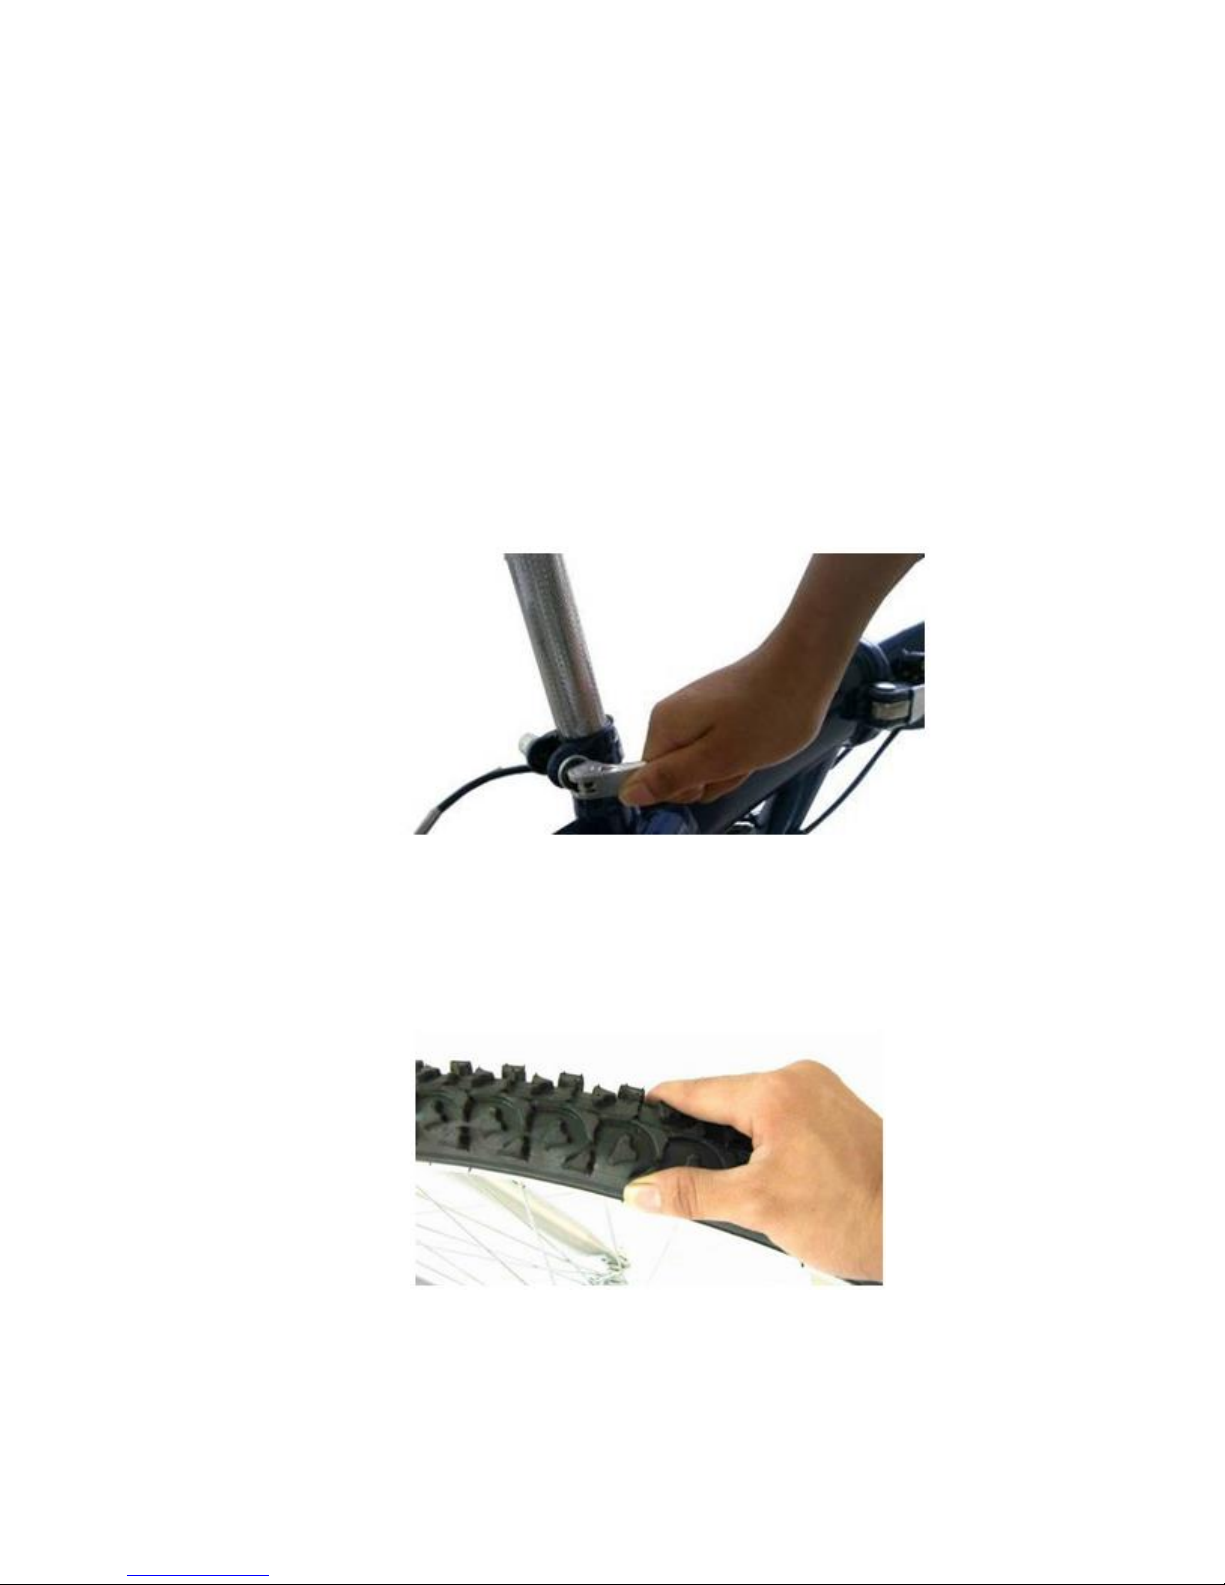
Tyres are inflated to correct pressure (indicated on side-wall of tyre). Also check condition of tyres for
cuts etc. (Note: It is a good idea to carry a puncture repair kit or spare inner tube, tyre levers and pump
with you).
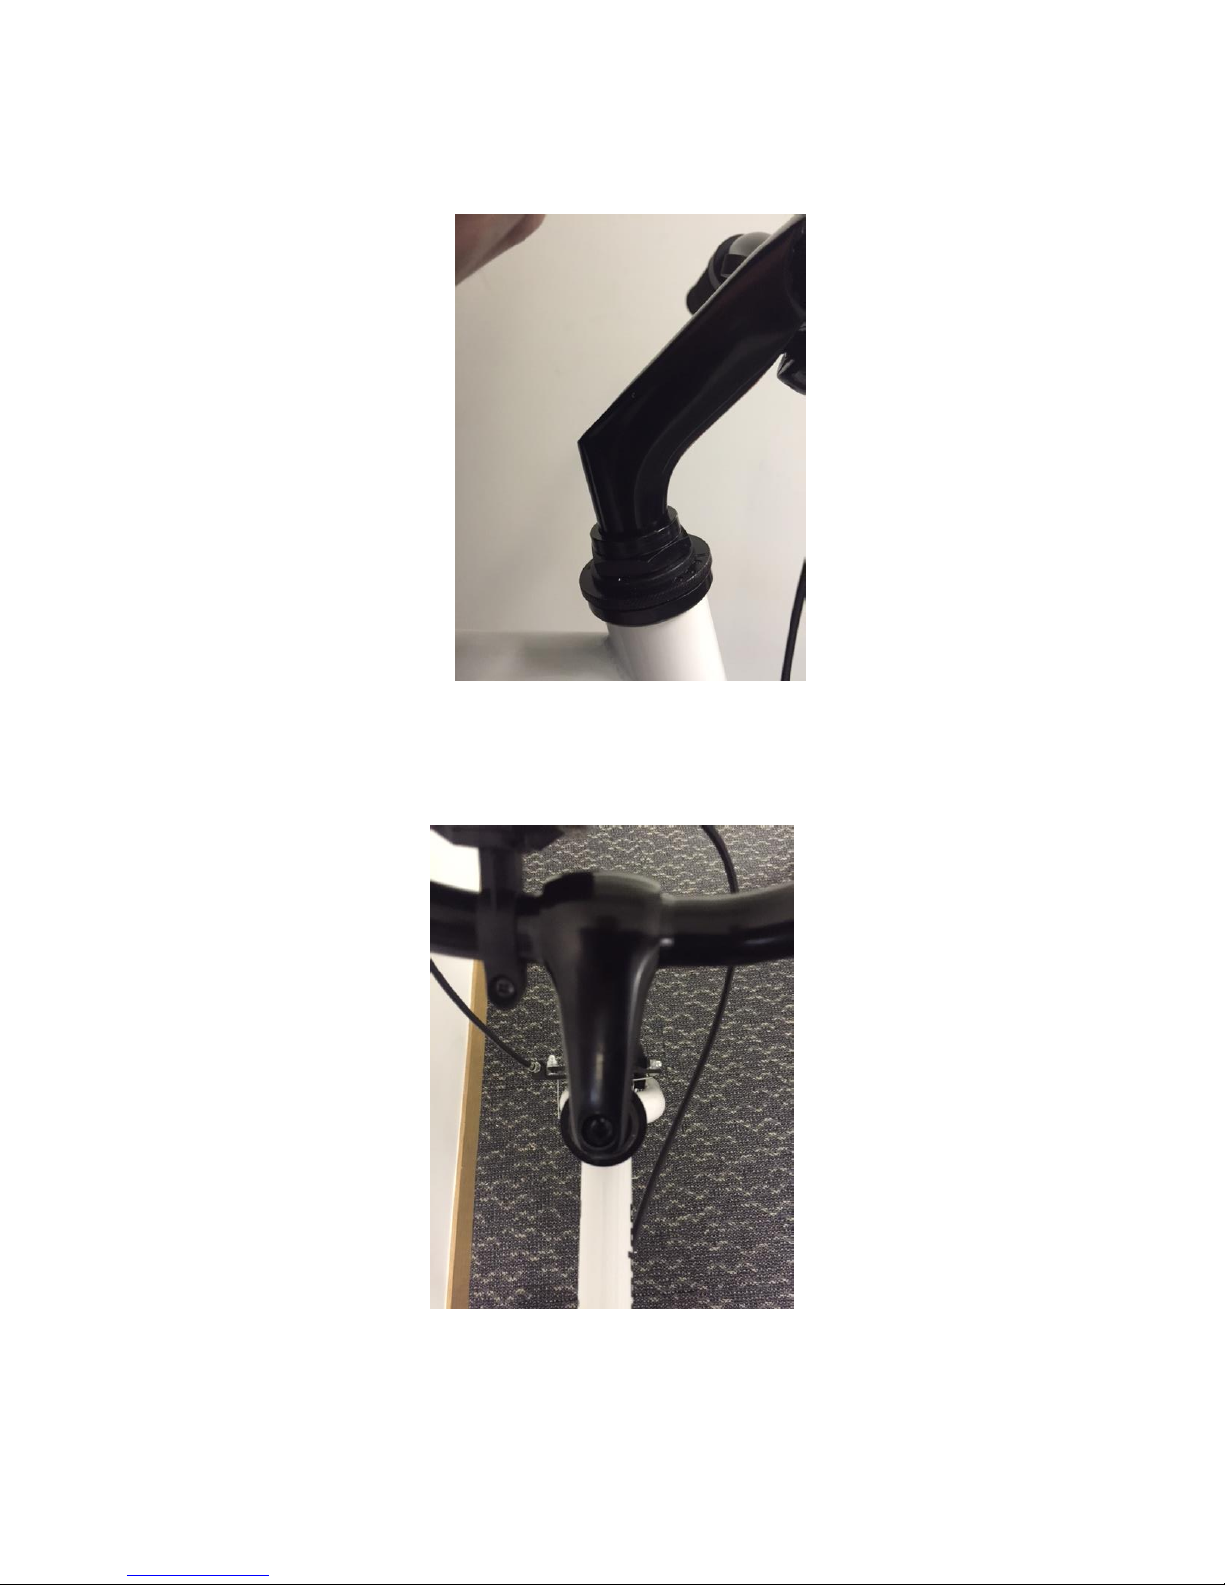
Handlebar, stem and headset locknut are tight and that the steering turns smoothly.
Squeeze the brake levers to ensure sufficient pressure can be applied without the lever touching the
handlebars. Also ensure brake blocks are aligned correctly with the rim and the blocks are not badly
worn.
Brake cables are not frayed at the end.
Gears operate correctly and smoothly.
Wheels are running true by spinning them. You can also check that mudguards, if fitted, are correctly
adjusted at this time.
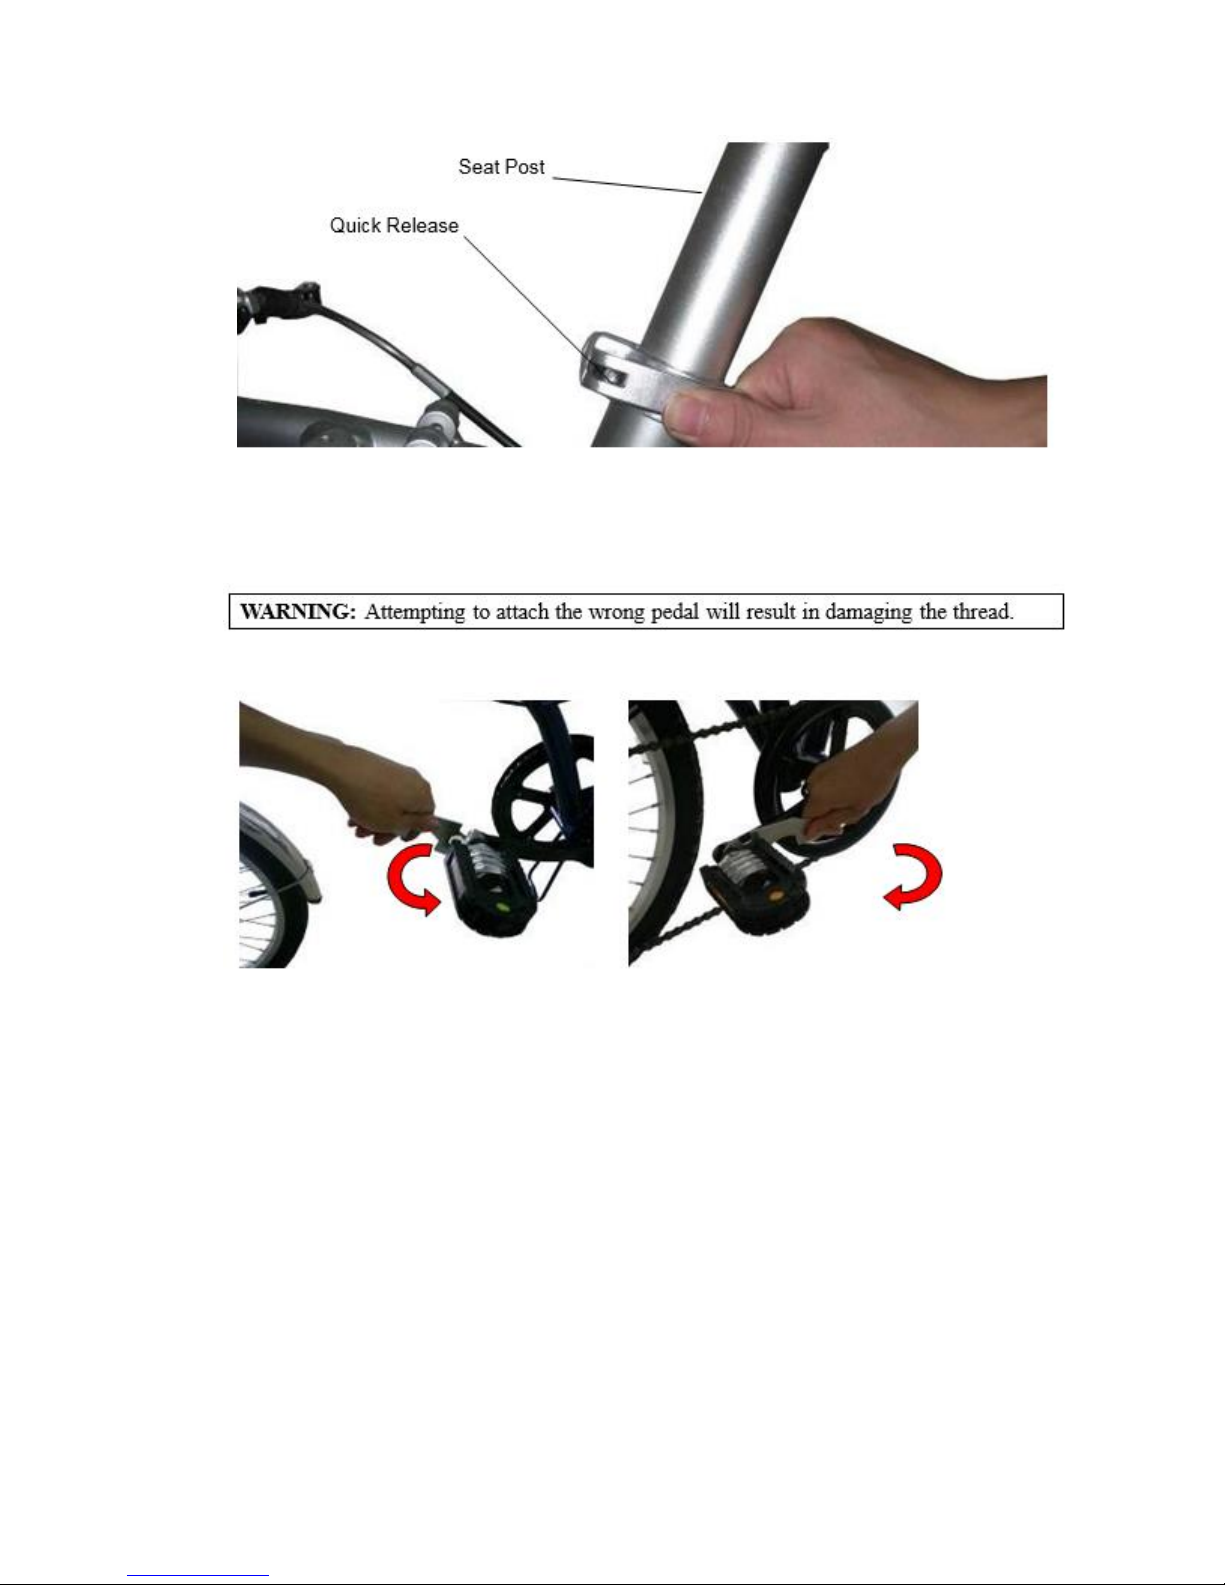
The height of the seat can be adjusted from 650mm to 1020mm. The vertical distance from the ground
to the top of the seat surface, measured with the seat in a horizontal Position and with the seat-pillar
set to the minimum insertion depth.
After long or hard rides or at least every month of regular use –check the above as well as the following:
Clean, degrease and lubricate your bicycle.
Crank, bottom bracket fittings and pedals are tight.
Tyre wear and general condition for cuts, glass, thorn etc.
Spokes are not loose or broken. These need to be attended to before the bike can be ridden again and
you would probably need to get these done at bicycle shop.
Hubs are running smoothly.
Tyres are free from imbedded objects such as thorns, glass or nails.

Every 12 months
Unless you have a good knowledge of bikes, we suggest that you take your bike to your local dealer for
a full service. If this is not feasible we suggest you use the following checks:
Frame and forks for any damage or cracks.
Wheels are true and if not replace or repair if necessary.
Tyres for wear, replace or repair if necessary.
Brake tracks on rims are not badly worn, also clean and degrease.
Brake levers, brake adjusters, break cable and nipple attached to levers are in good order. Any sign of
wear on cable to nipple joint replace inner wire.
Brakes and brake blocks are to be replaced if excessive wear is evident and e-set brakes.
Replace the chain wheel teeth especially if it is an alloy chain wheel, the same chain wheel ring is used
most of the time. Worn chain wheels can significantly affect gear changing.
Check the chain for wear and stiff links, clean and re-grease chain or replace if necessary. The chain
will stretch with use and should be changed before causing excessive wear to the chain wheel or
sprockets (approximately every 1500 –2000 miles or every 2 years if riding approximately 25 miles per
week).
Cranks are attached securely.
Bottom bracket fittings for wear and disassemble and re-grease or replace if required.
Headset moves smoothly by turning the wheel. Also check side movement by applying the front brake
and try rocking the bike. If any movement is found, the headset may need cleaning, adjusting and
re-greasing or the bearing may need replacing or even a complete new headset may need fitting.
If in doubt always consult a bike dealer or qualified mechanic.
Please note that these schedules are suggestions, frequent and heavy use of your bike such as off road riding
will require more frequent maintenance.
Remember good maintenance will prolong the life of your bike and components and ensure yours
and other people’s safety.
RECOMMENDED TIGHTENING OF FASTENERS
1). Handlebar: 200kgf.cm
2). Handlebar stem: 200kgf.cm
3). Saddle and pillar: 200kgf.cm
4). Wheel: 300kgf.cm
5). Quick release mechanism: 200kgf.cm

ADJUSTING YOUR BRAKES
Your brakes are already fine-tuned by the manufacturer. Still please check that when you squeeze the levers
hard, they do not touch the handlebar. If they do, you can adjust the brakes by tuning the brake cable-adjusting
barrel anti-clockwise. After adjustment turn the lock nut hard clockwise. If the brakes still fail then have your
dealer check them.
NORMAL SPARE PARTS ASSEMBLY
Tire and Tube
1) Pump up the tube slightly. Slip one edge of the tyre into the rim. Push the tube's valve
Into the rims hole and then, starting from the valve, push the tube inside the tyre. Make sure the valve stem is
upright and the tube isn't twisted.
2) Begin to place the second edge of the tyre onto the rim. (Only about 75 percent of the tyre will go on easily,
the rest needs to be coaxed onto the rim). For really stubborn tyres, use tyre levers to lever the tyre on slowly
making sure not to pinch the tube.
3) When completed, pump a bit more air into the tube to check that it isn't caught and the tyre is properly
seated on the rim. Once satisfied, you can inflate the tyre fully.

Brake Block Holder
1) After removing the old brake block, which can be done by simply unscrewing the nut on the block anti-
clockwise using the hexagonal key, take away the old brake block and put the new brake block in the screw
halfway.
2) Adjust the block height and angle in relation to the rim. Make sure when you use the brake, the brake blocks
contact the center of the rim, and that they are parallel to the rim.
3) Adjust the distance between both brake blocks and the rim to allow 1mm of space each side to allow the
wheel to rotate freely.
4) After above adjustments, secure the nut tight.
Warning: This bicycle is not designed for off road use or stunts. Periodic Inspections of the Frame, Fork and
Suspension joints
Every twelve months, check your frame, fork and suspension, as with all mechanical components, the bicycle is
subjected to wear and high stresses. Different materials and components react to wear or stress fatigue in
different ways. If the design life of a component has been exceeded, it may suddenly fail possibly causing
injuries to the rider. Any form of crack, scratches or change of coloring in highly stressed areas indicate that the
life of the component has been reached and it should be replaced.
Chain
Inspection
The chain must be kept clean and frequently lubricated in order to extend its life as long
As possible. It will require replacement if it stretches breaks or causes inefficient gear shifting. Make sure that
there are no shift links, they must all move freely.
The chain should be lubricated with light oil at least one month, or after use in wet, muddy, or dusty conditions.
Take care to wipe off excess oil, and not to get oil on the tyres or rim breaking surfaces.
REPLACEMENT PARTS / SPARES
Further assistance is available for the setup of the cycle, technical difficulties and spare parts. Please refer to the
contact details on the back page.
Where possible please return the damaged part for identification purposes.

UK & Europe
www.thesportshq.com
Units 3 and 4 Lower Park Farm Storrage Lane,
Alvechurch UK B48 7ER
Telephone: 01527 598388
USA
www.golfoutletsusa.com
72320 Manufacturing Drive
Thousand Palms, CA 92276
Telephone: 1-800-603-0004
AUS/NZ
www.thesportshq.com.au
25-55 Rothschild Ave, Rosebery, 2018,
NSW Australia,
Phone: 1300 132 151
Table of contents