RP3 Rowing MODEL-T User manual

MANUAL
OPERATING
MODEL-T
WWW.RP3ROWING.COM
210927RP3Trev1

The RP3 Dynamic rowing simulator is the world’s only rowing machine that truly simulates the dynamics of a light
racing shell, freely oating on the water. The main frame with its ywheel, stretcher and seat are the boat simula-
ting parts, and the main bar simulates the water.
In its patented design**, the ywheel assembly weighs about 21.5 kgs, which closely approximates the weight per
person of most racing shells. The seat is labile, as a boat would be, forcing the rower to sit and pull symmetrically.
The elasticity of the total system of main bar and ywheel assembly is designed to
match closely the elasticity of the combination of oar, boat and rigger.
It is however not a boat in all its aspects.
The technique of handling the oar is not required. Therefore deteriorating technique of handling the oar due to
fatigue, will not serve as an automatic safeguard for the oarsman against over-exertion, as would be the case in
a boat.
- Because the oarsman does not have to push the oar away at the beginning of the recovery, but instead is pulled
back, there is a tendency to row at a slightly higher stroke rate then in the boat.
- Other than the water, the main bar is not of innite length. Therefore, to stabilize the position of the rower within
this nite length, there is a slight downward bend in the main bar, with its lowest point at approx. 40 centimeters
from the rear leg. In order to inuence the dynamics of the system as little as possible, the curvature of this bend
is kept at a minimum. Due to the elasticity of the main bar, and the sag resulting from
the weight of the oarsman, the exact position of the lowest point of the main bar is weight dependent; of course
this position also depends on the slope of the oor the unit is placed on. The unit should be leveled in such a way,
that when rowing, neither of the two support legs are touched by the main frame or the seat. For leveling the unit
the rear leg is provided with a level adjustment knob. Turning the knob clockwise for the model T and Push the
knob for the model T to lower the rear end or turning it anti-clockwise raises the rear end.
** Patents: U.S. Patent 5,382,210
European Patent 0 376 403 B1
Introduction
2

Table of Contents
3
1. Safety 4
1.1 General 4
1.1.1 Purpose of use 4
1.1.2 Danger to children and other groups or persons 4
1.1.3 Caution – Risk of injury 4
1.1.4 Caution – Product damage 4
1.1.5 Notes on handling batteries 4
1.1.6 Notes on assembly 5
1.2 Physical 5
1.3 Mechanical 5
2. Product description 6
2.1 Dimensions 6
2.2 Performance monitor 6
2.3 User identication 7
2.4 Type of training 7
2.5 The Work screen 7
2.6 App’s for Android or IOS 8
2.7 Online logbook and online ranking 8
2.8 Online challenges and race 8
3. Assembly of the unit 9
3.1 Assembly procedure 9
3.2 Pictures 10/12
4. Actions prior to start 13
4.1 Operation 13
4.2 Levelling the unit 13
4.3 Adjusting the boat simulation characteristics 13
4.4 Interface and software 13
4.5 Actions prior to stsrt-up 13
5. Maintenance and cleaning 14
5.1 General 14
5.2 Main bar and sliding ywheel assembly 14
5.2.1 Before and after each training session 14
5.2.2 Weekly, or every 50 hours of use, whichever is the longest 14
5.2.3 Every 200 hours of use or every 4 weeks, whichever is the longest 15
5.3 Chain 15
5.3.1 Weekly, or every 50 hours of use, whichever is the longest 15
5.3.2 Every 200 hours of use or every 4 weeks, whichever is the longest 15
6. Support and service 16
6.1 Europe 16
6.2 Outside Europe 16
7. Warranty 17
7.1 Frame Parts–Five Year Limited Warranty 17
7.2 All parts-two year limited warranty 17
7.3 Additional Information 15
8. Disposal 18
9. Trouble shooting 18

1.1 GENERAL
1.1.1 PURPOSE OF USE
• The product is designed for domestic use and not for medical use or suitable for commercial purposes.
• The maximum weight allowed on this product is 200 kg.
1.1.2 DANGER TO CHILDREN AND OTHER GROUPS OF PERSONS
• Children do not recognize the danger that this product can pose. Hold children therefore,
far from this product. The product is not a toy.
• It should be kept in a place out of the reach of children and pets.
• If you let a child use the product, do not leave it unattended.
• Make the appropriate settings on the product yourself and supervise them the exercise routine
• Make sure that the packaging material does not get into the hands of children. It exists Suffocation hazard!
1.1.3 CAUTION - RISK OF INJURY
• Do not use a damaged or defective product. In this case, contact a specialist workshop or our service center.
• Before each use, check the product to ensure that it is in perfect condition. Defect parts must be replaced
immediately, otherwise function and safety will be impaired.
• Make sure that no more than one person uses the product at the same time.
• Always use the product on a horizontal, level, non-slip and solid place Underground.
• Never use it near water and keep around for safety reasons the product a sufcient free space of at least 1m.
• Make sure that your arms and legs are away from moving parts.
• Do not insert any materials into existing openings in the product.
1.1.4 CAUTION - PRODUCT DAMAGE
• Do not make any changes to the product and only use its Original spare parts.
• Only have repairs carried out in a specialist workshop or by similarly qualied persons carry out -
improper repairs can put the Users arise.
• Only use this product for the purposes described in the operating instructions.
• Protect the product from water splashes, moisture, high temperatures and direct sunlight.
1.1.5 NOTES ON HANDLING BATTERIES
• Remove batteries if they are at or if you will not be using the product for a longer period of time use.
This will prevent damage that can result from leaks.
• Batteries must not be charged or reactivated by other means, taken apart, thrown into re or
short-circuited. There is a RISK OF EXPLOSION!
1.SAFETY
4

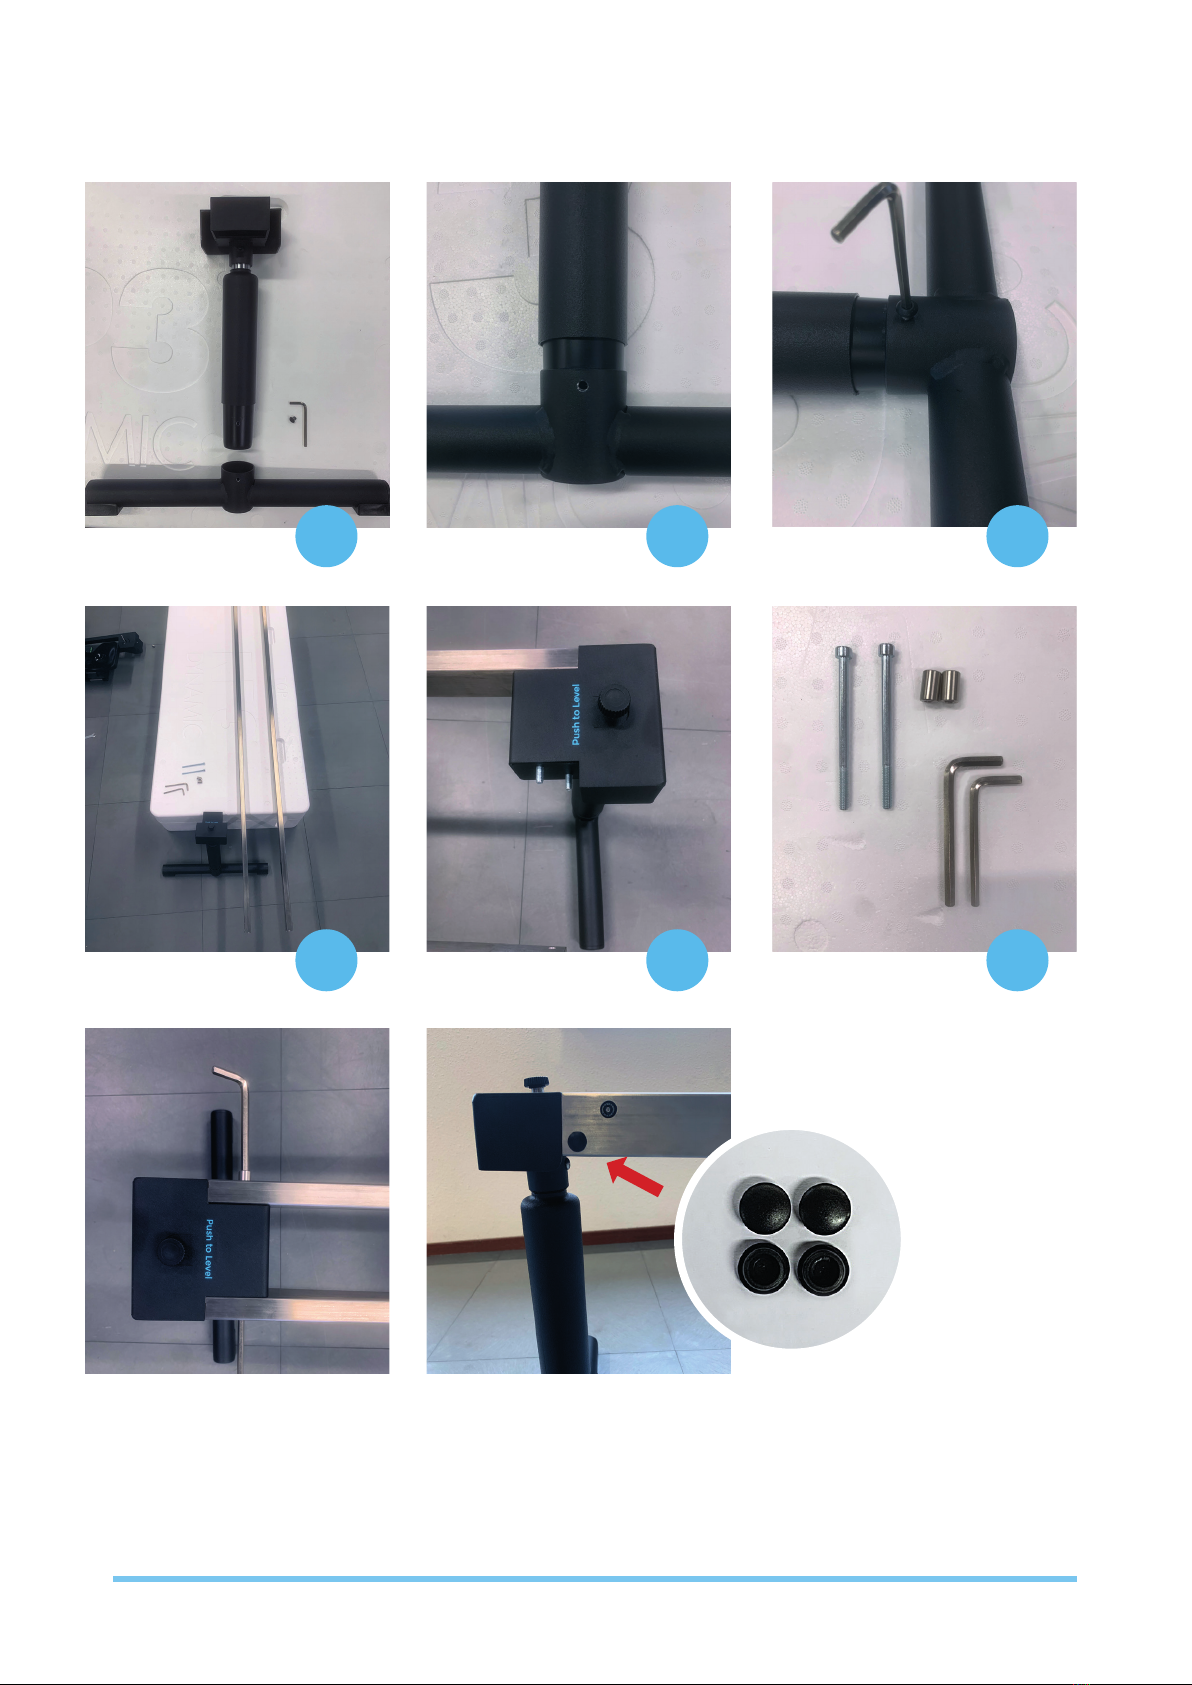
1.1.6 NOTES ON ASSEMBLY
• The assembly of the product must be carried out carefully and by an adult.
• If in doubt, seek the help of another, technically experienced person.
• Before you start assembling the product, read the assembly steps carefully and look at
the construction drawing.
• Remove all packing material and then place the individual parts on one free area.
This gives you an overview and makes assembly easier.
• Use a pad to protect the mounting surface from soiling or scratching.
• Now use the parts list to check whether all components are present.
• Do not dispose of the packaging material until assembly is completed.
• Note that when using tools and doing manual work there is always a possible risk of injury.
So, walk carefully and prudently when assembling the product.
• Make sure that the working environment is safe, for example do not leave any tools lying around.
• After you have set up the product according to the operating instructions,
make sure that all screws, bolts, and nuts are properly installed and tightened are.
• If necessary, lay a protective mat to protect your oor (not in the Scope of delivery included)
under the product, as it cannot be ruled out that e.g. rubber feet leave marks.
1.2 PHYSICAL
• Ensure that it is not dangerous for you to undertake a strenuous exercise. Consult your physician!
• Always warm up properly rowing easily for 5 to 10 minutes at a pulse frequency of 120 to
130 strokes per minute.
• Although the unit easily permits it, do not row at a higher stroke rate than you would be capable of,
rowing in a boat.
1.3 MECHANICAL
• Properly install the rowing simulator with the main bar at the correct inclination. Adjust the inclination
when front or rear legs are being touched by the main frame or the seat, by raising slightly the side that
is being touched.
• The RP3 Dynamic rowing machine has not been designed for use in the vicinity of children.
Keep children away when exercising.
• Allow for 1 m of clear space around the machine when in use.
• Keep spectators at more than an arm’s length from the rotating ywheel and the moving main frame.
• Never touch the rotating ywheel, and do not touch the main frame when in use.
• Always pull the handle with two hands, and do not bend, twist or kink the chain.
Any abuse of the chain may result in injury.
• Always place the handle into the handle hooks or against the cage before letting go.
Never let the handle y into the cage.
• Avoid ties, shawls or other clothing from being sucked into the cage by the rotating ywheel.
• Prevent objects from falling or being thrown into the rotating fan.
• Wear tight clothing and keep clothing free from the seat rollers.
• Maintain your machine properly as recommended in section Maintenance. Replace worn or
defective parts before using the unit.
In general: Treat your RP3 rowing simulator with the same loving care as you would your single scull.
5

Length Width Seat Height Total Weight Space recommended for use Stored dimension right up Weight Capacity
230 cm 51 cm 55 cm 41 kg 275 cm x 100 cm 257 cm x 60 cm x 160 cm 250 kg
91 in 20 in 22 in 91 lb 108 in x 39 in 101 in x 24 in x 63 in 551 lb
2.1 DIMENSIONS
2.2 PERFORMANCE MONITOR
RP3 MODEL-T
AUTOMATIC OPERATION
Monitor turns on when you start rowing
PERFORMANCE DATA
Track distance, peak force, pace, stroke length, stroke rate,
relative peak force position, energy (Joules), time, Force Curve
FORCE CURVE
with relevant stroke data
USER FRIENDLY
One knob to set the screen
TURN : to the left see data or to the right to see force curve
PUSH : Once to set distance, twice to set time, 3 seconds
to reset
6
2. PRODUCT DESCRIPTION

2.3 USER IDENTIFICATION
Introduce a new user to the system by lling out the rst time you run the software. The weight, gender,
boat and sprocket data are used to calculate a weight- and gender- corrected time and boat speed.
These times are close to the real times made in the chosen type of boat under ideal conditions with
technique in the boat near to perfect.
Choose by sprocket the big sprocket, because there is no option for the small
sprocket.
2.4 TYPE OF TRAINING
The type of training to be performed by the oarsman can be chosen by giving a certain amount of work
to do or by indicating certain intensity. The amount of work can be expressed in terms of STROKES, ENERGY,
DISTANCE or TIME. The chosen parameter then is counted down from the limitation value down to zero.
At the end of the session the results are presented in DISTANCE, TIME, total ENERGY dissipated, and POWER
(average over the total session in Watts).
If the option INTERVALS is chosen, the number of intervals, and the units in which the intervals are going
to be counted down, the required POWER during the interval, POWER during the rest period, as well as
an incremental value per interval can be selected.
Note: Always choose the number of intervals one higher than the number to be rowed.
Further you can nd a more detailed subscription of the software in the manual under HELP.
2.5 The WORK SCREEN
The work screen presents a visual display of the performance of the oarsman or oarswoman in comparison
to selected target values, and therefore is a very valuable tool for improving technique and for synchronizing
crews during the wintertime or at great distances.
7

2.6 APP’S FOR ANDROID OR IOS
Each RP3 rowing machine comes with an interface that has a USB connection and a Bluetooth
connectivity. The free RP3 Rowing App provides additional performances statistics, stores and
displays your workout results and you can upload these workouts to your personal webpage to
keep track of your performance.
The App works on iOS and Android devices which you can connect with the USB cable delivered
with the machine or through Bluetooth. You can put your own device on the machine with the
integrated Tablet or Phone holder.
Add variety to your routine, and choose from a number of apps that have been developed by
other companies especially for use with the RP3. This means that you are not locked into one
technology experience. Choose the app that works for you! Whether you are looking for realistic
video graphics, additional data and analysis, or just good entertainment, you can nd it in an
app and use the device of your choice, from smartphones to watches and tablets.
See the latest options available at rp3rowing.com/apps.
Wireless Heart Rate Monitoring using Bluetooth with compatible devices.
2.7 ONLINE LOGBOOK AND ONLINE RANKING
Keep track of all your workouts in our free Online Logbook. https://rp3rowing-app.com/login
The online logbook also enables you to participate in our challenges and competitive opportunities.
Use the Online Ranking to compare your performances with athletes from around the world over a
number of different events and categories. Our rankings include everybody from Olympic gold medalists
to athletes in their 90s.
2.8 ONLINE CHALLENGES AND RACE
Our online challenges and E-race App offer motivation to exercise
just a bit more than you might already!
https://play.google.com/store/search?q=rp3%20race&gl=NL
From individual events to challenge your buddy or to team events
to any team in the world, challenges can help to bring out your best,
reinforcing your persistence and self-discipline.
8
ONLINE

9
The RP3 rowing simulator comes pre-assembled into separate parts:
• Rear leg
• Front Leg
• Seat
• Foot stretcher with tubes
• Rear leg
• RP3
• Bag with tools and bolts/rings etc.
In the long carton:
• Main bar 2 pieces 40x20x2300 mm
3.1 ASSEMBLY PROCEDURE
Every machine and main bar have a serial number (is on the carton and
on the machine) make sure these are the same before assembly.
1. First assemble the rear leg, the tube to the mcylinder. Make sure the holes are inline
(picture 1A, 1B, 1C)
2. Assemble the rear leg tot the main bars (on the bars is a sticker with “Rear left” and “rear right”
and serial number (picture 2A, 2B, 2C, 2D)
3. Put the Seat on the main bar. Make sure it’s in the right direction (picture 3A)
4. First remove transport wooden bars (picture 4A, 4B)
5. Place the PR3 on the ground and stick the bars through the machine. Pleace be careful, it should
go easy. No big force needed (picture 5A)
6. Assemble front leg. Two bolts M6 and nuts. (picture 6A)
7. Put the foot stretcher to the frame. Watch that the loose ends are at the outside picture 7A, 7B, 7C)
8. Level the bar by putting the seat about 30cm and push the pin on the rear leg to activate the
cylinder (picture 8)
9. Attach power bank to USB Cable (picture 9A, 9B, 9C)
RP3 Dynamic is ready for use!
Please contact us if you need help.
3. ASSEMBLY INSTRUCTIONS
RP3 MODEL-T

10
PICTURES
1A
2A
1B
2B
1C
2C

PICTURES
11
3
5
6C
4A
6A
7A 7B
4B
6B
FRONT

PICTURES
12
8
9A 9B 9C
10

4.1 OPERATION
4.2 LEVELLING THE UNIT
Before starting to row, the unit should be leveled correctly, in order to allow gravity to stabilize the position of
the rower at the correct place. For leveling the unit, the height of the rear leg is adjustable by means of a black
knob. Turning the knob clockwise shortens the rear leg, and thus lowers the hind, turning it anti-clockwise raises
the rear end.
To level the unit correctly, proceed as follows:
Put the unit in its proper place where it is going to be used. Sit down on the seat and place your feet on the
stretcher. Then, without using the handle, sit in catch position, and push to and for with the legs quickly over a
distance of approx. 10 cm a couple of times. Gravity then causes the rower to arrive at the lowest point of the
bar. Properly leveled, the position of the center of the seat is then at approx. 30 cm from the rear of the main
bar. Your RP3 base unit now is ready for use.
When, while rowing, the main frame touches the front leg repeatedly, lower the rear by turning the knob
clockwise. When, on the contrary, the seat repeatedly touches the rear leg, raise the rear leg by turning the
knob anti-clockwise.
4.3 ADJUSTING THE BOAT SIMULATING CHARACTERISTICS
The “feel” of a racing shell depends upon a mixture of inertial forces and friction forces during the stroke
and recovery cycle, the type of oar and the inboard/outboard ratio used.
The ywheel assembly of the RP3 rowing simulator weighs 21.8 kgs, which is close to the average weight
per person of most racing shells, including the oars. To adjust the level of friction the central part of the fan
is covered by a disk and a sliding vane on top of the cage. With the combination of this disk and the vane
generally the RP3 can be made to give the same “feel” as a boat. Choose that combination that simulates
your boat closest.
If required bigger or smaller disks can be cut by the user from similar material to ne tune. Always use full disks
for adjustment of the level of friction, do not use louvers to throttle the fan at the inlet, as this will change the
friction characteristics of the fan. This then will lead to erroneous readings for power and all related parameters.
4.4 INTERFACE AND SOFTWARE
The interface and software will operate on any android and iOS devices.
You can download the App and instructions on the Google Play store or App Store.
4.5 ACTIONS PRIOR TO START-UP
Connect the interface with the Tablet by Bluetooth or with the USB cable.
4. ACTIONS PRIOR TO START
Note: The interface derives its energy from a power bank or
if connected to the USB port, no batteries are needed.
13

5. MAINTENANCE AND CLEANING
5.1 GENERAL:
To get the most satisfaction from your RP3 rowing simulator, treat her with the same loving care as you
would your single scull. The actual level of maintenance required can vary strongly depending upon the type
and frequency of use, and the environment the machine is used in. The following paragraphs can serve as a
guideline to keep your RP3 in good shape. The Product should be thoroughly cleaned at regular intervals,
depending on the intensity of use. Remove light dirt and dust with a soft cloth. Dirt can be removed with
damp cloth and mild soapy water. After cleaning, dry with a dry cloth!
Cleaning Notes:
• Do not use sharp tools for cleaning (knife, metal scraper) or aggressive solvents.
• Do not clean with a high-pressure cleaner.
• Clean all surfaces with a non-abrasive, mild detergent.
• To avoid damage to component surfaces, observe the instructions for detergent use.
Disinfection:
If disinfection is required during use, use only a suitable commercially available hand or surface disinfectant.
Apply the disinfectant with a cloth and do not rinse the device. Before the rst disinfection, carry out a test
at a suitable, non-visible location to avoid possible surface damage.
5.2 MAIN BAR AND SLIDING FLYWHEEL ASSEMBLY
To really simulate the dynamics of a racing shell, freely oating on the water, it is essential that the ywheel
assembly slides over the main bar with zero clearance between rollers and main bar, and with very low
resistance. Build-up of any dirt on the surface of the main bar will not only increase the resistance and
negatively inuence the dynamic simulation, but also will induce extremely high compressive strains in the
main bar when the rollers are forced over it when rowing.
These compressive strains will eventually cause failure of the main bar due to fatigue cracks on its corners.
The following maintenance schedule can serve as a general guideline for mainframe and main bar:
5.2.1 BEFORE AND AFTER EACH TRAINING SESSION:
• Wipe the main bar clean with an stainless steel cleaner to remove dust and sweat and to lubricate the
contact between rollers and main bar. (stainless steel cleaner available in the webshop)
5.2.2 WEEKLY, OR EVERY 50 HOURS OF USE, WHICHEVER IS THE LONGEST:
• Check the clearance between the rollers of the ywheel assembly and the main bar. The clearance of the
bottom rollers on the stretcher side, and the bottom rollers on the ywheel side should be such that one
is not able to make the roller slip over the surface of the main bar, by retaining the roller by pressing a
thumb rmly to the surface of the roller, and moving the ywheel assembly to and for over the main bar.
If a particular roller can be made to slip, adjustment of the clearance of that roller is necessary.
All adjustments should be done in small steps to avoid over tensioning. Proceed according to the following
sequence. Of the adjustment bolt adjacent to the roller set that should be adjusted, untighten the top
M8 nut by turning 15 degrees (clock wise), while keeping an hex key number 4 in the threaded shaft.
Subsequently tighten the bearings by turning the threaded shaft counter clockwise. After adjustment,
the main frame should still slide lightly over the main bar. If adjustment is done, the M8 nut should be
tightened again, therefore you need to keep the threaded shaft in position with the hex key so that it
cannot move while tighten the nut.
14
Note: When the clearance for a particular roller set is adjusted, this can affect the
clearance for the other roller set and might need adjustment in the same way too.

5.2.3 EVERY 200 HOURS OF USE OR EVERY 4 WEEKS, WHICHEVER IS THE LONGEST:
Check that the following bolts and nuts are not loose:
• The four knob bolts that hold the stretcher boards.
• The bolts holding the front and rear leg to the main bar.
5.3 CHAIN
To get the longest life from your chain and sprocket, keep the chain clean and properly lubricated at all times.
Do not use too much lubricant for the chain, as this may affect the life of the elastic cord in a negative way.
The following schedule can serve as a guideline for chain maintenance:
5.3.1 WEEKLY OR EVERY 50 HOURS OF USE, WHICHEVER IS THE LONGEST.
Pull the chain gently all the way out, until it stops, than use silicon oil specic for chains to spray the chain by
letting in go back gently.
5.3.2 EVERY 200 HOURS OF USE OR EVERY 4 WEEKS, WHICHEVER IS THE LONGEST:
- Inspect the chain handle connection.
Check the connector piece and the U bolt that connect the chain to the handle. The connector piece
is attached in the factory and should be stiff connected to the chain. The U-bolt is secured with a spring
which should be checked if it’s still good in place (see picture 10).
The U-bolt should be replaced if it is nearly half worn.
- Inspect the chain for stiff links.
Stiff links can cause the chain to skip over the sprocket. This can lead to injury and causes excessive
wear of both chain and sprockets. Stiff links can be caused by lack of lubrication, build-up of dirt,
or mechanical abuse of the chain. Generally repeated cleaning and lubrication, as in weekly
maintenance, will loosen up the links. If this is not the case and the chain skips over the sprocket,
the unit should not be used.
Contact your RP3 Dynamic agent for a replacement chain and sprocket.
15

6.1 EUROPE
Contact RP3 Rowing by telephone (+31852734931) or
of the problem.
Please scan the serial number on your indoor rower
(The serial number is located on the frame cover near rail)
6.2 OUTSIDE EUROPE
Contact the authorized dealer in your territory.
Contact details can be found at rp3rowing.com/locations.
Your serial number is located on the front frame cover near rail.
For more information on RP3 Rowing write or call to one of the following addresses:
For future reference, RECORD
YOUR SERIAL NUMBER HERE:
6. SUPPORT AND SERVICE
RP3 Rowing BV
Bouwstraat 9B
7483 PE Haaksbergen
The Netherlands
Tel. : +31 (0)85 2734931
Jan and Annet Lammers
Subject to change without notice.
For the agents see website:
www.rp3rowing.com
16

RP3 MODEL T INDOOR ROWING SIMULATOR LIMITED WARRANTY
7.1 FRAME PARTS–FIVE YEAR LIMITED WARRANTY
RP3 will replace or repair, at our discretion, the frame parts listed below that fail due to a defect in materials
or workmanship for a period of ve years from date of purchase of your RP3 Model T Indoor Rower.
This warranty is fully transferable to each subsequent owner of your indoor rower during the term of the
warranty should you sell it or give it away.
This warranty does not cover: damage to the nish of your machine; damage sustained as a result from neglect,
abuse, or failure to follow indoor rower maintenance requirements (see Maintenance); shipping charges and, if
applicable, customs clearance fees; or labor for installation of any parts shipped to you under warranty.
The ve year warranty applies to the following parts:
Rear Leg & Foot Assembly (excludes plastic foot caps) Flywheel Enclosure,
Seat & Seat Frames Outlet Perf, & Damper
Foot Stretcher Assemblies Monorail / Duo rail
Chain Guide Metal Brackets Frame Lock components
Front Leg(s) & Foot (excludes casters) Metal Box Frame
Flywheel Assembly including Hub & Bearings Monitor Bracket
Flywheel and Flywheel Axle All screws, bolts & nuts
7.2 ALL PARTS–TWO YEAR LIMITED WARRANTY
RP3 will replace or repair, at our discretion, any part (excluding monitor batteries) that fails for any reason for
a period of two years from date of purchase of your RP3 Model T Indoor Rower. Whether defective or
simply worn out, all parts on your machine (excluding monitor batteries) are covered for the rst two years.
This warranty is fully transferable to each subsequent owner of your indoor rower during the term of the
warranty should you sell it or give it away. This warranty does not cover: damage to the nish of your machine;
damage sustained as a result of neglect, abuse, or failure to follow indoor rower maintenance requirements (see
Maintenance); shipping charges and, if applicable, customs clearance fees; or labor for installation of any parts
shipped to you under warranty. The consumer must perform, or have performed, the maintenance, as described
under §5 in order to keep the warranty in effect.
7.3 ADDITIONAL INFORMATION
THE PROVISIONS OF THIS WARRANTY ARE IN LIEU OF ANY OTHER WARRANTY,
WHETHER EXPRESS OR IMPLIED, WRITTEN OR ORAL.
Under no circumstances shall RP3 Rowing BV. be liable to purchaser or any other person for any special,
incidental or consequential damages, whether arising out of breach of warranty or otherwise.
7. WARRANTY
Note: In the event of a defect, malfunction, or other failure of the product not caused by any misuse or
damage to the product while in the possession of the consumer, RP3 Rowing BV. will remedy the failure or
defect, without charge to the consumer, within 14 business days of its receipt of the product. The remedy
will consist of repair or replacement of the product, or refund of the purchase price, at RP3’s discretion.
However, RP3 Rowing BV. will not elect refund unless it is unable to provide replacement, and repair is not
commercially practicable and cannot be made within the time for performance or unless the consumer is
willing to accept such refund. Replacement of a component part includes its free installation if the unit is
returned to RP3 Rowing BV.
This warranty does not cover: shipping charges and customs clearance fees; or labor for installation of any
parts shipped to you under warranty. The term of this warranty begins on the date the product is shipped to
the purchaser, and continues for a period of two (2) years. Altering the indoor rower voids our warranty.
17

8 DISPOSAL
The disposal of the equipment must be in accordance with the respective national regulations.
An appropriate waste disposal company should be contacted. Properly dispose of the device at
the end of its service life (e.g. the local collection point for waste separation):
• The device packaging is disposed of through resource recycling
• The metal parts of the machine go to scrap metal disposal
• Plastic parts are given to plastic recycling
• Rubber parts are disposed of as hazardous waste
This symbol indicates electrical and electronic equipment that cannot be
disposed of with as standard waste, but must be handled separately.
Disposal must be carried out to prevent problems with heavy metals and ame
retardants in accordance with relevant waste management.
Please contact the manufacturer’s authorized representative in order
to obtain information concerning disposal of your equipment.
The disposal of the equipment must be in accordance with the respective
national regulations.
Wear parts are considered hazardous waste! After being replaced wear
parts must be disposed of according to country-specic waste laws.
Mailfunctions Remedy
1Monitor doesn’t work Charge power bank and try again
2Bumping to the front when rowing The rear leg should be lowered by pushing the knob and
place the seat about 50 cm from the rear and level the bar
3Bumping to the rear when rowing The rear leg should be raised by pushing the knob and place
the seat about 50 cm from the rear and level the bar
4Bluetooth doesn’t appear on devices list Charge power bank and try again
5Device connected with USB cable but no
device showing up in list
Disconnect the cable and reconnect, sit on the machine and
take some strokes
9 TROUBLE SHOOTING
TROUBLE SHOOTING
18
Table of contents
Other RP3 Rowing Home Gym manuals