INSTALLATION UNO - RUN11 / RUN11X / RUN11XX
Doc. # DR005-3 / 30-08-2019 www.rubi.ca - 1.888.988.RUBI (7824)
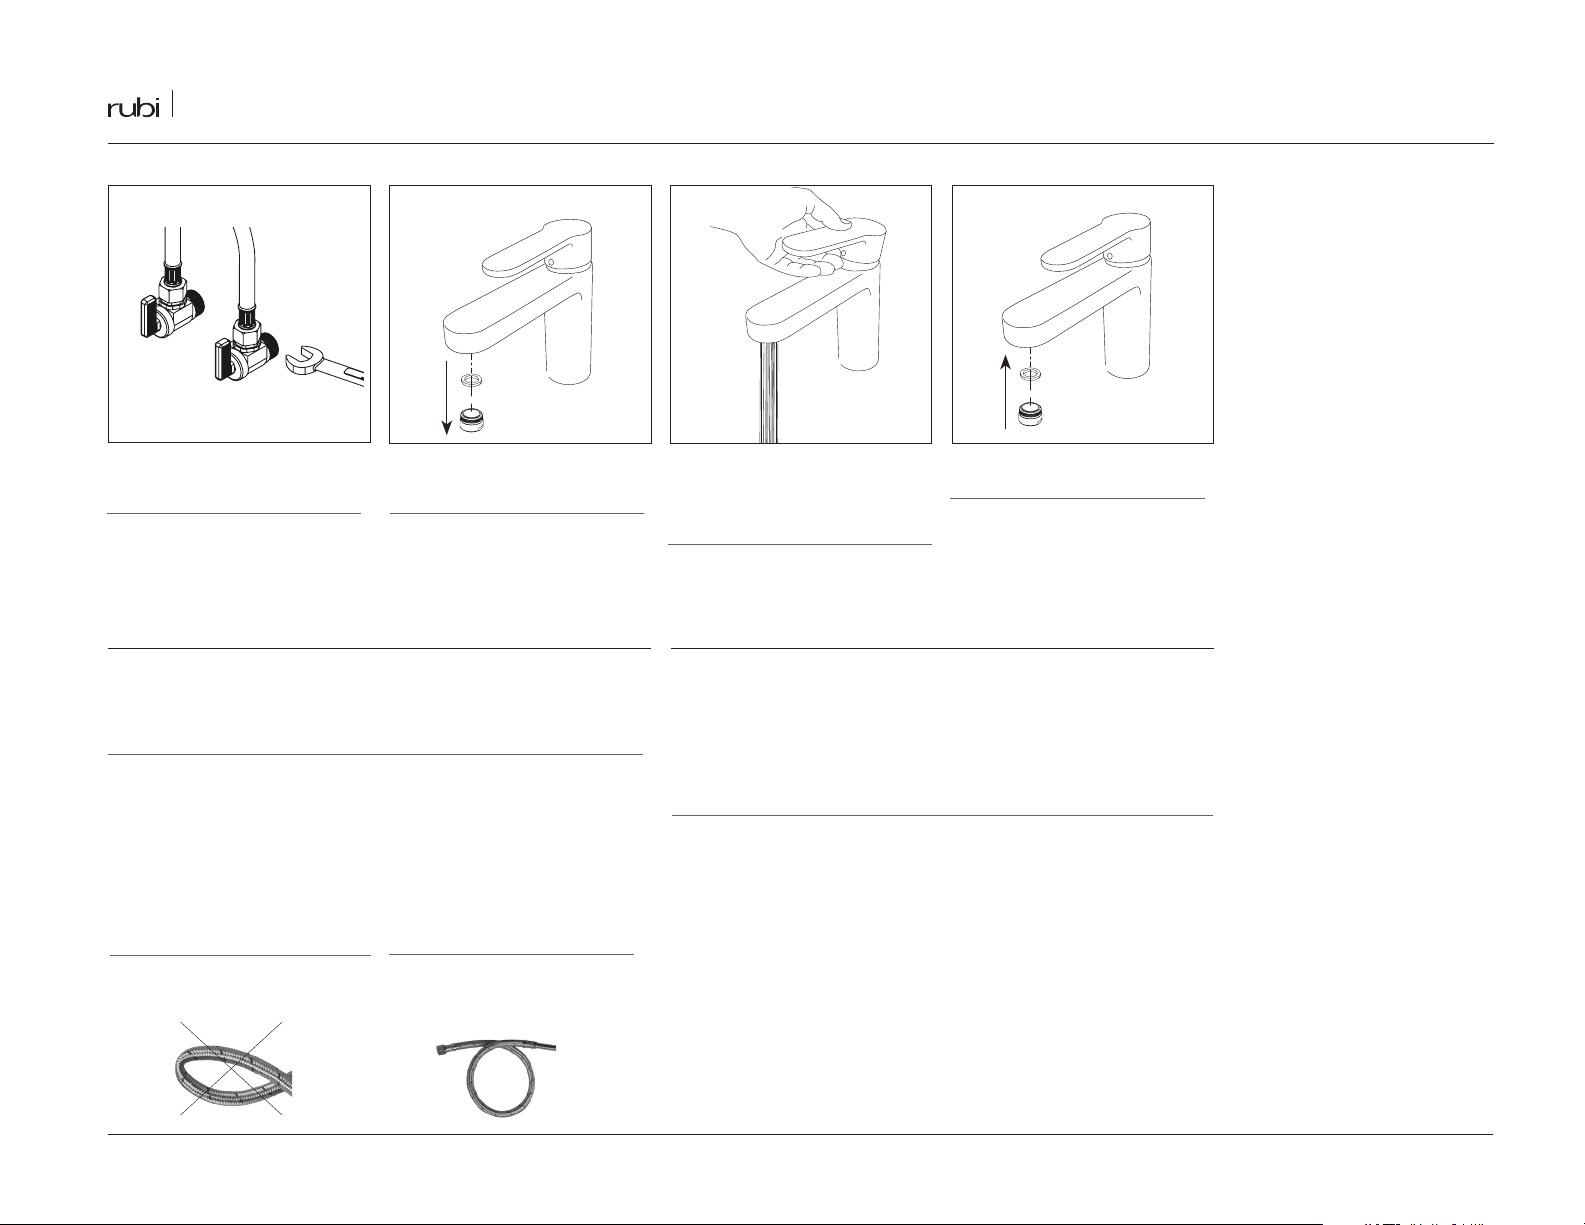
08
Fixez les flexibles d'entrée d'eau aux extensions
et aux valves d'arrêts respectives.
Thighten both water inlets hoses extensions
and to each ball valves.
01
À l'aide de la clé à molette, retirez l'anneau de
l'aérateur, l'aérateur et son joint d'étanchéité.
With the adjustable wrench,pull out the areator
ring, the aerator and its gasket.
02
Ouvrez l'eau à pleine capacité et laisser l'eau
froide couler pendant une minute puis l'eau
chaude pendant une autre minute pour purger
les conduits d'eau de tous résidus.
Open water at maximum capacity and let cold
water run for about a minute, then repeat with
the hot water to purge hoses and conduits out
of residues
03
Réinstallez l'aérateur et son joint d'étanchéité.
Put the aerator and rubber washer back in
place.
ÉTAPES / STEPS PRÉPARATION DU ROBINET / FAUCET PREPARATION
ENTRETIEN / MAINTENANCE
Pour nettoyer votre robinet, un savon doux, de l’eau chaude et un linge doux suffiront pour faire
disparaître saletés, tâches et traces d’accumulation de savon. Rincez après le nettoyage et asséchez
avec un linge doux et sec pour retrouver le lustre original de votre robinet. La garantie sera nulle
et non avenue dans les cas d’utilisation de produits nettoyants inadaptés (particulièrement ceux
contenant des agents abrasifs, cires, alcools, ammoniaques, javelisants, acides, des solvants
ou autres produits chimiques corrosifs), qu’ils soient utilisés par l’acheteur ou par un tiers pour
l’acheteur/propriétaire.
A mild detergent, warm water and a soft cloth will remove normal dirt and soap accumulations on
your faucet. Rinse thoroughly after cleaning and wipe with a soft dry cloth to restore original luster
on its surface. Do not use harsh abrasives cleaners to clean your faucet. The warranty will be void in
case of use of unsuitable cleaning products (especially those containing abrasive cleansers, waxes,
alcohols, ammoniated, bleach, acids, solvents or other harsh chemicals), whether they are used by
the purchaser or a third party for the buyer/owner.
ATTENTION / WARNING
Installation adéquate /
Proper installation
L'illustration ci-dessous montre une ins-
tallation appropriée du flexible. La courbe
du flexible n'est pas écrasée et permet un
raccord adéquat.
The illustration above shows a proper installa-
tion of the hose. The curve of the hose is not
crushed and allows an adequate fitting.
L'utilisation avec une substance autre que l'eau pourrait endommager et causer un bris d’équi-
pement. Éviter tout contact, ainsi que l’entreposage, avec les produits ménagers, chimiques et
corrosifs. Ne pas nettoyer avec des produits rugueux ou des matières abrasives. Serrez à la main
+ 1/4 de tour.
Using a substance other than water could damage and cause equipment failure. Avoid contact and
storage, with household products, chemicals and corrosive. Do not clean with rough or abrasive
materials. Hand tighten + 1/4 turn.
Installation inadéquate /
Improper installation
L'illustration ci-dessous montre une
installation inadéquate du flexible. La
courbe du flexible est trop aplatie et ne
permet pas une bonne circulation d'eau.
The illustration above shows an improper instal-
lation of the hose. The curve of the hose is too
flattened and does not allow a good water flow.


