manuals.online logo
Brands
  1. Home
  2. •
  3. Brands
  4. •
  5. Ruckus Wireless
  6. •
  7. Controllers
  8. •
  9. Ruckus Wireless SmartZone 300 User manual

Ruckus Wireless SmartZone 300 User manual

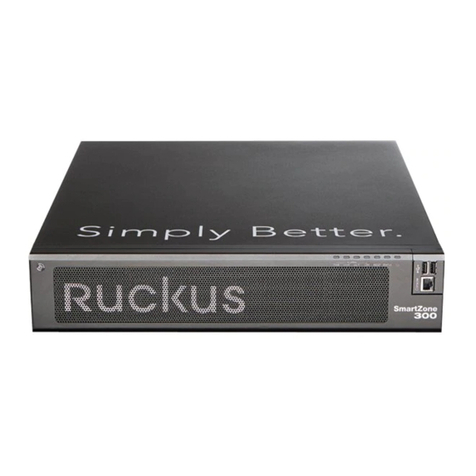
Ruckus SmartZone 300
Spare Fan Set
Quick Setup Guide for
SmartZone 5.1
This Quick Setup Guide provides basic instructions for
ordering and installing a spare fan assembly into the
Ruckus SmartZone 300 (SZ300) controller.
For information on advanced conguration and
management options, see the Getting Started Guide and
other appropriate documents, which are available for
download from the Ruckus Support website:
https://support.ruckuswireless.com/documents.
This Guide in Other Languages
请从以下网站获得该指南的简体中文版 https://
support.ruckuswireless.com.
Vous trouverez la version française de ce guide à
l'adresse suivante https://support.ruckuswireless.com.
このガイドの日本語版は https://
support.ruckuswireless.com でご覧ください。
이 가이드의 한국어 버전은 웹 사이트 (https://
support.ruckuswireless.com) 에서 확인하시기 바랍니다.
Veja a versão em português (Brasil) deste guia em
https://support.ruckuswireless.com.
Puede ver la versión en español (América Latina) de esta
guía en https://support.ruckuswireless.com.
Spare Fan Set Ordering Information
To order a spare fan set for the SmartZone 300 controller,
contact Ruckus Support.
For information on how to contact Ruckus Support, visit
https://support.ruckuswireless.com/contact-us. When
asked for the part number, provide the information in the
table below.
Part Number Description
902-S320-0000 Kit, Spare, fan assembly, SZ300 (6
fans)
Opening the Front Bezel
The front bezel helps prevent accidental access to the
controller's modules. Before you can install a module,
you must open the front bezel.
NOTE: If the controller is mounted in a rack with
adjacent units below the unit where a module needs to
be serviced, Ruckus recommends extracting the
controller from the rack approximately 5cm (2 in.). This
will provide clearance of the bezel when rotated out
towards you.
Follow these steps to open the front bezel.
1. With the controller in front of you, place your ngers
on both sides of the front bezel.
2. Pull the bezel toward you until it opens.
3. Gently lower the bezel to expose the controller's
replaceable modules.
FIGURE 1 Controller with the front bezel open
Replacing the Fan Assembly
After you have obtained a spare fan assembly and
opened the front bezel of the SmartZone 300 controller,
you are ready to install the fan assembly.
The controller has three hot swappable fan modules on
the front panel. Each of the fan module includes two high
performance fans that helps ensure optimized air ow in
and around the controller and an integrated fan LED that
indicates the status of the fan module (green means
operational, o means faulty).
Follow these steps to replace the fan assembly.
1. With the front bezel open, position the controller
facing you.
2. Locate the failed fan module (and the presence of a
spinning or stopped fan).
3. With the front bezel open, position the controller
facing you.
Using either your ngers or a Phillips screwdriver,
turn the two thumb screws (that secure the fan
module to the controller's chassis) counterclockwise
to loosen them.
FIGURE 2 Loosen the two thumb screws (circled in red)
that secure the fan module
4. Hold the thumb screws that you loosened and gently
pull them out to slide the failed fan module out of the
chassis.
5. Remove the replacement fan module that you
obtained from Ruckus from its packaging.
6. Orient the fan module with the cable guide to the
right.
7. Slide the replacement fan module in until it is fully
ush with the front of the chassis.
The fan LED turns green, which indicates that the fan
module is receiving power and operating normally.
8. Hand tighten the two captive screws.
You have completed replacing a fan module in the
SmartZone 300 controller.
Copyright © 2018 ARRIS Enterprises LLC. All rights reserved. Page 1 of 2
Published November 2018, Part Number 800-71881-001 Rev A
Closing the Front Bezel
After you complete installing a module, remember to
close the front bezel to prevent access to the modules
and protect them from dust and dirt.
If the controller is mounted in a rack, before completing
the following steps, grab the side handles on the
controller, and push the controller back into the rack.
Secure the controller to the rack using the rack fasteners.
Perform the following steps to close the front bezel.
1. With the controller in front of you, gently lift the bezel
and push it back onto the front panel of the
controller.
2. Gently press the bezel against the front panel until it
clicks into place.
The bezel should now be ush against the front
panel, completely covering it.
© 2018 ARRIS Enterprises LLC. All rights reserved.
ARRIS, the ARRIS logo, Ruckus, Ruckus Wireless, the Ruckus logo, and
the Big Dog design are trademarks of ARRIS International plc and/or
its aliates. All other trademarks are the property of their respective
owners.
Copyright © 2018 ARRIS Enterprises LLC. All rights reserved. Page 2 of 2
Published November 2018, Part Number 800-71881-001 Rev A

Other manuals for SmartZone 300

10

Other Ruckus Wireless Controllers manuals

Ruckus Wireless ZoneDirector 1100 User manual

Ruckus Wireless

Ruckus Wireless ZoneDirector 1100 User manual

Ruckus Wireless SmartZone 100 User manual

Ruckus Wireless

Ruckus Wireless SmartZone 100 User manual

Ruckus Wireless ZoneDirector 1100 User manual

Ruckus Wireless

Ruckus Wireless ZoneDirector 1100 User manual

Ruckus Wireless SmartZone 100 User manual

Ruckus Wireless

Ruckus Wireless SmartZone 100 User manual

Ruckus Wireless SmartZone 100 User manual

Ruckus Wireless

Ruckus Wireless SmartZone 100 User manual

Ruckus Wireless SmartZone 300 User manual

Ruckus Wireless

Ruckus Wireless SmartZone 300 User manual

Ruckus Wireless SmartZone 100 User manual

Ruckus Wireless

Ruckus Wireless SmartZone 100 User manual

Ruckus Wireless SmartZone 100 Service manual

Ruckus Wireless

Ruckus Wireless SmartZone 100 Service manual

Ruckus Wireless SmartZone 300 User manual

Ruckus Wireless

Ruckus Wireless SmartZone 300 User manual

Ruckus Wireless ZoneDirector 5000 User manual

Ruckus Wireless

Ruckus Wireless ZoneDirector 5000 User manual

Popular Controllers manuals by other brands

Texas Instruments TCAN4550-Q1 user guide

Texas Instruments

Texas Instruments TCAN4550-Q1 user guide

Mitsubishi AL2 Series Programming manual

Mitsubishi

Mitsubishi AL2 Series Programming manual

Panasonic AKHRP900P - CAMERA CONTROLLER HC Service manual

Panasonic

Panasonic AKHRP900P - CAMERA CONTROLLER HC Service manual

Roland BRIDGE CAST owner's manual

Roland

Roland BRIDGE CAST owner's manual

Siemens N 523/11 Technical product information

Siemens

Siemens N 523/11 Technical product information

Belimo AF120 US manual

Belimo

Belimo AF120 US manual

Full Gauge Controls MT-512G quick start guide

Full Gauge Controls

Full Gauge Controls MT-512G quick start guide

hager TX502 manual

hager

hager TX502 manual

AUMA SA 07.2 Operation instructions

AUMA

AUMA SA 07.2 Operation instructions

Precision Digital Corporation ProtEX-MAX PD8-6210 instruction manual

Precision Digital Corporation

Precision Digital Corporation ProtEX-MAX PD8-6210 instruction manual

HGM COMPUSHIFT Mini manual

HGM

HGM COMPUSHIFT Mini manual

Salus THB23030 quick guide

Salus

Salus THB23030 quick guide

Solamics Bunsen Air manual

Solamics

Solamics Bunsen Air manual

TRIATEK HMS-1655L installation manual

TRIATEK

TRIATEK HMS-1655L installation manual

NAiS AFP3434 Guide book

NAiS

NAiS AFP3434 Guide book

ComAp InteliNano NT Plus reference guide

ComAp

ComAp InteliNano NT Plus reference guide

Cairox S-TOUCH user manual

Cairox

Cairox S-TOUCH user manual

Elan OLE XL Specifications

Elan

Elan OLE XL Specifications

manuals.online logo
manuals.online logoBrands
  • About & Mission
  • Contact us
  • Privacy Policy
  • Terms and Conditions

Copyright 2025 Manuals.Online. All Rights Reserved.