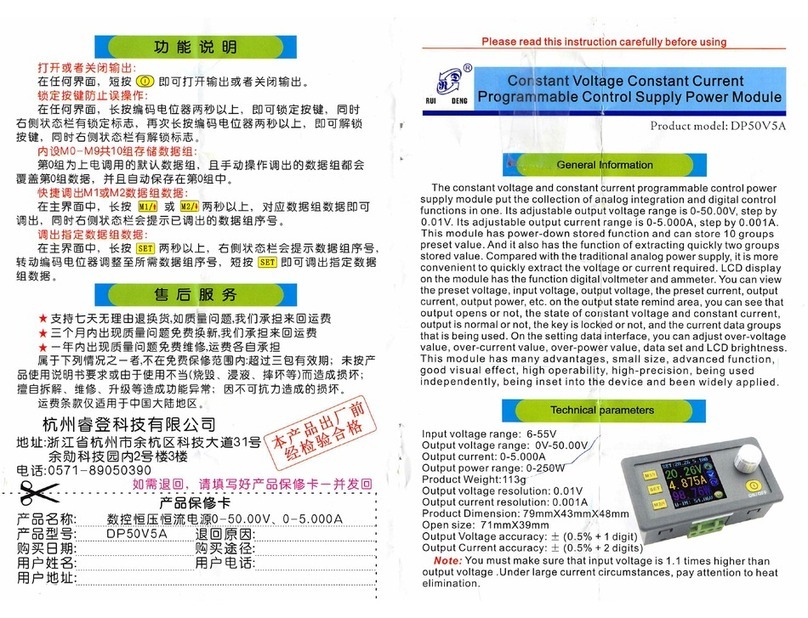
RuiDeng DPH3205 User manual

Digital Buck and Boost Digital Power Module DPH3205 RuiDeng
1
~
®
~
Digital Buck-Boost Supply Power Module
RUI
DEMG
Prod
uct model:
DPH3205
r-
------------------
--,
General
Information
T
he
cons
t
ant
voltage
and
constant
current Digital
cont
rol
power
supp
ly
module
put
the
collection
of
analog i
ntegrat
ion and
digita
l
con
trol
functions
in one. This
module
has
power
-d
own
stored
function
and
can
store
10
groups
prese
t
value
. And it al
so
has
the
function
of
extract
i
ng
qui
ckly
two
groups
storedvalue. Compared
wit
h the traditional
ana
log
power
supp
ly, itis
moreconveni
ent
to qui
ck
ly extractthe
vo
ltage
or
currentrequired
.LCD
display
on themodule hasthe
funct
ion ofdigital
vo
ltmeterand
ammeter
. You can view
the
preset
voltage,
input
vo
l
tage
,
output
vo
l
tage
,
the
preset
cur
rent,
output
cur
re
nt, o
ut
put
power.
On
t
he
ou
tput
sta
te r
emind
area,
you
can
see
that
output
opens
or
not
, t
he
st
ate
of
constant
vo
l
tage
a
nd
co
n
sta
nt
curren
t,
ou
tput
is
norma
l
or
not, the
key
is
l
ocked
or
not
, and
the
current
data
groups
thatis beingused. On the setting
data
i
nte
rf
ace
,
you
can
adjus
t
over-vo
l
tage
va
l
ue
,
over
-
current
va
l
ue,
over
-
power
val
ue,
data
set
and LCD
brightness.
T
his
mod
ule
adopts
buck
-
boost
structu
re;
whe
n
input
vo
lt
age
is
lo
wer
than,
equa
l
to
or
higher
than
output
voltage
,
ou
t
put
vo
l
tage
is
stil
l
stab
le
and
cha
n
geless.
This
feature
h
as
wi
de
range
of
app
l
ication.
Techn
i
cal
parameters
Input
voltage
range
:
DC6-40V
Outp
ut
vo
l
tage
range
: OV-32.0
0V
Output
curren
t: 0-
5.000A
Out
put
power
r
ange:
0-160W
Max
al
lowable
i
nput
current:
1
OA
Note: 1.
If
you
want
to ensure
output
at
full
load
,
you
must
make
sure
that
input
is
higher
than
18V
and
180W
;
pay
attention
to
heat
elimi
nation
at
full
load
.
2. Connection
between
display
part
and
power
part
should
be
according
to the
corresponding
words
.
Otherwise
it
will
not
work
by
wrong
connection
.
Product
Weight:22
7g
Output
ri
pple
:
about
1OOmVpp
Length
of
connecting
li
ne:200mm
Disp
l
ay
mod
u
le
size:
79mmX43mmX41
mm
Open
si
ze:
76mmX39mm
Power
modu
le
size:93mmX71
mmX42mm
Fixed
hole
ce
nt
er
distance
:
86mm,
64mm
Temperat
ur
e
of
the
ap
pli
ca
tio
n
environ
m
ent:
-
10
'
C-45
'C
Output
vo
l
tage
program
and
read
back
resolut
i
on
: 0.01V
Output
cu
rr
ent
program
and
read
back
resolution
: 0.
00
1A
Output
voltage
program
and
read
back
accuracy
:+
(0
.5% + 1
digit)
Output
cur
r
ent
program
and
read
back
accuracy:
+
(0.5%
+ 3 di
gits
)

2
Connection description
~
-
-
~
IN+:
Input
positive
IN-:
Input
negative
O
UT
+:
Output
posi
ti
ve
OUT-:
Output
negati
Note:
Input
voltage
range is
DC6-40V
,
and
40V
is
the
limit
voltage.
please
leave
a room
to use,
or
else
it
will
be
burnt. The
input
must
be
DC
power
supply
,
not
AC
220V,
or
else
it
will
be
burnt
too. Though
this
module
has
reverse
connection
protection
and
output
short
circuit
protection,
you
must
be
in
strict
accordance
with
connection
description
to
connect.
If
you
connectthe
supply
power
with output, the module
will
be
burnt.
Voltagesetting/Page
up
to choose/Shortcutextract
--,.
M1
da
ta
gro
up
Da
ta
sett
ing/ Extractvalue
of
the specffied data
gro
up/
Storevalue Into the
spec
ified data group
Current setting/Pagedown
tochoose/Shortc
ut
extract
M2 data gr
oup
Panel description
Coding potentiometer/
Data adju
stment/
Lock
all buttons
--
ooen
or
cl
ose
output
Display interfacedescription
The
preset
value
of
output
voltage
--
Th
e
actual
va
l
ue
__
_
of
output
voltage
Th
e
actual
val
ue
of
output
current
--
-1:
T
he
actual
val
ue
__
_
of
output
power
The
actual
value
of
in
put
vo
l
tage
--
Presetoutput voltage
Presetoutput
r•m
rPnl
Preset
ovEtr-v·olt•agE•
--
..
• •
Presetdata set
---'"'
fniT
11
'1'1
11
IH·J~~
U
-S
ET
: 1
'l
rtiiU
I
-SET
:
~
.
lllllA
S
OUI':
I I
111\U
'-t
S-OCP:S.!OOA
CV
S
01'1':
1'>11.1\W
B-LED'
""""
4
M-PRE:Mfl
Of'f'
constant
Open
or
close
o
utput
prompt
The main interface
The actual
va
lue
of
output
voltage and outputcurrent
Data setting interface

3
Operating Instructions
Whe
n connect the
power
supply, the
sc
reen sho
ws
welcome win
dow
fi
rstly
and then
comes
into main int
erface.
On the
ma
in
inte
r
face
, the o
ut
put
set
voltage
value
and the
output
set
current
val
ue
is on the top
of
the
screen.
S[T
1
.?
fJO
'J
100
12
oov
~
~
4.
894A
"
U
JN
J',
•_,
!,'-'
~
The big
font
value
on
the l
eft
are
the
act
ual
output
voltage, the actual ou
tput
Welcome window Main Interface
cur
r
ent
and the
ac
t
ual
output power.
Input
voltage
is
on
the bottom
of
the
sc
reen. T
here
are
some
run
n
ing
status
icons
on
the right of the screen,
key
l
ock
icon, ab
norma
l output
stat
us
icon,
constant
vo
l
tage
and const
an
t
cur
r
ent
icon,
da
ta set
ti
p
icon
and opening
or
closing
ou
t
put
icon.
Set
the
output
voltage
and
output
current
on
the main
interface
.
Press I
V/
tJ key shortl
y,
you canen
ter
into voltage settingstatus. Then
pressthe coding potentiometer,andthen enterto adjustthe numerical value.
Pr
ess
coding poten
tiomete
r
to
enter
i
nto
the
status
of
adjusti
ng the
numerical val
ue
you want to ad
ju
st.Turn coding potentiometer
to
ad
ju
st
the
nu
me
rical value.Tu
rn
by
clockwi
se
rot
at
ion to increase the numerical valu
e;
Turn
by
counter
clockw
i
se
to
dec
r
ease
the n
umerica
l value. If you want
to
exitadjusting t
he
numerical value, pressshortly
@II
.In the sametime the
preset
val
ue
will
be
stored.
Or
you
can
do
nothing in one
minu
t
e,
the status
will
be
automatically
ex
isted and the
preset
will
be
stored too. You can
press
IA/I I to set the
output
current
by
the
same
way.
Set
the
data
on
the
data
setting
Interface
On
th
e main interface, you can press l
sET
l
shor
tly to enterinto data se
tt
ing
int
erface
. On the data
sett
ing interface,
press
sh
ortly
[Y
it
l
or
I
A/
I Ito
page
up
or
page
down to
U-SET
or
I-SET.
and
then
set
the
output
vol
tage
and
output
current
by
same
way
used in the
main
interface
.
Set
the
protection
value.
Page up
or
page
down
to
S-OVP, S-
OC
P
or
S-OPPplace
to setover-voltage
value,
over-curr
ent
value and
over-powe
r
val
ue
correspo
ndingly;
when
the value
is
up
to
the
sett
ing
value, outp
ut
will be
closed;
and
there
is a pr
omp
t
on
r
igh
t
,,
'
~~·
xt:T
·~f
·
' '
~
- t
·
liPf
•!
TI•
"
r
~t
' '
lll~
~
\ill
I!·
,,,
~
\I
tilt•
1''''
,,
....
' e
~·
I
ill
of
scree
n .And then
press
shor
tly the coding poten
tiometer
Data
setting
to enter into the
status
of
adjusting the n
umerica
l val
ue
you
interface
want
to adjust. Turn
coding
pot
entio
met
er
to
adjust
the nu
mer
ical value.
If
you
wa
nt to
exit
adju
sti
ng the num
erical
value, press
shortly
l
sEr
lkey.
Adjust
the
brightness
of
screen
.
Page up
or
page
down
to
B-LED, and th
en
pr
ess
shortly the
codi
ng
potentiometer
to en
ter
i
nto
the
status
of
adju
st
ing the
brightness
of
screen.
Turn
coding
pote
nt
iometer
to
ad
j
ust
the
n
umerica
l val
ue
you
need.
If
you
want
to exit
adjusting
the n
umerica
l val
ue
, press (
sE
Tj
shortly. There
are
six
br
i
ghtness
levels
of LCD
sc
reen,
0-5
1evel. Rank 0
is
the
da
r
kest
; rank
5 is the
brig
htest.
Yo
u
can
ch
oose
what
you like.
Data
setting
and
store
thespecified
data
group
.
Page
up
or
page down
toM-PRE
, and then
press
shortly the coding
po
t
ent
iometer to
ente
r
into
the sta
tu
s
of
choosing the
data
groups.
Tur
n

4
coding
potent
io
meter
to ch
oose
the data
group
you need to view.
Then
the
data
group
you
need
wil
l
be
disp
layed
.
And
then
press
the
cod
ing
potentiometer
to
en
t
er
i
nto
stat
us
of
ch
ang
ing
output
state. Turn
coding
potentiometer
to
choose
ON
or
OFF.
When
choose
ON, the
data
gro
up is
extrac
ted and the
output
status
remain the same.
When
choose
OFF, the
data
gro
up is extracted and the
output
is closed.
If
you wantto exitchoosing
thedata group,
press
lssrj shortly. Then
press
short
ly L
v/
t)
or
[M!)
to
page
up
or
page down
to
ot
her
place
to
ad
j
ust
the data you need.
After
data
setting
done,
keep
press
ing IsETI
mo
re than
2s,
all
the
data
you
set
are
automatica
lly
stored
into
thespecified
data
group. In the same
lime
,
you can
see
the
group
nu
mber
on the
right
of
screen. Now you can p
ress
I
sET
] sh
ortly
back
to
the main i
nter
face.
Set
default
boot
open
or
close
output
Page up
or
page down
to
S-INI, and then
press
short
ly the codi
ng
potentiometer
to
enter
i
nto
the setting status.
Set
ON
,
default
boot
open;
set o
ff
,
de
f
au
lt boot close.
Function
description
Open
or
close the output:
You
can
press
(~)
to
open or
close
the
output
on
any
inte
rface
.
Lock
the
button
to
avoid
wrong
operation
:
On the any interface, you can keep pressingcoding potentiometermore
than 2s,
all
b
utt
ons
are locked.You can see the
key
lo
ck
icon on the
right
of
screen.
If
you
wa
nt to
un
l
ock
al
l
buttons
,
keep
pressing
coding
potentiometer
more than
2s
, all
buttons
are
unlocked. The key un
lock
ic
on
will
be di
sp
layed on the
right
of
screen.
MO
-
M9
ten data
groups
:
MO
group
is
thebootdefault datagroup.
When
you
ext
r
ac
t the data group
you
need,
this
data
group
will
cover
MO
data
group
an
d be
automatically
stored
on
MO
data
group.
Extract
Shortcut
storage
data
group
M1
or
M2:
On the main interface,
keep
pressing
IV/t I
or
!A
ft•more than 2s,
you
can
extract
Shortcut
storage data group M1
or
M2
qu
ick
ly
. In the
same
time
the
cor
r
esponding
data
group
numberwill
disp
layed
on
the right
of
the
screen.
Extract
thespecified
data
group
:
On the main interface,
keep
press
ing
[
SET
] more than
2s
, the
sequence
number
of
data
group
will
be
disp
layed on the
right
of
the
screen
, you can
turn coding
potentiometer
to
choose
data
group
you need.And
then
press
:ssrlshortly, you can
extract
the specified
data
group
you need.

Technical parameters:
Input voltage range: 6.00-40.00V
Output voltage range: 0V-32.00V
Output current: 0-5.000A
Output power range: 0-160W
Product Weight: about 227g
Display module size: 79*43*41(mm) (L*W*H)
Open size: 71mm*39mm
Power module size: 93*71*41(mm) (L*W*H)
Length of connecting line: 200mm
Fixed hole center distance: 86mm, 64mm
Max allowable input current: 10A
Output ripple: about 100mVpp
Output voltage program and read back resolution: 0.01V
Output current program and read back resolution: 0.001A
Output Voltage program and read back accuracy: ± (0.5% + 1 digit)
5

Output Current program and read backaccuracy: ± (0.5% + 3 digits)
Temperature of the application environment: -10°c ~45°c
6
Table of contents
Other RuiDeng Control Unit manuals
Popular Control Unit manuals by other brands

BENDIX
BENDIX E-10P DUAL BRAKE VALVES manual

Emerson
Emerson Fisher V270 instruction manual

Texas Instruments
Texas Instruments ADC12DJ5200RF user guide

SES-imagotag
SES-imagotag V:IoT APG2-PCIA-A installation manual

Apollo
Apollo ApolloPress APL77V10711 Installation, operation, maintenance guide

American Standard
American Standard 7017 Series installation instructions