6www.Rustica.com
STRUT HANGER Installation Instructions
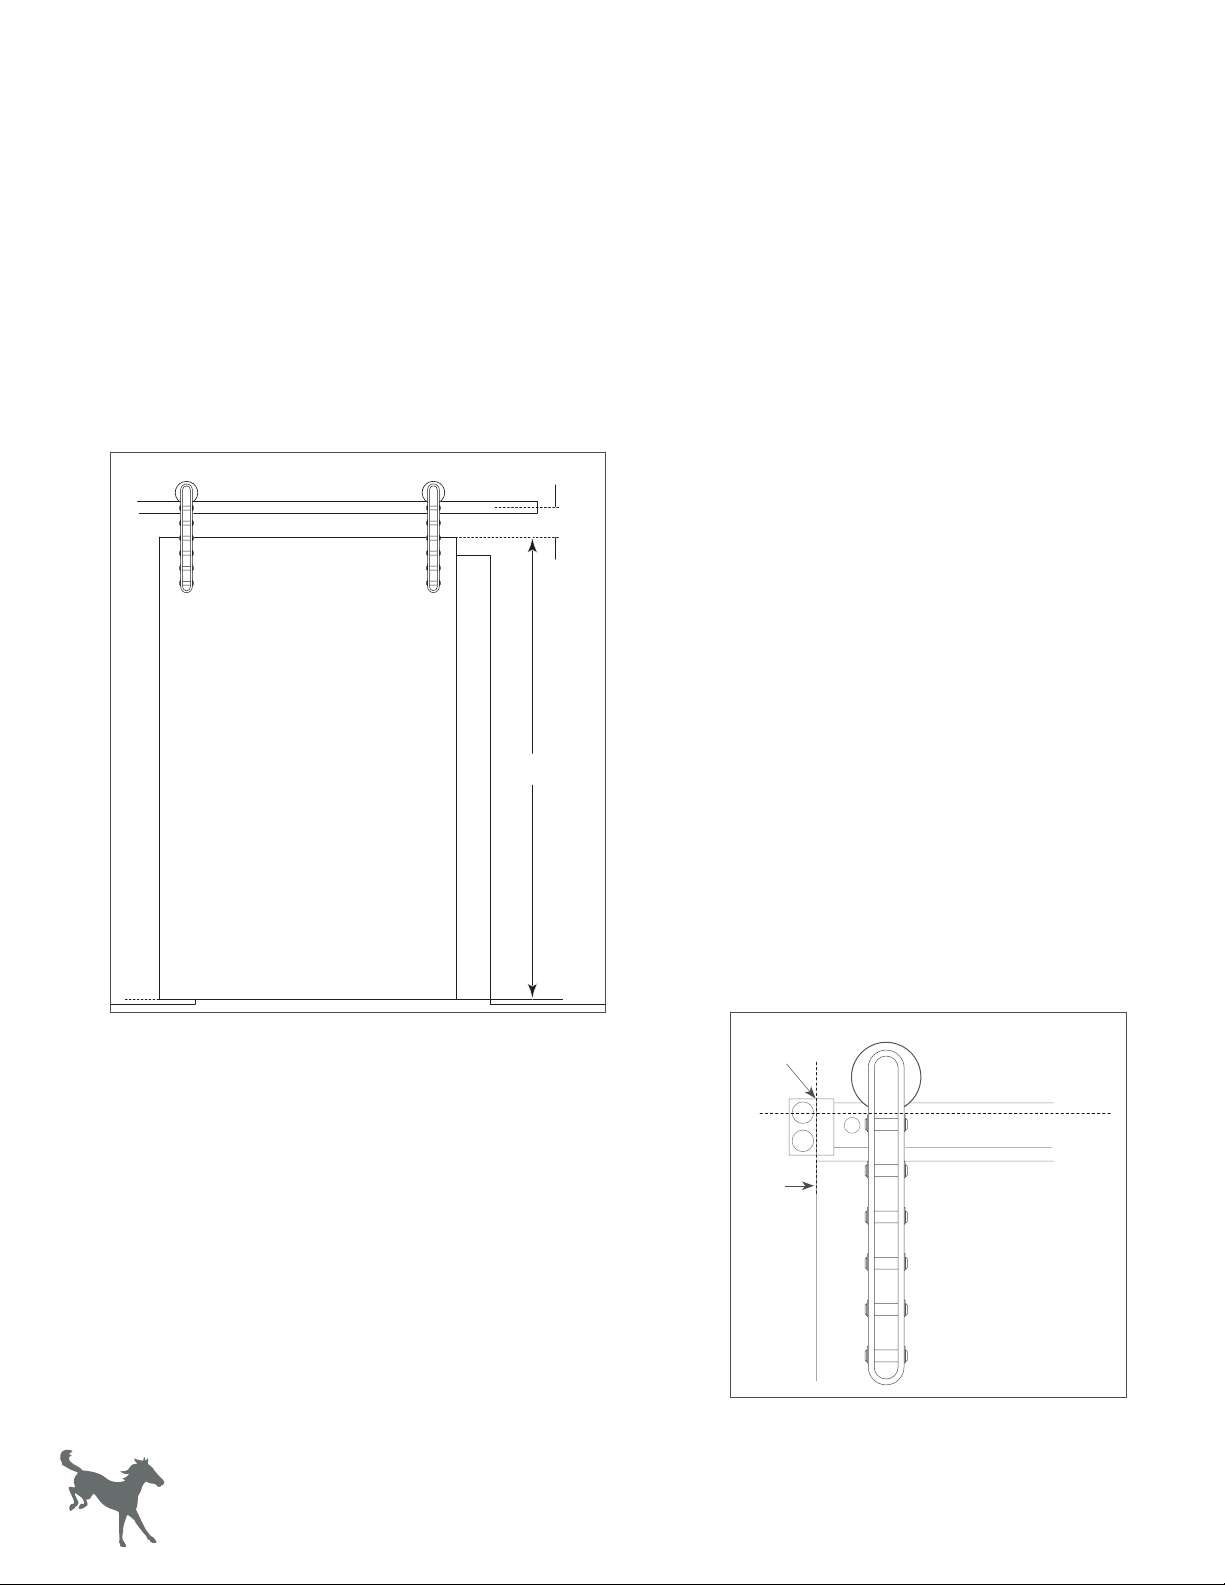
2-1/4”
Door Height
1/2”
Figure 2
Figure 1
Door
Door
edge
Bracket
interior
angle
1. To determine where the track should be installed,
first measure the height of the door, then add
2-3/4” to the door height. 1/2” will be for the
clearance between the bottom edge of the door
and the floor. 2-1/4” will be from the top edge of
the door to the center of the track (Figure 1).
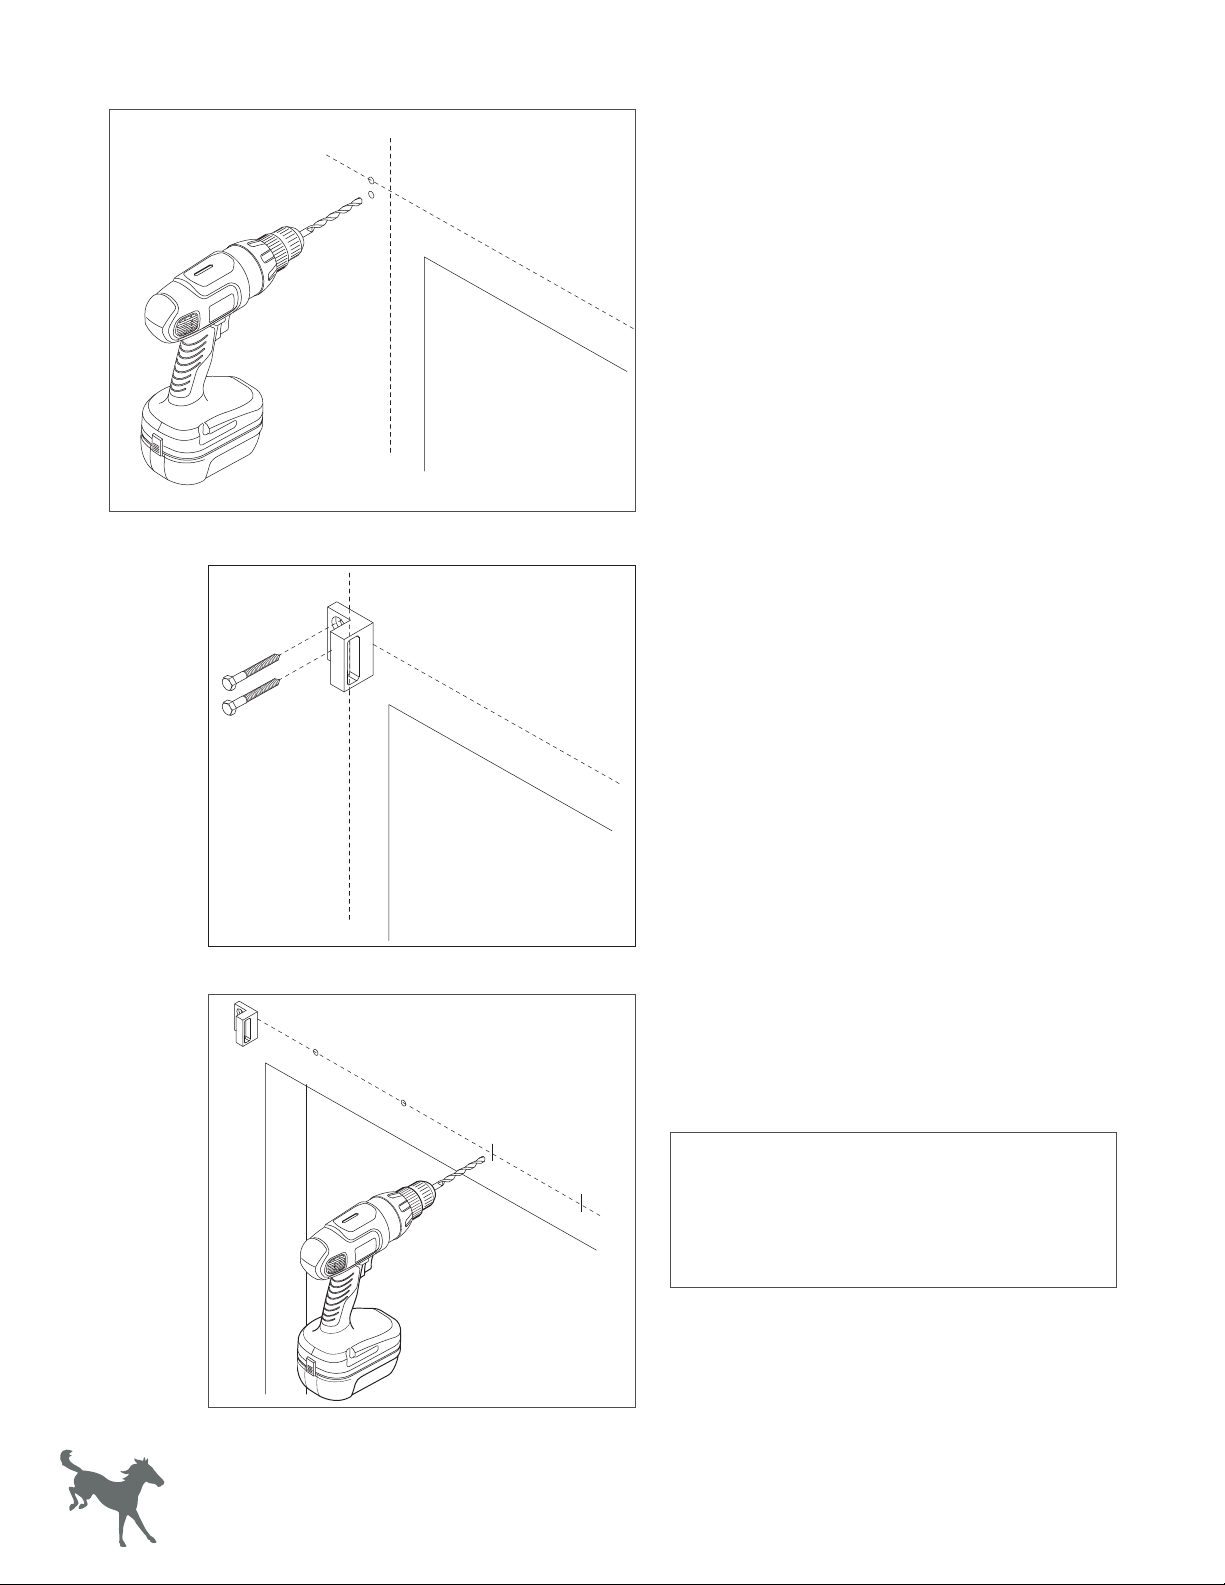
2. Using a level and a pencil, make a line above
the doorway.
3. The interior angle of the bracket should be in
line with the edge of the door. This is individual
preference and will depend on how far beyond the
doorway the door will overlap. Draw a vertical line
where the door will hang in the closed position
(Figure 2).
4. Position an end bracket so the interior angle of the
bracket is in line with the vertical line and the line
above the door is centered in the top hole of the
bracket (Figure 2). Using a pencil, mark the position
of both top and bottom holes.
FIRST THINGS FIRST
Check to see if the floor below the track area is level. If the floor rises more than 1/2” the door may rub or
not slide open completely. If the floor is not level, measure from the highest point of the floor surface to the
recommended track placement and adjust track placement accordingly.
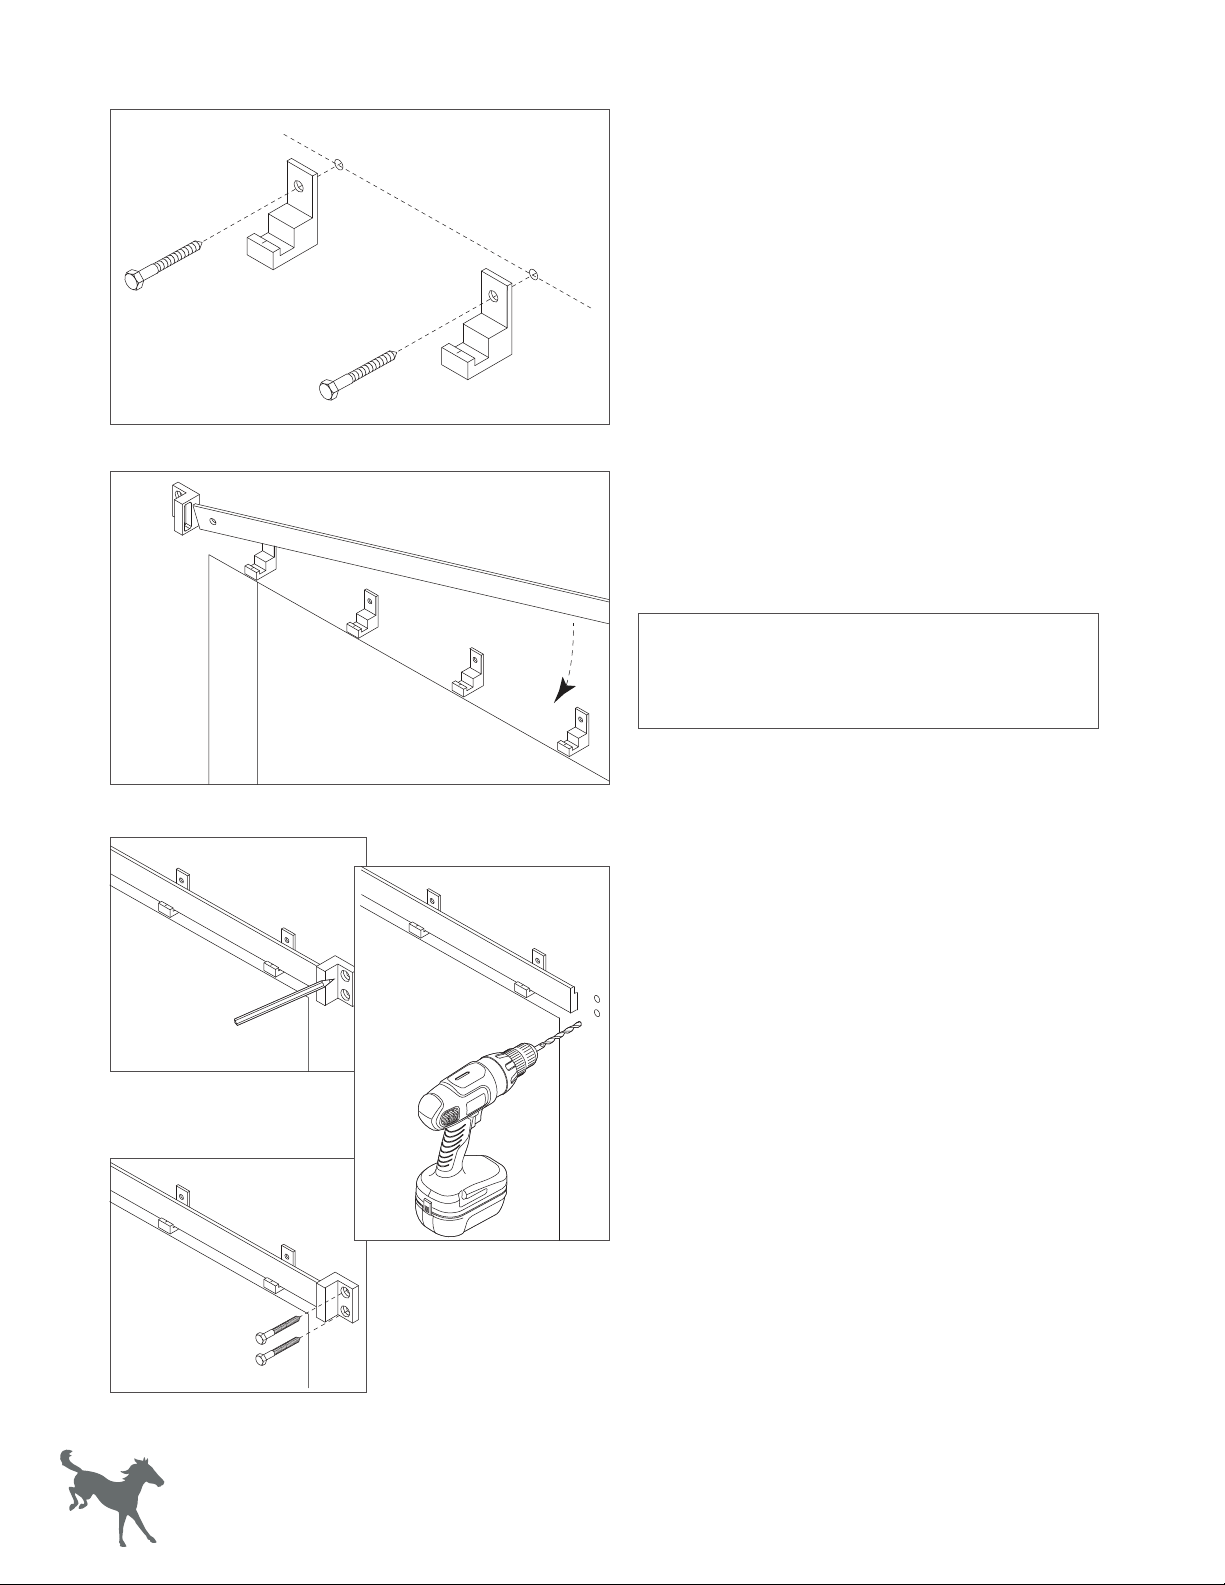
Ensure the track will be installed onto wall studs. If wall studs are not lining up with the installation a header will
be required to provide the necessary strength and stability for the track and door.
TRACK & DOOR INSTALLATION