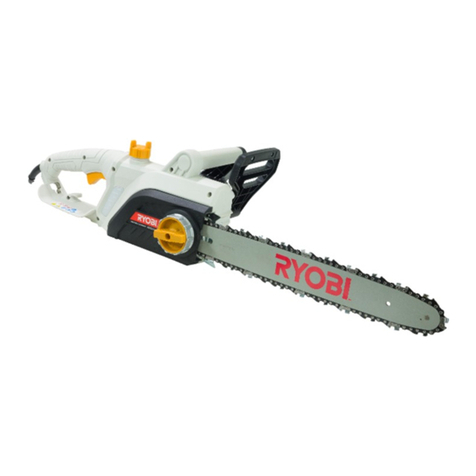
Ryobi RCS2340B User manual

ORIGINAL INSTRUCTIONS
Electric Chainsaw
RCS2340B


1
INTENDED USE
!
"
WARNING
#
$
WARNING
% &
'
"
$
GENERAL POWER TOOL SAFETY WARNINGS
WARNING
Read all safety warnings and all instr ctions.
Save all warnings and instr ctions for f t re reference
()
*+*+
WORK AREA SAFETY
Keep work area clean and well lit.%
Do not operate power tools in explosive
atmospheres, s ch as in the presence of flammable
liq ids, gases or d st.
Keep children and bystanders away while operating
a power tool. "
ELECTRICAL SAFETY
Power tool pl gs m st match the o tlet. Never
modify the pl g in any way. Do not se any adapter
pl gs with earthed (gro nded) power tools.
,
Avoid body contact with earthed or gro nded
s rfaces, s ch as pipes, radiators, ranges and
refrigerators.
Do not expose power tools to rain or wet conditions.
#
Do not ab se the cord. Never se the cord for
carrying, p lling or npl gging the power tool.
Keep cord away from heat, oil, sharp edges or
moving parts."
When operating a power tool o tdoors, se an
extension cord s itable for o tdoor se. ,
If operating a power tool in a damp location is
navoidable, se a resid al c rrent device (RCD)
protected s pply.,-%"
PERSONAL SAFETY
Stay alert, watch what yo are doing and se
common sense when operating a power tool. Do
not se a power tool while yo are tired or nder the
infl ence of dr gs, alcohol or medication.&
'
Use personal protective eq ipment. Always wear
eye protection.
'
Prevent nintentional starting. Ens re the switch
is in the off-position before connecting to power
so rce and/or battery pack, picking p or carrying
the tool.%
Remove any adj sting key or wrench before t rning
the power tool on.&
'
Do not overreach. Keep proper footing and balance
at all times.
.
Dress properly. Do not wear loose clothing or
jewellery. Keep yo r hair, clothing and gloves away

2
from moving parts.
If devices are provided for the connection of dust
extraction and collection facilities, ensure these are
connected and properly used.
POWER TOO USE AND CARE
Do not force the power tool. Use the correct power
tool for your application.
Do not use the power tool if the switch does not turn
it on and off.
Disconnect the plug from the power source and/or
the battery pack from the power tool before making
any adjustments, changing accessories or storing
power tools.
!
Store idle power tools out of the reach of children
and do not allow persons unfamiliar with the power
tool or these instructions to operate the power tool.
Maintain power tools. Check for misalignment or
binding of moving parts, breakage of parts and any
other condition that may affect the power tool-s
operation. If damaged, have the power tool repaired
before use. "
Keep cutting tools sharp and clean.
!
Use the power tool, accessories and tool bits etc,
in accordance with these instructions, taking into
account the working conditions and the work to
be performed.
Keep handles and grasping surfaces dry, clean
and free from oil and grease.
#
SERVICE
Have your power tool serviced by a qualified repair
person using only identical replacement parts.
ADDITIONA GENERA SAFETY WARNINGS
$!
%
&
'
()
*
!
'
!
+ ,
-.
!
'/
!
0 1
#!
2 !
!
, '
2
!!!!
,
3$!
!
$! !
4
'
!
$
$
WARNING
3
&
04$'1
56
3 #
$!
'#
7
/
+#
3

3
Make sure the power cord is positioned so that it
cannot be damaged by the cutting means and will not
be stepped on, tripped over, or otherwise subjected to
damage or stress.
Never pick up or carry the product by the electric cable.
Never pull the power cord to disconnect from the power
supply.
Keep the power cord away from heat, oil, and sharp
edges.
CHAINSAW SAFETY WARNINGS
Keep all parts of the body away from the saw
hain when operating the produ t. Before you
start the hainsaw, make sure the saw hain is not
onta ting anything. A moment of inattention while
operating chainsaws may cause entanglement of your
clothing or body with the saw chain.
Always hold the hainsaw with your right hand
on the rear handle and your left hand on the front
handle. Holding the chainsaw with a reversed hand
configuration increases the risk of personal injury and
should never be done.
Hold the power tool by gripping surfa e only,
be ause the saw hain may onta t hidden wiring
or its own ord. aw chains contacting a !live" wire
may make exposed metal parts of the power tool !live"
and could give the operator an electric shock.
Wear safety glasses and hearing prote tion. Further
prote tive equipment for head, hands, legs and feet
is re ommended. Adequate protective clothing will
reduce personal injury by flying debris or accidental
contact with the saw chain.
Do not operate a hainsaw in a tree. Operation of
a chainsaw while up in a tree may result in personal
injury.
Always keep proper footing and operate the
hainsaw only when standing on fixed, se ure and
level surfa e. lippery or unstable surfaces such as
ladders may cause a loss of balance or control of the
chainsaw.
When utting a limb that is under tension be alert
for spring ba k. When the tension in the wood fibres is
released the spring loaded limb may strike the operator
and/or throw the chainsaw out of control.
Use extreme aution when utting brush and
saplings. The slender material may catch the saw
chain and be whipped toward you or pull you off
balance.
Carry the hainsaw by the front handle with the
hainsaw swit hed off and away from your body.
When transporting or storing the hainsaw always
fit the guide bar over.
chainsaw will reduce the likelihood of accidental contact
with the moving saw chain.
Follow instru tions for lubri ating, hain tensioning
and hanging a essories. Improperly tensioned
or lubricated chain may either break or increase the
chance for kickback.
Keep handles dry, lean, and free from oil and
grease. Greasy, oily handles are slippery causing loss
of control.
Cut wood only. Do not use hainsaw for purposes
not intended. For example: do not use hainsaw
for utting plasti , masonry or non-wood building
materials. Use of the chainsaw for operations different
than intended could result in a hazardous situation.
Causes and operator prevention of ki kba k:
Kickback may occur when the nose or tip of the guide bar
touches an object, or when the wood closes in and pinches
the saw chain in the cut.
Tip contact in some cases may cause a sudden reverse
reaction, kicking the guide bar up and back towards the
operator.
push the guide bar rapidly back towards the operator.
Either of these reactions may cause you to lose control of
the saw which could result in serious personal injury. Do
not rely exclusively upon the safety devices built into your
saw. As a chainsaw user, you should take several steps to
keep your cutting jobs free from accident or injury.
Kickback is the result of tool misuse and/or incorrect
operating procedures or conditions and can be avoided by
taking proper precautions as given below:
Maintain a firm grip, with thumbs and fingers
en ir ling the hainsaw handles, with both hands
on the saw with your body and arms positioned to
allow you to resist ki kba k for es. Kickback forces
can be controlled by the operator, if proper precautions
are taken. Do not let go of the chainsaw.
Do not overrea h and do not ut above shoulder
height. This helps prevent unintended tip contact and
enables better control of the chainsaw in unexpected
situations.
Only use repla ement bars and hains spe ified
by the manufa turer. Incorrect replacement bars and
chains may cause chain breakage and/or kickback.
ADDITIONAL CHAINSAW SAFETY WARNINGS
It is recommended to cut logs on a saw-horse or cradle
when operating the product the first time.
Ensure all guards, handles and spiked bumper are
properly fitted and are in good condition.
The product is heavy, so the operator must be
physically fit. The operator should be alert, have a good
vision, mobility, balance, and manual dexterity. If there
is any doubt, do not operate the product.
Do not start using the product until you have a clear
work area, secure footing, and a planned retreat path
away from the falling tree.
Beware of the emission of lubricant mist and saw dust.
Wear a mask or respirator, if required.
Always keep the power cable tidy and away from the
area of cutting. Apart from the danger of electrocution,
untidy cables cause falls and trips.

4
!"#
$
% & #
"
#
'
"("
# $ ###
$
$ %
)#
(
*#
%#$
""#"
+#
,
#
#" "
#
% - # $
-#
. /" (
# # " " # "
%
#
0/###
#&&"
#"#1
!#
.
$
2/
Personal protective equipment
3 ( ("
" # $
%
,
Safety helmet
Hearing protection
Eye and face protection
Gloves
Leg protection (chaps)
Chainsa safety boots
Chainsa jackets for upper body protection
INSTRUCTIONS CONCERNING THE PROPER TECH-
NIQUES FOR BASIC FELLING, LIMBING, AND CROSS-
CUTTING
Understanding the forces ithin the ood
'
45
/ %
"4#5
0
"
0"
#%
Felling a tree
See page 19 - 20.
'#
"
#
%
" #
0 #
% #
#
%
/#/
!" "
"
$
" " #" "

5
See page 19 - 20.
See page 19 - 20.
!"#
$%
&
'
( ) )
)
*
+
)
Removing buttress roots
See page 18.
',
-
) -
)
Push and pull
)
)
))./
0)
./
1
Saw jammed in the cut
2&)
)
)
) )
) ( 1
)
)
Skating / Bouncing
*
)
)
)
)
,
Bucking a log
See page 21.
+ (
*
)
)*
./
*
*
*)
* 3 4
, )
&5'
)
')
Limbing a tree
See page 22.
6*
- +
Springpoles
See page 22.
' )
)
7
*
8) &
))

6
WARNING
Springpoles are dangerous and could strike the operator,
causing the operator to lose control of the chainsaw.
This could result in severe or fatal injury to the operator.
This should be done by trained users.
TRANSPORTATION AND STORAGE
See page 27 - 30.
Stop the product and disconnect it from the power
supply. Allow the product to cool down before storing
or transporting.
Clean all foreign material from the product. Store it in a
cool, dry, and well-ventilated place that is inaccessible
to children. eep away from corrosive agents such
as garden chemicals and de-icing salts. Do not store
outdoors.
Fit the guide bar cover before storing the product or
during transportation.
For transportation, secure the product against
movement or falling to prevent injury to persons or
damage to the product.
MAINTENANCE
Always keep the product in good working condition.
WARNING
Use only original manufacturer’s replacement parts,
accessories, and attachments. Failure to do so can
cause possible injury, poor performance, and may void
your warranty.
WARNING
Servicing requires extreme care and knowledge
technician. Have the product serviced by an authorised
service centre only. When servicing, use only original
replacement parts.
WARNING
Disconnect the product from the power supply before
adjustment, maintenance, or cleaning. Failure to do so
could result in serious personal injury.
You may only make adjustments or repairs described
in this manual. For other repairs, have the product
serviced by an authorised service centre only.
Consequences of improper maintenance, removal, or
modification of safety features like the chain brake,
ignition switch, hand guard (front and back), spiked
bumper, chain catcher, guide bar, low-kickback saw
chain may cause the safety features to not function
correctly, thus increasing the potential for serious injury.
eep the product professionally maintained and safe.
Sharpening the chain safely is a skilled task. Therefore,
the manufacturer strongly recommends that a worn or
dull chain is replaced with a new one, available at your
authorised service centre. The part number is available
in the product specification table in this manual.
Follow instructions for lubricating and chain tension
checking and adjustment.
After each use, clean the product with a soft dry cloth.
Check all nuts, bolts, and screws at frequent intervals
for security to ensure the product is in safe working
condition. Any part that is damaged should be properly
repaired or replaced by an authorised service centre.
RESIDUAL RISKS
Even when the product is used as prescribed, it is still
impossible to completely eliminate certain residual risk
factors. The following hazards may arise during use, and
the operator should pay special attention to avoid the
following:
Injury caused by vibration
Always use the right tool for the job. Use designated
handles. Restrict working time and exposure.
Exposure to noise can cause hearing injury.
Wear hearing protection and limit exposure.
Contact with exposed saw teeth of the chain (cutting
hazards).
Unforeseen, abrupt movement or kickback of the guide
bar (cutting hazards).
hazards).
Thrown out pieces of the work piece (wood chips,
splinters).
Inhalation of saw dust and particles or emission from
the petrol engine.
Skin contact with petrol/oil.
RISK REDUCTION
It has been reported that vibrations from hand-held tools
may contribute to a condition called Raynaud’s Syndrome
in certain individuals. Symptoms may include tingling,
upon exposure to cold. Hereditary factors, exposure to
cold and dampness, diet, smoking and work practices
are all thought to contribute to the development of these
symptoms. There are measures that can be taken by the
operator to possibly reduce the effects of vibration:
eep your body warm in cold weather. When operating
the unit wear gloves to keep the hands and wrists
warm. It is reported that cold weather is a major factor
contributing to Raynaud’s Syndrome.
After each period of operation, exercise to increase
blood circulation.
Take frequent work breaks. Limit the amount of
exposure per day.
retailers are designed specifically for chainsaw use,
which give protection, good grip and also reduce the
effect of handle vibration.

7
If you experience any of the symptoms of this condition,
immediately discontinue use and see your physician.
WARNING
Injuries may be caused, or aggravated, by prolonged
use of a tool. When using any tool for prolonged periods,
ensure you take regular breaks.
SAFETY DEVICES
Low kick-back saw chain
A low-kickback saw chain helps to reduce the possibility of
a kickback event.
he rakers (depth gauges) ahead of each cutter can
minimize the force of a kickback reaction by preventing the
cutters from digging in too deeply. Only use replacement
guide bar and chain combinations recommended by the
manufacturer.
As saw chains are sharpened, they lose some of the low
kickback qualities and extra caution is required. For your
safety, replace saw chains when cutting performance
decreases.
Spiked b mper
he integral bumper spike may be used as a pivot when
making a cut. It helps to keep the body of the chainsaw
steady while cutting. When cutting, push the product
forward until the spikes dig into the edge of the wood, then
by moving the rear handle up or down in the direction of
the cutting line it can help ease the physical strain of cutting
G ide bars
Generally, guide bars with small radius tips have somewhat
lower potential for kickback. You should use a guide bar
and matching chain which is just long enough for the job.
Longer bars increase the risk of loss of control during
sawing. Regularly check the chain tension. When cutting
smaller branches (less than the full length of the guide bar)
the chain is more likely to be thrown off if the tension is
not correct.
Chain brake
Chain brakes are designed to quickly stop the chain from
rotating. When the chain brake lever/hand guard is pushed
towards the bar, the chain should stop immediately. A
chain brake does not prevent kickback. It only lowers the
risk of injury should the chain bar contact the operator’s
body during a kickback event. he chain brake should be
tested before each use for correct operation in both the run
and brake positions.
Chain catcher
A chain catcher prevents the saw chain from being thrown
back towards the operator if the saw chain comes loose
or breaks.
ASSEMBLY
WARNING
If any parts are damaged or missing, do not operate the
product until the parts are replaced. Failure to heed this
warning could result in serious personal injury.
ADJUSTING THE CHAIN TENSION
See page 25.
1. Disconnect the product from the power supply. Wear
protective gloves.
2. o correct the chain tension, fully loosen the chain
tension/guide bar locking knob, then tighten the chain
tension/guide bar locking knob by turning it clockwise
until it locks into place. Check the chain tension
frequently.
he chain tension is correct when the gap between the
cutter in the chain and the bar is between 3 mm - 4
bar downwards (away from the bar) and measure the
distance between the bar and the chain cutters.
3. ighten and lock the chain tension/guide bar locking
knob by turning it clockwise.
OPERATION
ADDING CHAIN LUBRICATING OIL
See page 15.
WARNING
Never work without chain lubricant. If the saw chain is
running without lubricant, the guide bar and saw chain
can be damaged. It is essential to frequently check the
oil level in the oil level gauge and before starting to use
the chainsaw.
1. Clear surface around the oil cap to prevent
contamination.
2. Unscrew and remove the cap from the oil tank.
3.
gauge. Ensure that no dirt enters the oil tank while
filling.
4.
any spillage.
5. One full oil tank will enable you to use the saw for 18
- 28 min.
HOLDING THE CHAIN SAW
See page 15.
Always hold the chain saw with your right hand on the rear
handle and your left hand on the front handle. Grip both
Ensure that your left hand is holding the front handle so
that your thumb is underneath.

8
WARNING
Always keep the power cable tidy and away from the
area of cutting. Apart from the danger of electrocution,
untidy cables cause falls and trips.

STARTING THE CHAIN SAW
See page 15.
1. Connect the product to a power outlet. Make sure the
chain brake is in the run position by pulling back on the
lever/hand guard.
2.
press the on/off trigger.
CHECKING AND OPERATING CHAIN BRAKE
1. ngage the chain brake by rotating your left hand
around the front handle. Allow the back of your hand to
push the chain brake lever/hand guard toward the bar
while the chain is rotating rapidly. The chain should stop
rotating immediately. Be sure to maintain both hands on
the saw handles at all times.
2. Reset the chain brake back into the Run position by
grasping the top of the chain brake lever/hand guard
and pulling toward the front handle until you hear a
click.
WARNING
If the chain brake does not stop the chain immediately, or
if the chain brake will not stay in the run position without
assistance, have the product serviced by an authorised
service centre prior to use.
REPLACING GUIDE BAR AND SAW CHAIN
See page 23.
1. Disconnect the product from the power supply. Wear
protective gloves.
2. Unlock the chain tension/guide bar locking knob by
turning it counterclockwise until the sprocket cover
comes loose.
3. Remove the sprocket cover. Remove the bar and saw
chain from the product.
4. Remove the screw holding the guide bar to the chain
tension assembly. Dispose the used bar and saw chain
properly.
5. Mount the chain tension assembly on to the new bar
direction onto the bar and make sure that the drive links
are aligned in the bar groove.
6. Attach the bar to the chain saw and loop the chain
around the drive sprocket.
Replace the sprocket cover.
7. Tighten and lock the chain tension/guide bar locking
knob by turning it clockwise.
The chain tension is correct when the gap between the
cutter in the chain and the bar is between 3 mm - 4
bar downwards (away from the bar) and measure the
distance between the bar and the chain cutters.
Adjust the chain tension. Refer to the “Adjusting chain
tension” section.
WARNING
Improper chain sharpening increases the potential of
kickback.
WARNING
Failure to replace or repair a damaged chain can cause
serious injury.
WARNING
The saw chain is very sharp. Always wear protective
gloves when performing maintenance to the chain.
INSPECTING AND CLEANING THE CHAIN BRAKE
See page 26.
Always keep the chain brake mechanism clean by
lightly brushing the linkage free from dirt.
Always test the chain brake performance after cleaning.
Refer to the “Operation - Checking and Operating
Chain Brake” in this manual for additional information.
MAINTENANCE SCHEDULE
Daily chec
Before each use
Bar lubrication Before each use
Chain tension Before each use and
frequently
Chain sharpness Before each use, visual
check
For damaged parts Before each use
For loose fasteners Before each use
Chain brake function Before each use
Inspect and clean
Bar Before each use
Complete saw After each use
Chain brake very 5 hours*
* Hours of operation

9
WHATS IN THE BOX
RCS2340B
Chainsaw x1
Guide bar cover x1
Operators manual x1
SYMBOLS ON THE PRODUCT
Safety alert
To reduce the risk of injury user
must read and understand operators
manual before using this product.
Wear eye ear and head protection.
Wear non-slip safety footwear when
using the product.
Wear non-slip heavy duty gloves.
Remove plug from the mains
immediately before maintenance or if
cable is damaged or cut
Beware of chain saw kickback and
avoid contact with bar tip.
Do not expose to rain or damp
condition.
Hold and operate the saw properly
with both hands.
Do not operate the saw using only
one hand.
Class II tool double insulation
Regulatory Compliance Mark (RCM).
requirements.
Waste electrical products should not
be disposed of with household waste.
Check with your local authority or
retailer for recycling advice.
The guaranteed sound pressure level
is 96 dB.
The guaranteed sound power level is
107 dB
Bar and chain lubricant
Chain brake
Rotate to lock or unlock the guide bar
Lock
Unlock
Moving direction of the chain.
(Marked under the sprocket cover)
SYMBOLS IN THIS MANUAL
Connect to power outlet.
Disconnect from power outlet.
Note
Warning
Wear eye and face protection.
Wear upper body protection.
Wear leg protection.
Stop the product.
The following signal words and meanings are intended to
explain the levels of risk associated with this product.
DANGER
Indicates an imminently hazardous situation which if
not avoided will result in death or serious injury.
WARNING
Indicates a potentially hazardous situation which if not
avoided could result in death or serious injury.

10
CAUTION
Indicates a potentially hazardous situation, which, if not
avoided, may result in minor or moderate injury.
CAUTION
Without safety alert symbol
Indicates a situation that may result in property damage.

11

12
WHATS IN THE BOX
RCS2340B
x 1
x 1 x 1

13
Know your product
KNOW YOUR PRODUCT
1. Chain
2. Guide bar
3. Front hand guard/Chain brake
4. Front handle
5. Trigger relea e
6. Rear handle
7. Spiked bumper
8. Chain lubricant cap
9. Cord retainer
10. Switch trigger
11. Sprocket cover
12. Chain ten ion/Guide bar locking knob
13. Guide bar cover
14. Chain catcher

14
GETTING STARTED
1 2
7
Personal protective equipment (PPE)
Good quality personal protective equipment, as used by
professionals, will help reduce the risk of injury to the
operator.
3. Run the cable loop through the cable hook.1. ecure the power cable by inserting it through the cable
slot.
2. Loop the cable.
Remove the guide bar cover.

GETTING STARTED
3-4 mm
3 4
8
Always hold the product with your right hand at the rear
handle and your left hand at the front handle. Grip both
handles with the thumbs and fingers encircling the handles.
Ensure that your left hand is holding the front handle so that
your thumb is underneath.
Connect the product to a power outlet.
Tighten and lock the chain tension/guide bar locking knob
by turning it clockwise.
The chain tension is correct when the gap between the
cutter in the chain and the bar is between 3 mm - mm.
Pull the chain in the middle of the lower side of the bar
downwards (away from the bar) and measure the distance
between the bar and the chain cutters.
To tighten the chain, turn the chain tension/guide bar
locking knob clockwise. To loosen the chain, turn the
chain tension/guide bar locking knob counterclockwise.

16

17
OVERVIEW
Bucking a log Limbing a tree
Removing buttress roots
Felling a tree
p.19 p.20
p.22p.21

18
OVERVIEW
Chain tensioningChain replacement
TransportationCleaning the chain brake Storage
p.23 p.25
p.26 p.29p.27
Table of contents
Other Ryobi Chainsaw manuals

Ryobi
Ryobi RCS1835 User manual

Ryobi
Ryobi RCS4240NB User manual

Ryobi
Ryobi RY43006 User manual

Ryobi
Ryobi RCS5133C User manual

Ryobi
Ryobi RCS4640N User manual

Ryobi
Ryobi CCW180LBC User manual

Ryobi
Ryobi P545 User manual

Ryobi
Ryobi RCS18X3050 User manual

Ryobi
Ryobi RY74003D User manual

Ryobi
Ryobi P541 User manual

Ryobi
Ryobi RCS36B35HI User manual

Ryobi
Ryobi p546 User manual

Ryobi
Ryobi CS-4016 Operation manual

Ryobi
Ryobi P5452 User manual

Ryobi
Ryobi RCS4640C User manual

Ryobi
Ryobi RCS5133CB User manual

Ryobi
Ryobi RCS1835B User manual

Ryobi
Ryobi RY40507 User manual

Ryobi
Ryobi RCS-3540C User manual

Ryobi
Ryobi RCS36 User manual