Ryobi PLASMA-40 Operation manual


OWNER’S OPERATING MANUAL
PLASMA CUTTER
MODEL PLASMA-40
KEEP THIS MANUAL FOR FUTURE REFERENCE
Your new inverter generator has been engineered and manufactured to Ryobi’s
high standard of dependability, ease of operation and operator safety. Properly
cared for, it will give you years of rugged, trouble free performance. If you use
your inverter generator properly and only for what it is intended, you will enjoy
years of safe, reliable service.
SPECIFICATIONS
Rated input power supply.......................................................AC230V±5% 50/60 z
Rated input capacity...................................................................................... 6.4kVA
Rated output voltage..................................................................................... 88-96V
Current adjustment range............................................................................. 20-40A
Rated duty cycle................................................................................................ 80%
No load voltage................................................................................................ 310V
Overall efficiency................................................................................................85%
ousing protection grade................................................................................IP21S
Post flow time........................................................................................................7s
Gas pressure range............................................................................0.35-0.55Mpa
Max. cutting capacity (mild steel)............................... Clean cut 8mm/ Sever 12mm
Power factor.............................................................................................. 0.70 cosφ
Noise......................................................................................................... <70dB(A)
Insulation grade...................................................................................................... F
Dimensions............................................................................... 480 x 160 x 315mm
Net weight........................................................................................................ 7.8kg
THANK YOU FOR BUYING A RYOBI
PLASMA CUTTER
CAUTION: Carefully read through this entire owner’s
manual, paying close attention to the general
safety rules and rules for safe operation,
before using.
1

2
IMPORTANT SAFETY INSTRUCTIONS
The purpose of safety rules is to attract your
attention to possible dangers. The safety symbols
and the explanations with them, require your
careful attention and understanding. The safety
warnings do not by themselves eliminate any
danger. The instruction or warnings they give are
not substitutes for proper accident prevention
measures.
SAFETY ALERT SYMBOL. Indicates
danger, caution or warning. May be used
in conjunction with other symbols or
pictures.
Failure to obey a safety warning can result in
serious injury to yourself or to others. Always follow
the safety precautions to reduce the risk of fire,
electric shock and personal injury.
Do not attempt to operate this tool until you have
read thoroughly and completely understood the
safety rules, etc. contained in this manual. Failure
to comply can result in accidents involving fire,
electric shock or serious personal injury. Save this
Owners Operating Manual and review it frequently
for continual safe operation and for instructing
others who may use this tool.
EMF INFORMATION
Considerations About Welding And The Effects Of
Low Frequency Electric And Magnetic Fields.
Welding current, as it flows through welding cables,
will cause electro- magnetic fields. There has been
and still is some concern about such fields.
owever, after examining more than 500 studies
spanning 17 years of research, a special blue
ribbon committee of the National Research Council
concluded that: “The body of evidence, in the
committee’s judgment, has not demonstrated that
exposure to power- frequency electric and
magnetic fields is a human-health hazard.”
owever, studies are still going forth and evidence
continues to be examined. Until the final
conclusions of the research are reached, you may
wish to minimize your exposure to electromagnetic
fields when welding or cutting.
To reduce magnetic fields in the workplace, use the
following procedures:
1. Keep cables close together by twisting or
taping them.
2. Arrange cables to one side and away from
the operator.
3. Do not coil or drape cables around your body.
4. Keep welding power source and cables as far
away from operator as practical.
5. Connect work clamp to work piece as close
to the weld as possible.
ABOUT PACEMAKERS
Pacemaker wearers consult your doctor first. If
cleared by your doctor, then following the above
procedures is recommended.
WELDING HAZARDS
The symbols shown below are used throughout this
manual to call attention to and identify possible
hazards. When you see the symbol, watch out, and
follow the related instructions to avoid the hazard.
Only qualified persons should service, test,
maintain, and repair this unit.
During servicing, keep everybody, especially
children, away.
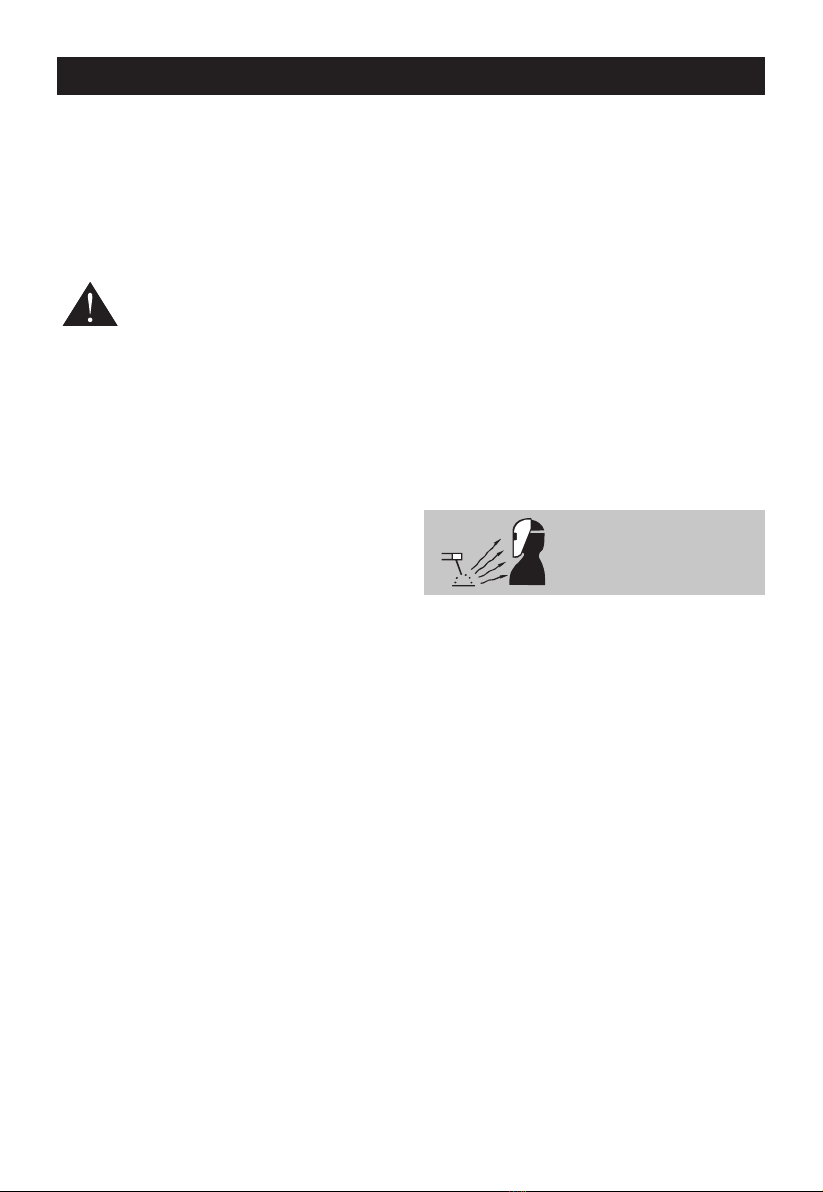
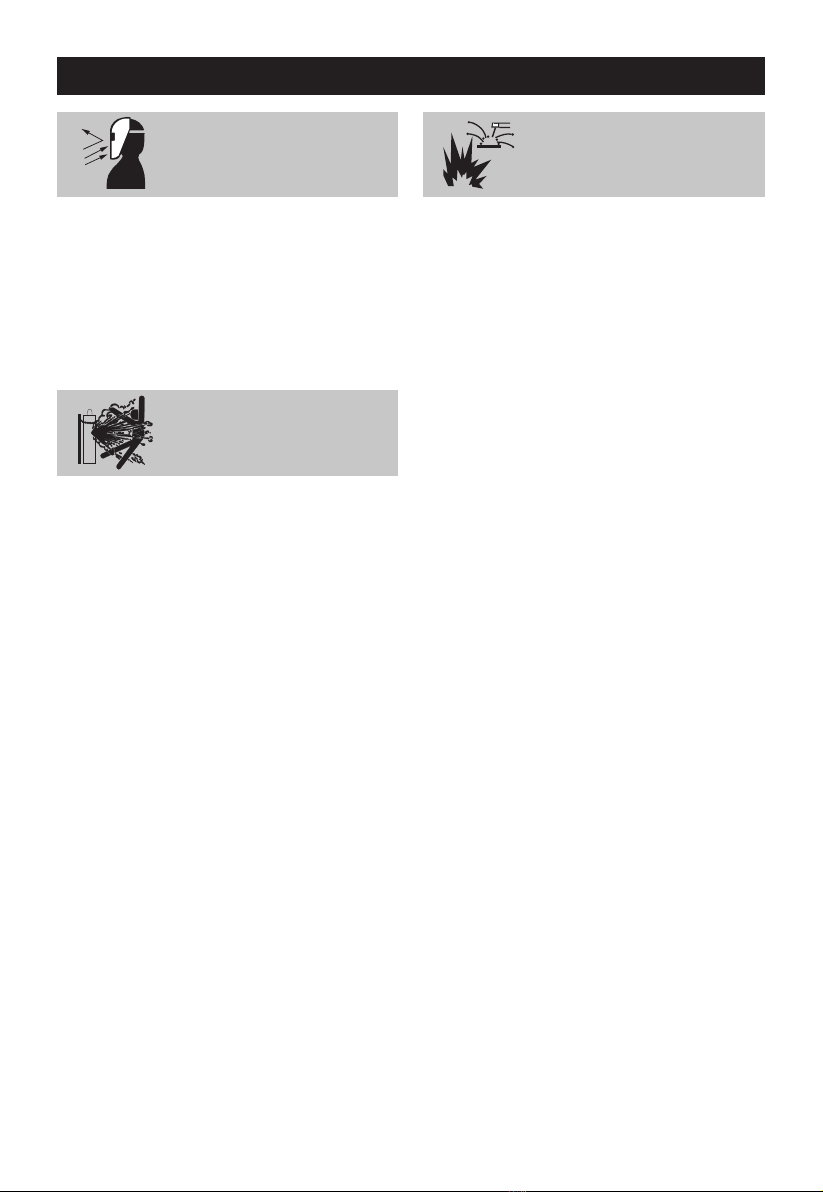
ARC RAYS can burn eyes and skin; NOISE can
damage hearing. Arc rays from the welding
process produce intense heat and strong
ultraviolet rays that can burn eyes and skin.
Noise from some processes can damage
hearing.
1. Wear a welding helmet fitted with a proper
shade of filter (ANSI Z49.1) to protect your
face and eyes when welding or watching.
2. Wear approved safety glasses. Side shields
recommended. Never wear contact lenses
while welding.
3. Use protective screens or barriers to protect
others from flash and glare; warn others not
to watch the arc.
4. Wear protective clothing made from durable,
flame-resistant material (wool and leather)
and foot protection.
5. Use approved ear plugs or ear muffs if noise
level is high.
ARC RAYS
Can Burn

3
IMPORTANT SAFETY INSTRUCTIONS

4
IMPORTANT SAFETY INSTRUCTIONS
Touching live electrical parts can cause fatal
shocks or severe burns. The electrode and
work circuit is electrically live whenever the
output is on. The input power circuit and
machine internal circuits are also live when
power is on. In semiautomatic or automatic
wire welding, the wire, wire reel, drive roll
housing, and all metal parts touching the
welding wire are electrically live. Incorrectly
installed or improperly grounded equipment is
a hazard.
1. Do not touch live electrical parts.
2. Wear dry, hole-free insulating gloves and body
protection.
3. Insulate yourself from work and ground using
dry insulating mats or covers.
4. Disconnect input power or stop engine before
installing or servicing this equipment. Lock input
power disconnect switch open, or remove line
fuses so power cannot be turned on
accidentally.
5. Properly install and ground this equipment
according to its Owner’s Manual and national,
state, and local codes.
6. Turn off all equipment when not in use.
Disconnect power to equipment if it will be left
unattended or out of service.
7. Use fully insulated electrode holders. Never dip
holder in water to cool it or lay it down on the
ground or the work surface. Do not touch
holders connected to two welding machines at
the same time or touch other people with the
holder or electrode.
8. Do not use worn, damaged, undersized, or
poorly spliced cables.
9. Do not wrap cables around your body.
10. Ground the workpiece to a good electrical
(earth) ground.
11. Do not touch electrode while in contact with
the work (ground) circuit.
12. Use only well-maintained equipment. Repair
or replace damaged parts at once.
13. In confined spaces or damp locations, do not
use a welder with AC output unless it is
equipped with a voltage reducer. Use
equipment with DC output.
14. Wear a safety harness to prevent falling if
working above floor level.
15. Keep all panels and covers securely in place.
FUMES AND GASES can be hazardous to your
health. Welding produces fumes and gases.
Breathing these fumes and gases can be haz-
ardous to your health.
1. Keep your head out of the fumes. Do not
breath the fumes.
2. If inside, ventilate the area and/or use
exhaust at the arc to remove welding fumes
and gases.
3. If ventilation is poor, use an approved air-
supplied respirator.
4. Read the Material Safety Data Sheets
(MSDSs) and the manufacturer’s instruction
for metals, consumables, coatings, and
cleaners.
5. Work in a confined space only if it is well
ventilated, or while wearing an air-supplied
respirator.
Shielding g ses used for welding c n displ ce
air causing injury or death. Be sure the
breathing air is safe.
6. Do not weld in locations near degreasing,
cleaning, or spraying operations. The heat
and rays of the arc can react with vapors to
form highly toxic and irritating gases.
7. Do not weld on coated metals, such as
galvanized, lead, or cadmium plated steel,
unless the coating is removed from the weld
area, the area is well ventilated, and if
necessary, while wearing an airsupplied
respirator. The coatings and any metals
containing these elements can give off toxic
fumes if welded.
ELECTRIC SHOCK
Can Kill
FUMES & GASES
Can Be Dangerous

FLYING SPARKS AND HOT METAL can cause
injury.
Chipping and grinding cause flying metal.
As welds cool, they can throw off slag.
1. Wear approved face shield or safety goggles.
Side shields recommended.
2. Wear proper body protection to protect skin.
CYLINDERS can explode if damaged.
Shielding gas cylinders contain gas under high
pressure. If damaged, a cylinder can explode.
Since gas cylinders are normally part of the
welding process, be sure to treat them
carefully.
1. Protect compressed gas cylinders from
excessive heat, mechanical shocks, and arcs.
2. Install and secure cylinders in an upright
position by chaining them to a stationary
support or equipment cylinder rack to
prevent falling or tipping.
3. Keep cylinders away from any welding or other
electrical circuits.
4. Never allow a welding electrode to touch any
cylinder.
5. Use only correct shielding gas cylinders,
regulators, hoses, and fittings designed for the
specific application; maintain them and
associated parts in good condition.
6. Turn face away from valve outlet when opening
cylinder valve.
7. Keep protective cap in place over valve except
when cylinder is in use or connected for use.
WELDING can cause fire or explosion.
Sparks and spatter fly off from the welding arc.
The flying sparks and hot metal, weld spatter,
hot workpiece, and hot equipment can cause
fires and burns. Accidental contact of electrode
or welding wire to metal objects can cause
sparks, overheating, or fire.
1. Protect yourself and others from flying sparks
and hot metal.
2. Do not weld where flying sparks can strike
flammable material.
3. Remove all flammables within 35 ft (10.7 m) of
the welding arc. If this is not possible, tightly
cover them with approved covers.
4. Be alert that welding sparks and hot materials
from welding can easily go through small
cracks and openings to adjacent areas.
5. Watch for fire, and keep a fire extinguisher
nearby.
6. Be aware that welding on a ceiling, floor,
bulkhead, or partition can cause fire on the
hidden side.
7. Do not weld on closed containers such as
tanks or drums.
8. Connect work cable to the work as close to
the welding area as practical to prevent
welding current from traveling long, possibly
unknown paths and causing electric shock and
fire hazards.
9. Do not use welder to thaw frozen pipes.
10. Remove stick electrode from holder or cut off
welding wire at contact tip when not in use.
11. When not welding, make certain no part of the
electrode circuit is touching the work or
ground. Accidental contact can cause
overheating and create a fire hazard.
5
IMPORTANT SAFETY INSTRUCTIONS
FLYING SPARKS
Can Cause Injury
CYLINDERS Can
Explode If Damaged
WELDING Can
Cause Fire or Injury

6
IMPORTANT SAFETY INSTRUCTIONS
Moving parts, such as fans, rotors, and belts
can cut fingers and hands and catch loose
clothing.
1. Keep all doors, panels, covers, and guards
closed and securely in place.
2. Stop engine before installing or connecting
unit.
3. ave only qualified people remove guards or
covers for maintenance and troubleshooting as
necessary.
4. To prevent accidental starting during servicing,
disconnect negative (-) battery cable from
battery.
5. Keep hands, hair, loose clothing, and tools
away from moving parts.
6. Reinstall panels or guards and close doors
when servicing is finished and before starting
engine.
SPARKS can cause BATTERY GASES TO E -
PLODE; BATTERY ACID can burn eyes and
skin. Batteries contain acid and generate explo-
sive gases.
1. Always wear a face shield when working on
a battery.
2. Stop engine before disconnecting or
connecting battery cables.
3. Do not allow tools to cause sparks when
working on a battery.
4. Do not use welder to charge batteries or jump
start vehicles.
5. Observe correct polarity (+ and –) on
STEAM AND PRESSURIZED HOT COOLANT
can burn face, eyes, and skin.
The coolant in the radiator can be very hot and
under pressure.
1. Do not remove radiator cap when engine is
hot. Allow engine to cool.
2. Wear gloves and put a rag over cap area when
removing cap.
3. Allow pressure to escape before completely
removing cap.
1. igh-frequency ( .F.) can interfere with radio
navigation, safety services, computers, and
communications equipment.
2. ave only qualified persons familiar with
electronic equipment install, test, and service
.F. producing units.
3. The user is responsible for having a qualified
electrician promptly correct any interference
problem resulting from the installation.
4. If notified by the FCC about interference, stop
using the equipment at once.
5. ave the installation regularly checked and
maintained.
6. Keep high-frequency source doors and panels
tightly shut, keep spark gaps at correct setting,
and use grounding and shielding to minimize
the possibility of interference.
MOVING PARTS
Can Cause Injury
SPARKS Can Cause
BATTERY GASES
TO E PLODE
SPARKS Can Cause
BATTERY GASES
TO E PLODE
H.F. RADIATION Can
Cause Interference

1. Electric current flowing through ny conductor
c uses loc lized Electric nd M gnetic Fields
(EMF). Welding current cre tes EMF fields
round welding c bles nd welding m chines.
2. EMF fields m y interfere with some
p cem kers, nd welders h ving p cem ker
should consult their physici n before welding.
3. Exposure to EMF fields in welding m y h ve
other he lth effects which re now not known.
4. All welders should use the following
procedures in order to minimize exposure to
EMF fields from the welding circuit:
5. Route the electrode nd work c bles together -
Secure them with t pe when possible.
6. Never coil the electrode le d round your
body.
7. Do not pl ce your body between the electrode
nd work c bles. If the electrode c ble is on
your right side, the work c ble should lso be
on your right side.
8. Connect the work c ble to the workpiece s
close s possible to the re being welded.
9. Do not work next to welding power source.
1. Lift unit with h ndle on top of c se.
2. Use h ndc rt or simil r device of dequ te
c p city.
3. If using fork lift vehicle, pl ce nd secure
unit on a proper skid before transporting.
1. Turn off input power using the disconnect
switch at the fuse box before working on the
equipment.
2. Install equipment in accordance with the
countries National Electrical Code, all local
codes and the manufacturer’s
recommendations.
3. Ground the equipment in accordance with the
countries National Electrical Code and the
manufacturer’s recommendations.
1. Do not touch hot parts bare handed.
2. Allow cooling period before working on
welding gun or torch.
1. Do not place unit on, over, or near
combustible surfaces.
2. Do not service unit near flammables.
1. Put on grounded wrist strap BEFORE handling
boards or parts.
2. Use proper static-proof bags and boxes to
store, move, or ship PC boards.
7
IMPORTANT SAFETY INSTRUCTIONS
ELECTRIC AND
MAGNETIC FIELDS
May Be Dangerous
FALLING UNIT Can
Cause Injury
FOR ELECTRICALLY
Powered Equipment
HOT PARTS Can
Cause Severe Burns
FIRE or E PLOSION
Hazard
STATIC Can Damage
PC Boards

8
IMPORTANT SAFETY INSTRUCTIONS
1. Allow cooling period; follow rated duty cycle.
2. Reduce current or reduce duty cycle before
starting to weld again.
3. Do not block or filter airflow to unit.
1. Consult the Owner’s M nu l for welding
s fety prec utions. Do not inst ll, oper te or
rep ir this equipment without re ding this
m nu l nd the s fety prec utions throughout.
2. Use only genuine repl cement p rts
OVERUSE Causes
OVERHEATING
READ THE
INSTRUCTIONS
ADDITIONAL SAFETY INSTRUCTIONS
1. ALWAYS ensure that there is full free air
circulating around the outer casing of the
machine, and that the louvres are
unobstructed.
2. ALWAYS use a proper welding face shield or
helmet, with suitable filter lenses. Proper
gloves and working clothes should be worn at
all times.
3. ALWAYS check that the pressure regulator and
gauges are working correctly. DO NOT
lubricate the regulator.
4. ALWAYS use the correct regulator. Each
regulator is designed to be used with a specific
gas.
5. ALWAYS inspect the hose before use to
ensure it is in good condition.
6. ALWAYS keep the free length of gas hose
outside the work area.
7. ALWAYS remove all flammable materials from
the welding area.
8. NEVER remove any of the panels unless the
machine is disconnected from the supply, AND
never use the machine with any of the panels
removed.
9. NEVER attempt any electrical or mechanical
repair unless your are a qualified technician.
If you have a problem with the machine contact
your local RYOBI dealer.
10. NEVER use or store in a wet/damp
environment. DO NOT EXPOSE TO RAIN.
11. NEVER use gas from a cylinder, the content
of which is unknown. It is important to ensure
the appropriate gas is being used.
12. NEVER use a damaged cylinder.
13. NEVER lift the cylinder by the valve.
14. NEVER expose the cylinder to a heat source
or sparks.
15. NEVER continue to weld, if, at any time, you
feel even the smallest electric shock. Stop
welding IMMEDIATELY, and DO NOT attempt
to use the machine until the fault is diagnosed
and corrected.
16. NEVER use the welder with input connections
greater than 10M in length.
17. NEVER point the torch at any person or
animal.
18. NEVER touch the torch nozzle until the welder
is switched OFF and the nozzle has been
allowed to cool off.
19. NEVER connect, disconnect, or attempt to
service the torch, until the machine is switched
OFF and disconnected from the mains supply.
20. NEVER allow the cables to become wrapped
around the operator or any person in the
vicinity.
21. Safety devices such as interlocks and circuit
breakers should not be disconnected or
shunted out.
22. Before installation, inspection, or service of
equipment, shut OFF all power and remove
line fuses to prevent accidental turning ON
of power.
23. Do not open power circuit or change polarity
while welding.

9
ADDITIONAL SAFETY INSTRUCTIONS
24. If, in an emergency, it must be disconnected,
guard against shock burns, or flash from switch
arcing. Always shut OFF and disconnect all
power to equipment. Power disconnect switch
must be available near the welding power
source.
25. Fully insulated electrode holders should be
used. Do NOT use holders with protruding
screws or with any form of damage.
26. Fully insulated lock-type connectors should be
used to join welding cable.
27. Frequently inspect cables for wear, cracks and
damage. IMMEDIATELY REPLACE those with
excessively worn or damaged insulation to
avoid possibly lethal shock from bared cable.
Cables with damaged areas may be taped to
give resistance equivalent to original cable.
Keep cable dry, free of oil and grease, and
protected from hot metal and sparks.
INSTALLATION
ENVIRONMENT
These units are designed for use in environments
with increased hazard of electric shock.
A. Examples of environments with increased
hazard of electric shock are:
1. In locations in which freedom of movement is
restricted, so that the operator is forced to
perform the work in a cramped (kneeling,
sitting or lying) position with physical contact
with conductive parts.
2. In locations which are fully or partially limited
by conductive elements, and in which there is
a high risk of unavoidable or accidental contact
by the operator.
3. In wet or damp hot locations where humidity
or perspiration considerable reduces the skin
resistance of the human body and the
insulation properties of accessories.
B. Environments with increased hazard of electric
shock do not include places where electrically
conductive parts in the near vicinity of the
operator, which can cause increased hazard,
have been insulated.
LOCATION
This machine can operate in harsh environments.
owever, it is important that simple preventative
measures are followed to assure long life and reli-
able operation:
• This machine must be located where there is
free circulation of clean air without restrictions
for air movement to and from the air vents. Do
not cover the machine with paper, cloth or rags
when switched on.
• Dirt and dust that can be drawn into the
machine should be kept to a minimum.
• This machine has a protection rating of IP21S.
Keep it dry and do not place it on wet ground
or in puddles. Do not use in wet or damp
locations. Store indoors.
• Locate the machine away from radio controlled
machinery. Normal operation may adversely
affect the operation of nearby radio controlled
machinery, which may result in injury or
equipment damage.
Read the section on electromagnetic compatibility
in this manual.
• Do not operate in areas with an ambient
temperature greater than 40°C.
TILTING
Place the machine directly on a secure, level
surface.
Do not place or operate this machine on a surface
with an incline greater than 15° from horizontal.
The machine may topple over if this procedure is
not followed.
VENTILATION
This cutting machine can create powerful cutting
current and has strict cooling requirements that
cannot be met with natural ventilation. Therefore
the built-in fan is very important in enabling the
machine to work stable with effective cooling. The
operator should make sure that the louvers be
uncovered and unblocked. The minimum distance
between the machine and nearby objects should
be 25cm.

10
INSTALLATION
CONNECTION OF INPUT CABLE
In order to ensure personal safety and avoid
electric shock, please ground the machine reliably
by connecting the ground wire of the machine to
the grounding device in the switching box.
Aprimary power supply cable is available for this
cutting machine. Connect the power supply cable
to the rated input power. The primary cable should
be tightly connected to the correct socket to avoid
oxidization. Check whether the voltage value varies
in acceptable range with a multi-meter.
The cross section of the leads used in the
switching box should meet the requirements of the
maximum input capacity of the machine.The
leakage protection switch should choose current
rating not less than 35A.
The Mains supply voltage should be within ± 5% of
the rated Mains supply voltage. Too low a
voltage may cause poor welding performance. Too
high a supply voltage will cause components to
overheat and possibly fail.
The Welding Power Source must be:
• Correctly installed, if necessary, by a qualified
electrician.
• Correctly earthed (electrically) in accordance
with local regulations.
DUTY CYCLE
The rated duty cycle of a Welding Power Source, is
a statement of the time it may be operated at its
rated welding current output without exceeding the
temperature limits of the insulation of the
component parts.
This product has a rated duty cycle of 80%. The
percentage represents the welding time in a 10
minute period for example 80% means that the
welding time is 8 minutes with a rest time of 2
minutes in a ten minute period although the actual
duty cycle will depend on the amperage used. If the
Welding Power Supply is used for longer than the
duty cycle or if you are welding using large welding
rods you may experience a temporary current shut
off. This is to protect the transformer inside the
Welding Power Supply from overheating.
Welding longer than rated duty cycle can
damage gun and void the warranty.
ELECTROMAGNETIC COMPATIBILITY
WARNING. Extra precautions for
Electromagnetic Compatibility may be
required when this Welding Power
Source is used in a domestic situation.
A. Installation and Use - Users Responsibility
The user is responsible for installing and using the
welding equipment according to the manufacturer’s
instructions. If electromagnetic disturbances are
detected then it shall be the responsibility of the
user of the welding equipment to resolve the
situation with the technical assistance of the
manufacturer. In some cases this remedial action
may be as simple as earthing the welding circuit,
see Note below. In other cases it could involve
constructing an electromagnetic screen enclosing
the Welding Power Source and the work, complete
with associated input filters. In all cases,
electromagnetic disturbances shall be reduced to
the point where they are no longer troublesome.
Note: The welding circuit may or may nor be
earthed for safety reasons. Changing the earthing
arrangements should only be authorised by a
person who is competent to assess whether the
changes will increase the risk of injury, e.g. by
allowing parallel welding current return paths which
may damage the earth circuits of other equipment.
Further guidance is given in IEC 974-13 Arc
Welding Equipment - Installation and use (under
preparation).
B. Assessment of Area
Before installing welding equipment, the user shall
make an assessment of potential electromagnetic
problems in the surrounding area. The following
shall be taken into account:
1. Other supply c bles, control c bles, sign lling
nd telephone c bles; bove, below nd
dj cent to the welding equipment.

11
ELECTROMAGNETIC COMPATIBILITY
2. Radio and television transmitters and
receivers.
3. Computer and other control equipment.
4. Safety critical equipment, e.g. guarding of
industrial equipment.
5. The health of people around, e.g. the use of
pacemakers and hearing aids.
6. Equipment used for calibration and
measurement.
7. The time of day that welding or other activities
are to be carried out.
8. The immunity of other equipment in the
environment: the user shall ensure that other
equipment being used in the environment is
compatible: this may require additional
protection measures.
The size of the surrounding area to be considered
will depend on the structure of the building and
other activities that are taking place. The surround-
ing area may extend beyond the boundaries of the
premises.
C. Methods of Reducing Electromagnetic
Emissions
1. Mains Supply
Welding equipment should be connected to
the mains supply according to the
manufacturer’s recommendations. If
interference occurs, it may be necessary to
take additional precautions such as filtering
of the mains supply. Consideration should be
given to shielding the supply cable of
permanently installed welding equipment in
metallic conduit or equivalent. Shielding should
be electrically continuous throughout it’s
length. The shielding should be connected to
the Welding Power Source so that good
electrical contact is maintained between the
conduit and the Welding Power Source
enclosure.
2. Maintenance of Welding Equipment
The welding equipment should be routinely
maintained according to the manufacturer’s
recommendations. All access and service
doors and covers should be closed and
properly fastened when the welding equipment
is in oper tion.
The welding equipment should not be modified
in any way except for those changes and
adjustments covered in the manufacturer’s
instructions. In particular, the spark gaps of arc
striking and stabilising devices should be
adjusted and maintained according to the
manufacturer’s recommendations.
3. Welding Cables
The welding cables should be kept as short as
possible and should be positioned close
together, running at or close to the floor level.
4. Equipotential Bonding
Bonding of all metallic components in the
welding installation and adjacent to it should be
considered. owever. Metallic components
bonded to the work piece will increase the risk
that the operator could receive a shock by
touching the metallic components and the
electrode at the same time. The operator
should be insulated from all such bonded
metallic components.
5. Earthing of the Workpiece
Where the workpiece is not bonded to earth for
electrical safety, nor connected to earth
because of it’s size and position, e.g. ship’s
hull or building steelwork, a connection
bonding the workpiece to earth may reduce
emissions in some, but not all instances. Care
should be taken to prevent the earthing of the
workpiece increasing the risk of injury to users,
or damage to other electrical equipment.
Where necessary, the connection of the work
piece to earth should be made by direct
connection to the workpiece, but in some
countries where direct connection is not
permitted, the bonding should be achieved by
suitable capacitance, selected according to
national regulations.
6. Screening and Shielding
Selective screening and shielding of other
cables and equipment in the surrounding area
may alleviate problems of interference.
Screening the entire welding installation may
be considered for special applications.

12
SYMBOL CHART

13
1. Carry handle
2. Air reducer valve
3. LCD display
4. Power indicator
5. Thermal cut out indicator / alarm
6. Current control knob
7. Earth clamp connection point (+ positive)
8. Gas hose
9. Cutting torch
10. Earth clamp
11. Cooling fan
12. Power lead
13. On/Off switch
14. Pressure gauge
15. Rocket switch
16. Gas/electric connection point
17. Interface for torch trigger
18. Fastening clips x 4
DESCRIPTION
13
4 5
7
6
31
8
12
11
2
14
15
16
910
17
18

14
AIR SUPPLY CONNECTIONS
CONNECTING AIR SUPPLY TO UNIT
The connection is the same for compressed air or
industrial compressed air in gas cylinders.
Connect the gas line to the compressed air input
inlet port at the appropriate pressure.
REDUCER VALVE SETTINGS
Steps for reducer setting are as follows:
Start the gas flow and lift the pressure control knob
upwards.
Adjust the gas pressure to the desired value by
rotating the knob (rotate to “+” direction to increase
gas pressure; rotate to “-” direction to reduce gas
pressure); press down the pressure control knob
to lock in place.
Drain the water by turning the drain knob when
there is too much water in the reducer valve.
Note: For a secure seal, apply thread sealant to the
fitting threads, according to manufacturer's
instructions.
Do Not use Teflon tape as a thread sealer, as small
particles of the tape may break off and block the
small gas passages in the torch.
USING INDUSTRIAL COMPRESSED AIR IN GAS
CYLINDERS
When using Industrial compressed air in gas
cylinders as the gas supply:
1. Refer to the manufacturer’s specifications for
installation and maintenance procedures for
high pressure gas regulators.
2. Examine the cylinder valves to be sure they
are clean and free of oil, grease or any
foreign material. Briefly open each cylinder
valve to blow out any dust which may be
present.
3. The cylinder must be equipped with an
adjustable high - pressure regulator capable of
outlet pressures up to 100 psi (6.9 bar)
maximum and flows of at least 300 scfh
(141.5 lpm).
4. Connect gas supply hose to the cylinder.
Note: For a secure seal, apply thread sealant to the
fitting threads, according to manufacturer's
instructions.
Do Not use Teflon tape as a thread sealer, as small
particles of the tape may break off and block the
small gas passages in the torch.
Attach to fitted
mounts on the back
of the machine
Pressure control knob
Pressure gauge
Drain knob
Gas hose

15
ASSEMBLY
WARNING. ELECTRIC SHOCK can kill.
Keep the electrode holder and cable
insulation in good condition.
Do not touch electrically live parts or electrode
with skin or wet clothing.
Insulate yourself from work and ground.
Turn the input line switch on the welder “OFF”
before connecting or disconnecting output
cables or other equipment.
CUTTING TORCH ASSEMBLY
The installation of the torches parts should follow
the order according to Fig.1.
1. Screw the electrode into the torch head.
2. Screw the nozzle into the torch head, and
tighten it.
3. Screw the protective sleeve into the torch head,
and tighten it.
CUTTING TORCH CONNECTION
Connect the copper nut on the cutting torch to the
gas/electric connector on the front panel of the
machine, and tighten it clockwise to avoid gas
leakage, Fig.2.
TORCH TRIGGER CONNECTION
Insert the plug of the torch trigger on the cutting
torch into the socket of torch trigger on the machine
panel, Fig.3.
EARTH CABLE CONNECTION
Insert the quick plug on the earth cable into the
earth connector on the front panel of the machine,
and tighten it clockwise, Fig.4. Clamp the
workpiece with the work clamp at the other end of
the earth cable.
Torch head
Electrode
Nozzle
Protective sleeve
Torch handle
Fig. 1
Fig. 2
Fig. 3
Fig. 4

16
OPERATION
BEFORE STARTING OPERATION
1. Make sure the place to install the machine can
bear the weight of the cutting machine.
2. Do not install the machine where water splash
may be occur, such as near water pipes.
3. Cutting should be carried out in a dry
environment with humidity of 90% or less.
4. The temperature of the working environment
should be between -10ºC and 40ºC.
5. Avoid cutting in the open air unless sheltered
from sunlight and rain. Keep it dry at all times
and do not place it on wet ground or in puddles.
6. Avoid cutting in dusty areas or environments
with corrosive chemical gas.
7. Do not carry out cutting with the cutting
machine placed on a platform with a pitch
greater than 10°.
Before starting any welding activity
ensure that you have suitable eye
protection and protective clothing.
Also take the necessary steps to protect any
persons within the area.
At the start of each operating session:
1. Check the torch for proper assembly and
appropriate torch parts. The torch parts must
correspond with the type of operation, and with
the amperage output of this power supply
(40 amps maximum). Use only genuine parts
with this torch.
Note: When operating the torch in a normal
condition, a small amount of gas vents through the
gap between the protective sleeve and torch
handle. Do not attempt to over tighten the
protective sleeve as irreparable damage to internal
components may result.
2. Check that the torch is properly connected.
3. Check the power source for proper input
voltage. Make sure the input power source
meets the power requirements for the unit.
4. Ensure gas source meets requirements
listed. Check connections and turn gas supply
on. Adjust gas pressure.
5. Clamp the work cable to the workpiece or
cutting table. The area must be free from oil,
paint and rust. Connect only to the main part
of the workpiece; do not connect to the part
to be cut off.
6. After connecting the welding leads as detailed
you will need to switch the power switch to
“ON”. The power indicator will illuminate.
7. Select the proper working mode and proper
function. There are two working modes
available on the machine panel: 2T and 4T.
7. Set the desired current output level.
8. Push the torch trigger on the cutting torch, the
cutting machine works.
STANDOFF CUTTING WITH HAND TORCH
Note: For best performance and parts life, always
use the correct parts for the type of operation.
The torch can be comfortably held in one hand or
steadied with two hands. Position the hand to press
the Trigger on the torch handle. With the hand
torch, the hand may be positioned close to the
torch head for maximum control or near the back
end for maximum heat protection. Choose the
holding technique that feels most comfortable and
allows good control and movement.
Note: The tip should never come in contact with the
workpiece except during drag cutting operations.
Depending on the cutting operation, do one of the
following:
a). For edge starts, hold the torch perpendicular
to the workpiece with the front of the tip on the
edge of the workpiece at the point where the
cut is to start.
Torch Gas Specifications
Gas (Plasma & Secondary) Compressed
Air
Operating Pressure 50 - 80 psi
3.5 - 5.5 bar
Maximum Input Pressure 116 psi / 8 bar
Gas Flow 30 - 80 lpm
(Cutting and Gouging)

17
MAINTENANCE
b). For standoff cutting, hold the torch tip on the
work piece, pull the trigger. After the arc is
initiated lift the tip to 3-4mm off the work
(Fig.5).
c). Cut as usual. Simply release the trigger
assembly to stop cutting. A period of
post-flow time 45 to 75 seconds (required for
torch cooling) will follow. Do not disconnect
air until this cooling period has been
completed. Failure to do this will result in torch
head damage.
Note: When the shield cup is properly installed,
there is a slight gap between the shield cup and the
torch handle. Gas vents through this gap as part of
normal operation. Do not attempt to force the shield
cup to close this gap. Forcing the shield cup
against the torch head or torch handle can damage
components.
DRAG CUTTING WITH A HAND TORCH
Drag cutting works best on metal 8 mm thick or
less.
Note: For best parts performance and life, always
use the correct parts for the type of operation.
a). Install a drag cutting tip and set the output
current.
b). The torch can be comfortably held in one hand
or steadied with two hands. Position the hand
to press the Trigger on the torch handle. With
the hand torch, the hand may be positioned
close to the torch head for maximum control or
near the back end for maximum heat
protection. Choose the holding technique that
feels most comfortable and allows good control
and movement.
c). Keep the torch in contact with the workpiece
during the cutting cycle.
d). old the torch away from your body.
e). Squeeze the trigger. The arc will start.
f). Place the torch tip on the work. The main arc
will transfer to the work.
g). Cut as usual. Simply release the trigger
assembly to stop cutting.
AFTER CUTTING OPERATION HAS
FINISHED
1. Release the torch trigger. Main arc stops.
2. Set the power supply ON / OFF switch to OFF
position.
3. Set the main power disconnect to OFF, or
unplug input power cord.
Fig. 5
Torch
Protective
sleeve
Standoff
Distance
3-9mm

CUT QUALITY
Note: Cut quality depends heavily on setup and
parameters such as torch standoff, alignment with
the workpiece, cutting speed, gas pressures, and
operator ability.
Cut quality requirements differ depending on
application. For instance, nitride build - up and
bevel angle may be major factors when the surface
will be welded after cutting. Dross - free cutting is
important when finish cut quality is desired to avoid
a secondary cleaning operation. The following cut
quality characteristics are illustrated in Fig.6.
NITRIDE BUILD-UP
Nitride deposits can be left on the surface of the cut
when nitrogen is present in the plasma gas stream.
These buildups may create difficulties if the
material is to be welded after the cutting process.
KERF WIDTH
The width of the cut (or the width of material
removed during the cut).
TOP-EDGE ROUNDING
Rounding on the top edge of a cut due to wearing
from the initial contact of the plasma arc on the
workpiece.
CUT SURFACE
The desired or specified condition (smooth or
rough) of the face of the cut.
BOTTOM DROSS BUILDUP
Molten material which is not blown out of the cut
area and resolidifies on the plate. Excessive dross
may require secondary cleanup operations after
cutting.
TOP SPATTER (DROSS)
Top spatter or dross on the top of the cut caused by
slow travel speed, excess cutting height, or cutting
tip whose orifice has become elongated.
BEVEL ANGLE
The angle between the surface of the cut edge and
a plane perpendicular to the surface of the plate. A
perfectly perpendicular cut would result in a 0°
bevel angle.
Fig. 6
18
Top Edge
Rounding
Dross Build-up
Top
Spatter
Cut Surface Drag Lines
Cut Surface
Bevel Angle
Kerf Width
GENERAL CUTTING INFORMATION
WARNING. Disconnect primary power at
the source before disassembling the
power supply, torch, or torch leads.
Frequently review the Welding azards at the front
of this manual. Be sure the operator is equipped
with proper gloves, clothing, eye and ear
protection. Make sure no part of the operator’s
body comes into contact with the workpiece while
the torch is activated.
CAUTION: Sparks from the cutting
process can cause damage to coated,
painted, and other surfaces such as
glass, plastic and metal.
Note: andle torch leads with care and protect
them from damage.
TORCH STANDOFF
Improper standoff (the distance between the torch
tip and workpiece) can adversely affect tip life as
well as shield cup life. Standoff may also
significantly affect the bevel angle. Reducing
standoff will generally result in a more square cut.
EDGE STARTING
For edge starts, hold the torch perpendicular to the
workpiece with the front of the tip near (not
touching) the edge of the workpiece at the point
where the cut is to start. When starting at the edge
of the plate, do not pause at the edge and force the
arc to "reach" for the edge of the metal. Establish
the cutting arc as quickly as possible.
DIRECTION OF CUT
In the torches, the plasma gas stream swirls as it
leaves the torch to maintain a smooth column of
gas. This swirl effect results in one side of a cut
being more square than the other. Viewed along
the direction of travel, the right side of the cut is
more square than the left.

GENERAL CUTTING INFORMATION
To make a square - edged cut along an inside
diameter of a circle, the torch should move counter-
clockwise around the circle. To keep the square
edge along an outside diameter cut, the torch
should travel in a clockwise direction.
DROSS
When dross is present on carbon steel, it is
commonly referred to as either “high speed, slow
speed, or top dross”. Dross present on top of the
plate is normally caused by too great a torch to
plate distance. "Top dross" is normally very easy to
remove and can often be wiped off with a welding
glove. "Slow speed dross" is normally present on
the bottom edge of the plate. It can vary from a
light to heavy bead, but does not adhere tightly to
the cut edge, and can be easily scraped off. " igh
speed dross" usually forms a narrow bead along
the bottom of the cut edge and is very difficult to
remove. When cutting a troublesome steel, it is
sometimes useful to reduce the cutting speed to
produce "slow speed dross". Any resultant cleanup
can be accomplished by scraping, not grinding.
19
MAINTENANCE
WARNING. ELECTRIC SHOCK can kill.
Have an electrician install and service
this equipment.
Turn the input power off at the fuse box, disconnect
supply lines and allow machine to sit for five
minutes minimum to allow the power capacitors to
discharge before working inside this equipment.
Do not touch electrically hot parts.
WARNING. Do not open this machine
and do not introduce anything into its
openings. Power supply must be
disconnected from the machine before each
maintenance and service. After each repair,
perform proper tests to ensure safety.
CAUTION. The power supply must be
disconnected from the machine before
each maintenance and service. Always
use gloves in compliance with the safety
standards.
ROUTINE MAINTENANCE
Periodically (3-6 months depending on use /
environment), remove the side/top panels of
machine and clean out machine with a low
pressure dry air line paying particular attention to
PC Boards, Fan blades and switchgear. Failure to
maintain plant can void manufacturers warranty.
Inspect input and output cables & hoses for fraying
and cuts, replace if damaged present.
Keep cutting torch and earth cables in good
condition.
Clean air vents to ensure proper air flow and
cooling.
The fan motor has sealed bearings which requires
no maintenance.
Caution: Water must never come into contact with
the welder.
Regularly check the general condition of the tool.
Check for loose screws, misalignment or binding of
moving parts, cracked or broken parts, damaged
electrical wiring, and any other condition that may
affect its safe operation.
If the supply cord requires replacing, the task must
be carried out by the manufacturer, the manufac-
turer’s agent, or an authorised service centre to
avoid a safety hazard.
EVERY THREE MONTHS
Check external air filter, replace if necessary.
Shut off input power; turn off the gas supply. Bleed
down the gas supply. Check air filter and replace if
necessary.
EVERY SI MONTHS
Check the in-line air filter(s), clean or replace as
required.
Check cables and hoses for leaks or cracks,
replace if necessary.
Check all contactor points for severe arcing or pits,
replace if necessary.
Vacuum dust and dirt out of the entire machine.
Table of contents
Other Ryobi Welding System manuals
Popular Welding System manuals by other brands

YASKAWA
YASKAWA MOTOWELD-T300D instructions

Chicago Electric
Chicago Electric 98870 Set up and operating instructions

PRETUL
PRETUL SOIN-101MP manual

Miller
Miller Trailblazer 302 Diesel owner's manual

Eastwood
Eastwood 12740 Assembly & operating instructions

Chicago Electric
Chicago Electric 68887 Owners manual & safety manual

Lincoln Electric
Lincoln Electric VRTEX 360 Operator's manual

GYS
GYS Cutter Inverter 20 manual

Hypertherm
Hypertherm Powermax45 XP Field Service Bulletin

Air Liquide
Air Liquide SAF-FRO PRESTOTIG 240 AC/DC Safety Instructions for Operation and Maintenance

Lincoln Electric
Lincoln Electric BULLDOG SVM208-A Service manual

Costway
Costway GoPlus EP24430 user manual