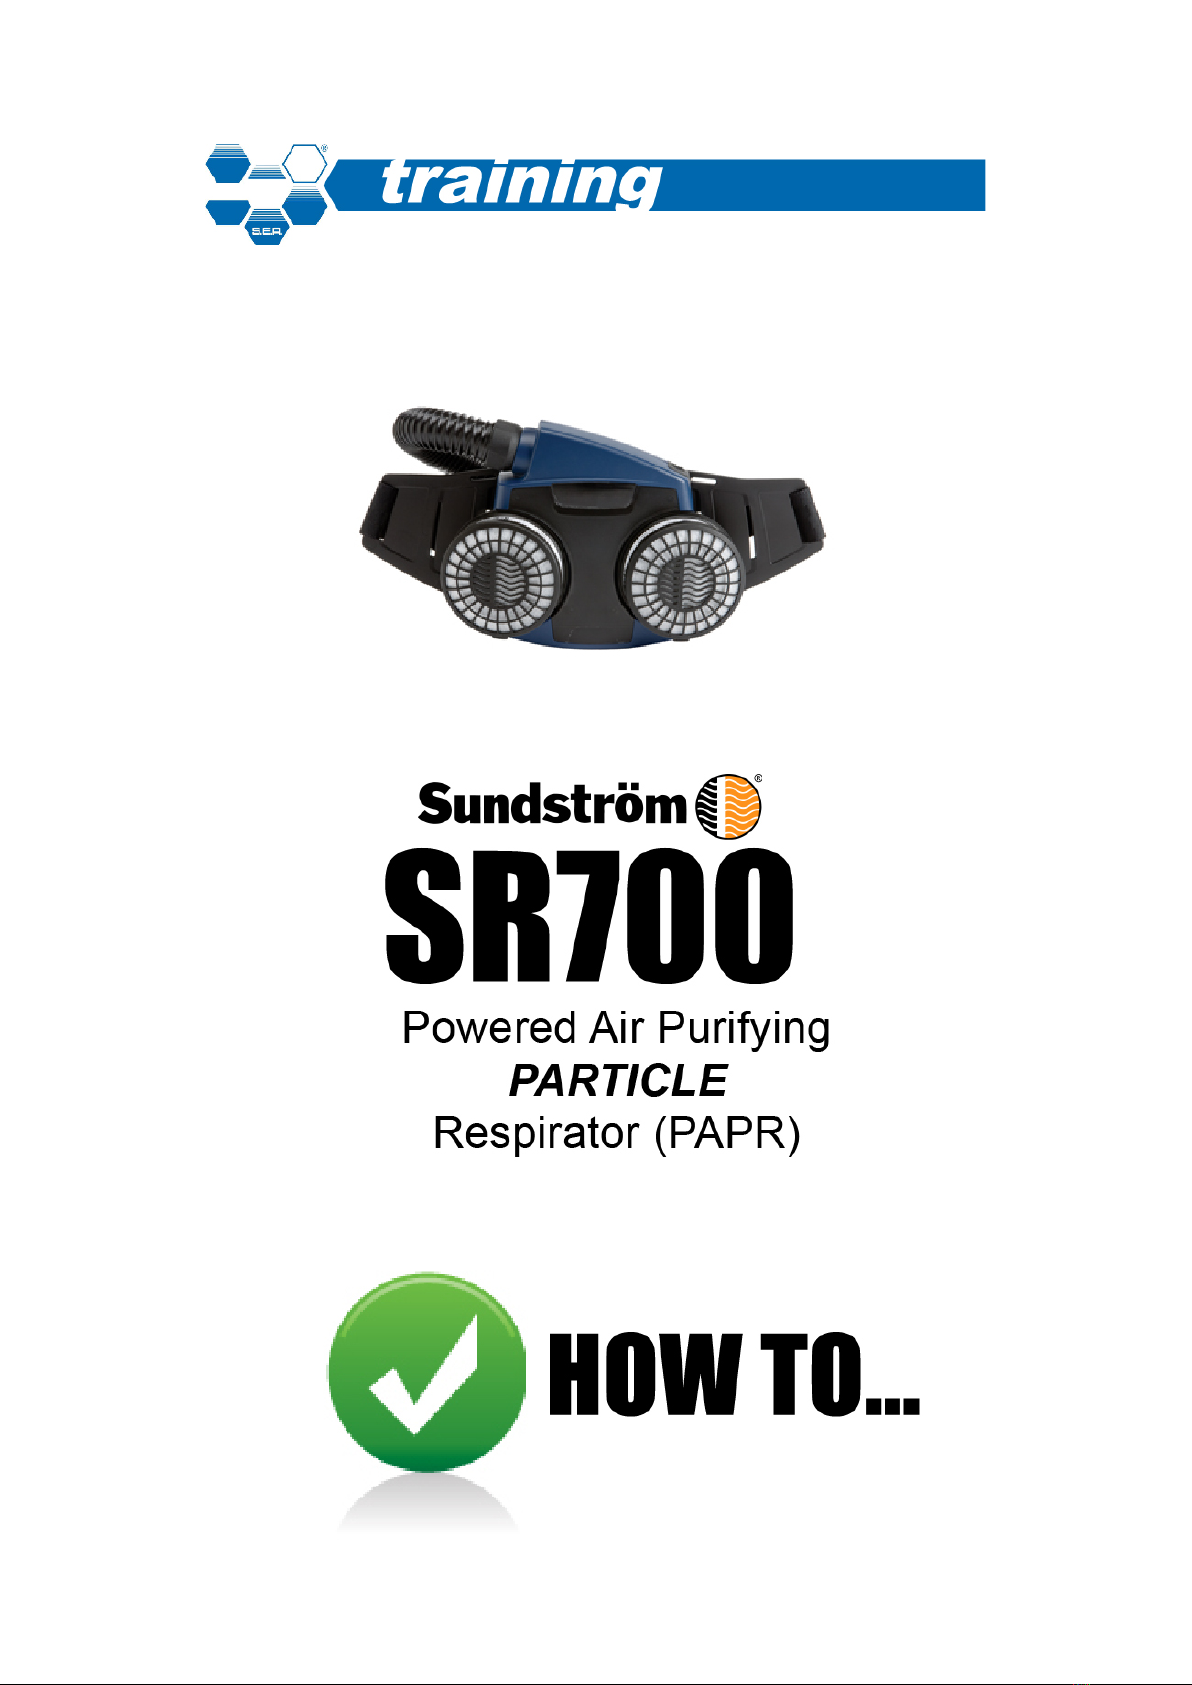
S.E.A. Group Sundstrom SR700 User manual
SR700 Particle PAPR — How to Copyright © 2013 by The S.E.A. Group 1
SR700 Particle PAPR — How to Copyright © 2013 by The S.E.A. Group 2
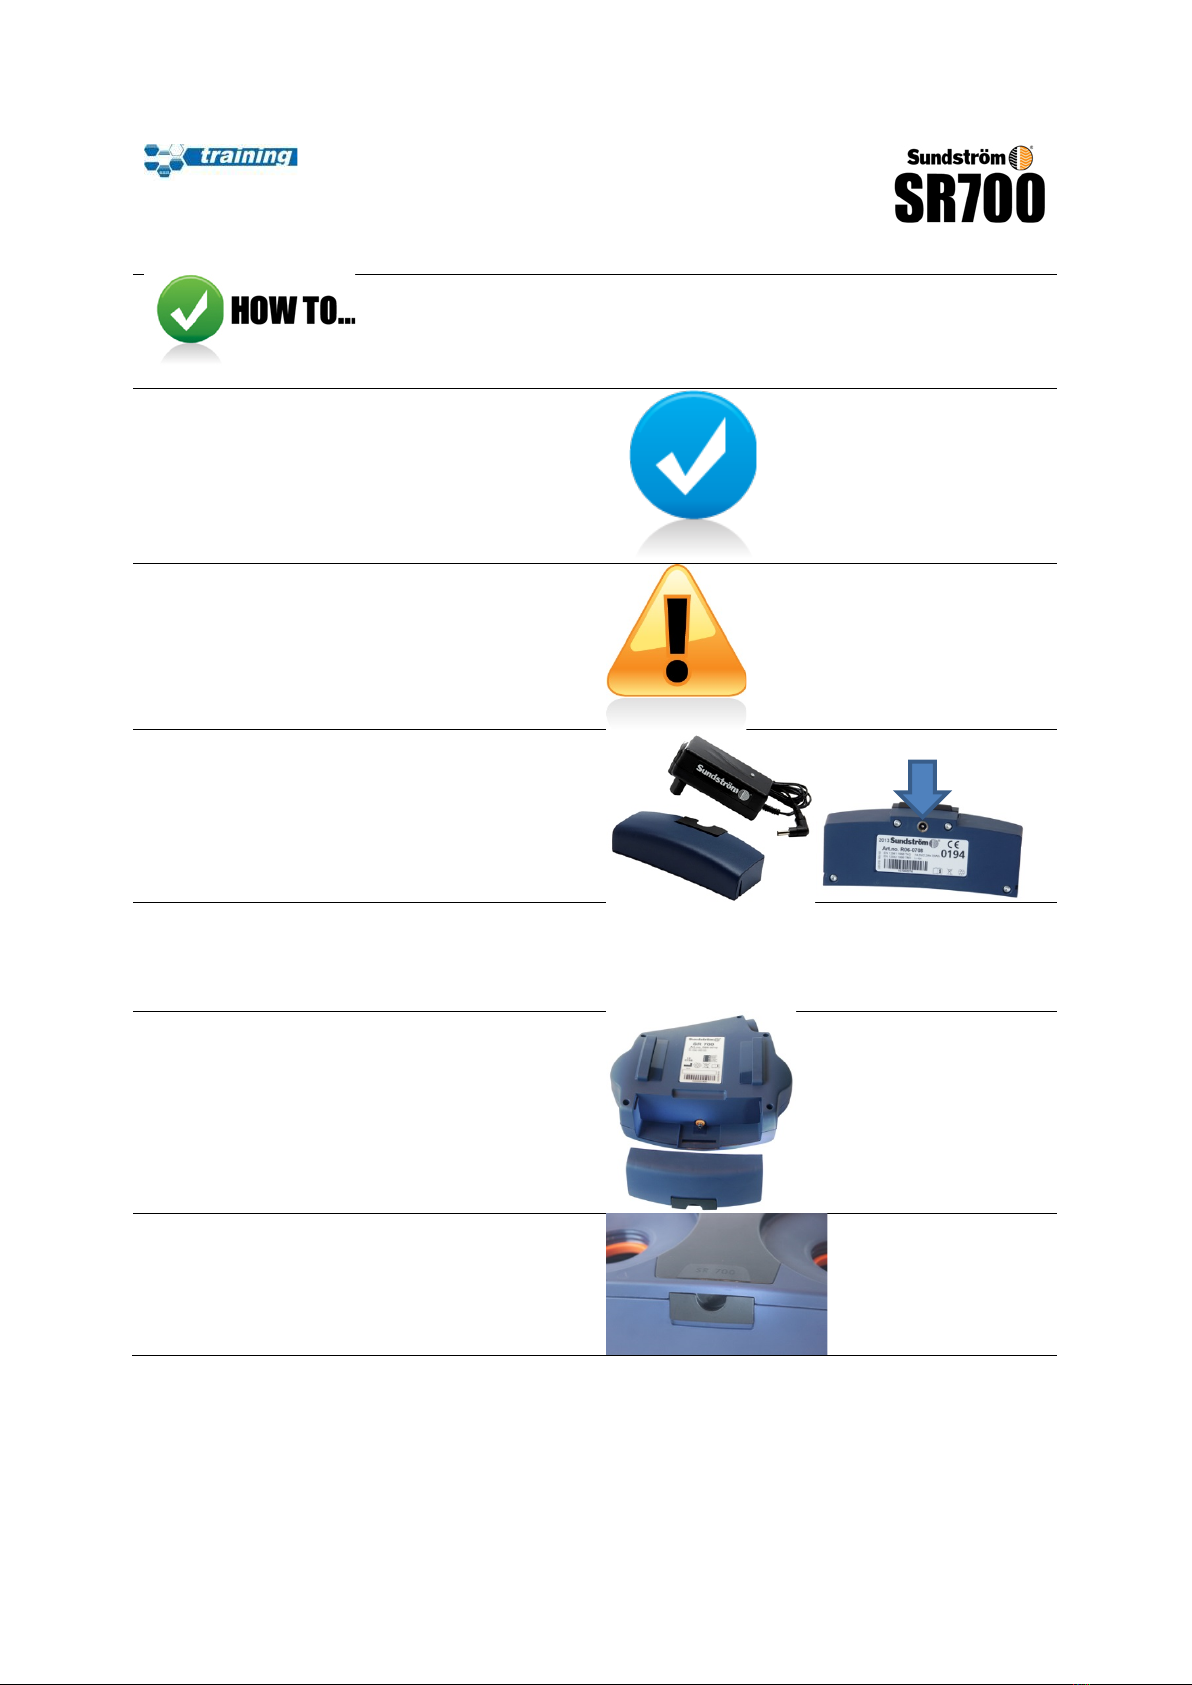
…prepare the SR700 Particle
PAPR battery for first use
BEFORE YOU START:
•Make sure the respirator and all its parts
are clean and intact
•Make sure you are familiar with the
equipment and know how to use it
If it is the FIRST TIME you unpack and use the
respirator, you must first charge the battery.
Plug in the battery charger to a wall socket and
to the battery.
There is an indicator light on the charger. Do not
unplug the charger until the battery is fully
charged and the charger displays a GREEN light.
ORANGE means that the battery is charging.
YELLOW means that the battery is almost fully
charged.
GREEN means that recharging is complete.
Slide the battery into its position in the
respirator fan unit until the lock clicks shut.
Use the battery lock tab to undo the battery
when you need to recharge it again.

SR700 Particle PAPR — How to Copyright © 2013 by The S.E.A. Group 3
BATTERY TIPS:
•Always recharge battery BEFORE it is
completely drained
•Don’t try to recharge other batteries
•Don’t use any other chargers
•Recharge the battery indoors
•The equipment becomes hot — do not
cover battery or charger during recharge
•Keep battery and charger away from
liquids and moisture
•Prevent short circuits by contact with
metal objects
•Don’t take battery apart
•Keep battery away from naked flame:
risk of explosion
…assemble the SR700 PAPR
Place the fan unit upside-down. Fit the three
tongues in one of the belt attachments into the
slots in the fan unit. Continue pushing the
attachment until it snaps into place. Repeat with
the other belt attachment on the opposite side.
Do not get left and right mixed up. Make sure
the plastic ‘wings’ are curved downwards with
the fan unit upside-down, as shown in the
picture.
Head pieces come with their own breathing
hose.
•Make sure the O-ring at the tip of the
hose is intact.
•Insert the hose into the hole in the fan
unit, fitting the two protruding lugs into
the corresponding slots of the bayonet
fitting.
•Turn the hose clockwise until it locks
securely.
If using the SR700 with the SR200 full face mask,
screw the threaded end of the hose into the
front of the face piece.

SR700 Particle PAPR — How to Copyright © 2013 by The S.E.A. Group 4
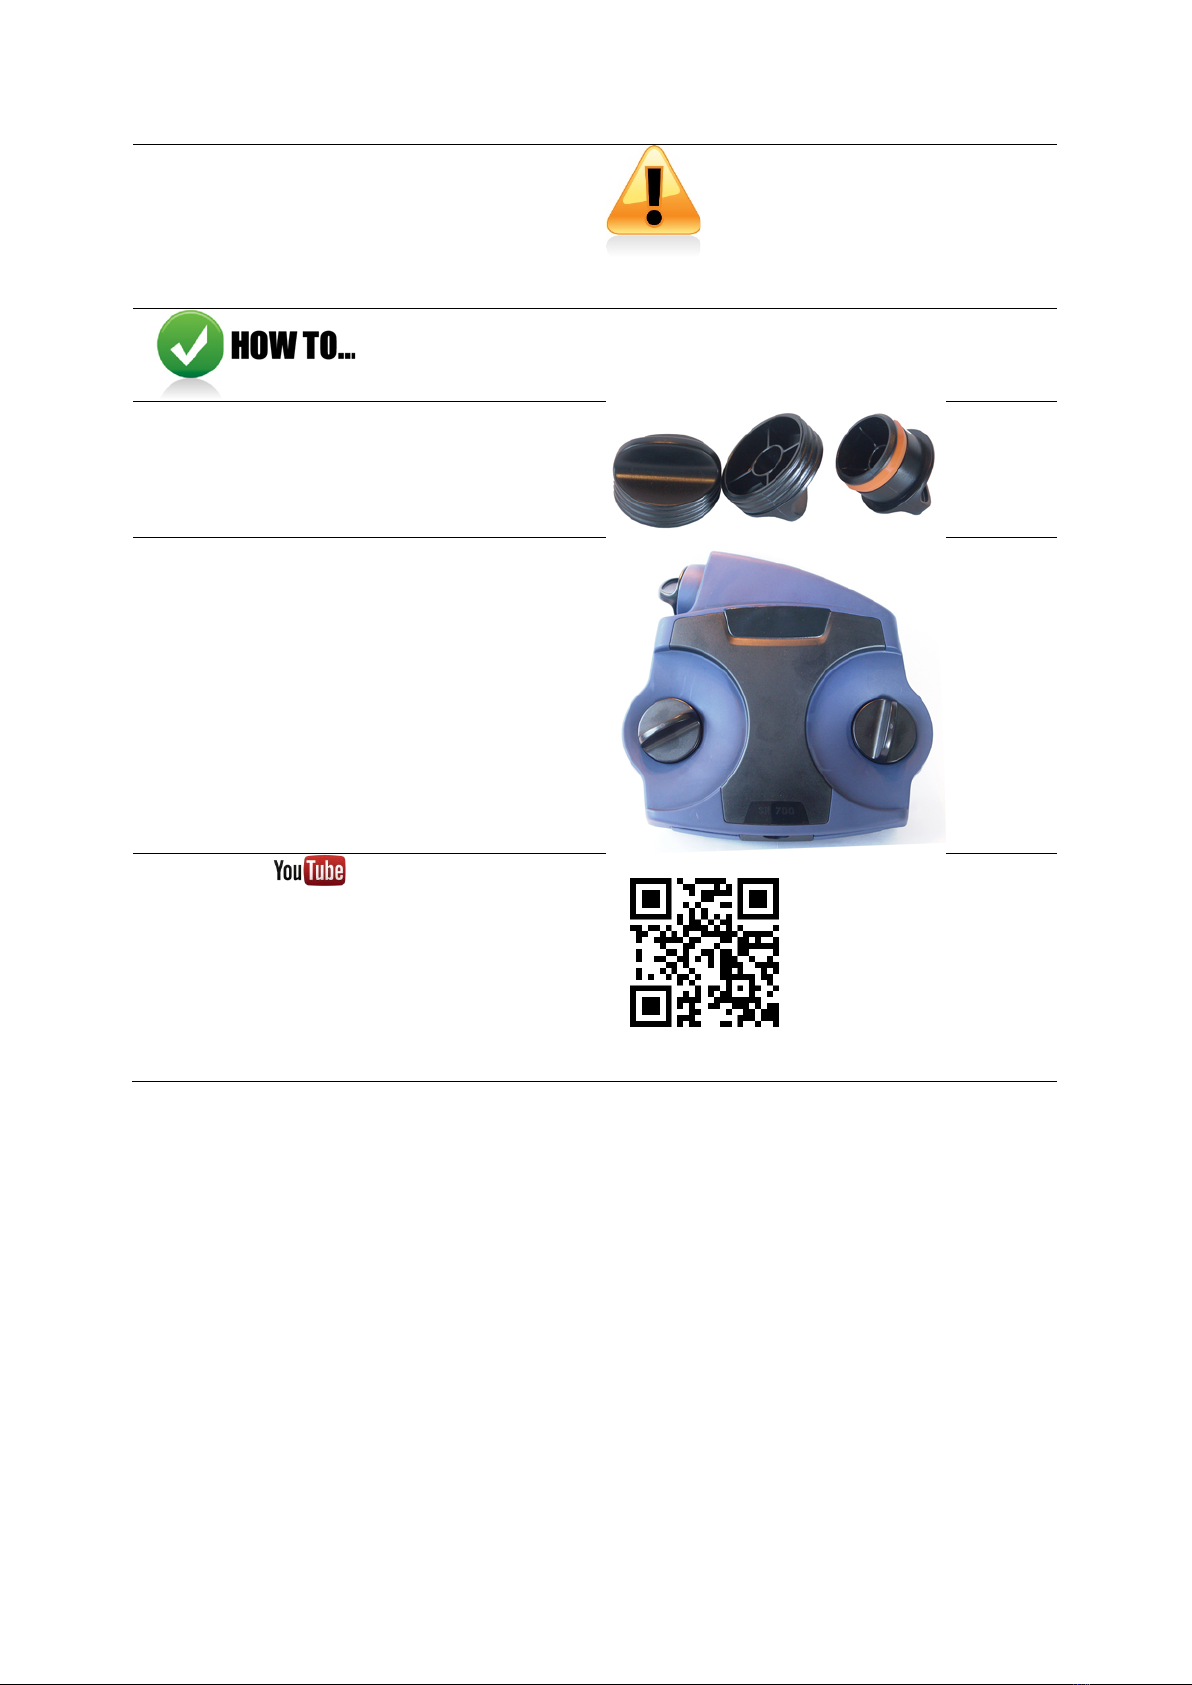
…attach UNTHREADED particle
filters to the SR700
Make sure you are using particle filters only.
Prefilters MUST be used.
If uncertain how to use filters, see the training
module on Sundström filters.
You will need two filter adapters.
With even pressure using both hands, squeeze
the particle filter into the filter adapter until it
snaps into place. Repeat with the other filter
adapter.
NOTE: the filters in both filter adapters must be
IDENTICAL! You must not use different filters or
filter combinations.
Place a prefilter on each particle filter and secure
it with a prefilter holder.
Screw in the two assembled filters into the fan
unit.
…remove filters from adapters
Insert a coin or similar between the filter rim and
the filter adapter and twist the two apart.
…attach THREADED filters
Screw two identical filters directly into the fan
unit.

SR700 Particle PAPR — How to Copyright © 2013 by The S.E.A. Group 5
Place a prefilter on each particle filter and secure
it with a prefilter holder.
Make sure the filters are securely screwed on.
…operate the fan unit
The SR700 is operated with a single button.
Switch on the fan by pressing the button once.
The fan will start and perform a self-test. During
the test, the display symbols will light up, the
alarm will sound, and the vibrator will buzz
twice.
After the self-test, the display will show only the
small fan symbol, indicating that the fan unit is
running normally at 175 litres/minute air supply.
The PAPR is ready to use.
Press the button once more to enter boost
mode. The fan goes up in speed, delivering air at
225 l/min, and the large fan symbol lights up.
Press the button again to return to normal air
speed.
To turn the fan off, press and hold the button
until the motor switches off and the display goes
black.

SR700 Particle PAPR — How to Copyright © 2013 by The S.E.A. Group 6
…recognise alarms
If the airflow dips below the selected flow rate
(175 l/min in standard mode and 225 l/min in
boost mode), the following will happen:
•A red triangle will flash on the display.
•A pulsing beep will be heard.
WHAT TO DO:
•Stop work.
•Do not remove the respirator or head
piece!
•Leave the area — go to a safe
environment with clean air.
•Inspect the equipment and fix the cause
of the dip in airflow.
+rapid continual beep pulses
If the particle filters are clogged, the following
will happen:
•The red triangle on the display will flash.
•The beeper will sound for 5 seconds
every minute or so.
WHAT TO DO:
•Stop work.
•Do not remove the respirator or head
piece!
•Leave the area — go to a safe
environment with clean air.
•Replace the particle filters with new
ones.
+5-second beeps every minute
If the battery is running low, the following will
happen:
•The yellow battery symbol on the display
will flash.
•The beeper will sound twice every 30
seconds.
WHAT TO DO:
•Stop work.
•Do not remove the respirator or head
piece!
•Leave the area — go to a safe
environment with clean air.
•Recharge the battery.
+two beeps every 30 seconds
…perform a functional check
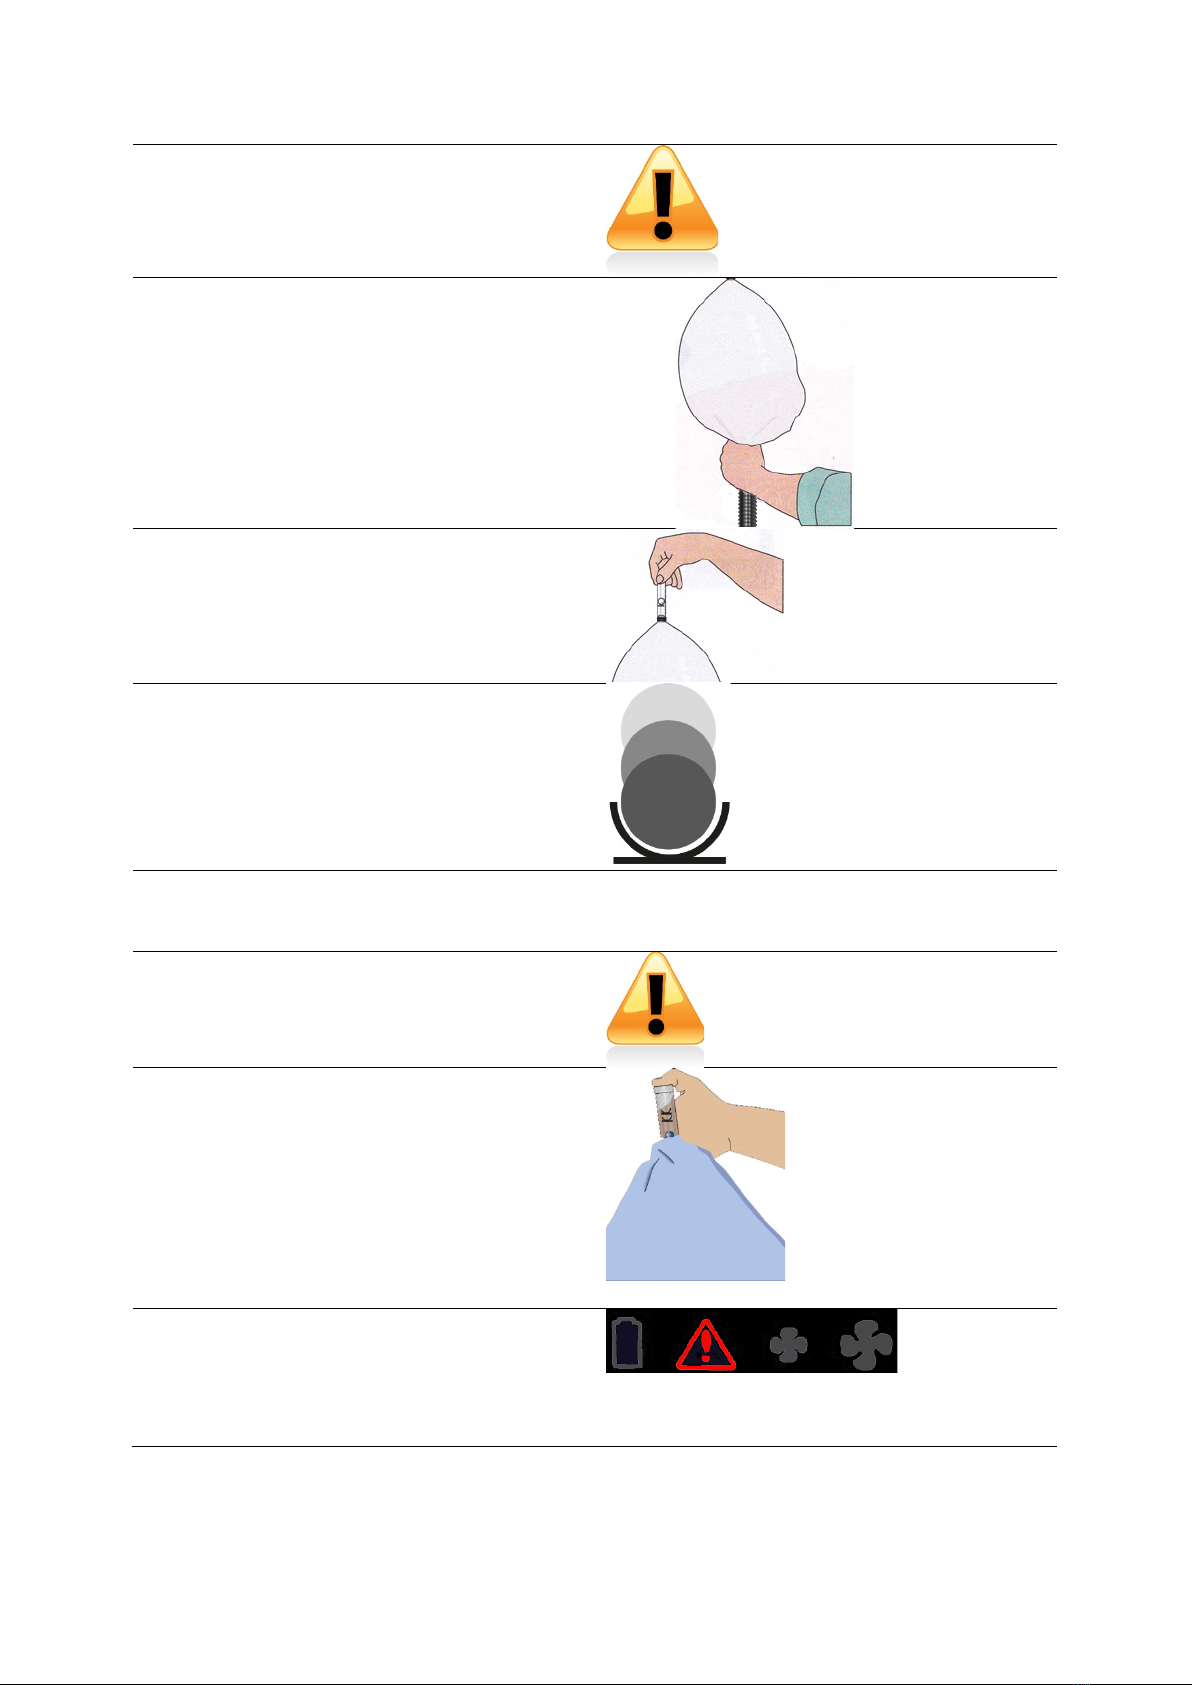
SR700 Particle PAPR — How to Copyright © 2013 by The S.E.A. Group 7
Make sure the SR500, headpiece and filters are
intact and correctly assembled.
Switch on the PAPR.
Place the entire facepiece or headpiece into the
test bag and seal off by closing your hand around
both the bag and the breathing hose.
IMPORTANT! Do not in any way obstruct,
squeeze together or bend the breathing hose.
With the other hand, hold the flow tube up
vertically from the bag.
The floating ball in the tube should be on the line
marked 175 or slightly above it.
175 l/min
If the floating ball isn’t on or above the line,
shake it a few times, and make sure the tube is
completely vertical.
If it seems impossible to get a successful
measurement, call your supervisor. Do not use
the equipment.
Now test the alarm functions of the SR500.
With the fan unit running, and still sealing off
around the breathing hose, block the exhaust of
the test flow tube with your thumb or hand.
The following should happen:
•The red triangle should flash on the
display.
•A pulsing beep should sound.
+rapid continual beep pulses

SR700 Particle PAPR — How to Copyright © 2013 by The S.E.A. Group 8
When the air block is released, all alarms should
stop after about 15 seconds.
…wear the SR700 Particle PAPR
The fan unit should sit on the small of your back.
If using a headpiece, let the breathing hose run
straight up your back without kinks or bends.
If using the SR200 full face mask, run the
breathing hose around your waist and up along
your chest.
…clean the SR700 Particle PAPR
For normal cleaning and disinfection, use
Sundström’s cleaning tissues.
Alternatively, use a mild detergent and water
and wipe the regulator all over with a soft cloth
or sponge. Warm water may give a better clean.
Leave to dry and store in a dry, clean area at
room temperature away from direct sunlight.
SR700 Particle PAPR — How to Copyright © 2013 by The S.E.A. Group 9
IMPORTANT!
•Never use solvents to clean the
equipment.
•Avoid getting any liquid or detergent
into the fan unit itself. If necessary, use
the supplied sealing plugs.
…protect the SR700
If there is a risk of liquids or other material
entering the interior of the SR700 during
cleaning, transport or storage, sealing plugs are
available to eliminate the risk.
Simply screw in the threaded plugs into the filter
fittings and press the third plug into the bayonet
fitting of the breathing hose attachment.
Watch this on
(using your SmartPhone, tablet or computer)
http://youtu.be/QCqmQAlw_uo
Other S.E.A. Group Respiratory Product manuals


