8
Autoranging
When radiaon levels increase in some modes over certain preset levels, the Monitor 1000EC uses autoranging,
automacally changing from CPM to KCPM or from µR/hr to mR/hr.
Operang in Dose/Rate Modes
Cauon: Be sure there is no obstrucon between the detector window and the source being monitored/
surveyed. Avoid making measurements with the GM window facing the sun, as it could aect your readings.
At low count rates, signicant changes in the radiaon level displayed can take up to 30 seconds to stabilize
when set to auto-ranging. See Autoaveraging.
CPM, CPS, and Total counts are the most direct methods of measurement.
µR/hr, mR/hr and µSv/hr are calculated using a conversion factor opmized for Cesium-137. This mode is
less accurate for radionuclides other than Cs-137, unless you have calibrated the instrument for the specic
radionuclide you are surveying.
The most immediate indicators of the radiaon level are the audio indicator and count light.
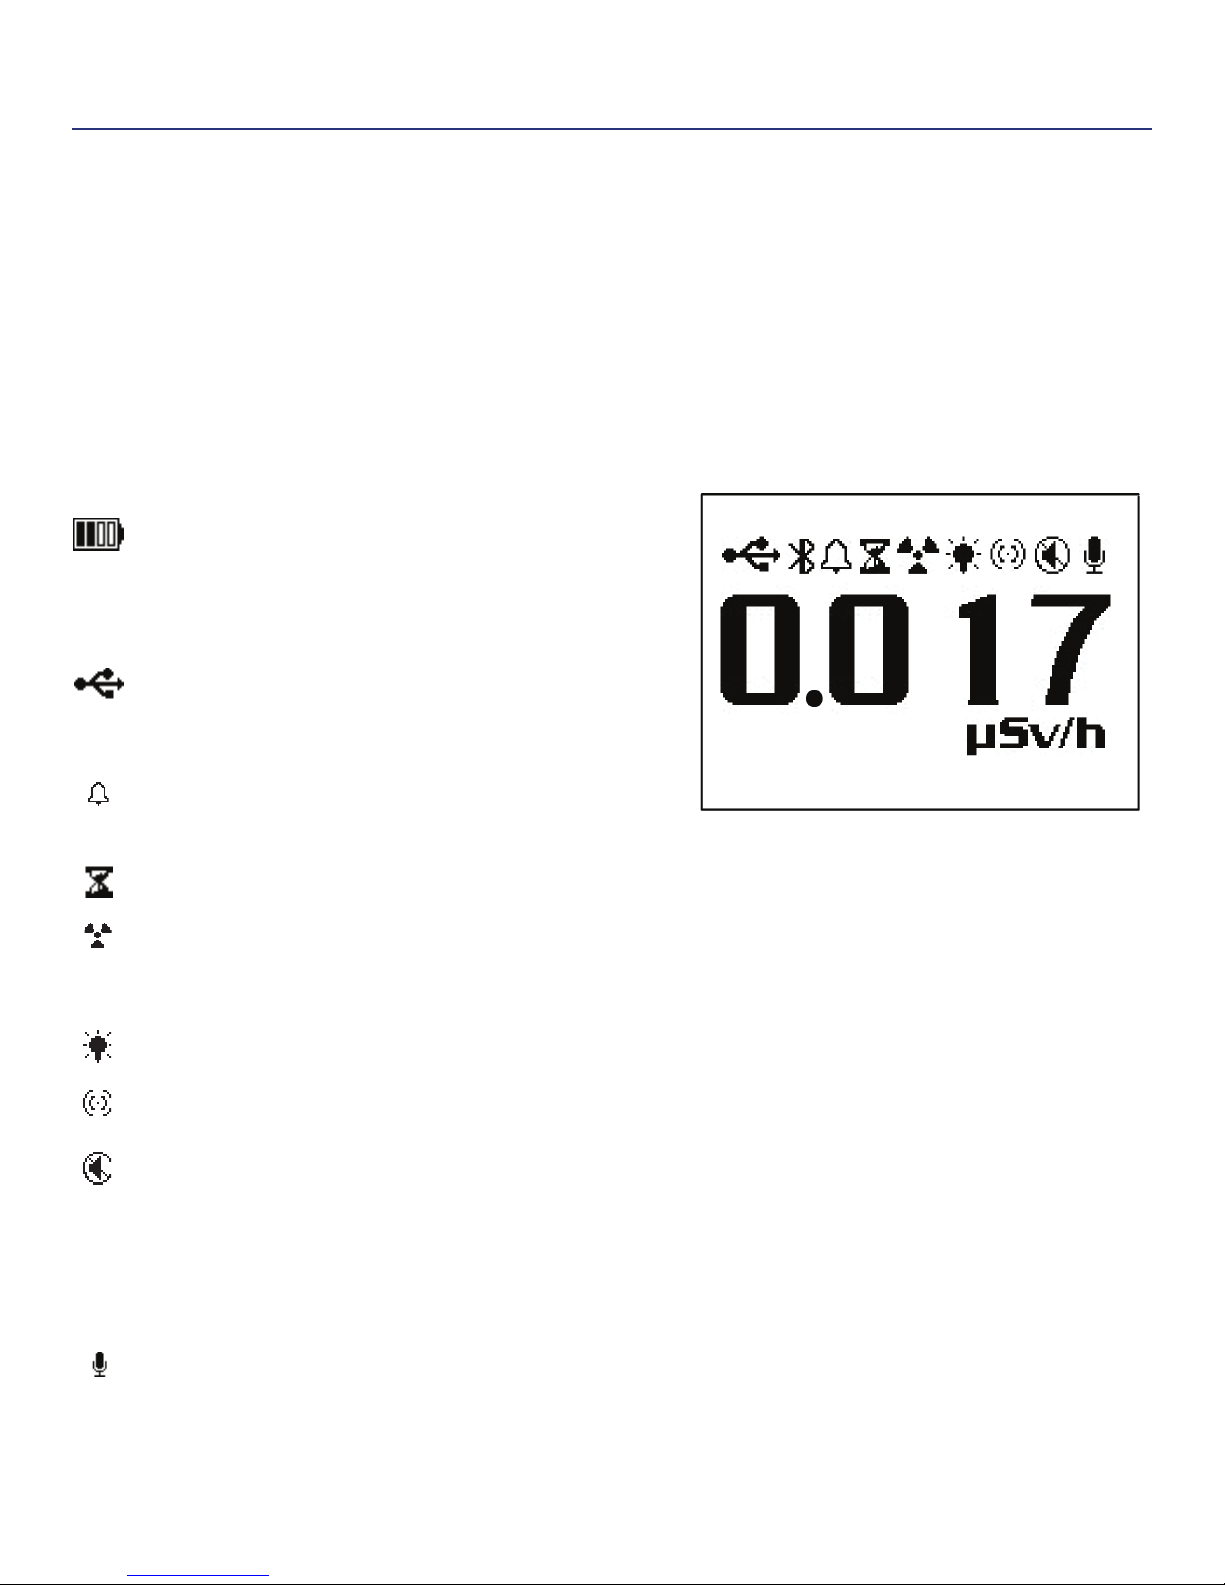
Using The Alarm
The Alarm can be set in dose or rate modes using the currently selected unit of measurement. Once the alarm
threshold is reached, the beeper will sound and the alert icon (radiaon symbol) will ash unl the alarm is
deacvated, or the radiaon level drops below the set alarm threshold.
1. To set the alarm, press the alarm buon. The SET ALARM screen will be displayed.
2. Use the + or - buons to increase or decrease the desired alarm level.
3. Once you have set the alarm to the desired level, press the enter buon to retain the seng into
memory and acvate the alarm. The alarm icon (bell icon) is now displayed to indicate the alarm is acve.
4. Once the alarm is triggered, press the alarm buon to mute the alarm. The alert icon (radiaon
symbol) will remain ashing unl the radiaon level falls below the set alarm level.
5. To deacvate the alarm mode, press the alarm buon, then the enter buon.
The alarm icon is no longer shown at the top of the display.
Using the Data Logging Feature
It is not necessary to set the internal clock to start collecng data to memory, but it is recommended to
properly me stamp the data collecon on your device to ensure the correct me and date in your collected
readings. You will need a copy of the Observer USB Soware to set the internal clock. The latest version is
available at seintl.com/soware. See Chapter 6: Observer USB Soware. The internal clock of the Monitor
1000EC can be set to the date and me on a PC running the Observer USB Soware by clicking Funcons
> Synchronize Monitor 1000EC to PC Clock. The Monitor 1000EC will beep twice once synchronizaon has
completed.
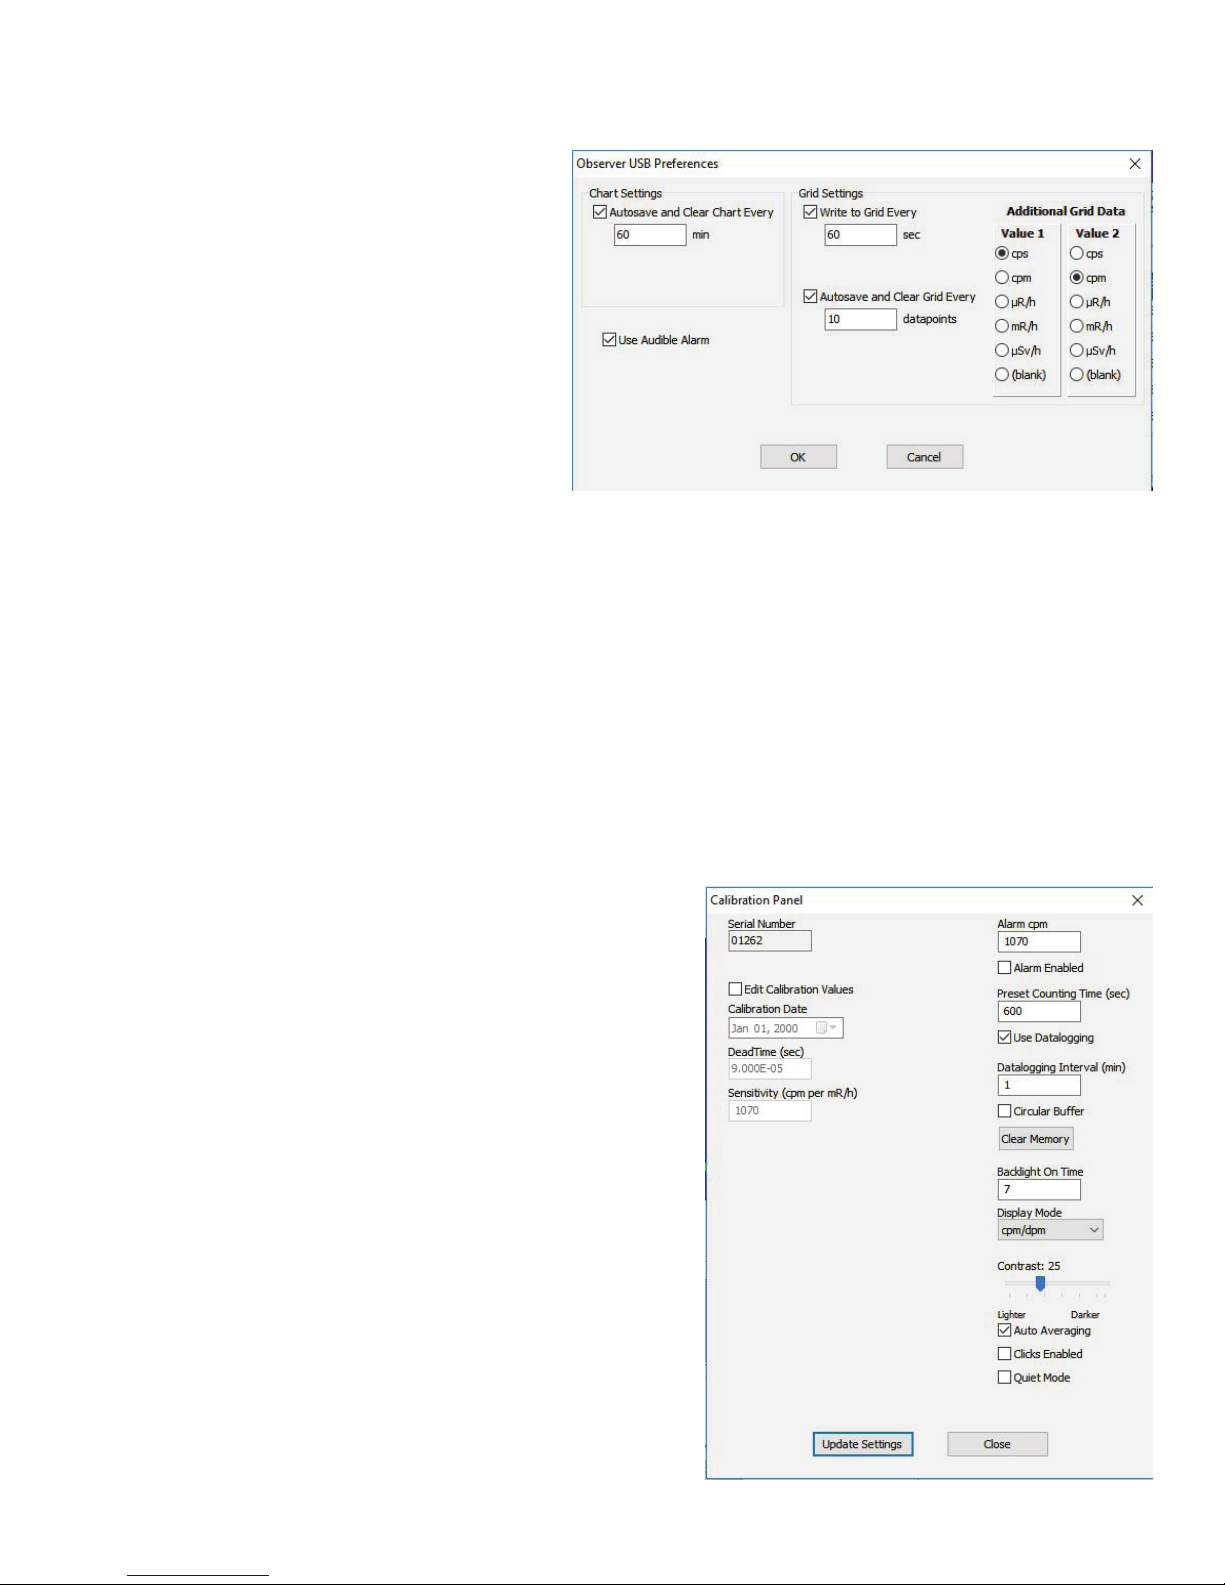
Once the me has been set, you can acvate the data logging via the Observer USB Soware or via the menu
buon on the Monitor 1000EC. To acvate it on the instrument, press Menu > Data Logging, then enter and
follow the on screen prompts. The default data logging frequency is 1 minute. You can change the frequency
in the Cal Panel window of the Observer USB Soware. There is enough on-board memory for a data logging
frequency of 1 minute to record for 90 hours. A data logging frequency of 10 minutes can record for 888 hours.
See Chapter 6: Observer USB Soware.