V0.2 | 11.11.2019 14:46 7/8
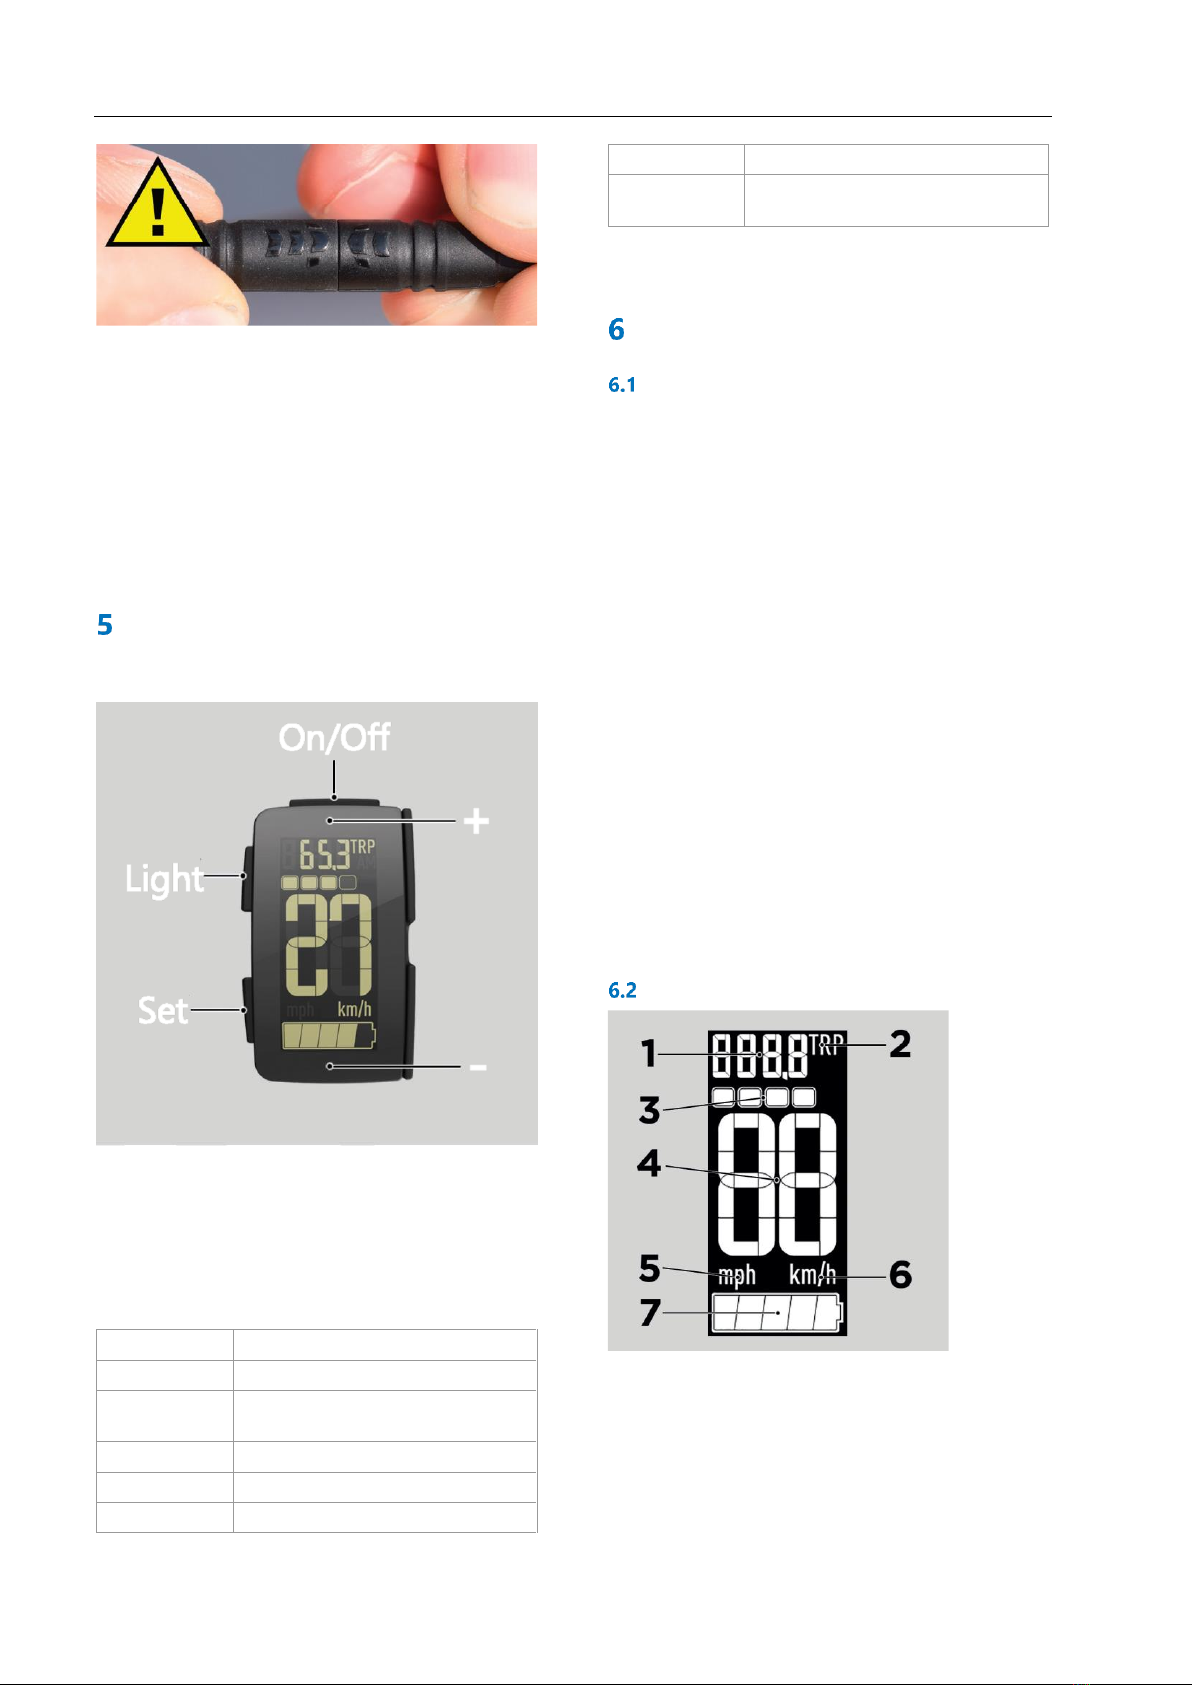
1. distance travelled or range (chapter 6.5)
2. trip distance (TRP), range (R) or odometer (T)
(chapter 6.5)
3. assist level (chapter 6.7)
4. speed (chapter 6.8)
5. mph = units in miles per hour (chapter 6.6)
6. km/h = units in kilometers/hour (chapter 6.6)
7. state of charge of battery (chapter 6.9)
Note: While riding, the display does not show all segments at
the same time.
Lighting
Press the "Light" button (Chapter 5) to switch on the lighting.
Normally the lighting on the pedelec consists of a headlight
and a rear light. Although there is no visual representation of
the lighting on the LCD display, the B100R's backlight turns on
and remains on as long as the lighting is on. Press the light
button again to turn off the backlight.
Pushing aid
Press and hold "+" on the rocker switch (chapter 5) to switch
on the pushing aid. The pushing aid switches on the motor to
move the pedelec forward slowly (6 km/h) without the driver
having to pedal. This function can be useful, for example, if
you push the pedelec up a ramp. There is no visual indication
of the pushing aid on the LCD display; the function is stopped
as soon as "+" is released. If you pedal or drive faster than 6
km/h, the pushing aid will end.
Distance travelled, range and odometer
At the top right [Figure 8, number 2], the display shows either
the travelled trip distance (TRP), the estimated remaining
range of the pedelec (R) or the odometer (the total distance
travelled by the pedelec = T). The default setting for the
display is TRP. Press and hold the "-" key (chapter 5) to reset
the TRP counter to 0.
To change the display settings, press the "Set" button once
(chapter 5) to display range (R) or twice to display odometer
(T). Press the "Set" button again to advance the display in the
order TRP / R / T; after T the display returns to TRP.
The display will count up to 9999 kilometers or 6213 miles. If
the odometer reaches more than that, it restarts with 0.
Units
Long-push „Set“ (chapter 5), to toggle between metric units
(km/h = kilometers/hour) and Imperial units (mph = miles per
hour). The units are shown in Figure 8 (numbers 5 and 6).
Choice of assist level
You can always press "+" and "-" on the rocker switch
(chapter 4) of the B100R to change the degree of motor
assistance. This allows you to make optimum progress with
your pedelec in any situation and on any terrain. There are
four assist levels and "Off" (level 0), so a total of five levels.
The symbols for the levels are shown in Figure 9.
Figure 9: Assist levels
Level 4: highest assist level with the most power, drains
battery fastest
Level 3: second highest assist level
Level 2: second lowest assist level
Level 1: lowest assist level, battery lasts the longest
Level 0 (Off): no assistance, pedelec is like a bicycle
Speed
The largest part of the display shows the pedelec’s current
speed [Figure 8, number 4]. To change the units (km/h or
mph), press and hold the "Set" button.
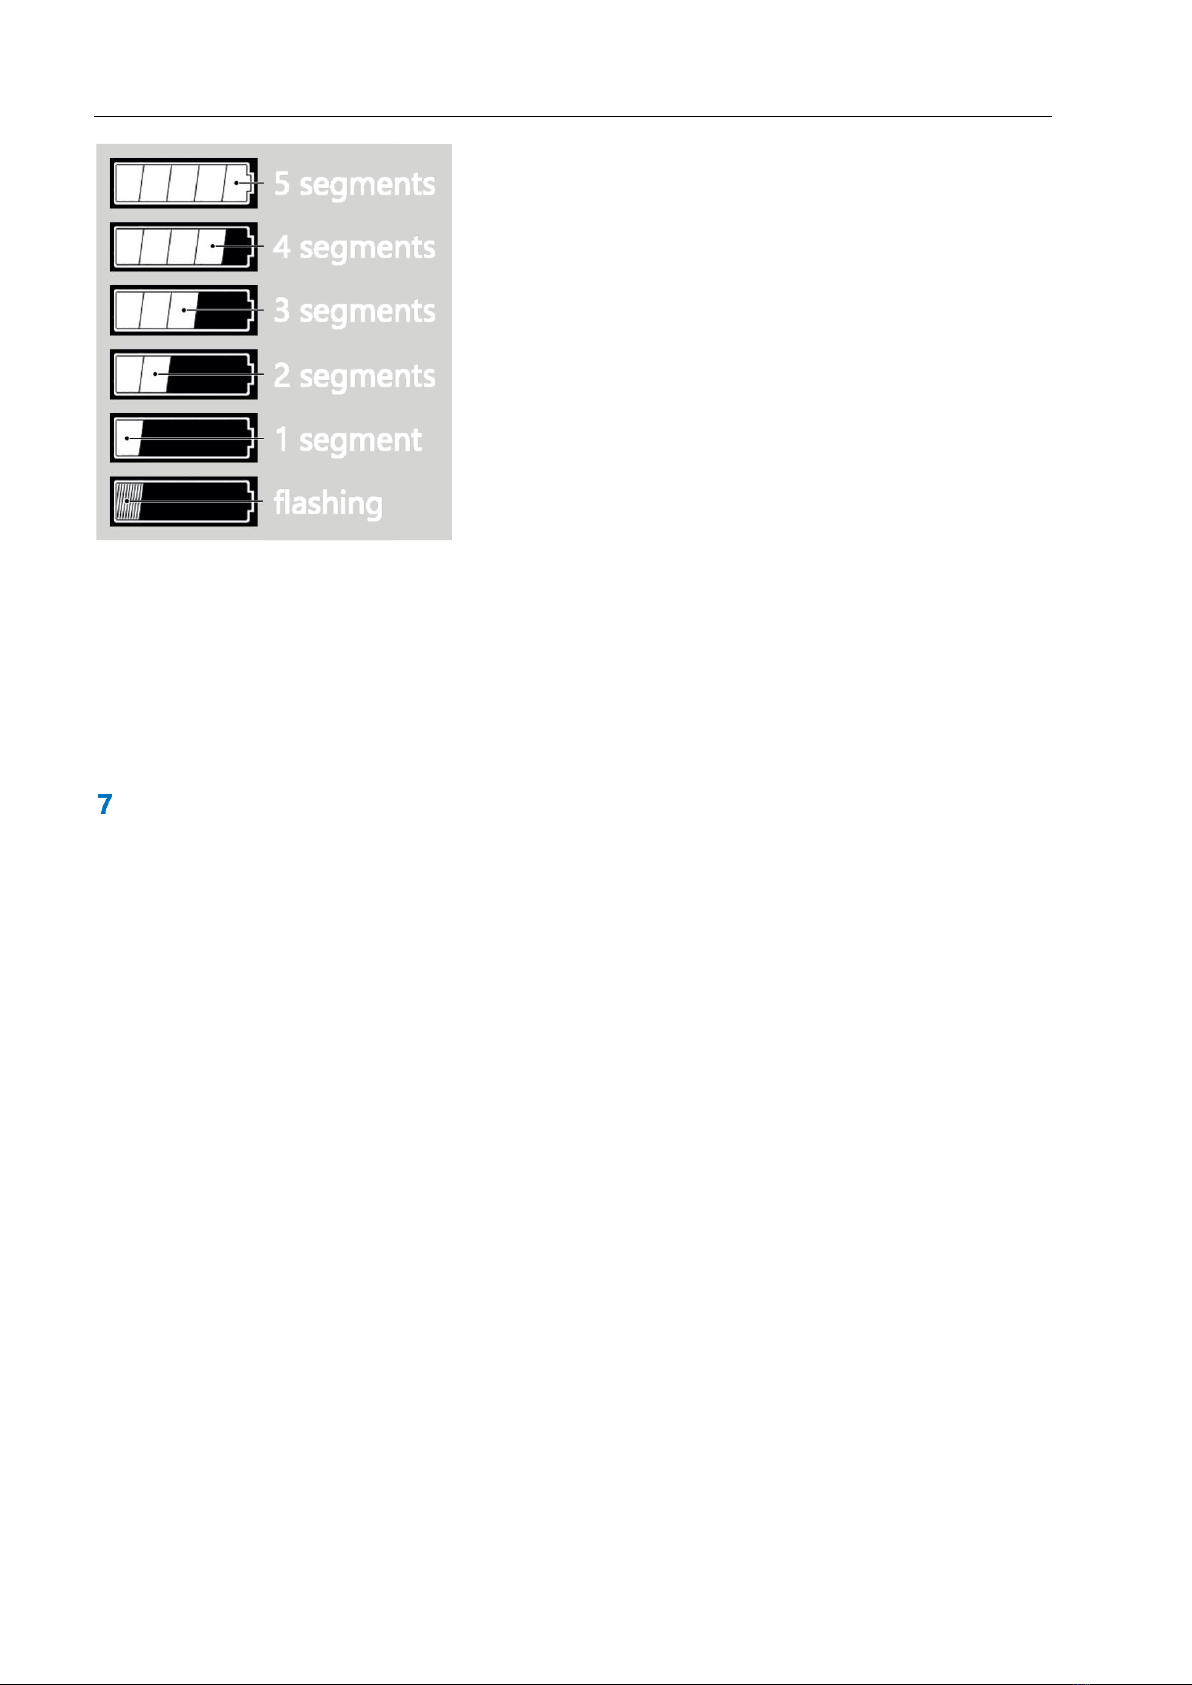
Battery state of charge (SoC)
The battery symbol at the bottom of the display indicates the
battery’s state of charge in five segments [Figure 10]. Please
note that each segment only indicates a range of 20 %, not an
absolute value. For example, if three segments are displayed,
the battery is approximately half full, but not necessarily
exactly 60 % full - the charge level is in the range of 41 % to
60 %. When the battery charge drops to 10 % or less, the last
of the five segments starts flashing to indicate the low state of
charge.