• If your seat is ever damaged, do not use it until it has been inspected by your local professional motorcycle dealer. You may also need to send your seat to
Saddlemen for inspection or repair. Replace any mounting part immediately if it has sustained damage that will prevent the seat from being properly secured
to your motorcycle.
DO NOT ATTEMPT TO USE THIS SEAT IF:
• You do not understand these installation and use instructions;
• You do not understand any part of the seat’s mounting system;
• You have any doubts as to the security of the seat’s mounting system.
• If you have any concerns or questions, seek help at your qualified motorcycle dealer or call the Saddlemen support line at (310) 638-1222.
PASSENGER GRAB STRAP: This accessory seat is provided without a passenger grab strap. Carrying a passenger
without a grab strap in place on your motorcycle may be hazardous for the passenger. Grab straps, rear mounted
foot pegs, sissy bars, passenger backrests and trunks aid in making a passenger more secure on the vehicle.
Laws in some jurisdictions require grab straps or other security devices when a passenger is transported. Do not
transport a passenger if they are not secure. Do not disable grab straps or other safety features provided on your
motorcycle and obey all trac laws while riding.
Saddlemen oers a complimentary grab strap for this seat, part no. 15327. Call (310) 638-1222 for more informa-
tion. Always ride responsibly and take precautions to be sure your passenger is secure and comfortable at all time.
Remember: Motorcycling can be a dangerous activity. Installation of any accessory can increase your risk if it is
not installed properly. You are responsible to install this seat or any accessory so it will not contact any portion of
the drive train, suspension or steering, or in any way interfere with the operation of your motorcycle.
To avoid injury, install while engine is cold.
1. Remove your original seat, and place it on a table with the bottom side
up, next to your new Saddlemen replacement seat.
In some cases, it MIGHT be necessary to remove mounting hardware and
rubber bumpers from your original seat and reinstall them on your new
seat. If so, our seat base design may dier slightly from your original pan,
using dierent hardware (supplied with this seat) to attach your original
brackets, than that used on your original seat. Because of manufacturing
variances between dierent models and years, it may be necessary to
slightly alter the bolt-hole size on the original brackets with a drill or file to
accommodate the new bolts.
2. If applicable, remove brackets from your original seat and install them
in the corresponding locations on your new seat, using the bolts provided.
Place the new bolts through the brackets and into the threaded riv-nuts in
the new seat base. Repeat until all hardware is transferred.
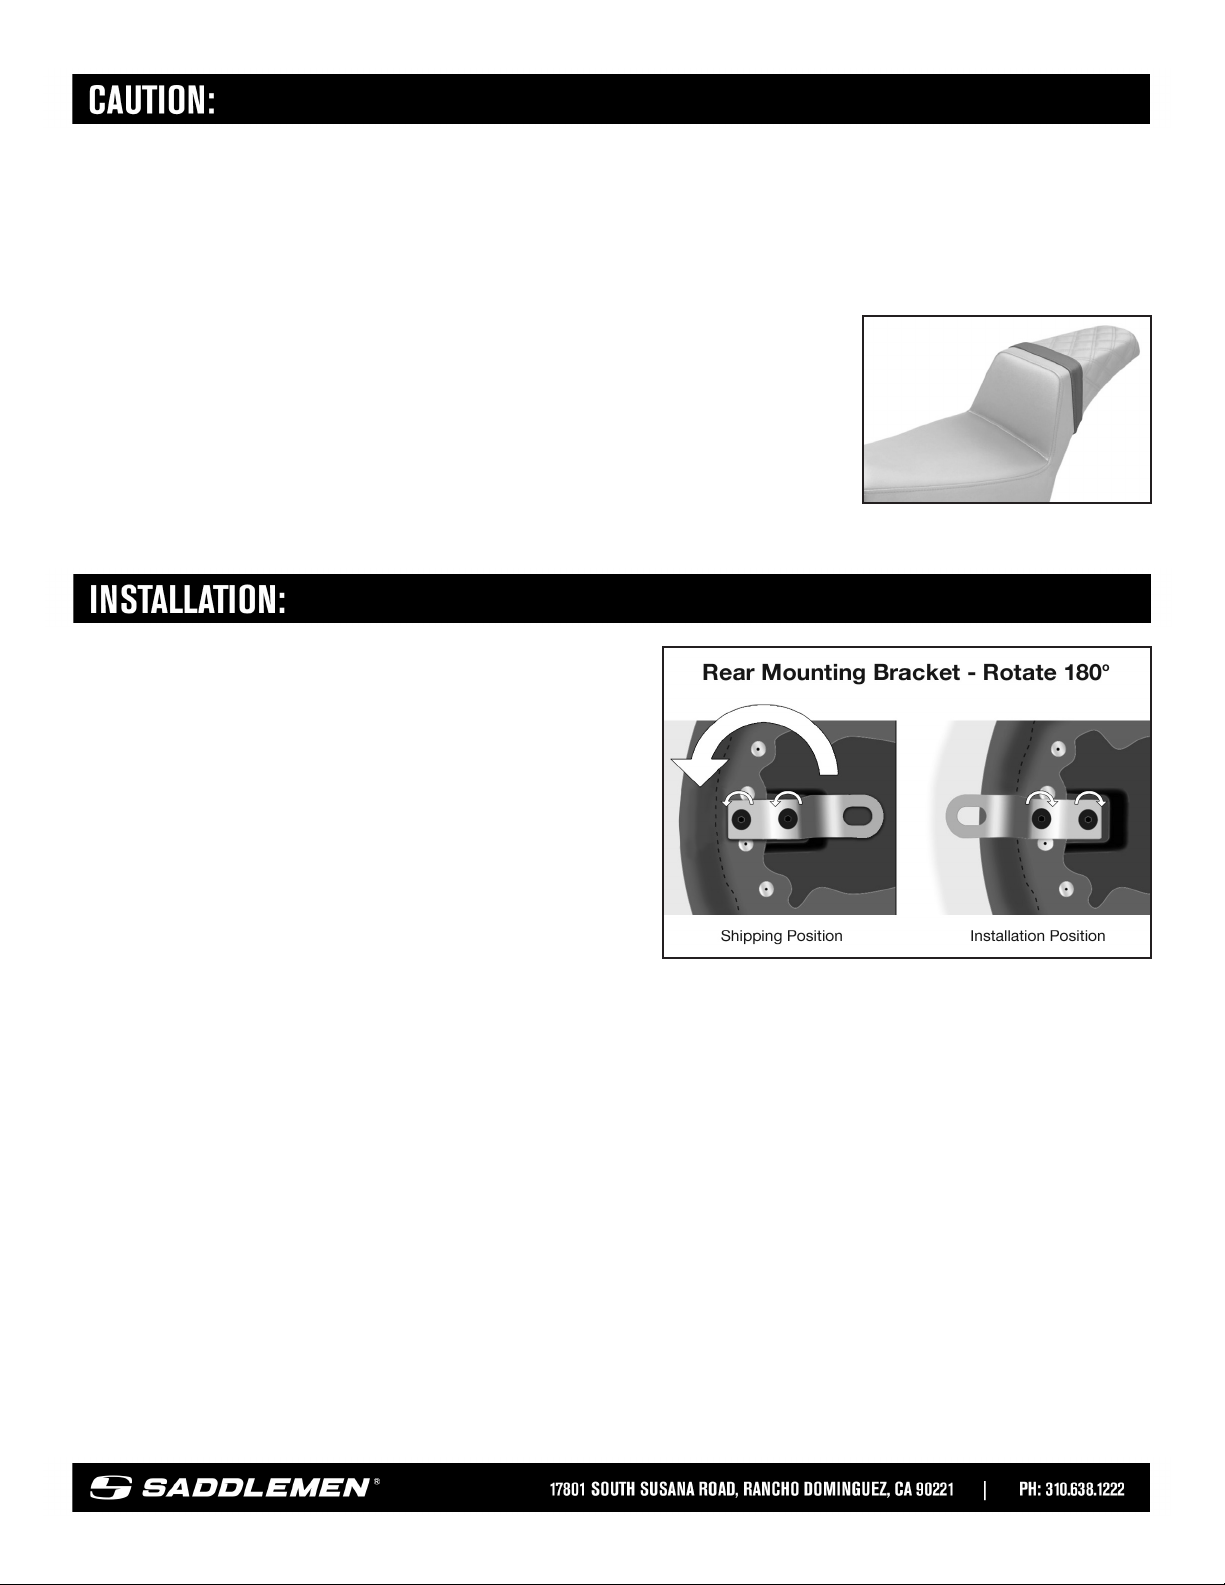
3. If your Saddlemen seat uses a single fender mounting bracket at the
rear, you may need to remove the two bolts holding it to the seat base, and reinstall the bracket with the tongue in the correct mounting posi-
tion (see illustration).
4. Check all fasteners for tightness, 10 -to- 15 ft/lbs torque is recommended, do not overtighten.
5. If applicable, remove rubber bumpers from your original seat and move them to your new Saddlemen seat. In some instances, we have al-
ready installed bumpers that are needed, but some models require the special specific bumpers from your original seat for proper tolerance
and fit. The stock bumpers are easily removed by twisting and pulling at the same time. Reinstallation may require drilling a hole of the same
diameter as the original into the new seat pan. For bumper removal or installation, use either soapy water or silicone spray as a lubricant.
6. Install the new seat on the motorcycle. Check to make sure the seat fits properly. The new seat will be firmer than the original seat and
will break-in over time to provide greater comfort (usually several hundred miles of riding is required). During the break-in, the seat will also
settle in, or lower, about ½ to one inch. Older seats may seem substantially lower because of the worn-out, compressed foam that may have
deteriorated with time.
Generic Metric Seat Install (Rev 08-21)


