Saebo MAS mini User manual

Product Manual
No Plateau In Sight®
SaeboMAS mini
(Patent Pending)
Maximizing Function
While Improving Strength

1
SaeboMAS mini Product Manual
The SaeboMAS mini is a lightweight, zero gravity, dynamic mobile arm support that challenges
and assists the weakened shoulder and elbow during functional tasks. This compact device was
specically designed for clients suffering from neurological and orthopedic conditions resulting in
shoulder and elbow weakness.
The SaeboMAS mini is the ideal home program solution to improve strength, motor recovery, and
independence. Clients will be able to perform functional exercises with greater ease and minimal
compensation. Additionally, this personal device allows for enhanced independence for self-care,
leisure or occupational tasks like using a computer, eating, drinking, or grooming.
The main feature of the SaeboMAS mini is the tension system. Based on the functional goals, the
adjustable spring based parallelogram provides precise customization for assistance or resistance.
Whether the client requires extra assistance for functional tasks or less assistance to further
challenge his or her strength during exercise, the proprietary tension system is fully adjustable.
o Increase motor control, strength and
range of motion.
o Improve self-care performance.
o Minimize over use injuries and unwanted
movement.
o Provide an opportunity for the patient to
perform highly repetitive tasks without
fear of proximal overuse injuries or pain.
o Safe and effective way to treat shoulder
subluxation.
o The SaeboMAS mini should not be used
with individuals who exhibit severe
shoulder and elbow pain.
Introduction
Benets Contraindications

2
SaeboMAS mini Product Manual
MAS500(armhouder)deel3
WEIGHT:
A3
SHEET 1 OF 1
SCALE:1:5
DWG NO.
TITLE:
REVISION
DO NOT SCALE DRAWING
MATERIAL:
DATE
SIGNATURE
NAME
DEBUR AND
BREAK SHARP
EDGES
FINISH:
UNLESS OTHERWISE SPECIFIED:
DIMENSIONS ARE IN MILLIMETERS
SURFACE FINISH:
TOLERANCES:
LINEAR:
ANGULAR:
Q.A
MFG
APPV'D
CHK'D
DRAWN
To decrease risk of bodily injury, please be sure to lower the Tension Indication Knob completely
until you feel a stop (knob parallel with bottom arrow) prior to opening or closing the SaeboMAS
mini (clipping or unclipping).
The SaeboMAS mini must be mounted to a sturdy table. The device should not be mounted to
unstable surfaces or tables on wheels. Do not mount to plastic tables.
Do not perform hand-to-mouth activities without the Elbow Support. The Elbow Support must be
attached. Without the Elbow Support attached, the Forearm Support may migrate distal (i.e., slip
downwards) towards the wrist. In some cases, the Forearm Support may slip completely off the
arm.
For some individuals, the Forearm Support may migrate distally (i.e., slip downwards) toward the
wrist during use. Add non-slip material, such as wafed shelf liner to minimize migration.
Parts List
Precautions
Forearm
Support
Lock
Horizontal Bar
Metal C-Clamp
Handle
Rubber Stop
Height
Adjustable
Knob
Vertical Bar
Tension Adjustable Handle
Forearm Support
Table Mount
Cable
Forearm
Liner
D-Ring
Elbow Support
Base
Forearm Base
Swivel Stop
Wrist Support
Elbow Support
Tension Indication Knob

3
SaeboMAS mini Product Manual
During the installation, please keep the SaeboMAS
mini in a closed position (i.e., horizontal bar secured/
clipped to the frame) until the setup is complete (see
Figure 1). Once you are nished installing the device,
open the SaeboMAS mini (i.e., unclip the horizontal
bar from the frame) to begin treatment. When you are
not using the device, lower the Tension Indication Knob
completely until you feel a stop (knob parallel with
bottom arrow) (see Figure 2).
Important: To decrease the risk of bodily injury,
make sure the tension is lowered completely
before opening/closing the SaeboMAS mini
(see Figure 2).
SaeboMAS mini Installation
Figure 1
Figure 2
Figure 3 Figure 4
A. Attach the Table Mount
1. The Table Mount should be positioned on the involved
side approximately 2 feet away from the user.
2. The Table Mount should be secured to a sturdy heavy surface. Ideally, the mounting surface
should be 2-3 inches (5 - 7.5cm) thick. If you are applying the Table Mount to a counter top, be
sure to have a sufcient surface area to properly secure the mount to the counter.
3. Place the Table Mount in the correct position (see Figure 3).
4. Tightly rotate the Handle until the mount is secured (see Figure 4).

4
SaeboMAS mini Product Manual
B. Attach SaeboMAS mini to the Table Mount
1. Now that the Table Mount is secured to the surface, insert the
SaeboMAS mini vertical pole into the opening of the Mount
(see Figure 5).
2. Once the appropriate height is determined, secure the vertical
pole by rotating the Height Adjustable Knob on the Table Mount
in a clockwise direction (see Figure 6).
3. Be sure to keep the device in a closed position
(see Figure 1).
C. Height Adjustment
1. To increase or decrease the height of the device, rotate the
Height Adjustable Knob in a counter-clockwise direction (to
loosen) and gently pull up or push down to the appropriate
height. Once the appropriate height is determined, secure
the vertical pole by rotating the Height Adjustable Knob in a
clockwise direction (see Figure 6).
Important: What height should the SaeboMAS mini be
positioned?
The Tension Adjustment Handle of the SaeboMAS mini should be positioned at shoulder height of
the user (see Figure 7).
D. Apply Forearm Support
1. The SaeboMAS mini includes 2 Forearm Supports (1 Small, 1 Medium/Large). The Medium/
Large Forearm Support is attached to the device.
2. To replace the Forearm Supports, loosen the Knobs under the Forearm Support Base and
remove. Replace with the Small Forearm Support and re-secure.
Reminder: The Forearm Supports are malleable and can be shaped for an intimate t.
Figure 7
Figure 5
Figure 6

5
SaeboMAS mini Product Manual
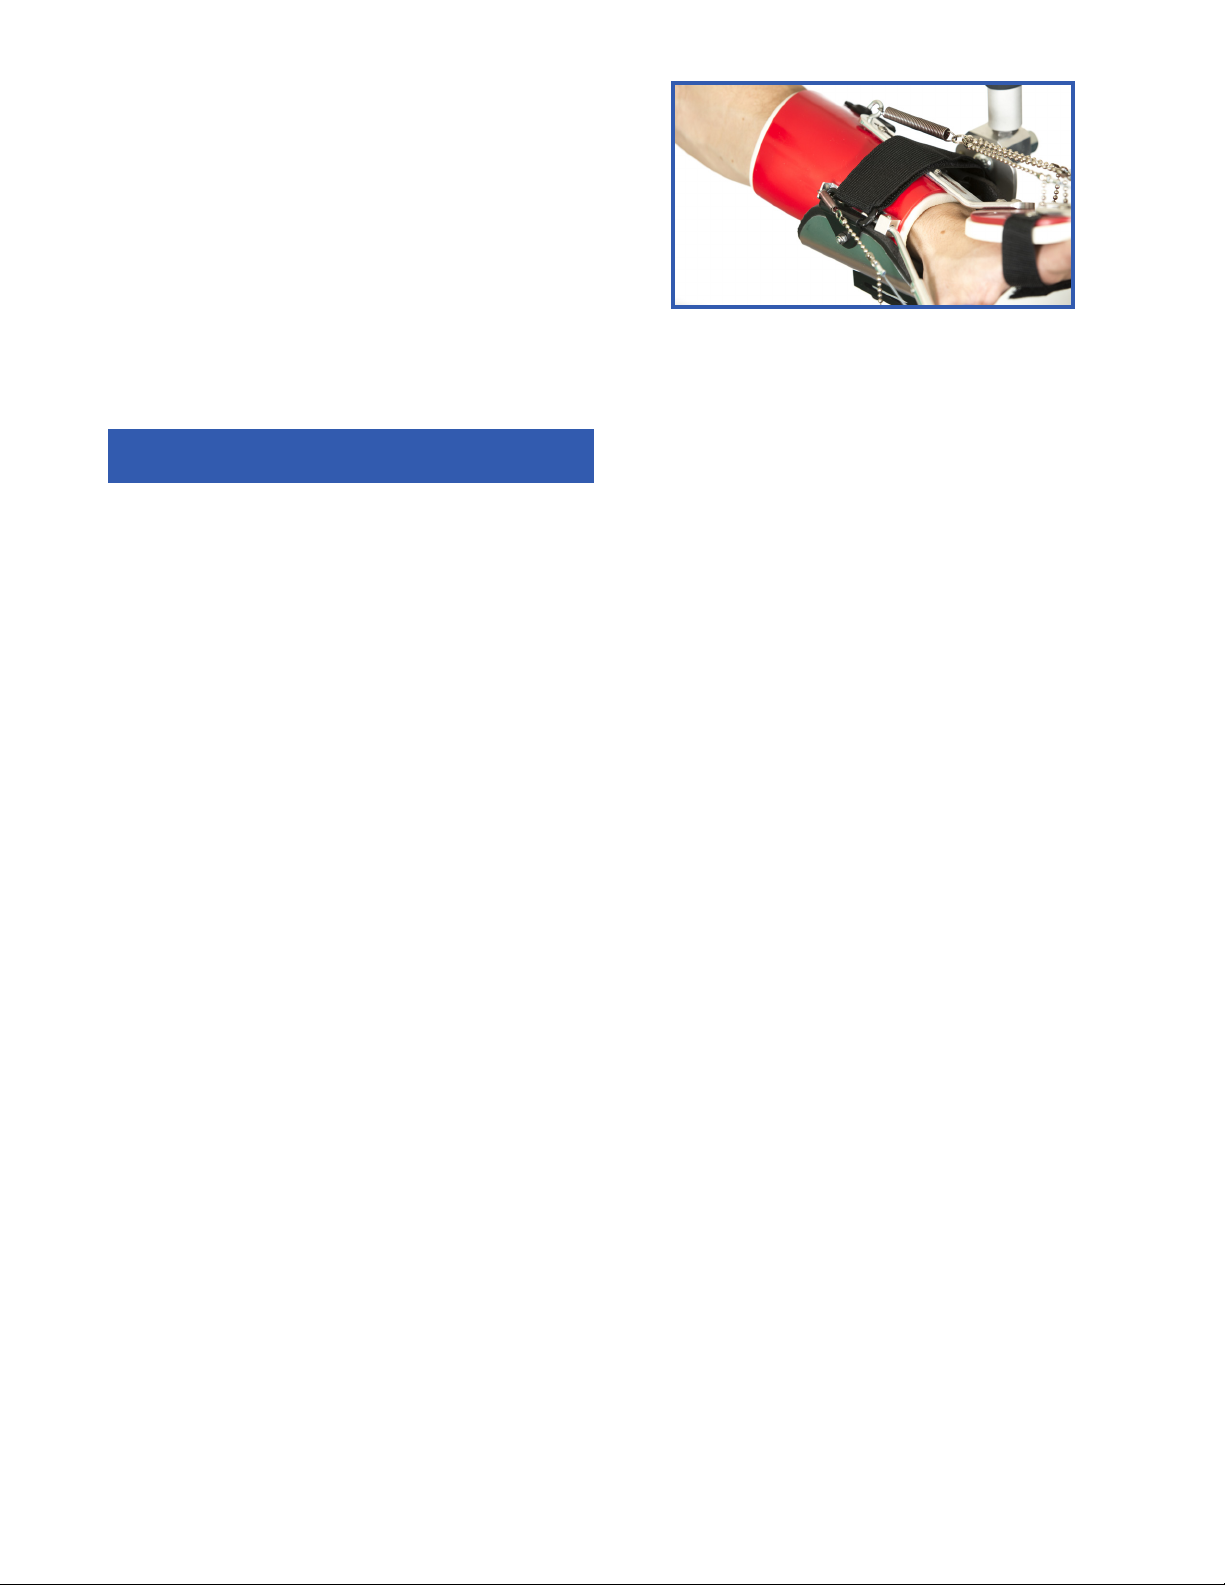
E. Apply Elbow Support
Important: What is the Elbow Support and when should I use it?
1. It is highly recommended that the elbow support be
used for any activities involving elbow exion. For
example, all activities that incorporate hand to mouth
movements (i.e., feeding, grooming) will need the elbow
support. This will prevent the Forearm Support from
migrating distally (slip downwards) towards the wrist.
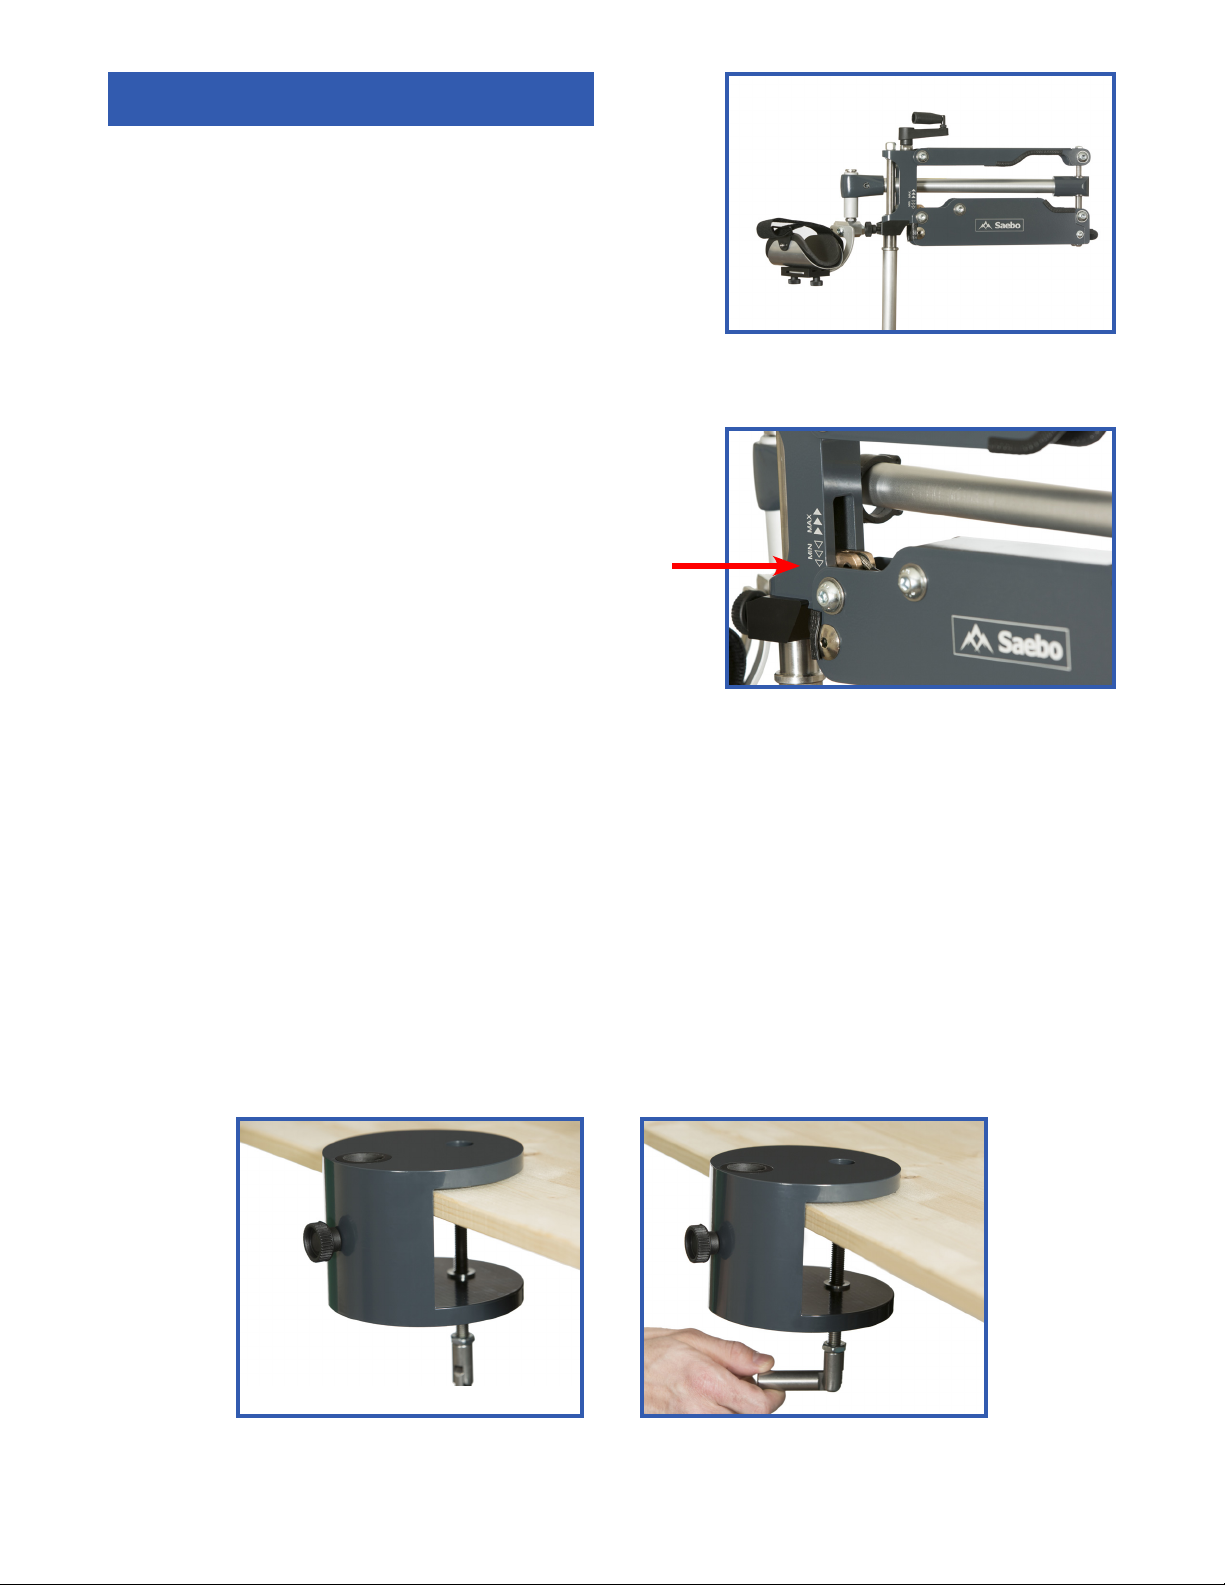
2. To attach the Elbow Support, loosen the Elbow Support
Base Knobs. Thread the Elbow Support into the opening
on the right side. Re-tighten the Knobs to secure the
Elbow Support to the Elbow Support Base (See Figure 8).
3. Be aware that elbow extension will be limited while using the Elbow Support.
DO NOT USE THE ELBOW SUPPORT FOR TASKS THAT REQUIRE ELBOW EXTENSION.
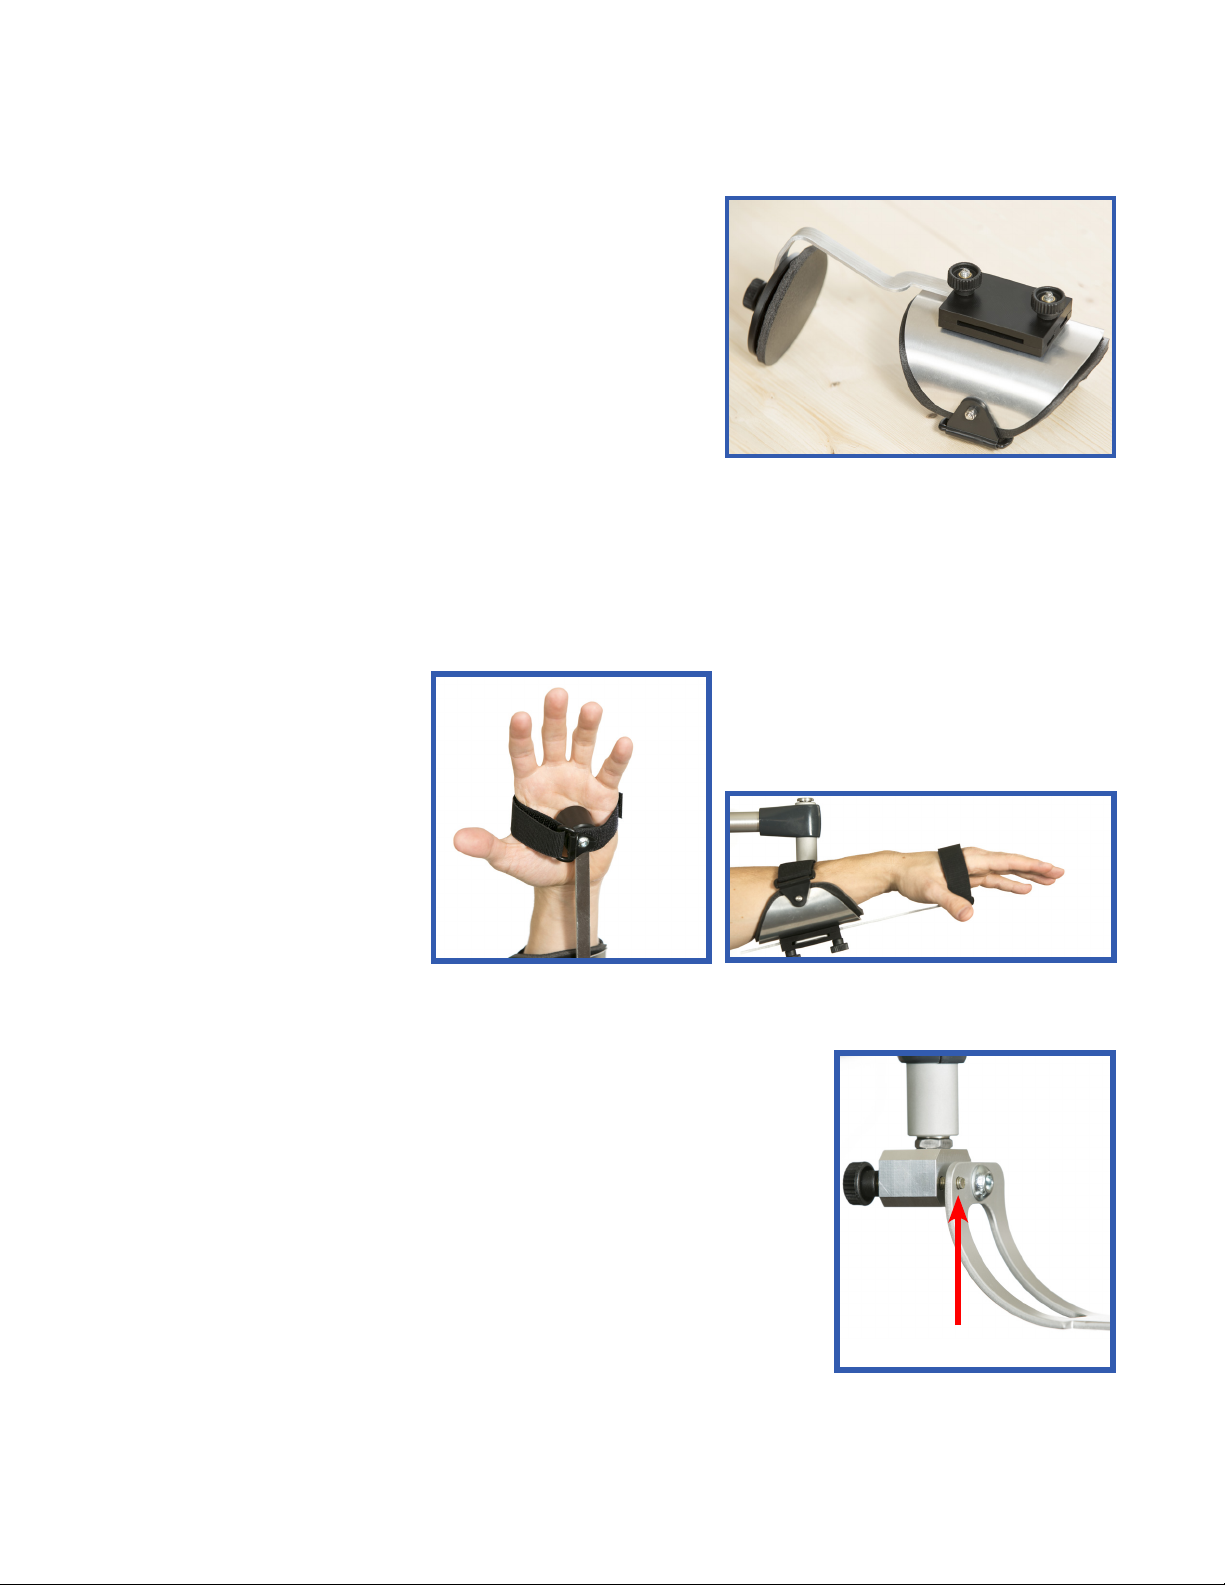
F. Apply Wrist Support
The Wrist Support is ideal for
patients that exhibit “wrist
drop”. To attach the Wrist
Support, loosen the Forearm
Support Base Knobs and thread
the Wrist Support into the
opening. Re-tighten the Knobs
to secure the Wrist Support to
the Forearm Support.
G. Forearm Support Lock
1. One of the unique features of the SaeboMAS mini is the ability
to lock and unlock the forearm support as needed. For example,
patients that exhibit poor strength at the elbow and forearm
may require the forearm support to be in a locked positioned for
increase stability and control (i.e., Forearm Support unable to swivel
vertically/up and down). Conversely, patients that have fair or good
strength at the elbow and forearm may be able to tolerate the
forearm support in an unlocked position (i.e., Forearm Support able
to swivel vertically/up and down).
2. To lock the Forearm Support, rotate the Knob in a clockwise direction
until it threads the hole on the Forearm Support (See Figure 11).
To unlock, rotate the Knob in a counter-clockwise direction.
Figure 8
Figure 11
Figure 10Figure 9

6
SaeboMAS mini Product Manual
H. Tension Adjustments
The SaeboMAS mini includes a Tension Scale to identify and track the amount of support needed
for the affected arm (see Figure 12). The scaled ranges from min to max (min=least amount of
tension/support; max=greatest amount of tension/support).
1. Tension Adjustments
a. Increase Tension/Support: Rotate the Tension Adjustment Handle in a clockwise direction.
b. Decrease Tension/Support: Rotate the Tension Adjustment Handle in a counter-clockwise
direction.
c. To avoid damage, once the desired tension is reached, be sure to move the Tension
Adjustment Handle away from the frame.
2. Progressing the Program
a. When appropriate, consider decreasing the amount of tension provided to further challenge
the affected arm.
Important: How much support should be provided?
Each individual will require a customized program based on his or her motor impairments. There
should be enough support provided to successfully complete the functional task. At the same time,
the support should be limited to challenge the user. Finding a balance between too much support
and too little will be important.
Figure 12

7
SaeboMAS mini Product Manual
J. Swivel Stop
The purpose of the Swivel Stop is to eliminate rotation or turning of the SaeboMAS mini when
not in use. To avoid rotation of the SaeboMAS mini when not in use, tighten the Swivel Stop
Knob in a clockwise direction. The SaeboMAS mini will not move freely when the Swivel Stop
Knob is tightened.
Important: Be sure to loosen the Swivel Stop Knob prior to use to avoid damage.
I. Correct Position
The SaeboMAS mini should be used in a seated position. The user should be positioned side-by-
side (approximately 2 feet or 60cm away) from the SaeboMAS mini.(see Figure 13).
Figure 13
2 ft.

8
SaeboMAS mini Product Manual
The SaeboMAS mini can conveniently be combined with other orthoses such as the SaeboFlex
and SaeboGlove. There are several ways to stabilize the users forearm to the Forearm Support on
the SaeboMAS mini. You will need to select the best approach based on the size and length of the
user’s forearm.
Option #1:
Position the SaeboFlex or SaeboGlove just distal (i.e.,below) to the SaeboMAS mini Forearm
Support. Secure the SaeboMAS mini Forearm Support Strap to the arm just proximal (i.e., above)
to the SaeboFlex or SaeboGlove (strap is not touching the orthosis (See Figure 14 & 15).
Option #2:
Position the SaeboFlex or SaeboGlove on top of the SaeboMAS mini Forearm Support. Secure the
SaeboMAS mini Forearm Support Strap around the proximal portion of the orthosis.
(See Figure 16 &17).
Figure 14 Figure 15
Figure 16 Figure 17
Incorporating the SaeboFlex®and SaeboGlove®
while using the SaeboMAS
mini

9
SaeboMAS mini Product Manual
Trouble Shooting Tips
1. If the user exhibits decrease wrist extension strength (i.e., wrist drop) consider applying a wrist
brace for added support.
2. If the user exhibits increased tone at the elbow exors, it may be difcult to perform
movements requiring elbow extension. To maximize the extension at the elbow, consider the
following strategies:
a. Electrical stimulation on the triceps
b. Elbow air splint
c. Manual facilitation
d. EMG/biofeedback
3. During elbow exion activities, the elbow may shift/migrate while using the Elbow Stop. For
these instances, consider securing the elbow to the Elbow Support by using a Velcro strap
Option #3:
Same as Option 2, however, for the SaeboFlex,
consider threading the strap under the bead
lines for the ngers and thumb
(see Figure 18).
Figure 18

www.saebo.com
Table of contents
Other Saebo Medical Equipment manuals
Popular Medical Equipment manuals by other brands

Skytron
Skytron 6700B HERCULES Maintenance manual

Johnson & Johnson
Johnson & Johnson DePuy Synthes Kaneda manual

Handicare
Handicare SystemRoMedic EasySlide Series user manual

tryten
tryten Nova Go Assembly instructions

Accriva Diagnostic
Accriva Diagnostic AVOXimeter 4000 Operator's manual

Borringia
Borringia Rise IIIS-130 user manual

medi
medi protect.Leva strap Instructions for use

MORIA
MORIA Epi-K system quick start guide

Gima
Gima OXY-50 Instructions for use

Physio Control
Physio Control LIFEPAK 15 operating instructions

bort medical
bort medical 112 120 quick guide

WORLD OF MEDICINE
WORLD OF MEDICINE Stryker Pneumoclear Instructions for use