Saey 194 User manual

SAEY 194
wood
Holz
Installation and operation manual
Aufstell- und Bedienungsanleitung
Versie01/09

2

3
Content
1. General warnings and safety instructions………………………….… 4
2. Introduction……………………………………………………………… 4
3. Fuel…..………………………………………………………..…………. 5
4. Technical data…..……………………………………………………..… 6
5. Spare parts..……………………………………………………………... 8
6. Technology ……………………………………………………………… 10
7. Options…………………………………………………………………… 10
8. Packaging………………………………………………………………… 11
9. Installing the stove.……………………………………………………… 11
9.1. The chimney………………………………………………………… 11
9.2. Connection of the stove to the chimney….…………………….… 14
9.3. Combustion air………………………………………………….…… 14
9.3.1. Combustion air supply …..…..……………..…..…… 14
9.4. Clearances around the stove to be respected……....…..……… 15
10.Use……….…………………………………………..…………………… 16
10.1. First use……………….……………………………….………… 16
10.2. Use ………………………………………………….……… 17
11.Operation……………………………………….………………………… 17
12.Heating……………………………………………………………………. 18
12.1. Lighting …………………………….……………………………. 18
12.2. Heating with firewood… …………..………………………………. 18
13.Cleaning and maintenance……………………………………………… 19
14. Troubleshooting………………………..…………………………………. 21
15.Guarantee………………………………….…………………………….… 22
English

4
1. General warnings and safety instructions
The general warnings and instructions must be followed closely.
- Read the whole manual carefully before putting the stove into use.
- Your stove may only be carried using approved means of transport with adequate
load bearing capacity,
- When fuel is burning heat is released, so the upper part of the stove, the doors,
the door handles, the inspection windows, the flues and possibly also the jacket
of the stove may become very hot. These parts must therefore not be touched
without suitable heat-resistant gloves or the operating handle
- Tell your children about this danger and make sure that they stay a safe distance
away whenever the stove is used
- Do not place items which are not heat-resistant on the stove or close to it
- Do not put a kettle on top of the stove except on the polished plate specially
provided
- Do not put clothes on the stove to dry
- Drying racks for clothes, etc. must be placed a safe distance away from the
heating installation - FIRE RISK!
- No inflammable or explosive materials must be used in the same or adjacent
spaces,
- The stove is not designed as an all-purpose incinerator. Use only suitable fuel
- The outside of some parts of the stove can become very hot. Take appropriate
precautions
- The stove must not be altered or modified in any way
- Use only original spare parts from the manufacturer
- This stove is not suitable for installation using a flue to which multiple stoves are
connected,
2. Introduction
Dear user,
By purchasing this SAEY 194 wood stove you have chosen an innovative heating
installation. Congratulations !
We pay careful attention not just to the technology, but also to the materials, the
manufacturing process and sealing. That is why we can guarantee you
problemfree operation.
The SAEY 194 wood was built using innovative techniques and meets European
standard EN 13240.
If you want the stove’s performance to be as clean and green as possible, then
you need to read and follow the instructions in this installation and operating
manual with care.
Any damage to the stove resulting from a failure to follow the instructions in the
installation and operating manual will invalidate the guarantee.
Do you need additional information or technical data? An installation problem?
Contact your dealer first.
English

5
3. Fuel
Which type of fuel?: wood
Which firewood should I choose?
There are various types of firewood which each have their own power and way of
burning. Preference should be given to hardwood such as oak, beech, ash,
hornbeam and wood from fruit trees. These types of wood burn well and form a
bed of coals that stays glowing for a long time.
The wood must be dry!!
Damp wood gives off a much less heat, because a lot of energy is used up to
evaporate the moisture from the wood. It also causes soiling of the hearth,
window and chimney.
Dry wood means clean pieces wood with a humidity ratio, by comparison with
dried wood, of no more than 20%. So choose well-cleaved wood that has been
able to dry out for two years and store it in a protected but well- ventilated spot.
TIP : How to recognise dry wood ? Dry wood weighs significantly less and makes
a brighter noise if you bang two blocks against each other.
Use prepared wood or finely chopped wood (splinters) to light the stove !
Things not to use…!!
Rubbish, wood chips, shavings and sawdust, bark and waste from chipboard,
plywood and wood with a treated surface must not be used. They cause soiling of
the hearth and the chimney and can emit poisonous fumes.
Watch out:
Do not cut the firewood too small. Very thin wood burns only for a very short time
and is only suitable for lighting the stove. Let large pieces, generally about 35 cm
long burn naturally. Round short wood must be chopped small.
Also take account of the power of your stove. If your stove has a power of 9 kW
than ± 2,8 kg dry wood per hour is enough.
Model Saey 194
Wood
Wood
Max. length of wood logs mm 350
Max. diameter / width mm 200
Max. humidity % 20
Consumption nominal power kg/h 2,8
Maximum volume kg 2
English

6
4. Technical data
Results Saey 194
wood
Power range kW 5 – 11
Nominal power kW 9,6
Efficiency % 81,1
CO – emissions (at 13% O2) for wood % 0,115
Fume temperature at nominal power °C 354
Sizes and weights
Height mm 740
Width mm 645
Depth mm 540
Distance middle of extractor pipe – floor mm 610
External flue Ø mm 150
Height with open lid mm -
Top connection Yes
Rear connection Yes
Ø provision combustion air mm 100
Height to the center provision combustion
air
mm 323
Opening side door (HxW) mm 170 x 190
Dimension window (WxHxthickness) mm 402 x 282 x 5
Maximal length of wood logs mm 350
Room to be heated m³ tot 200
Weight
Not packed
Packed
Kg
Kg
164
180
Installation values
Chimney draft at nominal power Pa 12
Chimney draft limits Pa 10 - 20
Supply of fresh air m³/u 31
English

7
S194 wood
English

8
5. Parts
English

9
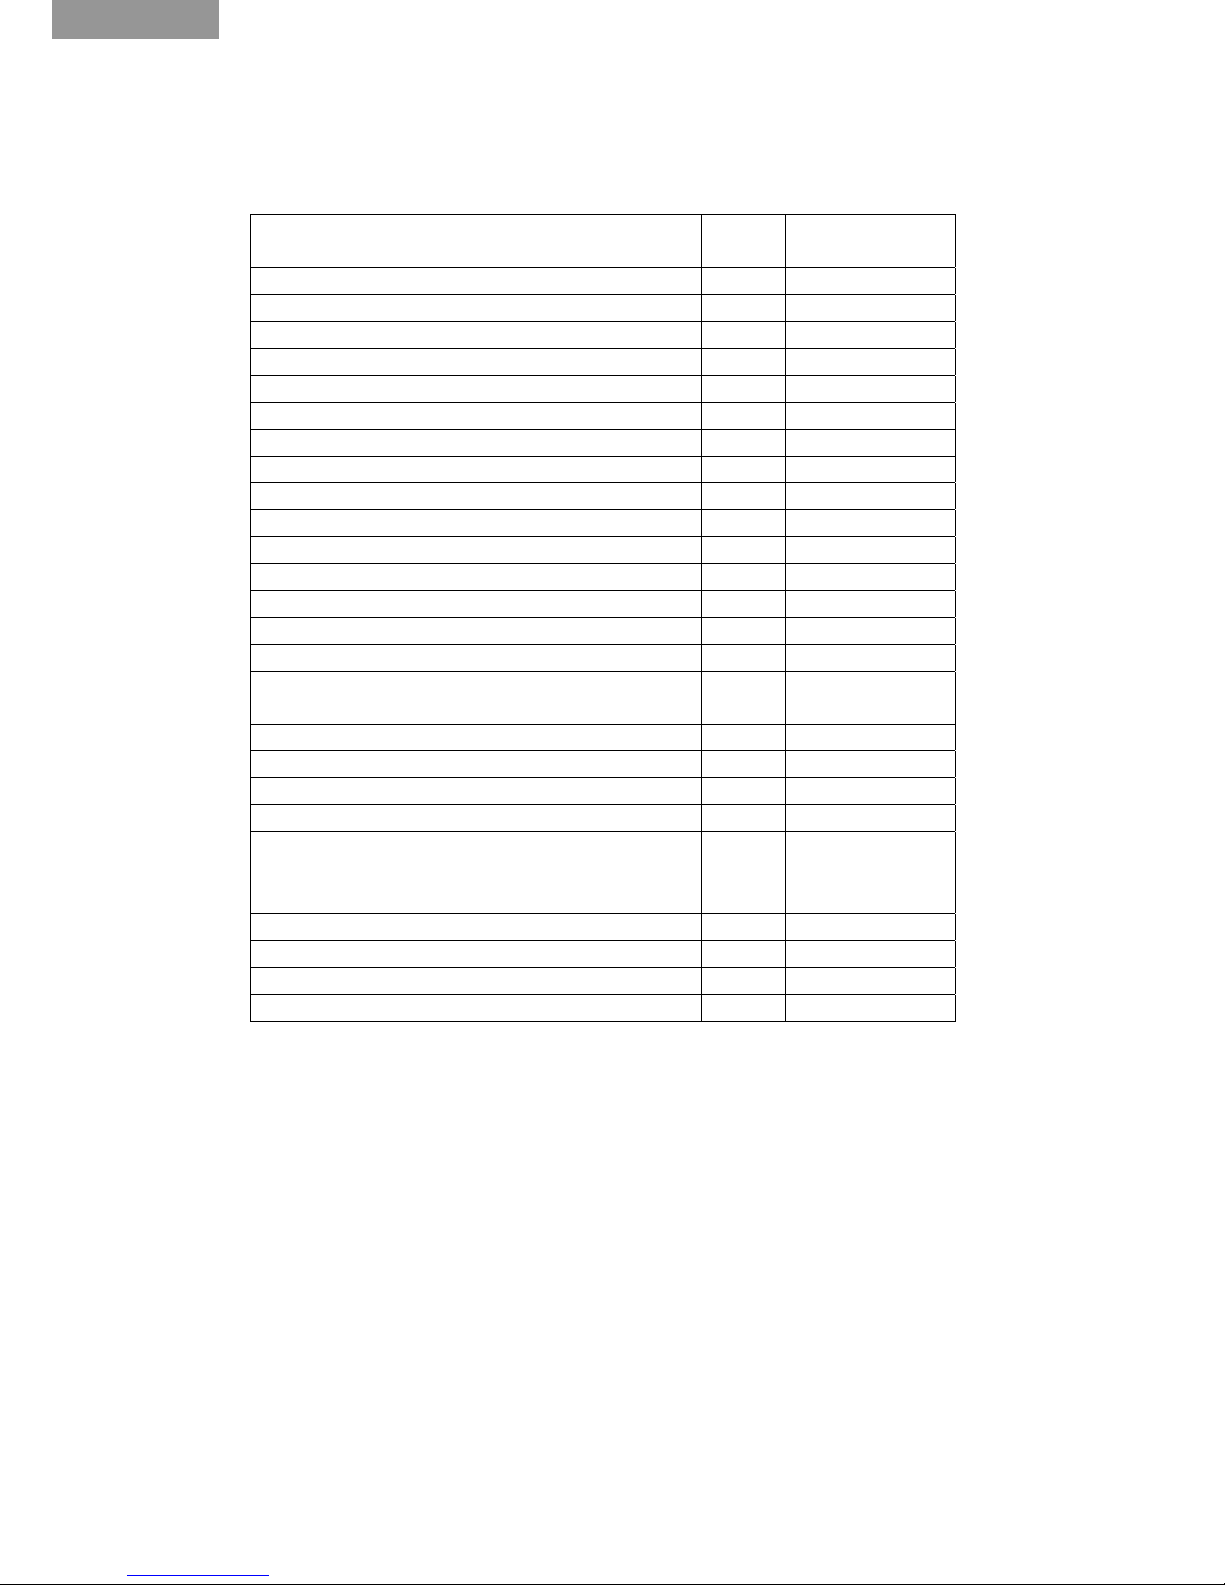
Saey ref. Code Descripton
4790094000 0094-150 VERTICAL PIPE OUTLET ANTHR
4790194000 1094-190 WOOD GRILL S94 440 X 190 MM
4790700001 A104b/03 AIRBOX SAEY SCOPE / SAEY 194
8760003990 312-300 CLAMP, GLASS PANEL S92/94 TR
8770000020 0092-015 LEG
8770000140 0092-140 SIDE DOOR
8770000150 0092-145 SIDE DOOR INNER PLATE
8770000170 0092-165 INNER REAR CAST PANEL
8770000220 0092-272 DOOR CATCH ASSEMBLY
8770001400 0700-260 REGULATION COMB. AIR
8770001555 0700-210 PRIMARY AIR REGULATION ANTHR
8770001570 0700-300 KNOB AIR REGULATION ANTHR
8770001590 A102/03 AXLE REGULATIONAIR
8770003410 0094-012 BASE PLATE ANTHR
8770003490 0094-065 BLANKING PLATE ANTHR
8770003510 0094-090 FIRDOOR ANTHR
8770003520 0094-100 ASHPAN DOOR ANTHR
8770004120 A18b/98 ASHPANSAEY94
8770005050 0094-066 BLANKING PLATE CLAMP
8770007730 A28b/94 GLAS
8771094010 1094-060 BACK PLATE ANTR. S194
8771094020 1094-050 LEFT SIDE ANTR. S194
8771094030 1094-040 RIGHT SIDE ANTR. S194
8771094040 1094-030 FRONT ANTR. S194
8771094050 1094-130 FRONT AIR DUCT S194
8771094060 1094-310 RIGHT AIR DUCT S194
8771094070 1094-320 LEFT AIR DUCT S194
8771094080 1094-200 INNER LEFT PANEL S194
8771094090 1094-160 DEFLECTOR S194
8771094100 1094-086 FIRE GRATE S194
8771094110 1094-080 LOG RETAINER S194
8771094120 1094-330 DEFLECTOR PLATE LEFT S194
8771094130 1094-340 DEFLECTOR PLATE RIGHT S194
8771094140 1094-020 TOPPLATE ANTR. S194
8771094150 A54a/08 DEFLECTOR PLATE S194
8771094160 A56a/98 BOTTOM PROTECTION PLATE S194
8771094170 A70/08 REAR ISOLATING STONE S194
8771094180 A57a/08 HANDLE AIR REGULATION ANTR. S194
8771094190 A92/08 AIR REGULATION INDICATOR
8771094200 A53a/08 REAR PROTECTION PLATE S194
8780034740 0092-110 DOOR KNOB COMPLETE ANTHR
4790094000 0094-150 VERTICAL PIPE OUTLET ANTHR
4790194000 1094-190 WOOD GRILL S94 440 X 190 MM
4790700001 A104b/03 AIRBOX SAEY SCOPE / SAEY 194
8760003990 312-300 CLAMP, GLASS PANEL S92/94 TR
8770000020 0092-015 LEG
8770000140 0092-140 SIDE DOOR
8770000150 0092-145 SIDE DOOR INNER PLATE
8770000170 0092-165 INNER REAR CAST PANEL
8770000220 0092-272 DOOR CATCH ASSEMBLY
8770001400 0700-260 REGULATION COMB. AIR
8770001555 0700-210 PRIMARY AIR REGULATION ANTHR
8770001570 0700-300 KNOB AIR REGULATION ANTHR
8770001590 A102/03 AXLE REGULATIONAIR
English

10
6. Technology
- Snorkel
SNORKEL Technology ensures a healthy, safe and efficient combustion. This is
possible due to the optional airbox (ref. 479.0700.001).
Healthy, because SNORKEL Technology draw all the necessary oxygen from the
outside, just like a snorkel, in fact – and not from your room. That’s important,
because the insulation in our homes is constantly improving. SNORKEL
Technology ensures the maximum breathing space in even the best insulated
homes.
Safe, because the stoves give off nothing indoors, except heat. There is no risk of
backwash combustion gases or CO poisoning.
Stoves with SNORKEL Technology are also more efficient, because they no
longer suck heated air out of the room.
- Airwash
Airwash system & Post-combustion in our wood-burning stoves.
The airwash system provides a natural flow of air across the window of the stove,
preventing soot deposits from forming on it. As a result, you can enjoy the playful
flames in your stove or inset to the fullest.
Adding fresh oxygen to the extremely hot flue gases causes a secondary
combustion – the post-combustion – which increases efficiency and reduces flue
gas emissions, which benefits the environment.
7. Options
Available options:
For more information, please check our website: www.saeyheating.com .
English

11
8. Packaging
Your first impressions are important to us ! The packaging of your new stove offers
exceptional protection against damage. However the stove and its accessories can
still be damaged in transit.
So please check the stove for damage and missing components when you take
delivery of it. Notify your supplier immediately of any missing components and also
on the CMR document.
The packaging for your stove is harmless for the environment. The cardboard and
the plastic foil an be returned to the local waiste facility for recycling.
9. Installing the stove
All local regulations, including national and European standards must be followed when
the appliance is installed.
Only an appliance connected by a recognised installer guarantees compliance with
legislation on construction and fire prevention. This is certainly required for safe and
proper use of the stove.
The stove may only be installed on a floor with adequate load-bearing capacity. If the
floor is non-compliant, then steps will have to be taken to increase the load-bearing
capacity.
9.1. The chimney
Before a stove is connected to a chimney connected is, the size and quality of the
chimney must be checked to ensure that they meet locally applicable regulations.
The measurements may need to be calculated.
The chimney must be cleaned yearly. This cleaning must take place in
compliance with local legislation in force.
9.1.1. Chimney tips:
The stove can be connected directly to the chimney. The diameter of the outlet
pipe must match the diameter of the connector pipe on the fireplace.
We can guarantee that the appliance will work well if there is a hearth draught of
between 10 and 20 Pa. The hearth draught can only be determined when the
appliance is lit! If the chimney draws too strongly, then a damper must be
incorporated.
English

12
If it draws too little, then the following measures should be considered:
a. Extending the chimney
b. Improving the insulation of the chimney (less cooling of the flue gases)
c. Improving the flow of air into the space in which the stove is installed.
d. Improving the air tightness of the chimney.
Many problems with stoves are caused by badly working chimneys. Therefore we
offer the following tips. These are for information only and are not binding on us.
There are just too many unknown factors affecting how well the appliance-
chimney combination works. If in doubt, you should contact a specialist.
Chimneys that have worked perfectly well with an old stove can give problems
with a new one. The stoves of 30 years ago had much lower performance than
the present generation of stoves which burn a lot cleaner and also have higher
requirements as regards the chimney.
Tips:
e. A round channel is preferable (to minimise friction)
f. The diameter of the chimney must not be smaller at any point than that of
the appliance (except in very long chimneys where a narrower section
should sometimes be included).
g. The mouth of the chimney should be unobstructed.
h. The chimney should be as close as possible to vertical with as few curves
as possible.
i. The chimney must not draw in extra air. Watch out for flue dampers and
cleaning hatches in the cellar or on the roof!
j. The chimney must not have too many connections - that reduces the
upwards pressure. Consult your chimney specialist!
k. Flue connections to different stoves and fireplaces must not be located
opposite each other at the same height, in order to prevent the chance
that combustion gases will not be drawn out. Two flue connections must
be at separated vertically by at least 30 cm.
l. For the chimney opening, you will need to comply with your national
legislation. For Belgium this is NBN 61-001. Here are a few rules from this
standard that cover chimney openings:
English

13
Zone 1: A
chimney opening
is automatically
permitted
(preferably
without a static
cowl)
Zone 2:
A chimney opening is only permitted if
the appliance(s) is /are fitted with an
atmospheric burner and if a static cowl is
fitted to the top of the chimney.
Zone 3:
A chimney opening
is not permitted
under any
circumstances
For details on chimneys we refer you to the relevant regulations with which the
chimney needs to comply. Because of the highly technical nature of these
regulations, they are primarily aimed at professional installers/chimney
specialists.
List of the most important standards with which chimneys have to comply:
- EN 12446:2003 Chimneys - Components - Concrete outer wall elements.
- EN 1443:2003 Chimneys - General requirements
- EN1856-1:2003 Chimneys - Requirements for metal chimneys - Part 1:
System chimney products
- EN1856-2:2004 Chimneys - Requirements for metal chimneys - Part 2: Metal
liners and connection flue pipes
- EN13384-1:2003 Chimneys - Thermal and fluid dynamic calculation methods -
Part 1:
EN 2006 Chimneys serving one appliance
- EN1857: 2003 Chimneys - Components - Concrete flue liners
- EN1457: 1999 and Clay/ceramic flue liners. Requirements and test
methods
En 2002
- EN 1806: 2006 Chimneys - Clay/ceramic flue blocks for single wall chimneys
- Requirements and test methods.
- EN13069: 2005 Chimneys - Clay/ceramic outer walls for system chimneys -
Requirements and test methods.
- EN 13063: 2006 Chimneys - System chimneys with ceramic flue liners - Part
1: Requirements and test methods for soot fire resistance
For Belgium:
- NBN D51 parts 1, 2 and 3 installation standards for combustion
appliances.
- NBN B61 parts 1, 2 and 3 rules governing the location of combustion
appliances
English
FLAT
ROOF PITCHED
ROOF

14
What must I do in the event of a chimney fire?
We recommend that you take the following steps in the event of a chimney fire
1. Close off the air supply.
2. Call the fire brigade.
3. Clear access routes to the cleaning openings (e.g. cellar and attic).
4. Move all inflammable objects away from the chimney.
5. When the stove is put back into service, the chimney and the stove should
be checked over by a specialist.
6. This specialist should also investigate the cause of the chimney fire after
and take any corrective measures.
Note: If you let the stove burn for 10 minutes each day at maximum power, this
allows combustion products to be burnt off. This reduces the risk of any
chimney fire and also helps keep the window clean.
9.2. Connection from the stove to the chimney
The stove can be connected directly to the chimney (top outlet). The diameter of
the outlet pipe must match the 150 mm diameter of the connecting pipe section to
the stove.
If the chimney draws too strongly (>20 Pa), then a damper must be incorporated.
See also the basic requirements for the chimney in 9.1.
9.3. Combustion air
The SAEY 194 stove can only be used when the stove door is closed. The SAEY
194 stove uses 31m³ per hour at its nominal power.
Consideration must be given to any other hearths or air extraction installations in
the same space or that share the same combustion air connection, which can
compromise the operation of the stove. The grille that provides incoming air must
not be blocked.
If necessary the combustion air connection must be calculated or a separate
combustion air supply system must be installed outside.
Tip: If the airbox is not installed, consideration must also be given to cooker hoods
which may be connected to the space in which the stove is installed. They cause
underpressure, which can lead to a malfunction in the combustion air supply. The
combustion gas which results can damage residents' health and even cause death
9.3.1. Combustion air supply
There are two possible systems :
Classical system : The SAEY 194 takes the combustion air via openings at the
lower backside of the stove. When applying the classical system, please make sure
the room in which you install the SAEY 194 is sufficiantly ventilated (see technical
data, point 4).
English

15
Airbox System: the combustion air is supplied via 1 opening on the stove and
distributed via airducts inside the stove. An airbox can be mounted on the air inlet.
On this inlet, you can mount a tube with a diameter of 100mm. When using smooth
tubes, you can connect up to 12 meters of tubes. When applying accessories such
as elbows, you need to reduce the maximum length of 12m by 1 meter per
accessory (e.g. 10m tubing + 2 elbows = 12m tubing)
Mounting the airbox:
9.4. Clearance around the stove to be respected
Fire safety measures concerning inflammable or temperature-sensitive floor
coverings:
The surface under the stove must have a fire-resistant, non-inflammable
covering (e.g. cast iron plate, marble or tile)
English
1. Remove the protection plate at the back
of the stove by means of two screws.
2. Remove the split-pin.
3. Loosen the screws on the air regulation
handle and dismount it
4. Unscrew the air regulation axle.
5. Move the airsliders to the outer left
position (maximum supply of combustion
air)
6. Mount the airbox with the joints.
7. Remount the axle of the air regulator
through the hole in the airbox
8. Put the shortest end of the regulation axle in
the air regulation handle and fix it with the
split-pin.
9. Remount the air regulation handle on the
back of the stove.
10.Move the airsliders left and right to check..
11.Remount the protectionplate onto the
backside of the stove.

16
No inflammable or temperature-sensitive material (e.g. firewood) may be
stored underneath the stove.
Safety distance to inflammable or temperature-sensitive items:
From the sidewalls from the stove: at least 60 cm
From the rear wall at the upper connection: at least 30 cm
From the rear wall with protective shield at least 20 cm
Within the line of sight of the glass: at least 80 cm
Floor protection in front: at least 50 cm
Floor protection at sides: at least 30 cm
10. Use
10.1. First use
When the stove is used for the first time it must first be completely dried. Warm it
for around an hour with a small quantity of fuel.
Position regulating disc “Max. Open”.
During this phase a few unpleasant odours may be released as the undercoat used
dries out. If necessary open a window or door.
English

17
Stay by the appliance during this phase and remove any condensation immediately
before it has the chance to break through the paint.
10.2 Use
Take care of the following:
The appliance may only be used when the fire door is closed. The doors of
the stove must also be closed when the appliance is not in use.
Take account of the power of the stove when loading wood. E.g. for a power
of 9kW you need ± 2.8 kg of wood per hour.
11. Operation
Operating the air inlet
The supply of combustion air is regulated at the back of the stove. If the handle is
positioned
To the right: supply of combustion air is completely cut off.
In the middle: supply of combustion is set to half its capacity.
To the left: supply of combustion air is set to its maximum capacity.
Air regulation handle
Position 0 Position ½ Position 1
( right / closed ) ( middle / half open ) ( left / open )
English

18
Directing the air stream (up or below the grill)
When litting up the stove it can be recommended to direct the airstream below the
grill to draw the fire even more.
12. Heating
12.1 Lighting
Make sure the air supply is set to its maximum capacity (air inlet regulator should
be moved to the left - open).
Open the fire door and put a fair amount of kindling wood on the woodgrill. Add 2
to 3 firelighters, spread over the kindling wood, in the front and at the back. Then
add a few logs on top and lit the firelighters. The fire should start up easily.
After the stove has been lit, the fire door must be firmly closed.
To simplify and speed up the kindling, the lower airstream regulator must be
opened to its maximum. As soon as the stove is burning well, you can steadily shut
the lower air regulator.
IMPORTANT : Please do not open the fire door or the ash tray door once the stove
is burning, except when adding more wood .
Attention: If there is still backwash 15 minutes after kindling, due to weather
conditions (e.g. heavy winds or fog), you need to shut down the stove and retry
when the weather conditions have improved.
12.2 Heating with firewood
For the appliance to reach the desired temperature quickly without too many
undesirable emissions, after lighting you should follow the following heating
procedure:
Put 2 to 3 smaller logs (of about 2 kg max.) in two layers inside the stove. Open the
air inlet to its maximum. This is the handle at the upper right backside of the stove.
When the wood is burning sufficiently, you can halve the combustion air inlet. The
air supply handle (directing the stream up or below the grill) can be opened for ¼.
You will find the handle on the lower right backside of the stove.
Closed Open
English

19
Wood burns for a long time and produces a lot of gas; it must be burnt fast with a
constant oxygen supply. To reduce the possible undesirable effects of long-term
reduced air supply, it is best to let the stove burn for a quarter of an hour at full
power every day that it is used.
Possible undesirable effects:
Smouldering fire, condensation, tar deposits
High levels of soot
Smoke problems (emissions of poisonous substances)
Risk of explosion
Wood is not suitable for a small fire! In other words, a wood-burning stove can not
be choked. It can just take a long time to burn fully. This means that, when the air
inlet is closed, the set temperature is only reached when the wood is burnt well
down and the degassing process – the large flames die back and only the glowing
embers of the wood remain – is complete!
In particular, avoid adding excessive fuel, otherwise too much heat is released, a lot
of combustion gases are released and the appliance will be overloaded. You also
run the risk of overheating the stove and damaging it.
13. Cleaning and maintenance
Removing and emptying the ashpan
Depending on the quantity of ashes, the ashtray should be emptied regularly in
order to avoid the ash from reaching the woodgrill. When it does reach the
woodgrill, the grill can not cool down and the cast iron parts will start melting.
Simply hook the handling tool into the front panel of the ashtray and carefully pull
the ashtray out to empty it.
Removing the grids
After regular use (depending on the quantity of ashes) the grid and the space of the
ashtray must be cleaned thoroughly by means of a vacuum cleaner. Make sure the
stove is cooled down first. You can remove the grids, with or without the use of the
handling tool.
English

20
Cleaning the smoke channels
The smoke discharge duct (between the checking-plate and the rear wall) must be
cleaned after every heating season – at least 1 x a year.
By removing the control damper, you will be able to reach the smoke discharge duct.
This makes it easy to remove the fly ash from the discharge duct as well as the
connector. The control damper must be put back correctly afterwards.
Ceramic window
The SAEY 194 has a high-performance airwash system which prevents the window
from turning black too quickly. However, it cannot prevent a long-term attack on the
glass. Using damp or wet wood makes the problem worse. The water vapour
released sticks to the window and holds soot particles.
To clean the window, first wait until it has cooled down completely. For cleaning use
glass cleaners which are commonly available in the shops. Do not use corrosive or
scouring products in any event to clean the glass.
Before and after the heating season
It is recommended that, after the heating season (i.e. during the summer months)
the flue pipe between the stove and chimney should be removed or sealed in order
to prevent condensation and/or corrosion in the stove. This improves the durability
of your stove.
Before starting again to heat with your stove after a period of not using it is
recommended to decrease the tension of the screws on the glass by using a
screwdriver. In this case you will raise the lifespan of the glass and avoid possible
cracks.
English
Table of contents
Other Saey Wood Stove manuals
Popular Wood Stove manuals by other brands

Warmington
Warmington Nouveau Pizzeria SN1250 Double Flue installation instructions

Nibe
Nibe Contura 310G manual

Harman
Harman Oakwood owner's manual

Brunner
Brunner BKH 5.0 Tunnel 42-66 green installation manual

HearthStone
HearthStone Shelburne 8371 owner's manual

Cola
Cola MARY Installation, use and maintenance manual

Waterford
Waterford Erin(e) Installation and operating instructions

MISA
MISA 11108 Instructions for installation and use

Nectre Fireplaces
Nectre Fireplaces Form 1 Series operating instructions

Morso
Morso 1400 Instructions for installation and use

Nordpeis
Nordpeis Smarty user manual

Contura
Contura C 26K Low installation instructions