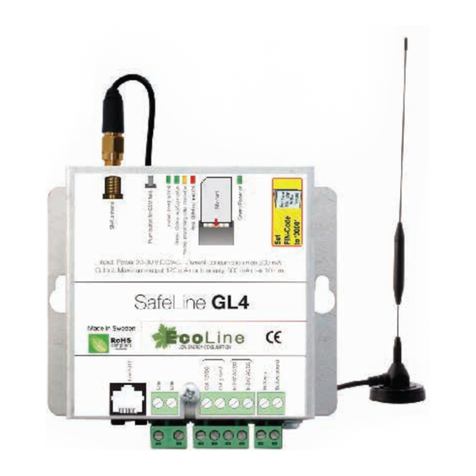
Safeline GL6 User manual

www.safeline-group.com
09.2020 © 2020 SafeLine and all the SafeLine products and
accessories are copyrighted by law.
GL6 manual
GSM gateways
SafeLine GL6 v.2.1.1 EN
Innovation brought to you from Tyresö Sweden

2SafeLine GL6 v.2.1.1 EN
Power: 230 VAC, 50 Hz, max 9 W
Battery: 12 V, 0.8 Ah
Inputs: 10-30 VDC, 5 mA optically isolated
Antenna connector: SMA (female)
Size: 96 x 145 x 58 mm (H x W x D) (without antenna)
Weight: 830 g
Relay output: 1 A/30 VDC, potential free relay contact output
IP code: IP20
Output: 12 VDC maximum output 120 mA continuous, 500 mA max 10 min
Output indicator intercom: 12 VDC, max 100 mA
Line voltage: 48 VDC
USB: USB mini 2.0
Interface board: *SL6-GSM-BOARD:
- Supports 2G (900/1800 MHz)
- Requires SW 1.00 or later
*IF-BOARD-4G
- Requires SW 1.30 or later
- Supports 2G, 3G and 4G (800/900/1800/2100/2600 MHz)
- This product is intended for use in EMEA countries.
SIM card size: Micro SIM
Operating temperature: +5 - 40C
Air humidity: 30 - 90 % RH
Technical data

3SafeLine GL6 v.2.1.1 EN
Content General information 4
Introduction 5
Overview 5
Wiring diagram 6
Relay output 7
Intercom 8
Network services 9
Activating the SIM card 9
Indication LED 10
GSM eld strength 11
Reset button 11
Conguration 12
Conguration with PC 12
SafeLine Pro 12
Operation 17
Troubleshooting 18
Interference/poor sound quality 18
Avoid GSM interference 18

4SafeLine GL6 v.2.1.1 EN
This unit was built with state-of-
the-art technology and to
generally recognised safety
related technical standards
currently applicable. These
installation instructions are
to be followed by all people
working with the unit, in both
installation and maintenance.
It is extremely important that
these installation instructions
are made available at all times
to the relevant technicians,
engineers or servicing and
maintenance personnel. The
basis prerequisite for safe
handling and trouble free
operation of this system is a
sound knowledge of the basic
and special safety regulations
concerning conveyor techno-
logy, and elevators in particular.
The unit may only be used for
its intended purpose. Note in
particular that, no unauthorised
changes or additions may be
made inside the unit or indivi-
dual components.
Exclusion of liability
The manufacturer is not liable
with respect to the buyer of
this product or to third parties
for damage, loss, costs or work
incurred as a result of accidents,
misuse of the product, incorrect
installation or illegal changes,
repairs or additions. Claims
under warranty are likewise
excluded in such cases. The
technical data is the latest
available. The manufacturer
accepts no liability arising from
printing errors, mistakes or
changes.
Declaration of conformity
Download ”The declaration of
conformity” at our website:
www.safeline-group.com
Safety Precautions!
- Only trained professionals,
who are authorised to work on
the equipment, should install
and con gure this product.
- This quality product is dedi-
cated for the lift industry. It has
been designed and manufactu-
red to be used for its speci ed
purpose only. If it is to be used
for any other purpose, SafeLine
must be contacted in advance.
- It should not be modi ed
or altered in any way, and
should only be installed and
con gured strictly following the
procedures described in this
manual.
- All applicable health and
safety requirements and
equipment standards should be
considered and strictly adhered
to when installing and con -
guring this product.
- After installation and con -
guration this product and the
operation of the equipment
should be fully tested to ensure
correct operation before the
equipment is returned to
normal use.
Electrical and electronic
products may contain materials,
parts and units that can be
dangerous for the environment
and human health. Please
inform yourself about the local
rules and disposal collection
system for electrical and
electronic products. The correct
disposal of your old product
will help to prevent negative
consequences for the environ-
ment and human health.
General
information

5
3 4
9
1 2 5
8
6 7 10
SafeLine GL6 v.2.1.1 EN
Overview
Introduction
1. Reset button
2. LED’s
3. Intercom button - press once to activate an intercom call
4. SIM-card holder
5. USB-mini for conguration with SafeLine Pro
6. RJ12 for intercom (comphone)
7. RJ12 for telephone line
8. SMA-antenna connector
9. Terminals
(C3: Lift Monitoring System (LMS)/SMS. Programmable input for
LMS to send SMS messages to up to 3 different numbers.)
10. GND
SafeLine GL6 is a line emulator that simulates a standard telephone
line. It can be used together with all SafeLine telephones or any
other PSTN (Public Switched Telephone Network) telephone. Easy
to install and suitable as both temporary or permanent installation.

6
+12 VDC
DC
B
A
1 2 1 2 3 5 6 7 1 24
1 2
+12 V
0 V
230 VAC L
230 VAC N
GND
SafeLine GL6 v.2.1.1 EN
Wiring diagram
+ Battery
- Battery
Input
Relay 1, NO/NC
Input intercom, only NO button
Indicator intercom
Telephone line out

7
= NC
= NO
/
SafeLine GL6 v.2.1.1 EN
Relay output
There are three ways to congure the relay output (congurable in
SL Pro).
1. Battery failure
Relay is active when battery test has failed.
2. System failure
Relay is active when GL6 has GSM network coverage. Relay
deactivates when GSM network is missing for more than 15
seconds or when mains power has been off for more than 15
minutes.
3. Emergency light
Relay is activated when there is a mains power failure (230 VAC).
Relay output

8
12 VDC
1.
2.
SafeLine GL6 v.2.1.1 EN
The intercom function can be triggered in two ways:
1. Push button once to activate intercom.
2. Push NO button to activate intercom.
Optional external indication of active intercom function can be
wired between 12 VDC output and intercom indication output.
Use of intercom
When an intercom call is generated the GL6 rings up to 16 times,
waiting for a phone that is connected to the GL6 to answer.
LED3 indicates when a ringing call expires, and when the call
time counter is activated. LED3 is activated as long the call is on.
Maximum call time is 5 minutes (not adjustable).
Hash, ”#”, must be generated for the phone to disconnect the call.
Intercom
Maximum call time is 5
minutes.Afterthat,the
callwillbedisconnected.
Tocancelanintercomcall,
press#.

9SafeLine GL6 v.2.1.1 EN
The GL6 can only recognize the PIN code if the code is set to
“1234”, “0000”, “1111” or if it is deactivated. If set to anything else,
the GL6 cannot use the SIM card.
If the PIN code is set to “1234”, “0000”or deactivated, the SIM card
can be used on any of SafeLine’s GSM products.
Setting the PIN code
1. Insert the SIM card in an ordinary phone. In the phone’s
security settings, change the PIN to “1234”. If not possible,
set the PIN code to “0000” or, if available, set the ”PIN code
request” option to “OFF”.
2. Verify the PIN code by switching your phone off and on again.
3. Make a call from your phone to verify that the SIM card is active.
4. Make a call to the GL6 after insertion to ensure there is a proper
connection.
“1111”PINcode
If the PIN is set to “1111”, the code will be randomly generated by
the SafeLine GSM unit and memorized. This is a safety measure,
making sure the SIM card will only work with the selected SafeLine
GSM unit. To change the PIN again, use the PUK code provided to
you by your mobile services provider for setting up a new PIN.
If you want to upload a new SIM card for the GSM unit with a new
“1111” PIN, you will rst need to upload a SIM card with PIN code
“1234” or “0000” to clear the old code in memory.
Activating the
SIM card
Disconnect both mains
andbatteryplugs,before
inserting or removing the
SIMcard.
Network
services
Only applicable for *GL6 and *GL6-FC: Before you can start using
a new SIM card, the card has to be prepared and support 2G
network. Cards that only support 3G and/or 4G will not function.
Only applicable for *GL6-4G and *GL6-FC-4G:Network services
may differ from country to country and/or service providers.
Contact your service provider for more information about 4G and
VoLTE in your specic region.

10 SafeLine GL6 v.2.1.1 EN
LED1indicatesthepowersupplystatus:
Continuous green Mains power supply OK.
Flashing red Battery operated, no main power supply.
LED2indicatesbatterycondition:
Light off Battery OK.
Flashing red Battery check in progress.
Continuous red Battery test failure.
LED 3 indicates the phone line’s status:
Slowly ashing green GSM network OK.
Flashing green Call connection in progress.
Flashing two times green Connected handset is not hung up.*
Continuous green Call connected.
Flashing yellow Incoming call.
Flashing red Searching for GSM network.
Continuous red No SIM card.
Indication LED
* Hash, ”#”, must be generated for the phone to disconnect the call.
Please ask the operator to press ”#” before hanging up.

11
LED 1
LED 2
LED 3
SafeLine GL6 v.2.1.1 EN
Reset button
Press for 5 sec Turn off when using battery power
Press for 3 sec Check GSM network signal strength
Press 3 times Start a battery test manually
Press once Cancel battery test
Press once Turn on when using battery power
Reset
* Minimum signal strength for using GSM Interface
GSMeld
strength
If the reset button on
the unit is pressed for 3
secondstheGSMeld
strength will be displayed
for5seconds.
LED
123
GSM signal
strength
= 100 %
>= 85 %
>= 70 %
>= 55 %
>=30%*
>= 15 %
>= 0 %
Reset button

12
1
2
3
4
5
6
7
9
8
SafeLine
GL6
SafeLine
PRO
SafeLine GL6 v.2.1.1 EN
Conguration
with PC
The unit can be congured at the ofce prior to the installation or
on site after installation.
The conguration software SafeLine Pro can be downloaded from
www.safeline-group.com.
Conguration
SafeLine Pro
Use the latest version of
SafeLinePro.Thesoftware
can be download from
www.safeline-group.com.
1.Callsettings
• Max call time
Here you can choose the maximun call time between 1-99
minutes.
0 = Unlimited call time.
5 = Default value.

13 SafeLine GL6 v.2.1.1 EN
• RX audio level
Received Audio Level:
Standard.
Increase on the RX level of the receiver by 25%.
Increase on the RX level of the receiver by 50%.
Increase on the RX level of the receiver by 75%.
Increase on the RX level of the receiver by 100%.
Note: Large increase may cause voice switching problems.
2.Externalinputformonitoring
• Function
Here you can set the input to different functions.
None: Input 1 is not enabled (default).
SMS: Sends a text message when the input has reached the set
value.
• Type
Sets the input to N/O (Normally open) or N/C (Normally
closed) linked.
• Value
Sets the input activation time.
E.g. 10 min, 10 sec or 10 pulses before activating an event.
3.Relayoutput
Sets the output relay operating mode.
• None
The output relay is not enabled (default).
• Battery failure
The output relay is activated if the battery test has failed.

14 SafeLine GL6 v.2.1.1 EN
• System failure
The output relay is activated when the GL6 has a GSM network.
The output relay is deactivated when the GSM network has
been lost for more than 15 seconds, or when the power has
been off for more than 15 minutes.
• Emergency light
Relay is activated when there is a main power failure, and
switches to battery power.
4.Textmessage
Here you can enter information and specify the destination of the
text message.
• Battery failure SMS
If the battery test fails, a text message is sent.
SMS destination: you can enter up to 3 mobile phone
numbers.
Message: the limit for the message text is 128 characters
maximum. E.g.: “The battery test has failed at...”
• Mains failure SMS
A text message is sent if the 230 VAC supply has been lost for
more than 15 minutes.
SMS destination: you can enter up to 3 mobile phone
numbers.
Message: the limit for the message text is 128 characters
maximum.

15 SafeLine GL6 v.2.1.1 EN
• LMS input SMS
An text message is sent if the LMS input has reached the set
value.
SMS destination: you can enter up to 3 mobile phone
numbers.
Message: the limit for the message text is 128 characters
maximum.
5.Miscellaneous
Resets all input elds to their default value. Puts SafeLine Pro in
basic mode execution, empties phone elds etc.
6.Connection
Test
With a computer directly to GL6.
• Alarm type
None: no test alarms activated.
Battery failure: simulates a battery test
Mains power failure: simulates a power failure.
LMS message: simulates an operational alarm failure.
• Functions
LMS input: lights green when the input is active.
Intercom input: lights green when the intercom is activated.
GSM net: lights green when there is enough network
coverage.
Mains power: lights green when the input is active.
Relay output: toggles the output relay on and off.
Intercom output: toggles the intercom output on and off.
Line output active: lights green when the line output is active.
Read
Reads out the conguration of the GL6.
Write
Write changes to the GL6.

16 SafeLine GL6 v.2.1.1 EN
7.Software/hardwareinformation
• Software version
Here you can nd information about the GL6 software version.
• Hardware version
Here you can nd information about the GL6 hardware version.
• Serial number
Here you can nd the serial number of the GL6.
• IMEI number (International Mobile Equipment Identity)
The IMEI is used by the GSM and UMTS mobile phones. The
IMEI is used by yhe GSM network to identify and authorize
mobile phones, and can thus stop the stolen mobile phones
and make them unusable.
8.Systemsettings
Depending on network module, select the wireless net.
9.File
Open a previously saved GL6 parameter le, or save the current
GL6 parameters to a le. E.g. IDD12345678.gl6. Save the GL6
parameter le for use elsewhere, for example if you have several
GL6 with the same settings.

17 SafeLine GL6 v.2.1.1 EN
Use the latest version of
SafeLinePro.Thesoftware
can be download from
www.safeline-group.com.
Battery check
• Automatic battery test
Battery capacity is tested every 7 days. The test takes 15 minutes
maximum. If the battery test fails LED2 is activated. An SMS is sent
to 3 destinations maximum and with a maximum of 128 characters.
• Manual battery test
Start battery test by pressing the reset button 3 times. To cancel the
test press reset button once.
• Battery discharge protection
When the GL6 runs on battery power, the battery saver function will
turn off the GL6 when the battery level reduces to 10.7 volts. When
the mains power is reconnected the GL6 powers up again.
Mains power control
The GL6 is constantly monitoring the mains power. If power failure
occurs an SMS regarding the power loss will be sent after 15
minutes. An SMS is sent to 3 destinations maximum and with a
maximum of 128 characters.
Externalinput1(SMS)
There is an input for monitoring with the possibility to send SMS
messages. The input requires 12VDC and it is possible to choose
between N/O and N/C (N/O is default). An SMS is sent to 3 destina-
tions maximum and with a maximum of 128 characters.
GSM functions
GSM eld strength indication is active for 10 seconds when it is
activated by the reset button. If the GSM network coverage is lost,
the GL6 will automatically restart the GSM module after 10 minutes.
The GL6 provides 48 VDC line power only when it has GSM
network.
Outgoing call
Maximum call time for outgoing calls is congurable in SafeLine Pro
from 1 to 99 minutes (0 = unlimited). When a call is interrupted, the
GL6 generates. 10 busy tones, before it returns to standby mode.
CongurationofGL6
Use the latest version of SafeLine Pro. Conguration can only be
done in “standby mode”. All conguration must be done using the
USB port. Serial port is only for factory use.
Operation

18
0,1m²
>>1.5 m >>1.5 m
>>1.5 m
SafeLine GL6 v.2.1.1 EN
To avoid GSM interference: Place the unit, the lift emergency
telephone and the GSM antenna at least 1500 mm apart.
Avoid GSM
interference
Trouble-
shooting
NoLED’sarelit.
• Make sure that the supply voltage is: 230 VAC
LED3iscontinuouslyred.
• Make sure that the SIM card is correctly inserted.
• Check that the SIM card PIN code is deactivated or that the PIN
code is set to ”1234”, “0000” or ”1111”
• Make sure that the SIM card is activated and operational by
testing the card in a cellular phone.
Thecallisinterrupteddirectlyafterbeingconnected.
• Make sure the battery is properly charged. Check voltage with
the battery plug disconnected.
Callcannotbeconnected.Errormessagefromtelephoneoperator.
• To make a call, area code must always be used.
Interference/
poor sound
quality
• Bear in mind that the wiring between GL6 and the lift tele-
phone/ phone is basically a “standard” PSTN-line and can
therefore not be placed within the lift travelling cable together
with high voltage. *** (Risk of interference)***
• Always place the antenna in an upward position and at least
1500 mm distance from GL6.
• Place the antenna where the highest eld intensity is obtained
according to the table on the unit.
• When a call is connected, try placing the antenna in different
places to nd where the best receiving/sending position is.

EU Declaration of Conformity GL6 V3.0
Your partner in lift safety
Antennvägen 10, 13548 Tyresö, Sweden
+46 (0)8-447 79 32, www.safeline-group.com
EU Declaration of Conformity
Product: Mobile network emulator
Type / model: Safeline GL6
Article no: *GL6, *GL6-4G, *GL6-FC, *GL6-FC-4G
Manufacturer: SafeLine Sweden AB
Year: 2020
We herewith declare under our sole responsibility as manufacturer that the products referred to above
complies with the following EC Directives:
Directives
Radio Equipment (RED): 2014/53/EU
RoHS 2: 2011/65/EU
Standards applied
EN 12015:2014 EMC: Emission, Electromagnetic compatibility
EN 12016:2013 EMC/Lifts: Immunity, Electromagnetic compatibility
EN 62368–1:2014/AC:2015 LVD: Information Technology Equipment
EN 50581:2012 RoHS: Technical doc. for assessment of restriction of RoHS.
For RED 2014/53/EU, the conformity assessment procedure “Module A” used as described in Annex II. Accordingly, respective manufacturer
has done the radio modules conformity assessment:
Standards applied Article of Directive 2014/53/EU
EN 60950-1:2006+A11:2009+A1:2010+A12:2011+A2:2013
3.1 (a): Health and safety of the user
EN 62311:2008
EN 301 489-1 v2.1.1 + EN 301 489-52v1.1.0 Draft 3.1 (B): Electromagnetic Compatibility
EN 301 511 v12.5.1
3.2: Effective use of spectrum allocated
EN 301 908-1v11.1.1 /-2v11.1.1 /-13v11.1.1
Firmware used during assessment
GL865-Dual V3: 16.00.152 / 16.01.150 / 16.01.153
LE910-EU V2: 20.00.402
SafeLine GL6: 1.00
Tyresö, 2020-03-09
Lars Gustafsson,
Technical Manager, R&D , SafeLine Group
Module
Notified body
Address
NB nr
Test nr
1 GL865-Dual V3 2.
LE910-EU V2
Dekra Test &Cert
Dekra Test &Cert
Parque Tecnologico de Andalucia / SeveroOchoa 2,
29590 Spain
1909
1909
53051 RBN.001
52382 RCB.001
LE910C1-EU
Dekra Testing and
Certification
Parque Tecnologico de Andalucia / Severo Ochoa 2,
29590 Málaga, Spain
1909
57536RNB.001A1

www.safeline-group.com
SafeLine Europe
Industrieterrein 1-8 · 3290 Diest · Belgium
Support: +32 (0)4 85 89 08 95
SafeLine Deutschland GmbH
Kurzgewannstraße 3 · D-68526 Ladenburg · Germany
SafeLine Norway
Solbråveien 49 · 1383 Asker · Norway
SafeLine Denmark
Vallensbækvej 20A, 2. th · 2605 Brøndby · Denmark
SafeLine Headquarters
Antennvägen 10 · 135 48 Tyresö · Sweden
Support: +46 (0)8 448 73 90
SafeLine Group UK
Unit 47 · Acorn Industrial Park · Crayford ·
Kent · DA1 4AL · United Kingdom
SafeLine is a registered trademark of SafeLine
Sweden AB. All other trademarks, service marks,
registered trademarks, or registered service marks
are the property of their respective owners.
Other manuals for GL6
1
Table of contents
Other Safeline Computer Hardware manuals