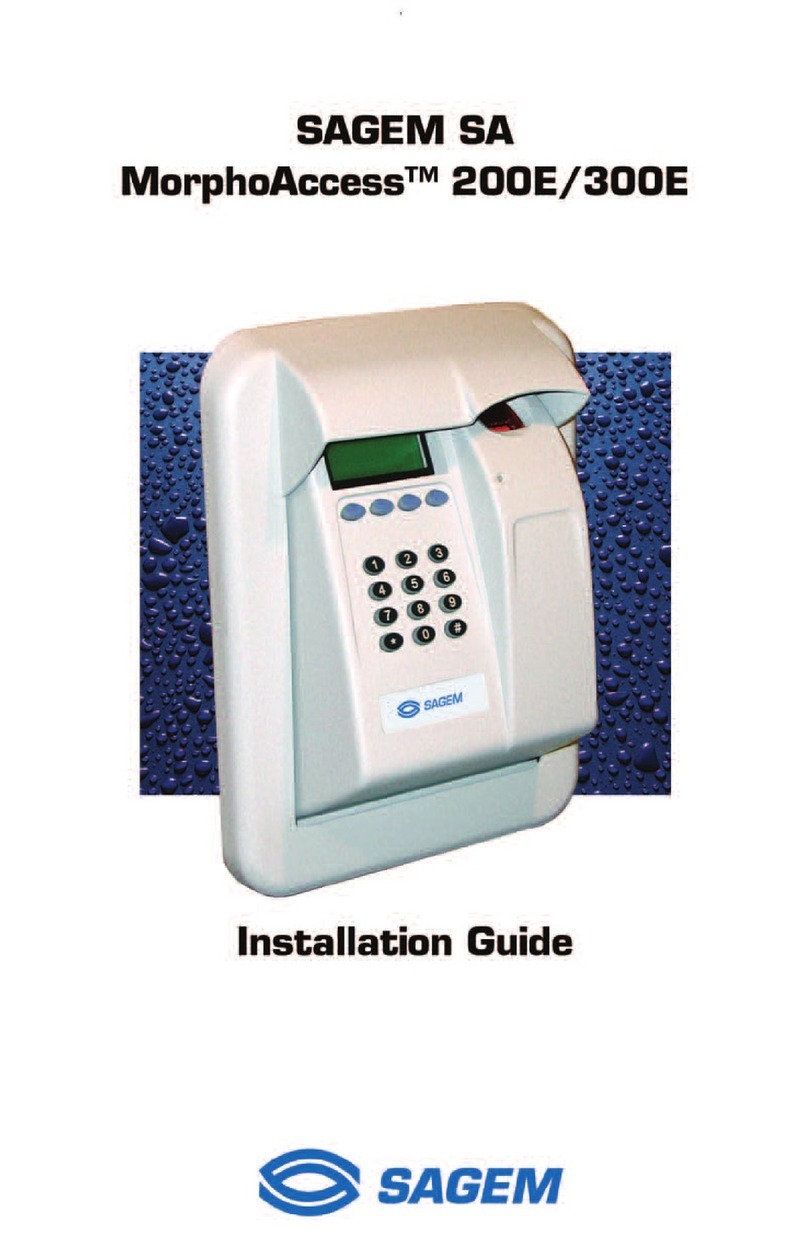
Sagem MORPHOACCESS 200 User manual

SAGEM Défense Sécurité
MORPHOACCESSTM
Installation Guide
MorphoAccessTM 200/220/300 July 2006

2SAGEM Défense Sécurité document. Reproduction and disclosure forbidden. SK-0000011145-05

CONTENTS
INTRODUCTION 9
SAFETY INSTRUCTIONS 10
REPLACEMENT OF THE BATTERY LOCATED ON THE MOTHERBOARD 11
GENERAL DESCRIPTION 12
INSTALLATION PROCEDURE 13
STAGE 1: DRILLING THE MOUNTING HOLES 13
STAGE 2: MOUNTING THE METAL CHASSIS ASSEMBLY 14
STAGE 3: CONNECTING THE CHASSIS ASSEMBLY TO THE COVER ASSEMBLY 15
STAGE 4: CLOSING MORPHOACCESS™16
HOW TO UPGRADE MORPHOACCESS™ 200 TO 300 17
ELECTRICAL INTERFACE 18
TERMINAL BLOCK BOARD 18
POWER SUPPLY CABLE 19
COM1 RS422 SERIAL PORT WIRING 19
COM1 DEISTER WIRING (OPTIONAL)20
ETHERNET WIRING 20
COM2 RS232 WIRING 21
WIEGAND OUTPUT WIRING 21
WIEGAND INPUT WIRING 22
DATA CLOCK OUTPUT WIRING 22
DATA CLOCK INPUT WIRING 23
OUTPUT RELAYS AND TAMPER SWITCHES 24
WIEGAND / DATACLOCK: MOTHERBOARD CONFIGURATION 25
USER INTERFACE 27
ACCESS CONTROL BY IDENTIFICATION (MORPHOACCESS™ 200) 28
ACCESS CONTROL BY IDENTIFICATION (MORPHOACCESS™ 300) 29
SK-0000011145-05 SAGEM Défense Sécurité document. Reproduction and disclosure forbidden. 3

ACCESS CONTROL BY AUTHENTICATION – ID SENT ON WIEGAND OR
DATACLOCK 31
CONTACTLESS AUTHENTICATION WITHOUT DATABASE 33
ID ONLY MODE 34
TEMPLATES OR BIOPIN CODE MODE 35
PIN CODE MODE 36
PIN CODE THEN TEMPLATES OR BIOPIN CODE MODE 37
CARD DEFINED MODE 39
CONTACTLESS AUTHENTICATION WITH : STANDARD CARD 40
CONTACTLESS AUTHENTICATION WITH DATABASE: BINARY ID 42
PROXY MODE 45
MERGED MODE 46
AUTHENTICATION MODE WITH DATABASE: USING KEYBOARD ID 47
SOFTWARE ADMINISTRATOR INTERFACE 48
BIOMETRIC MANAGEMENT OPERATIONS 49
BIOMETRIC MANAGEMENT BETWEEN TERMINAL AND MORPHOACCESS™ MANAGEMENT
SYSTEM (MMS) 49
BIOMETRIC MANAGEMENT IN STAND-ALONE MODE 50
INSERT TEMPLATE/ID IN DATABASE 51
REMOVE TEMPLATE/ID FROM DATABASE 51
REMOVE ALL TEMPLATE/ID FROM DATABASE 52
RESET CONFIGURATION TO FACTORY SETTINGS 52
WARM-UP RESET 52
ACCESS THE SET UP FUNCTIONS OF THE SYSTEM 54
CONFIGURATION MENU 56
HOW TO EDIT PARAMETERS? NETWORK PARAMETERS EXAMPLE 57
SYSTEM AND ADMIN PASSWORDS 59
MORPHOACCESS™ SYSTEM ADMINISTRATOR PIN 59
MORPHOACCESS™ ADMINISTRATOR PIN 59
4SAGEM Défense Sécurité document. Reproduction and disclosure forbidden. SK-0000011145-05

SETTING UP HOST COMMUNICATION. 60
SETTING UP MATCHING PARAMETERS 61
SETTING UP JUVENILE RECOGNITION 61
SETTING UP ANTI-LATENCY 61
SETTING UP RECOGNITION MODE 62
MATCHING THRESHOLD 64
USER INTERFACE SETTINGS 66
MULTILINGUAL APPLICATION 66
IDENTIFICATION INFORMATION 67
CLOCK 68
IDLE MODE 68
DISPLAY PERSONALIZATION 69
SETTING UP CONTACTLESS READER PARAMETERS 70
LOG FILE 72
SETTING UP TIME MASK 73
SETTING UP DOWNLOAD AGENT - (SDL) 74
WIEGAND / DATACLOCK CONFIGURATION 75
NOTE 75
WIEGAND / DATACLOCK : ID SENDING 75
WIEGAND / DATACLOCK : ADVANCED INFORMATIONS 76
WIEGAND : FACILITY CODE 76
WIEGAND : FACILITY CODE VERIFICATION 77
DATACLOCK : DATA AND STROBE LEVELS 77
WIEGAND / DATACLOCK : LED OUT – CARD PRESENT SIGNALS 77
WIEGAND / DATACLOCK : LED IN SIGNAL 79
SETTING UP WIEGAND INTERFACE 80
ID SENDING ON UDP 82
ID SENDING ON RS232 OR RS422 83
ID SENDING ON « COM1 » 83
ID SENDING ON « COM2 » 83
SK-0000011145-05 SAGEM Défense Sécurité document. Reproduction and disclosure forbidden. 5

SERIAL PORT PARAMETERS 85
COM1 PORT (SER0) 85
USING A DEISTER CONTACTLESS READER ON COM1 86
COM2 PORT (SER1) 86
RELAY ACTIVATION 87
TIME AND ATTENDANCE 88
THE VERSION MENU 91
THE SERIAL NUMBER MENU 92
THE SETTING MENU 93
ACCESS THE MIFARE KEYS UPDATE MENU (MORPHOACCESS 220) 95
CONTACTLESS CARD DATA STRUCTURE (MORPHOACCESS 220 ONLY) 97
DATA STRUCTURE 97
MORPHOACCESS™ TAGS 97
ADMIN CARD FORMAT (MORPHOACCESS 220 ONLY) 99
SAGEM KEYS 99
MAPPING 100
COMMUNICATION PROTOCOL 101
MORPHOACCESSTECHNICAL CHARACTERISTICS 102
DISPLAY 102
KEYBOARD 102
FUSE 102
MEMORY 102
PERIPHERALS INTERFACES 102
POWER SUPPLY 102
SIZE AND WEIGHT 103
ENVIRONMENTAL CONDITIONS 103
STORAGE CONDITIONS 103
CLEANING PRECAUTIONS 103
RECOMMENDATIONS 104
6SAGEM Défense Sécurité document. Reproduction and disclosure forbidden. SK-0000011145-05

AREAS CONTAINING COMBUSTIBLES 104
GENERAL PRECAUTIONS 104
ETHERNET CONNECTION 104
DATE / TIME SYNCHRONISATION 105
WARNING 105
APPENDIX 1 - ETHERNET COLOR STANDARD 106
RJ45 PINOUT 106
APPENDIX 2 - WIEGAND DATA FORMAT 107
EXAMPLES 108
APPENDIX 3 - ISO 7811/2-1995 - TRACK 2 DATACLOCK FORMAT 109
DATA ENCODING TABLE 109
DATACLOCK LEVELS 111
APPENDIX 4 - RESERVED CONFIGURATION 112
APPENDIX 5 - FINGERPRINT PLACEMENT RULES 113
APPENDIX 6 – RECOGNITION MODES 114
BIBLIOGRAPHY 115
DRILLING TEMPLATE 116
SK-0000011145-05 SAGEM Défense Sécurité document. Reproduction and disclosure forbidden. 7

8SAGEM Défense Sécurité document. Reproduction and disclosure forbidden. SK-0000011145-05

I
IN
NT
TR
RO
OD
DU
UC
CT
TI
IO
ON
N
Congratulations for choosing the SAGEM MorphoAccess™1Automatic
Fingerprint Recognition Terminal. MorphoAccess™ provides an innovative
and effective solution for access control or time and attendance
applications using Fingerprint Verification or/ and Identification.
Among a range of alternative biometric techniques, the use of finger
imaging has significant advantages : each finger constitutes an unalterable
physical signature which develops before birth and is preserved until
death. Unlike DNA, a finger image is unique to each individual - even
identical twins.
The MorphoAccess™ terminal integrates SAGEM image processing
and feature matching algorithms (MorphoSoft™ and MorphoImaging™).
This technology is based on lessons learned during 18 years of experience
in the field of biometric identification and the creation of literally millions of
individual fingerprint identification records.
We believe you will find the SAGEM MorphoAccess™ fast, accurate, easy
to use and suitable for physical access control or time and attendance.
The SAGEM MorphoAccess™ offers the following advantages:
• High quality optical scanner.
• Supports multiple input/output interfaces used in the physical
access control industry.
• Local area network interface for easy interaction with other host
systems.
• Compact size for easy installation and integration into your
available office space.
• Intuitive interface that is easy to use in both setup and
operational modes.
• Extensive, flexible flash memory for data storage (user data,
biometric templates, etc.).
To ensure the most effective use of your SAGEM MorphoAccess™, we
recommend that you read this Installation Guide totally.
1The SAGEM logo and trademark are the property of SAGEM Défense Sécurité.
All other trademarks or product names are trademarks or product names of the respective title
holders.
SK-0000011145-05 SAGEM Défense Sécurité document. Reproduction and disclosure forbidden. 9

S
SA
AF
FE
ET
TY
Y
I
IN
NS
ST
TR
RU
UC
CT
TI
IO
ON
NS
S
The installation of this product should be made by a qualified service
Person and should conform to all local codes.
It is strongly recommended to use a class II power supply at 12 V ±5% and
2.5 A/min according with Safety Electrical Low Voltage (SELV). The 12 V
power supply cable length should not exceed 3 meters.
This product is intended to be installed in accordance with the NEC Class
2 requirements; or supplied by a listed external Power Unit marked Class
2, Limited Power source, or LPS and rated 12 V DC, 2.5 A minimum.
In case of building to building connection it is recommended to connect 0V
to ground. Ground cable must be connected with the terminal block board
fixation screw marked with universal ground symbol.
Warning:: The user could connect the MorphoAccess™ 0V to
Ground only if the MorphoAccess™ was before connected and tested in
working.
Europe : SAGEM hereby declares that the SAGEM MorphoAccess™
has been tested and found compliant with the below listed standards as
required by the EMC Directive 89/336/EEC: EN55022 (1994)/EN55024
(1998) and by the low voltage Directive 73/23/EEC amended by
93/68/EEC: EN60950 (2000).
USA: This equipment has been tested and found compliant with Class B
digital device requirements, pursuant to part 15 of the FCC Rules. These
requirements are designed to ensure reasonable protection against
harmful RF interference in a residential installation.
This equipment generates, uses and can radiate radio frequency energy
and, if not installed and used in accordance with the instructions, may
interfere with radio communications. If this equipment interferes with radio
or television reception - which can be determined by disconnecting and re-
connecting the unit – the user is encouraged to try to correct the
interference by one or more of the following measures :
• Reorient or relocate the receiving antenna.
• Increase the separation between the equipment and receiver.
• Connect the equipment into an outlet on a circuit different from that
to which the receiver is connected.
• Consult the dealer or an experienced radio/TV technician for help.
10 SAGEM Défense Sécurité document. Reproduction and disclosure forbidden. SK-0000011145-05

R
RE
EP
PL
LA
AC
CE
EM
ME
EN
NT
T
O
OF
F
T
TH
HE
E
B
BA
AT
TT
TE
ER
RY
Y
L
LO
OC
CA
AT
TE
ED
D
O
ON
N
T
TH
HE
E
M
MO
OT
TH
HE
ER
RB
BO
OA
AR
RD
D
CAUTION
Danger of explosion if battery is incorrectly
replaced.
Replace only with the same or equivalent type
recommended by the manufacturer.
Must be disposed of properly.
ATTENTION
ll y a danger d’explosion s’il y a remplacement
incorrect de la batterie.
Remplacer uniquement avec une batterie du
même type ou d’un type équivalent recommandé
par le constructeur.
Éliminer de façon appropriée.
SK-0000011145-05 SAGEM Défense Sécurité document. Reproduction and disclosure forbidden. 11

G
GE
EN
NE
ER
RA
AL
L
D
DE
ES
SC
CR
RI
IP
PT
TI
IO
ON
N
Senso
r
Display
136 x 34 dots
MIFARE
Card reade
r
(MA220 only)
Function keys
Keyboard
Mounting keyholes
Cable entry
Metal chassis
Anti-thef
t
entr
y
12 SAGEM Défense Sécurité document. Reproduction and disclosure forbidden. SK-0000011145-05

I
IN
NS
ST
TA
AL
LL
LA
AT
TI
IO
ON
N
P
PR
RO
OC
CE
ED
DU
UR
RE
E
S
St
ta
ag
ge
e
1
1:
:
D
Dr
ri
il
ll
li
in
ng
g
t
th
he
e
m
mo
ou
un
nt
ti
in
ng
g
h
ho
ol
le
es
s
Mounting and cable entry hole location (rear view)
SK-0000011145-05 SAGEM Défense Sécurité document. Reproduction and disclosure forbidden. 13
a) Drill the 2 holes for the screws for the mounting keyholes so that the
cable entry is in a suitable position for your cabling, using the dimensional
drawing above.
b) Drill the hole for the third screw in the centre of the slot so that it is
possible to correct the position later, if necessary.
c) The mounting screws must be 5 mm diameter maximum.

S
St
ta
ag
ge
e
2
2:
:
M
Mo
ou
un
nt
ti
in
ng
g
t
th
he
e
m
me
et
ta
al
l
c
ch
ha
as
ss
si
is
s
a
as
ss
se
em
mb
bl
ly
y
Cable entr
y
Tamper switch Terminal block board
Chassis bold receivers
a) Disconnect the ribbon cable between the motherboard and the terminal
block board so that the assembly shown above can be detached from the
rest of MorphoAccess™.
b) Pass the connecting cables through the cable entry.
c) Position the chassis assembly against the wall using the two screws in
the mounting keyholes.
d) Hold the chassis in place with a screw through the mounting slot.
e) Adjust the position, and fix in place by tightening all three screws.
f) Connect cables to terminal blocks (see the detailed instructions in the
following sections).
14 SAGEM Défense Sécurité document. Reproduction and disclosure forbidden. SK-0000011145-05

S
St
ta
ag
ge
e
3
3:
:
C
Co
on
nn
ne
ec
ct
ti
in
ng
g
t
th
he
e
c
ch
ha
as
ss
si
is
s
a
as
ss
se
em
mb
bl
ly
y
t
to
o
t
th
he
e
c
co
ov
ve
er
r
a
as
ss
se
em
mb
bl
ly
y
Ribbon cable connector location
Tamper switch
SK-0000011145-05 SAGEM Défense Sécurité document. Reproduction and disclosure forbidden. 15
Motherboard/terminal block board
ribbon cable connectors
Cover assembly Chassis assembly
Position of the ribbon cable as the case is closed
Cover assembl
y
Chassis assembl
y
The ribbon cable must be folded as
shown so that the case closes
easily without damaging the cable

S
St
ta
ag
ge
e
4
4:
:
C
Cl
lo
os
si
in
ng
g
M
Mo
or
rp
ph
ho
oA
Ac
cc
ce
es
ss
s™
™
16 SAGEM Défense Sécurité document. Reproduction and disclosure forbidden. SK-0000011145-05
Catch for the cover assembly lip
Lip
When the ribbon cable has been
connected between the two assemblies
(see stage 3), the cover assembly is fitted
to the chassis assembly.
1 The lip on the cover slides behind
the chassis, to fit over the catch shown on
the diagram above.
2 The cover is fitted onto the chassis
by rotating it.
Fit the two M4x10 assembl
y
screws. Use screwdriver TORX 20 Assembled
MorphoAccessTM

H
HO
OW
W
T
TO
O
U
UP
PG
GR
RA
AD
DE
E
M
MO
OR
RP
PH
HO
OA
AC
CC
CE
ES
SS
S™
™
2
20
00
0
T
TO
O
3
30
00
0
This operation requires that the MorphoAccess™ is powered off.
External flash card
When external flash card is inserted, the MorphoAccess™ 200 becomes a
MorphoAccess™ 300. From then, all database information will be stored
on the new media.
Warning: All database information of the MorphoAccess™ 200 is lost.
Warning: 12 pin card flash must be connected on the most right
position on the 13 pin motherboard connector. One pin of the motherboard
connector must be visible on the left side of the external card flash while
connected.
Bad positioning may damage the external card flash.
For more information, refer to the MorphoAccess Host System Interface
Specifications.
This upgrade is available for products with serial number starting with
01511XXXX.
This remark does not concern 13 pin card.
After card flash installation, for the first terminal power on, a memory
initialization is performed during approximated 1 minute, then will increase
the terminal starting time.
SK-0000011145-05 SAGEM Défense Sécurité document. Reproduction and disclosure forbidden. 17

E
EL
LE
EC
CT
TR
RI
IC
CA
AL
L
I
IN
NT
TE
ER
RF
FA
AC
CE
E
T
Te
er
rm
mi
in
na
al
l
b
bl
lo
oc
ck
k
b
bo
oa
ar
rd
d
For EMC compatibility in order to be EC and FCC compliant (EN55022,
EN55024 FCC part 15), it must be set an axial ferrite bead (2 turns) with
the 12 V supply cable, and for any interface cable used, except Ethernet
LAN.
J1 5 pin block Ethernet Interface (LAN 10 Mbps)
J3 2 pin block 12 V supply ± 5% regulated
J4 4 pin block Wiegand output to host or Data Clock
output
J5 5 pin block Wiegand peripheral input or Data Clock
output
J7 5 pin block COM1 RS422 serial interface
J8 7 pin block Output relay and Tamper-Switch
J9 34 way ribbon cable Cable connection to main assembly
J11 5 pin block COM2 reduced RS232C serial
F1 Fuse 2.5 A quick blow fuse
18 SAGEM Défense Sécurité document. Reproduction and disclosure forbidden. SK-0000011145-05

P
Po
ow
we
er
r
s
su
up
pp
pl
ly
y
c
ca
ab
bl
le
e
The terminal blocks are shown viewed from the front with the chassis
assembly in its normal position on the wall.
Terminal block J3
Pin 1 +12 V Power
Pin 2 Ground Power
Power supply 12 V ± 5% (regulated) 2.5 A
C
CO
OM
M1
1
R
RS
S4
42
22
2
s
se
er
ri
ia
al
l
p
po
or
rt
t
w
wi
ir
ri
in
ng
g
Terminal block J7
Pin 1 Rx+ Input
Pin 2 Rx- Input
Pin 3 Tx+ Output
Pin 4 Tx- Output
Pin 5 Ground Ground
For a half-duplex RS422 connection, only Tx+, Tx- and ground are
connected. Otherwise, as the unit is a peripheral, the connections must be
crossed over: Rx on the MorphoAccess™ is connected to Tx on the host
and Tx on the MorphoAccess™ is connected to Rx on the host.
SK-0000011145-05 SAGEM Défense Sécurité document. Reproduction and disclosure forbidden. 19

C
CO
OM
M1
1
D
De
ei
is
st
te
er
r
w
wi
ir
ri
in
ng
g
(
(o
op
pt
ti
io
on
na
al
l)
)
Terminal block J7
Pin 3 A Input/Output
Pin 4 B Input/Output
To use the features of the optional Deister contactless card reader,
connect the AB wires to the Tx port.
AB wires are connected to the Deister contactless card reader as defined
in its install manual.
For more information about this option, please contact your SAGEM sales
representative.
E
Et
th
he
er
rn
ne
et
t
w
wi
ir
ri
in
ng
g
Terminal block J1
Pin 1 Rx+ Input
Pin 2 Rx- Input
Pin 3 Tx+ Output
Pin 4 Tx- Output
Pin 5 Ground Ground
See Ethernet color standard Appendix.
See Ethernet connection recommendations in Recommendations section.
20 SAGEM Défense Sécurité document. Reproduction and disclosure forbidden. SK-0000011145-05
This manual suits for next models
2
Table of contents
Other Sagem Touch Terminal manuals
