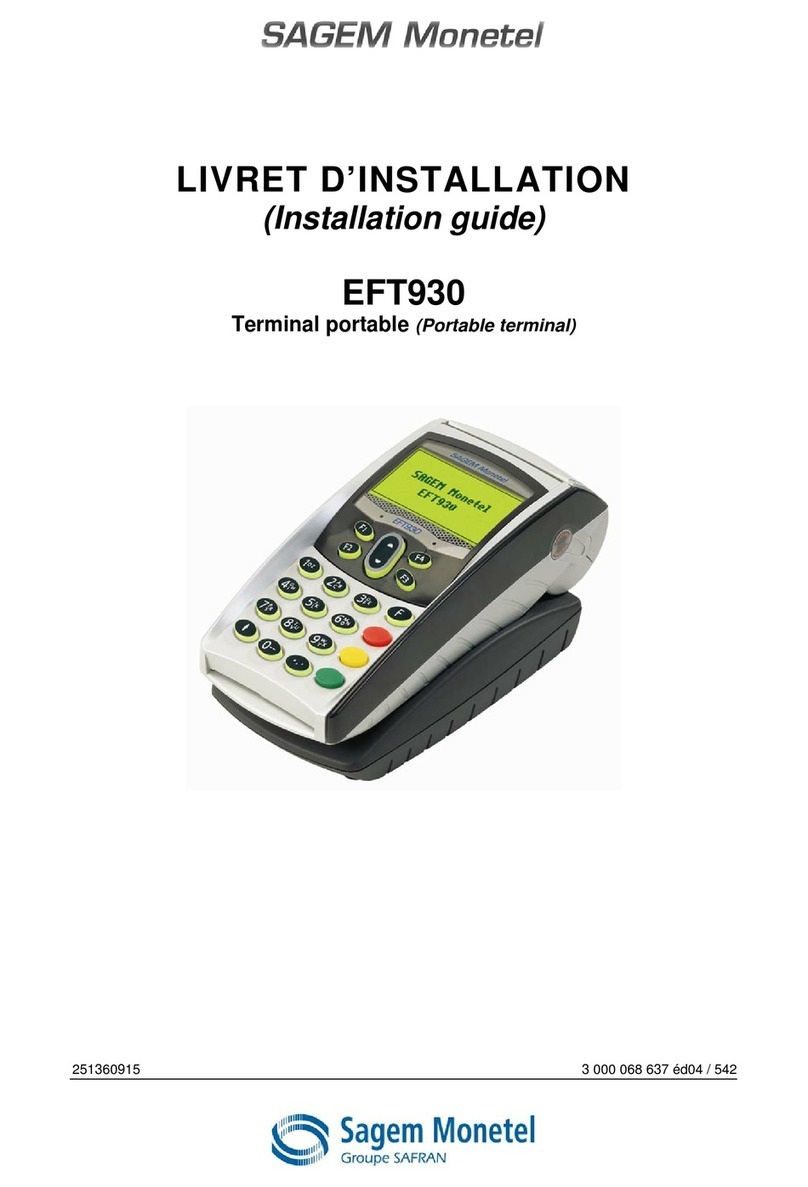
Sagem EFT930 User manual

0
EFT930 Mobile GPRS Terminal
Quick Reference Guide

1
123 Send Mobile GPRS Terminal
INDEX PAGE
GlossaryofTerms 2
Getting Started 3
Terminal Layout 4
Till Rolls 5
Changing Your Passwords 6
TakingCardPayments 8
Processing a Chip and PIN Refund 10
Processing a Mail Order / Customer Not Present (CNP) Sale 11
Processing a Banking Report 12
Troubleshooting 13
Terminal Management 18
Terminal Menu Structure 19
Additional Services 20
Contact Numbers 21

2
Glossary of Terms
Term Definition
Acquirer Your acquirer is a processing house where all of your transactions are
processed and the funds then transferred into your business bank
account.
Banking Window
This is a specific time slot, set by your acquirer, when your transactions
are confirmed by your acquirer. To confirm this time slot you will need to
contact your acquirer.
CNP This is a feature which enables you to take payments over the telephone
or by mail order. You must ensure you have all of the customer’s details
before proceeding with this type of transaction
GPRS General Pack Radio Service - This is the means the transaction data is
transmitted from the terminal to the bank.
Heartbeat
The terminal has a built in system that connects automatically to the
TMS every 4 weeks. This is to ensure the software on the terminal is up
to date.
MID Merchant Identification – This is a unique number that is assigned to
your Company by your Acquiring Bank.
PIN Personal Identification Number – The customer’s personal number
that they enter when paying for goods. This number is not to be divulged
to anyone.
TID
Terminal Identification - This is a unique number that is assigned to
your terminal to ensure the correct details are being used for your
company. You can find your TID on your receipt and you should have
this number to hand prior to calling the helpdesk.
TMS Terminal Management System – This is the application that 123Send
uses to configure your terminal.

3
Getting Started
BATTERY INFORMATION:
Please ensure you charge the battery for a minimum of 6 hours before use.
The battery can only be recharged when in the terminal, using the supplied base unit or travel
charger.
While the battery is charging, an animated line will be shown below the symbol.
For maximum efficiency, it is recommended to charge the battery at ambient temperatures
(between 15 and 25 C).
For maximum performance, it is recommended to change your battery pack every two years.
It is normal for the battery and base to heat up slightly when charging.
If the battery symbol shows empty , and the terminal displays a “Battery Low” warning
then you should recharge the terminal battery as soon as possible for a minimum of 6 hours.
If the terminal displays a “Battery too low” warning and powers off, then the battery must be
recharged, before further use of your terminal is possible, for a minimum of 6 hours.
DO NOT attempt to use your terminal without its battery pack.
DO NOT attempt to open the battery pack. There are no user-serviceable components.
DO NOT remove the battery pack from the terminal for extended periods of time.
DO NOT discard old or broken battery packs. Return them to your terminal
supplier for correct recycling.
DO NOT leave on constant charge as this will have a degrading effect on the
batteries life span.
Within your delivery, you should have the following::
1. GPRS Terminal
2. Mains charging lead (fits into base station)
3. Base station for terminal
4. One full till roll
5. SIM CARD – This will already be installed in the terminal
6. Full instruction manual
7. Any additional accessories you have ordered
If an
y
of these items are missin
g
p
lease call our Technical Hel
p
desk on 0800 54 24 123
Only use approved chargers provided by 123Send

4
Terminal Layout
Printer
Feed
Function
Buttons
Keypad
Power On/Printer Feed
Chip & Pin Slot
Magnetic Strip
Enter
Back Space
Cancel
Menu Button
Display
Battery Icon
Signal
Strength
Network Status
Date and Time
Handset Number
Terminal
Status

5
Till Rolls
Changing Till Rolls
Your terminal will only work using 123Send approved thermal paper. This can be purchased by
visiting our online shop www.123send.net/shop or by calling 0800 54 24 123.
To replace the till roll please follow the steps below:
Open the paper housing cover
by pulling the catch upwards.
Do not be too forceful as this
may damage the terminal.
Remove the remaining roll or
the inner tube.
Un-stick the paper at the start of
the new roll and insert. Close
the paper housing cover by
pressing the cover closed to
engage the two catches.
Press the paper feed key
when the terminal has powered
up.
Till Roll Text
If you wish to amend the till roll text please contact our Technical Helpdesk on 0800 54 24 123.
Please note there can only be a maximum of 24 characters, including spaces, per line.
123Send
120 Leman Street
0800 54 24 123
MID: 897654321
TID: 12345678
HANDSET 1
VISA DEBIT
AID: A000000031010
VISADEBIT
************ 1230
EXP 04/12
SALE
AMOUNT £123.00
TOTAL £123.00
PIN VERIFIED
THANK YOU FOR YOUR CUSTOM
CUSTOMER COPY
PLEASE RETAIN
Till Roll Text Line 1
Till Roll Text Line 2
Till Roll Text Line 3
Merchant Identification Number (MID)
Terminal Identification Number (TID)
Handset Number
Card Type
Acquirer’s Reference
Card Type
Card Number
Expiry Date
Amount
Total

6
Changing Your Passwords
Supervisor Password
Your terminal has several security features enabled to minimise the risk of fraudulent
transactions/refunds being processed. One such feature is a Supervisor Password which must be
entered when processing refunds and banking reports.
123Send recommend that you change your password upon receipt of your terminal. To change
your password please follow the steps below:
TERMINAL DISPLAY DESCRIPTION
Press Menu button Twice
Press F3
Due to recent changes some Acquirers insist the
password is amended before the terminal is
dispatched. The default password can be found
on the confirmation letter that was emailed or
posted to you. Enter the default password*
Press F2
Press F4
Press F1
Press OK
Press OK
This is now complete.
Please ensure the safekeeping of the password and do not disclose it to anyone outside of your
company. You are able to change your password as many times as you wish.
*If you have forgotten the Supervisor Password please call our Technical Helpdesk on
0800 54 24 123 and they will reset this back to the default password, after verifying your identity.

7
Changing Your Passwords
Refund Password
Your terminal has a Refund Password function. When you receive your terminal this password will
be the same as the Supervisor Password. The Supervisor Password must be entered before
processing a refund. To change your Refund Password please follow the below instructions. Please
note, your Supervisor Password will remain unchanged.
TERMINAL DISPLAY DESCRIPTION
Press Menu Twice
Press F3
Due to the recent changes some Acquirers insist the
password is amended before the terminal is
dispatched.
Enter Default Password*
Press F2
Press F4
Press F2
Press OK
Press OK
This is now complete.
*as per page 6

8
Taking a Payment using Chip and Pin
TERMINAL DISPLAY DESCRIPTION
Insert the Customer Card into the reader with the chip
facing up and towards the keypad.
The terminal will check the card type then display the
screen shown left
Key in the amount in pence
(i.e. 1545 for £15.45) then press OK
The screen will now display the amount entered for
the customer to confirm and enter their PIN.
Hand the terminal to the customer
Using the keypad ask the customer to enter their 4
digit PIN, then press OK
The terminal will confirm the PIN entered is correct
and then prompt the customer to hand the terminal
back to the merchant. If the PIN number entered is
incorrect the terminal will prompt to re-enter. The
customer has 3attempts to get it right.
The terminal will make connection to the Acquirers
system to obtain an Authorisation code. Ensure the
card is not removed during this process as it will
VOID the transaction.
The first receipt which the terminal will print is the
Merchant copy, tear this off and then press OK to
print the Customer copy
Remove the card. Tear off customer copy. Check the
transaction has been verified and not Declined / Void
or Cancelled
The terminal is now ready to take the next transaction.
If the terminal shows “Call Auth Centre” Please call
your acquirer. The telephone number will be displayed
on the screen. Follow the on screen prompts.
All queries relating to payments that are being paid into your bank account must be directed
to your acquiring bank (see page 21 for contact details)
You must only enter the Authorisation Code provided to you by the Authorisation Centre.
Failure to do so could result in the money not being paid into your account.

9
Taking a Payment using the Magnetic Strip
If the customer’s card does not have a chip on it then you can take payments by using the Swipe
function on the terminal, which is located on the right hand side of the terminal, see page 4
TERMINAL DISPLAY DESCRIPTION
Enter the amount to be charged in pence
The terminal will then connect to your acquirer for
authorisation
If the transaction has been approved an authorisation
code will appear on the screen. If the transaction has
not been authorised the terminal will display Void,
Declined or Call Auth Centre
Once it has been authorised it will print of a receipt for
the customer to sign. You must retain this
Check the signature.
Press F1 for an invalid signature
Press F2 for a valid signature
If the signatures match then the terminal will print a
copy of the receipt. This must be handed to the
customer for them to retain
Once complete the terminal will return to the ‘Ready’
screen
Please ensure that you always have your back up swipe machine if your acquirer provides one.
Refer to your acquirer Merchant Operating procedures on Magnetic Swipe Payments and how to
process, in case you experience any technical issues with your terminal that cannot be resolved by
our Technical Helpdesk in the short term.
You must only enter the Authorisation Code provided to you by the Authorisation Centre.
Failure to do so could result in the money not being paid into your account.

10
Processing a Chip and PIN Refund
TERMINAL DISPLAY DESCRIPTION
On the Ready screen Press the Menu button once.
Select F2 for Refunds
You will be prompted to key in your password (You should
change this for security reasons from the default, please
see page 7) Press OK once the password is entered.
Insert the Cardholder’s Card into the reader with the chip
facing up and towards the keypad.
Key in the amount in pence (i.e. 1545 for £15.45) then
press OK
The terminal will make connection to the acquirers system
to obtain an Authorisation code. Ensure the card is not
removed during this process as it will VOID the refund
Once the terminal has received the authorisation from the
acquirers system to complete the refund, the terminal will
prompt you to remove the card
The first receipt the terminal will print is the Merchant copy,
retain this and then press OK to print the Customer copy
The terminal is now ready to take the next transaction

11
Processing A Mail Order / Customer Not Present (CNP) Sale
TERMINAL DISPLAY DESCRIPTION
On the Ready screen press the Menu button once. This will
bring up a list of options
Select MAILORDER by pressing F1 on the keypad
To complete a CNP Sale select F4 on the keypad. You will be
prompted to key in the long card number
Using the keypad enter the long number for the credit card.
The terminal will check the card type and display it on the
screen
Using the keypad enter the 4 digit expiry date. If the expiry
date appears as 11/12 on the card, then key in 1112 then
press OK
The CSC number can generally be found on the Signature
Strip and is the last 3 digits
Key in the numbers from the CARDHOLDER’S Postcode (i.e.
for HA7 2JE key in 72) then press OK
Key in the numbers from the CARDHOLDER’S address (i.e.
412 for 4A, 12 High Street) then press OK. If there is no house
number then leave blank and just press OK
Key in the amount in pence (i.e. 1545 for £15.45) then press
OK
The First receipt which the terminal will print is the Merchant
copy, tear this off and then press OK to print the Customer
copy
Terminal is now ready to take the next transaction
If the terminal shows “Call Auth Centre” Please call your
acquirer. The telephone number will be displayed on the
screen. Follow the on screen prompts.
You must only enter the Authorisation Code provided to you by the Authorisation Centre.
Failure to do so could result in the mone
y
not bein
g
paid into
y
our account.

12
Processing a Banking Report
In order to ensure accurate accounts you must carry out banking reports via your terminal on a
regular basis. Below is a step by step guide on how to complete these reports.
Reporting
To ensure the transactions processed by the terminal are being received by your acquiring bank it
is strongly recommended that you run the appropriate reports:
Banking -The banking report (sometimes called “Reconciliation”) compares the
transactions taken by the machine with those received by your acquirer. You must run
these reports in order to maintain accurate accounts.
X Balance - An ‘X’ balance may be used at intervals throughout the trading day – for
example, to separate takings from different shift periods or staff members. It does not reset
the totals for the trading period, but provides a subtotal of the takings since the last balance
report. This total will reset when you do a Banking/End of Day report.
Z Balance - A ‘Z’ balance will reset the banking. This report shows the transactions taken
since the last ‘Z’ balance was run. This report should be used in conjunction with the
Banking report at the end of your trading day to ensure that your takings match those
received by your acquirer. If the totals do not match please contact your acquirer, see page
21 for contact numbers.
End of Day - This option is not an independent report, but a function which runs a
Banking and ‘Z’ Balance in succession.
TERMINAL DISPLAY DESCRIPTION
Press the Menu button twice to bring up the menu on the
screen
Select F1 for reports
You will be prompted to key in your password (You should
change this for security purposes from the default. If you
have not done so already please see page 6) Press OK
once the password is entered
Select F1 for End of Day. The terminal will now make
connection with the Acquirer system, if you have more than
one Acquirer, the terminal will call them in alphabetical
order, e.g. Amex, Diners, and Streamline). Once it has
completed the reconciliation it will print off the report
Terminal is now ready to take the next transaction
Banking Reports should be completed at the end of each working day in your Banking Window.
This is to ensure that all transactions taken are confirmed at your acquirer. If you are not sure of
your Banking Window please contact your acquirer on the number listed at the back of this booklet.

13
Troubleshooting
Before calling the Helpdesk, please use the troubleshooting guide below to help resolve common
issues. If these do not provide a solution then please contact our Technical Helpdesk on 0800 54
24 123.
TERMINAL DISPLAY DESCRIPTION
The terminal is unable to communicate.
Try powering down the terminal and rebooting to try and
establish a network connection.
If the GPRS status shows NO SIM, turn the terminal off,
remove SIM card and wipe with a clean, dry cloth. Reinsert
the SIM card and switch the terminal back on. If GPRS
Status shows NO SIM, contact the Helpdesk on 0800 54 24
123.
The customer’s card inserted is not configured for the
selected transaction type. Ask the customer to pay by some
other means.
The selected operation is not allowed for the card presented,
or the card is faulty. Ask the customer to pay by some other
means and advise them to contact their Card Issuer.
The selected operation is not allowed for the card presented,
or the card is faulty. Try to process the payment one more
time. If the terminal displays the same message ask the
customer to pay by some other means and advise them to
contact their Card Issuer
A referral has occurred. Call the Authorisation Centre on the
number displayed or printed by the terminal for voice
authorisation of this transaction
The card issuer has declined to authorise the transaction,
ask the customer to pay by another means.
The terminal has not successfully contacted the Acquirer
Host within 3 dial attempts. The diagnostic codes printed on
the subsequent receipt will show whether there is a problem
with the network or the Acquirer Host system. Check signal
strength and if network coverage is good but problem
persists contact the helpdesk.
The card presented is a card type that is not supported, or is
damaged and cannot be read by the terminal .Try to process
the payment one more time and if the terminal displays the
same message ask the customer to pay by some other
means and advise them to contact their Card Issuer
You have attempted to perform a transaction but the
acquirer has not set you up for this facility, e.g. Cashback or
Customer Not Present Transaction.
Whilst 123Send will endeavour to resolve any issue with your terminal in a timely manner we
cannot guarantee network connection.
PLEASE BE AWARE 123SEND CANNOT BE HELD RESPONSIBLE FOR NETWORK ISSUES.
PLEASE REFER TO SECTION 3 OF YOUR TERMS AND CONDITIONS FOR FURTHER
CLARIFICATION.

14
Troubleshooting (continued)
Printing Problems
If at any time your terminal struggles to print out receipts and/or reports, we recommend you follow
the below steps:
TERMINAL DISPLAY DESCRIPTION
Press the down button on centre button
Press 0
Press 3
Press 3
Press 2
Press 1
Press 1
Press the Red Cancel button to return to
the READY screen
The battery icon will display half a charge. Once you have carried out this procedure, leave your
terminal on charge for a minimum of 6 hours. If this does not resolve the issue please contact the
Technical Helpdesk on 0800 54 24 123. Following this procedure may also resolve issues such as
the terminal not holding charge.

15
Troubleshooting (continued)
Connection Issue
On rare occasions the signal bars, shown in the top right hand corner of the screen, may disappear.
Please follow the instructions below to resolve the issue.
INSTRUCTION DESCRIPTION
Switch off the terminal using the yellow key
and button with three dots on. Press
simultaneously and hold until the terminal
switches off
Remove the SIM card
Wipe the SIM with a clean dry cloth
Reinsert the SIM Card (as shown in the
picture)
Power the machine back on
Wait 30 seconds and the signal bars should
reappear
If the signal bars do not reappear then please contact our Technical Helpdesk on 0800 54 24 123.
Multiple Terminals
Your terminal is set up to work on a specific network. If you have more than one terminal it is
important that the SIM cards are not moved from one terminal to another as it may result in the
terminal not functioning. This will also affect our records which may cause a delay in resolving any
issue you may have with the terminal.

16
Troubleshooting (continued)
Taking Your Terminal Outside of the UK
If you are planning to use the terminal outside of the UK you need to:
1) Refer to your acquirer to ensure that you able to transact outside of the UK and
2) Contact our Customer Service team on 0800 54 23 123 so they can enable international roaming
at least 4 working days before travelling. There is an additional cost for the set up of this service.
Please note we are unable to configure terminals to work in certain countries
PLEASE BE AWARE 123SEND CANNOT BE HELD RESPONSIBLE FOR NETWORK ISSUES.
PLEASE REFER TO SECTION 3 OF YOUR TERMS AND CONDITIONS FOR FURTHER
CLARIFICATION.
PLEASE ENSURE YOUR TERMINAL IS SWITCHED OFF AND REMOVE THE BATTERY FROM
THE TERMINAL WHEN ON AN AEROPLANE.
Terminal Displaying ‘Not Ready’
Once every 4 weeks your terminal will dial up to the Terminal Management System (TMS) to
update the terminal software. If at any stage during this process the power or signal strength is
reduced then it will be unable to complete the download. To rectify this you will need to carry out a
TMS call. To perform this function follow the below steps:
TERMINAL DISPLAY DESCRIPTION
Press Menu
Press F4 Setup
The terminal will connect to the Terminal
Management System and download any
software changes
Once complete the terminal will return to
the ‘Ready’ screen and you will be able to
take transactions again.
Security Alert
If this message is displayed on your terminal please contact the Technical Helpdesk immediately.
Do not attempt to carry out any repairs on the terminal as it will only further damage the terminal
and you maybe liable for any costs to repair the terminal. You will not be able to process any
transactions whilst the terminal displays this message.

17
Troubleshooting (continued)
ISSUE SOLUTION FURTHER ACTION
Terminal unable to print or printing
slow
Check to see if the
battery is showing as
charged
Perform a Battery Reset
as advised on page 14
Leave the terminal on
charge for a minimum of
6 hours
If these actions do not resolve the
issue contact the Technical
Helpdesk on 0800 54 24 123
Terminal not printing
Open the paper house
and check to see if the
Printer Roll Bar is clean
If these actions do not resolve the
issue contact the Technical
Helpdesk on 0800 54 24 123
No Network coverage
Switch off the terminal
and remove the Sim card,
wipe with a clean dry
cloth, as advised on page
15
Reinsert the SIM card
and switch the terminal
on and the signal bars
should appear in
approximately 30
seconds
If these actions do not resolve the
issue contact the Technical
Helpdesk on 0800 54 24 123
Terminal displaying ‘NOT READY’
Ensure you have a
minimum of 4 signal bars
on your terminal
Press Menu once
Press F4 for Setup
The terminal will now
connect to the network
and carry out a download
Once complete the
terminal will display
‘Ready’
Sometimes you may need to
repeat this process if the download
fails. Simply follow the instructions
again. If these actions do not
resolve the issue contact the
Technical Helpdesk on 0800 54 24
123
Security Alert
Contact the Technical
Helpdesk on 0800 54 24
123
Your terminal will not
function whilst in this
state
N/A
Memory Full
In order to clear this you
must carry out a Banking
Report as advised on
page 12
If these actions do not resolve the
issue contact the Technical
Helpdesk on 0800 54 24 123
Display Contrast
To amend the screen
contrast of the terminal
hold down the button with
3 dots on it and press the
Up or Down on the button
below the screen.
If these actions do not resolve the
issue contact the Technical
Helpdesk on 0800 54 24 123

18
Terminal Management
By following the simple guidelines below it can help get improved performance out of your terminal
and minimise the risk of any faults occurring with the machine
Do
Read the 123Send Quick Reference Guide for instructions on how to set up your terminal
When you receive your new terminal ensure it is placed on charge for a minimum of 6 hours
before you use it
Ensure you are familiar with how the terminal works before you commence trading
Only use the supplied 123Send equipment
If you are experiencing no signal remove SIM card and wipe with a clean cloth and restart
your terminal before contacting the Technical Helpdesk as per page 15
Remember to complete your Banking Reports at the end of each day. For instructions on
how to carry this out refer to page 12 of the manual.
Keep your terminal away from liquids at all times
If you only use your terminal sporadically throughout the year then ensure you charge your
terminal at least once a month to ensure battery longevity
If you are taking your terminal outside of the UK remember to contact our Customer Service
Department on 0800 54 23 123 at least 4 working days before you travel
If your terminal is lost report it immediately to our Technical Helpdesk and your acquirer or if
stolen please contact the police immediately as well
Remember to check our website as we update it with information regarding known issue,
special offers and new products on a regular basis
Check our website for all the latest news and offers from 123Send
Don’t
Attempt to open (with the exception of the battery cover or SIM cover) or carry out any DIY on
your terminal as it will cause a Security Alert which will render the terminal inoperable and
you may incur additional costs to repair the terminal.
Give out your Supervisor Password to anyone outside of your company
Use if any of the wires are exposed
Swap batteries between terminals, unless instructed to do so by our Technical Helpdesk, as
this could damage the software of the terminals
Attempt to use the SIM card in a mobile phone as you will incur additional costs.
Swap SIM cards and terminals around as this may result in the terminal failing to connect to
the network

19
Terminal Menu Structure
The table below shows the layout of the menu structure of your terminal. To access the first level
options press the ‘Menu’ button once and use the centre button to navigate your way through this
menu. To gain access to each option press ‘OK’. To access some of the options the terminal
requires the Supervisor Password to be entered. The machine will prompt you to enter this when
required.
1st Level 2nd Level 3rd Level 4th Level
Other manuals for EFT930
1
Table of contents
Other Sagem Touch Terminal manuals
