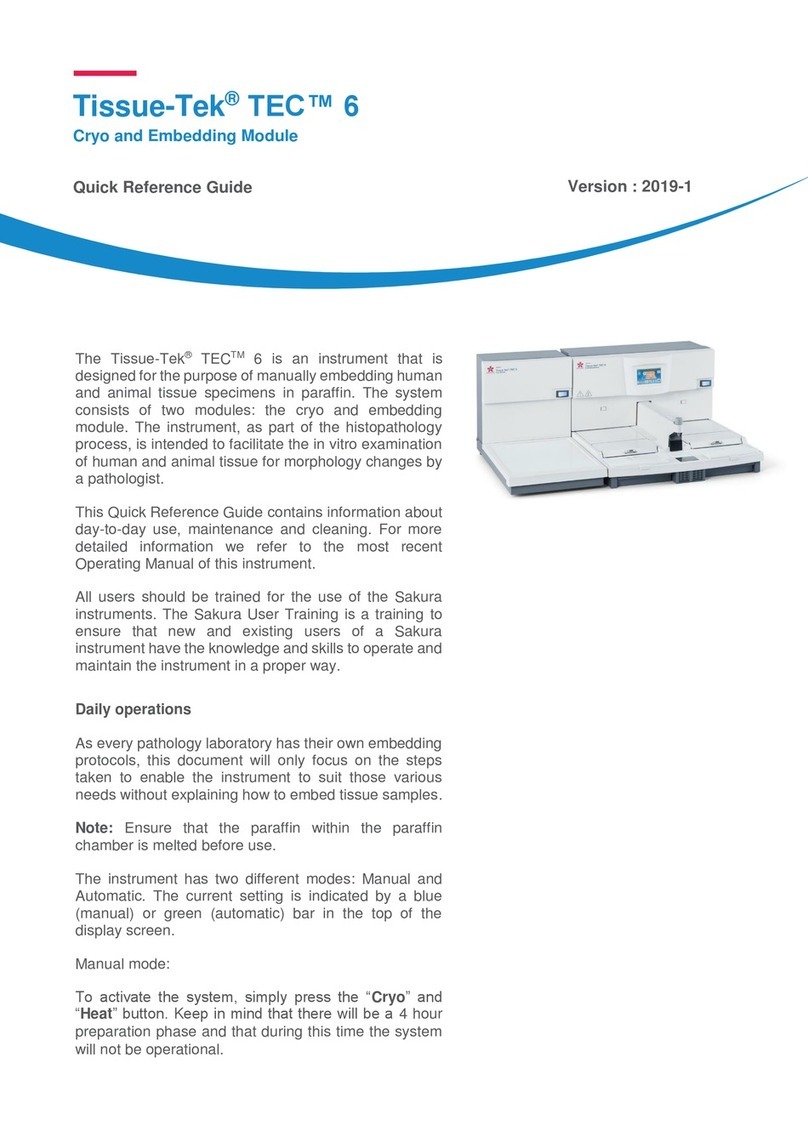
Sakura Tissue-Tek TEC 6 User manual

Tissue-Tek®TEC™6
Cryo Module
Operating Manual
Part Number M01-022E-01
Revision Letter Original
Released 2018-08-03

2
The brand names of products that have been registered or trademarked by and are owned
by Sakura Finetek USA, Inc., Sakura Finetek Japan Co., Ltd., and Sakura Finetek Europe B.V.
appear here:
Sakura
Tissue-Tek
Please visit our website www.sakura-netek.com
Manufactured for:
Sakura Finetek USA, Inc., Torrance, CA 90501 U.S.A.
Sakura Finetek Europe B.V., 2408 AV Alphen aan den Rijn, NL
Sakura Finetek Japan Co., Ltd., Tokyo, 103-0023, Japan
Manufactured by:
Sakura Seiki Co., Ltd., Nagano, 387-0015, Japan
© 2018 Sakura Finetek Japan Co., Ltd.
All Rights Reserved
Printed in Japan.

Table of contents
3
1. Introduction
1.1 Intended Use…………………………………………………………7
1.2 Safety Precautions …………………………………………………8
1.3 Precautions for Use……………………………………………… 13
1.4 Overview of the Instrument …………………………………… 14
1.4.1 Instrument Conguration ……………………………… 14
1.4.2 Specications …………………………………………… 15
1.5 Accessories ……………………………………………………… 16
1.5.1 Standard Accessories (Cryo Module) ………………… 16
1.6 Description of Instrument Parts ……………………………… 17
1.6.1 Instrument (Front Side) ………………………………… 17
1.6.2 Instrument (Rear Side) ………………………………… 17
2. Installation
2.1 Installation ………………………………………………………… 19
2.1.1 General Information on Installing the Instrument…… 19
2.1.2 Installation Environment………………………………… 19
2.1.3 Unpacking Method of the Cryo Module ……………… 20
2.1.4 Installation Method ……………………………………… 22
2.2 Setting Up the Instrument ……………………………………… 25
2.2.1 Temperature Setting for Each Part of the Instrument 25
2.2.2 Setting the Schedule of the Auto Operation (with the
Auto Cryo Mode) ………………………………………… 28
2.3 Operational Overview …………………………………………… 30
2.3.1 Operation Method ……………………………………… 30
3. Explanation of Operations
3.1 Explanation of Operations ……………………………………… 33
3.1.1 Basic Operations ………………………………………… 33
4. Error Log
4.1 Error Log ………………………………………………………… 35
4.1.1 Viewing the Error Log …………………………………… 35
5. Troubleshooting
5.1 Troubleshooting ………………………………………………… 37
5.1.1 Instrument Condition and Solution …………………… 37
5.1.2 Message Window………………………………………… 38
5.1.3 What to Do Following a Power Outage ……………… 44

4
5.2 Cleaning…………………………………………………………… 45
5.2.1 Inspection and Cleaning ………………………………… 45
5.2.2 Cleaning the Cryo Module ……………………………… 45
6. Replacement Parts
6.1 Replacement Parts ……………………………………………… 47
6.1.1 Cryo Module …………………………………………… 47
7. Glossary of Terms
7.1 Glossary of Terms ……………………………………………… 49

Table of contents
5

1. Introduction

1. Introduction
7
1.1 Intended Use
The Tissue-Tek®TEC™6 Cryo Module (hereinafter referred to “the instrument”)
is intended to embed processed human or animal tissue in parafn by cooling
blocks which contain tissues and paraffin on cassettes after dispensing
molten paraffin. This instrument is used to facilitate as part of steps to
produce tissue specimens for histological studies and tests conducted in the
elds of pathology, anatomy, clinical pathology, etc.
The Cryo Module is controlled through the Embedding Module, so it must be
connected with a control cable. This document is the Operating Manual for
the Cryo Module. For more detail on how to operate the instrument, refer to
the Operating Manual for the Tissue-Tek®TEC™6 Embedding Module.
In the case of disposal or maintenance of the instrument, comply with
national, regional and local laws and regulations for equipment containing
hydrouorocarbon to ensure proper management and collection of HFC.
Carefully read this Operating Manual and use the instrument correctly so
that its performance can be utilized fully. Any other use of this instrument is
considered improper operation.

8
1.2 Safety Precautions
Designate the "Instrument Control Manager."
• Operation of the instrument requires expert knowledge of the target
application, method of use, and so on. Therefore, to use the instrument
correctly and safely, designate an "Instrument Control Manager."
• When the instrument is delivered, the Instrument Control Manager should
receive explanation on the handling of the instrument directly from the
staff trained in the instrument or distributor.
Before using the instrument, read the "Safety Precautions" to ensure the
correct use of the instrument.
The cautionary instructions provided herein are intended to ensure that the
instrument will be used safely in a manner preventing operator from injury and
property damage. These instructions provide important safety information
that must be needed at all times.
In this manual, instructions pertaining to different levels of potential hazards
are classified and indicated respectively as danger, warning, caution and
note.
The denition of each hazard is dened below.
DANGER pertains to a potential hazard where failure to observe the specied
instruction may result in death or serious injury of the user or another person.
WARNING pertains to a potential hazard where failure to observe the
specified instruction may result in a serious injury of the user or another
person.
CAUTION pertains to a potential hazard where failure to observe the specied
instruction may result in damage to the instrument or other property, or affect
the process results.
NOTE pertains to an item to pay attention to or other useful information.
DANGER
WARNING
CAUTION

1. Introduction
9
The symbols used on the labels attached to the instrument are explained.
The labels bearing one of the following symbols provide particularly important
information you must know in order to ensure safety of the operator, improve
work efficiency and protect the instrument from damage. Be sure to check
these labels and understand the specified instructions before commencing
your work
A label bearing this symbol specifies an action that must be taken. Always
follow the instruction.
A label bearing this symbol specifies a prohibited item. Always follow the
instruction.
A label bearing this symbol specifies a precaution. Wrong handling against
the instruction may potentially expose the operator to danger or damage the
instrument, so be sure to follow the instruction.
A label bearing this symbol is provided near a high-temperature area. Exercise
caution against burns caused by high temperatures.
If any biologically hazardous substance is handled, follow applicable
regulations or guidelines in your country or region to ensure safety.

10
WARNINGS:
• Follow instructions in this operating manual.
If the instrument is not used properly, it may induce failure of the
instrument, injury to operators, and/or damages to facilities.
• Observe the instructions described in the Operating Manual.
Failure to do so will lead to instrument failure, a risk of injury to the
user and damage to facilities.
• Do not disassemble or modify the instrument.
Do not disassemble or modify the instrument except for the areas
specified in this manual.The instrument may malfunction or cause
accident, thus creating a dangerous situation.
• Do not wet the instrument.
Do not wet the instrument except for the areas specified in this
manual. If the instrument gets wet, electrical current leak may occur
and cause re or electric shock.
• Do not operate the switches with a wet hand.
Failure to observe the instruction may result in electric shock.
• Do not connect/remove the power plug with a wet hand.
Failure to observe the instruction may result in electric shock.
• When connecting/removing the power plug, do so by holding the
plug.
Connecting/removing the power plug by holding parts other than the
plug may cause re or electric shock.
• Do not damage the power cord.
Do not forcibly bend, pull, twist or bundle the power cord. If the
damaged power cord is used, fire or electric shock may occur. If
the power cord or power plug has scratches or other abnormalities,
contact a Sakura instrument distributor or representative.
• Check the power cord and electrical outlet for damage and
accumulated dust periodically.
Failure to do so may cause re depending on the condition.

1. Introduction
11
CAUTIONS:
• Connect the power plug to an electrical outlet with grounding
terminals.
Connect the power plug to a dedicated electrical outlet with
grounding bar. If the power plug is not grounded, electric shock may
result.
• Use the supplied power cord.
If the supplied power cord is not used, electric shock or failure may
result. In particular, use of a power cord of lower capacity may cause
re or electric shock.
• Turn off the power before cleaning the instrument.
Unless otherwise instructed in this document, turn off the power
before cleaning the instrument. If the instrument is cleaned while the
power is still on, an accident may occur.
• Turn off the power if the instrument behaves abnormally.
Should you notice the instrument giving off a foul smell or abnormal
noise, or otherwise behaving abnormally, remove the power plug and
contact a Sakura instrument distributor or representative.
• Do not remove the warning/caution labels.
Do not remove the warning/caution labels attached to the instrument.
Without these labels, the operators cannot be reminded of the
necessary warning/cautionary information in the day-to-day handling
of the instrument, which may result in unexpected problems.
• Perform periodic inspection of the instrument every 6 months.
Perform periodic inspection of the instrument every 6 months to
ensure safe use of the instrument and maintain its performance.
For details on periodic inspection, contact a Sakura instrument
distributor or representative.
• When moving the instrument, hold it on each side or the back side.
When moving the instrument, hold it on each side or the back side.
Also, two persons should work together to carry the instrument,
because the Cryo Module weighs approx. 22 kg.
*Do not hold the Cryo Module with your hands on the front side.
Doing so may damage the resin part and cause injury or the
instrument to fall.

12
• Precautions when installing the instrument (Installation)
Do not put down the instrument in an unstable place or on a oor or
surface with insufcient strength.
• How to remove dew condensation water.
Remove dew condensation on the cooling plate before dew
condensation water flows out of the frame. (See 5.2.2 Cleaning the
Cryo Module.)
• Stay away from the instrument during earthquake.
The instrument may fall over and cause injury.

1. Introduction
13
1.3 Precautions for Use
CAUTIONS:
• Precautions when installing the instrument (installation)
Do not put down the instrument in an unstable place or on a bench or
surface with insufcient strength. Doing so may cause injury. Install
the instrument in a location meeting the installation conditions. Dew
condensation, etc. may cause malfunction. (See 2.1.2 Installation
Environment)
• Precautions when cleaning (Caution for chemical agent)
When cleaning, do not use chemical agents other than those
specied. Unauthorized chemical agents may damage the instrument
or cause health issues. Also, wear protective gears when cleaning.
• Precautions for infections
When using the instrument in a hospital, be careful not to cause
secondary infections.
• Caution on electromagnetic environment
The instrument is designed to operate in normal electromagnetic
environment. In any other electromagnetic environments, use the
instrument on user’s own responsibility.
• Detaching a plug from an electrical outlet
A power switch of the instrument must be off before pulling a plug.
Precautions for Prevention of Failures
• When cleaning the instrument, do not use any organic solvents
(xylene).
The coatings and materials of the exterior panels may deteriorate.
• Do not put anything on top of the instrument.
Failure or unexpected problems may occur.
• Do not extend the power cord using a different cord, etc.
Connect the instrument power cord directly to an electrical outlet
instead of extending it using a different cord, etc. Especially in
the case of the Cryo Module, if the power cord is extended and
connected, the supply voltage may drop and the compressor may
stop working.
• Do not block the air ventilation panel on the rear side.
Doing so will decrease cooling performance and cause instrument
failure.

14
1.4 Overview of the Instrument
1.4.1 Instrument Conguration
The instrument comprises of the cooling plate that cools/solidifies the
embedded parafn blocks.
CAUTION:
The Cryo Module is controlled by the Embedding Module
which is connected to the Cryo Module by the control cable.
The Cryo Module cannot be used alone.
CAUTION

1. Introduction
15
1.4.2 Specications
General name Parafn-embedded block preparation system
Brand name Tissue-Tek®TEC™6 Cryo Module
Model TEC 6-CM-J0 TEC 6-CM-A1 TEC 6-CM-E2 TEC 6-CM-JC2
Product code 5105 5109 5113 5117
Manufacturing license number 20B2X00014000036 ---
Dimensions 330 (W) × 617 (D) × 377 (H) mm
(Cold plate size:300 (W) × 370 (D))
Weight Approximately 22 kg
Rated power supply 100 VAC 50/60 Hz 3.0 A 115 VAC 60 Hz 2.0 A 230 VAC 50 Hz 1.0 A 230 VAC 50 Hz 1.0 A
Temperature
control
Heated area &
Program-mable range
-10 to 0 °C
Lowest temperature
achievable
-5°C ± 3.5°C or below
(Room temperature of 25°C, with no wind, measured at a center of the cold plate under no loaded environment)
Time to reach at a
setting -5
°C
Within 30min after started to operate
(Room temperature of 25°C, with no wind, measured at a center of the cold plate under no loaded environment)
Safety device
Overcurrent protection (circuit protector)
Overload protection for compressor (overload protection relay)
Detection of fan rotation (built-in fan sensor)
Location of the Instrument Indoor use
Required
facilities
Voltage 100 VAC ±10% 115 VAC ±10% 230 VAC ±10% 230 VAC ±10%
Frequency 50/60 Hz 60 Hz 50 Hz 50 Hz
Capacity 15 A or higher 15 A or higher 10 A or higher 10 A or higher
Operating
environment
Ambient temperature 10 to 35°C
Relative humidity 30 to 85% (non-condensing)
Altitude 2,000 m or lower
Storage
environment
Ambient temperature -10 °C to 60 °C
Relative humidity
30 to 85% (non-condensing)
Overvoltage category II (2)
Transient overvoltage up to the level 1500V
Electromagnetic environment Normal electromagnetic environment
Pollution degree * 2 (*per IEC61010)
Noise* 60 dB or less (A-weighted level) (*per JIS Z8737-2:2000)
Vibration/Drop Vibration test per JIS Z 0200, JIS Z 0232
Refrigerant
Coolant Type
Hydrouorocarbon (HFC)
Coolant No.
HFC-134a
GWP value 1430
Amount 110 g 105 g 105 g 105 g
Regulatory
and
applicable
standards
Law
Pharmaceutical Affairs Law FDA Class1 IVD CE Marking
EMC/LVD/RoHS Directive
CFDA
Electrical safety
evaluation
JIS C 1010-1:2014
JIS C 1010-2-101:2013
UL61010-1; 3rd ed: 2012
CSA-C22.2 No.61010-1-
2012
IEC61010-2-010:2014
IEC61010-2-101:2015
EN 61010-1-2010 GB 4793.1-2007 (IEC61010-
1:2001)
GB 4793.6-2006
(IEC61010-2-010:2005)
YY 0648-2008 (IEC61010-
2-101:2002)
Risk management
JIS T 14971:2012
IEC 62366:2007
---
Medical equipment
software
JIS T 2304:2017 - - -
Quality management
ISO13485:2003 ---
Electro-magnetic
compatibility
JIS C 1806-2-6:2012 - EN 61326-1:2013 GB/T 18268.1-2010
(IEC61326-1:2005)
GB/T 18268.26-2010
(IEC61326-2-6:2005)
Others
- - EN 50581:2012(RoHS) -
(TEC 6-CM-A1) (TEC 6-CM-E2)

16
1.5 Accessories
1.5.1 Standard Accessories (Cryo Module)
Item name Product code Quantity
TEC 6-CM-J0 TEC 6-CM-A1 TEC 6-CM-E2 TEC 6-CM-JC2
[1] Power cord A4010527 1 - - -
A4010539 - 1 - -
A4010535 - - 1 1
[2] Control cable A4120001 1111
Operating Manual - 1111
[1] [2]
[TEC 6-EM-J0]
[TEC 6-CM-E2(JC2)] [TEC 6-CM-A1]

1. Introduction
17
1.6 Description of Instrument Parts
1.6.1 Instrument (Front Side)
[1] Power switch
A switch for the main power supply. The lamp is turned on while power is
supplied.
[2] Cooling plate
A cooling plate that cools/solidies the embedded parafn block.
1.6.2 Instrument (Rear Side)
[1] Power inlet
Connect the power cord here.
[2] Control cable connector
Used to connect to the Embedding Module.
[3] Intake and exhaust openings
Openings of air ventilation for compressor.
[1]
[2]
[1]
[3]
[2]

2. Installation

2. Installation
19
2.1 Installation
2.1.1 General Information on Installing the Instrument
This section provides information on determining a location for and installing
the instrument.
Installation should be performed by trained staff for the instrument. This
instrument must be installed correctly to ensure proper operation and service.
Read this Operating Manual carefully before operating the instrument. Follow
all instructions provided in this document carefully.
CAUTION:
This instrument is a precision instrument and must be
handled with care. If the instrument is handled in a rough
manner or dropped, its internal components may malfunction
or get damaged. Always exercise due care when handling the
instrument.
2.1.2 Installation Environment
Install the instrument in a location meeting the following conditions:
• Free from re or ignition sources nearby
• Not exposed to direct sunlight
• A horizontal level and stable surface area
• Subject to minimum vibration
• Protected from water splashes
• Away from volatile substances or ammable materials
• Away from corrosive chemicals (acids, alkalis, etc.)
• Free from equipment that consumes high voltage or large current
Example) Large refrigerator, ultrasonic cleaner, cooling centrifuge, etc.
• The ambient temperature and humidity meet the following use
environment values:
Ambient temperature: 10 to 35°C
Relative humidity: 30 to 85 % (non-condensing)
CAUTION

20
2.1.3 Unpacking Method of the Cryo Module
How to remove the instrument from the packing box that has been carried
in, and remove the protective materials, is explained in this document. To
perform each work safely and correctly, be sure to follow the procedure
specied herein.
CAUTIONS:
• Confirm before unpacking the instrument, that the packing
materials have not been damaged due to external forces
applied during transportation.
• Unpacking of the instrument should be performed by qualified
service staff.
• The instrument itself weighs approx. 22.0 kg. At least two
people should work together when lifting or moving the
instrument.
• When lifting the instrument, bend your knees fully or
otherwise assume a natural posture.
Unpacking the Instrument
1. Cut the two bands with a cutting knife, etc. and remove the cap.
2. Pull up the top pad to remove.
NOTE:
Remove the top pad while holding down the sleeve.
CAUTION
バンド
キャップ
Cap
Band
天面パッド
スリーブ
Sleeve
Top pad
Other manuals for Tissue-Tek TEC 6
2
This manual suits for next models
1
Table of contents
Other Sakura Control Unit manuals