manuals.online logo
Brands
  1. Home
  2. •
  3. Brands
  4. •
  5. Sam4s
  6. •
  7. Cash Register
  8. •
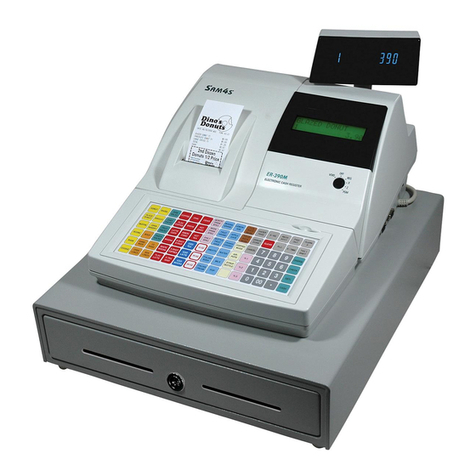
  9. Sam4s ER-900 Series User manual

Sam4s ER-900 Series User manual

Sam4s ER
-
900
-
Quick Setup Guide
Memory Allocation Reset & Confi uration
Note – This reset procedure has been carried out at the factory
and need only be carried out again if the default file sizes needs
increasing or decreasing.
Important:-The following procedure resets the machine back
to factory defaults. This will remove all current program and
sales information.
3
-Insert the C key and turn past PGM to the unmarked S mode.
-Then power OFF/ON whilst holding the key shown below.
The display will show the prompt RAM ALL CLEAR
-
Press the Top Left, Bottom Left, Top Ri ht, Bottom Ri ht keys.
The display will show RAM ALL CLEAR, and an <- for each of the 4
corner key presses.
-Please Wait.. displays whilst determining the om Version
-At the LOAD DEFAULT SET prompt
either Press CASH to load and print the default values.
“
Memory alloc OK “ is shown when completed.
or Continue as shown below to change the values.
- Press QTY/TIME to begin entering new values.
-When prompted with the file name i.e. PLU, GROUP
either Enter the New Value and press CASH
or Press CASH to bypass and keep default values
-At the PRESS CASH TO FINISH prompt press CASH
The process is now complete and the preset values printed.
- Turn to the EG mode, Enter 1 then press Clerk No. to sign on.
Quick Help Function in REG Mode function
The register has located on the keyboard a QUICK HELP key.
This provides Step by Step guides for a number of operations
i.e. Product creation, making a sale, taking a report etc.
-Ensure a Clerk is signed on
-Press the QUICK HELP key and the list of options is printed.
-Enter the Option number i.e. 2
-Once done either enter another number or press CLEAR
Note :- The programming manual provides additional setup information
Receipt Lo o
The following shows how to program the eceipt logo messages.
-Insert the C key and turn to the PGM mode
-Enter 700 and press the SUBTOTAL key
-Enter the line number*. Then press the QTY/TIME key
*Lines 1 – 6 for header or 7 - 12 for footer text
-Type in the text using the alpha layout and press the SUBTOTAL key
The entered logo message text is printed
Repeat – Enter the line number, then Qty/Time then text and then Subtotal
- Press CASH to finish and return to EG mode
Note :- For bitmap image printing please refer to the manual, or press the
help key for instructions on printing 1 of 20 preset images.
Product Creation
New items can be created in EG as shown opposite and PGM as below.
Namin Products
-Insert the C key and turn to the PGM mode
-Enter 300 and press the SUBTOTAL key
-Select the product by either, Pressing the item key, or Entering the
code number and Pressing the PLU No Key.
(or by scanning the item).
-Type in the Name using the Alpha layout and press the QTY/TIME key
Repeat – Select the item, enter the text, then press the Qty/Time key.
- Press CASH to finish and return to EG mode
Product Pricin
-Insert the C key and turn to the PGM mode
-Enter 200 and press the SUBTOTAL key
-Select the product by either, Pressing the item key, or Entering the
code number and pressing the PLU No Key.
(or by scanning the item).
-Type in Price 1 without a decimal point and press the QTY/TIME key
Type in Price 2 without a decimal point and press the QTY/TIME key
*Price 2 is optional as the register can be set with 1 price.
Repeat – Select the item, enter the price (s), then the Qty/Time key.
- Press CASH to finish and return to EG mode
Note :- Price functions can be set to sell at another price if the current price
is 0. Also the sale of 0 price products can be prevented as per the manual.
Product Groupin
Linkin Products to Groups
-Insert the C key and turn to the PGM mode
-Enter 150 and press the SUBTOTAL key
-Select the product by either, Pressing the item key, or Entering the
code number and pressing the PLU No Key.
(or by scanning the item).
For a range of products, select both the first then the last item.
-Enter the Sales & Printer Group i.e. 1 and press the QTY/TIME key
Repeat – Select the item, enter the group then press the Qty/Time key.
- Press CASH to finish and return to EG mode
Namin Groups
-Insert the C key and turn to the PGM mode
-Enter 910 and press the SUBTOTAL key
-Enter the Group Number and press the QTY/TIME key
-Type in the Name using the alpha layout and press the SUBTOTAL key
Repeat – Enter the Group No., press Qty/Time, enter name then Subtotal
- Press CASH to finish and return to EG mode
Creatin the Products in REG – Short Method
This shows the procedure for item creation in EG mode, with
price entry and automatic naming from a keyboard item.
-Turn the key to the REG mode.
Enter the PLU code and press the PLU No Key or Scan the item.
-
At NOT FOUND Prompt. Enter the price without a decimal point
- Press the key on the keyboard for item name and group setting.
-The item is now sold, and the sale can continue
Creatin the Products in REG – Detailed Method
The following is a more detailed item creation in EG mode as
an alternative method to the above.
(This requires the following
setup to create a Not Found Key which can be used)
Settin up the Not Found function
- Insert the C key and turn past PGM to unmarked S mode.
- Enter 70 then the SUBTOTAL key.
- Enter 231 and press a new Not Found key then press CASH
- Turn to PGM then enter 70 and press the SUBTOTAL key
- Enter 5105 and press the New Not Found key, then press CASH
- Enter 30 then the SUBTOTAL key. 38 then press QTY/TIME
- Enter 1 then the SUBTOTAL key, press CASH and return to EG
Note :- enter 0 as above to return not found to the short method.
Usin the Not Found function
-Turn the key to the REG mode.
Enter the PLU code and press the PLU No key or Scan the item
-
At the NOT FOUND error press the new NOT FOUND Key
-At the ENTER PRICE 1 QTY/TIME enter the price with no
decimal point then press the QTY/TIME key
(repeat for price 2)
- At the ENTER PLU NAME prompt
either Press QTY/TIME to automatically create the name
from the group number to be entered next
or Type in Text required and press the QTY/TIME key
- At the GROUP prompt enter the Group No. and press QTY/TIME
- The product is programmed ready to sell now or later
Note for such settings as manager control of the key see the manual.
Usin Clerk Interrupt & Check Trackin
It is possible to save a transaction either for a clerk or a check
For Clerk interrupt, the clerk would sign on, make the sales as normal
then sign off and the sale will be automatically stored for recall when
the clerk signs back on. For Checks, the operation is as follows. :-
Openin
- Ensure a Clerk is signed on.
- Enter the Number and press the CHECK NO. key
- Sell the products as required.
- Press SERVICE to store the balance
(or select payment)
Billin
-Ensure a Clerk is signed on.
-Enter the Number and press the CHECK NO. key
-Press the PRINT CHECK# key to produce the ticket
Note :- For adding checks together refer to the operation manual
Backin Up Pro ram To SD Card
The files shown are as default, backed up on to the card in the
folder \E 900\PgmBackup\Backup
PLU / Mix and Match Group Tax System Options
Print Options Function Status Clerks Financial / Clerk Text
Logo Stock Macro Misc & Ports
- The SD slot is near to the receipt roll, secured with a screw
- Insert a formatted
(FAT32)
SD card into the slot
- Insert the C key and turn past PGM to the unmarked S mode.
- Enter 100 then press the SUBTOTAL key
- Once copied, the successful filenames are printed on the receipt.
- Then return to the EG Mode
Note: - The default store name of \backup (without spaces) can be
changed as shown in the manual
Restorin Pro ram From SD Card
The files shown are the program files, stored on to the card in the
folder \E 900\PgmBackup\Backup. The program should only be
restored into a machine with the same memory allocation settings.
To print the memory allocation; in S Mode, enter 60 subtotal
*Warnin this procedure will overwrite pre-existing data
PLU / Mix and Match Group Tax System Options
Print Options Function Status Clerks Financial / Clerk Text
Logo Stock Macro Misc & Ports
- The SD slot is next to the receipt roll, secured with a screw
- Insert a formatted
(FAT32)
SD card into the slot
- Insert the C key and turn past PGM to the unmarked S mode.
- Enter 110 then press the SUBTOTAL key
- Once copied, the successful filenames are printed on the receipt.
- Then return to the EG Mode
Note: - The default store name of \backup (without spaces) can be
changed as shown in the manual
Savin Sales Total to SD Card
The files shown are as default backed up on to the card in the
folder \E 900\CSV Backup\Backup\Date\Time
CLK Time Fin & VID MnM
Day Grp PLU STK
T N EJ MIN Tbl
- The SD slot is next to the receipt roll, secured with a screw
- Insert a formatted
(FAT32)
SD card into the slot
- Insert the C key and turn to the X position
- Enter 101 then Press the SUBTOTAL key to save the files
- When Finish is displayed return to the EG mode
Note: - There is a EC Service task to reset all sales totals in S Mode using
20 SUBTOTAL then QTY/TIME, CASH
(or 30 Subtotal for GT’s)
Settin up a Kitchen Printer
Sales orders can be printed on an internal or external printer. The
products are linked to Groups
(as shown previously)
These groups
are then used to choose which items are to print on the ticket.
Settin the Groups to Print
The items are linked to groups (see previously) i.e. Food, Specials
etc. These groups are then set as Kitchen Printer.
- Insert the C key and turn to the PGM mode
- Enter 900 and press the SUBTOTAL key
- Enter the Group No. i.e 1,2 and press QTY/TIME
- Enter the answer (see table) i.e. 2100 then press SUBTOTAL
Answer
Printer
Answer
Pr
int
2100
eceipt Printer
2200
Com Port 1
2400
Com Port 2 Printer
Repeat Group No then Qty/Time, the answer then press the Subtotal key.
-Press CASH to finish and return to EG mode
Settin a Communications Port Printer
The following defines which of the communication ports is to work
with an external printer. (
Nothing is required to be set for eceipt Print KP).
Note :- The required wiring is outlined below.
- Insert the C key and turn past PGM to unmarked S mode.
- Enter either 80 for port 1 or 81 for port 2 connection
- Press the SUBTOTAL key
- Enter the Option number and press QTY/TIME
- Enter the Answer as per the table below and press CASH key
E.g. to set port 1 as baud rate 19,200 enter 80 SUBTOTAL
then 1 QTY/TIME then 4 CASH and CASH to finish.
Note :- The current printer baud rate can be found by powering off/on
the printer whilst depressing the feed key (
power off afterwards).
Repeat Option No. Qty/Time, answer then the CASH key.
- Set all options, then press CASH and return to EG mode
Note :- The wiring used would be as shown below
ECR
C
onnection
Printer
3
3
2
2
6+8
20
4
6
5
7
Option
Answer
Option
Answer
1
Baud Rate Speed
0=9600 4=19,200
5=38,400 6=57,600
7=115,200
11
Printer Type
2=Bixolon S P2xx
4=Bixolon S P350
& Sam4s Ellix20
5 Device
4 – emote Printer 2,3,4 0 –
not used
Settin Up a Barcode Scanner
A serial barcode Scanner can be connected for the creation and sale of
EAN 8, 13 and 02,21 etc Price Inclusive codes
(see Manual)
Settin an External Scanner Port
- Ensure the Scanner is connected to the coms port and the
supplied Sam4s Scanner setup sheet has been scanned, and
a note made of the baud rate, parity and stop bit settings
- Insert the C key and turn past PGM to unmarked S mode.
- Enter either 80 for port 1 or 81 for port 2 connection
- Press the SUBTOTAL key
- Enter the Option number from below i.e. 1 to set Baud ate
- Press the QTY/TIME key
- Enter the Answer i.e. 0 for 9600 baud and press CASH key
Repeat Option then Qty/Time key, Answer then the Cash key.
- Set all options, then press CASH and return to EG MODE
Option
Answer
Option
Answer
1
Baud Rate
Speed
0=9600 2=2400
3=4800
2 Parity 0=None
1=Odd 2= Even
3 Stop bits -
0=1 1=None
5 Device –
6 - Scanner
Connectin a PC - SERAIL
The EC can connect to the PC using various packages. E.g.
The Sam4s Utility which allows the program to be Uploaded
from the EC edited then Download back to the EC . There
is also control for sales reporting and eceipt bitmap images.
- Insert the C key and turn past PGM to the unmarked S mode.
- Enter either 80 for port 1 or 81 for port 2 connection
- Press the SUBTOTAL key
- Enter the Option number and press QTY/TIME
- Enter the Answer as table below and press the CASH key
Repeat Option No. Qty/Time, answer then the CASH key.
- Set all options, then press CASH and return to EG mode
Option
Answer
Option
Answer
5
Device
1 – PC Connection
1
*
9600
Default
Baud Rate Speed
0=9600 4=19,200
5=38,400 6=57,600
7=115,200
2,3,4 0 – Not Used
Note :- The wiring used would be as shown below
ECR Connection PC
2 3
3 2
4 6
6 4
5 5
7 8
8 7
Important:-
Ensure any
USB to serial convertor
used is supplier
approved
Sam4s ER-900 - Quick Setup Guide

Other manuals for ER-900 Series

9

Other Sam4s Cash Register manuals

Sam4s ER-920 Owner's manual

Sam4s

Sam4s ER-920 Owner's manual

Sam4s ER-430M Troubleshooting guide

Sam4s

Sam4s ER-430M Troubleshooting guide

Sam4s ER-600 User manual

Sam4s

Sam4s ER-600 User manual

Sam4s ER-380 Troubleshooting guide

Sam4s

Sam4s ER-380 Troubleshooting guide

Sam4s ER-230JB Owner's manual

Sam4s

Sam4s ER-230JB Owner's manual

Sam4s ER-380M User manual

Sam4s

Sam4s ER-380M User manual

Sam4s ER-230 Series Troubleshooting guide

Sam4s

Sam4s ER-230 Series Troubleshooting guide

Sam4s ER-650 User manual

Sam4s

Sam4s ER-650 User manual

Sam4s ER-655II User manual

Sam4s

Sam4s ER-655II User manual

Sam4s ER-180 User manual

Sam4s

Sam4s ER-180 User manual

Sam4s ER-900 Series Troubleshooting guide

Sam4s

Sam4s ER-900 Series Troubleshooting guide

Sam4s ER-390M Troubleshooting guide

Sam4s

Sam4s ER-390M Troubleshooting guide

Sam4s ER-180T Owner's manual

Sam4s

Sam4s ER-180T Owner's manual

Sam4s ER-230 Series Troubleshooting guide

Sam4s

Sam4s ER-230 Series Troubleshooting guide

Sam4s NR-510B Owner's manual

Sam4s

Sam4s NR-510B Owner's manual

Sam4s ER-5200 User manual

Sam4s

Sam4s ER-5200 User manual

Sam4s ER-180T User manual

Sam4s

Sam4s ER-180T User manual

Sam4s ER-260EJ Owner's manual

Sam4s

Sam4s ER-260EJ Owner's manual

Sam4s ER-900 Series User manual

Sam4s

Sam4s ER-900 Series User manual

Sam4s ER-285M User manual

Sam4s

Sam4s ER-285M User manual

Sam4s ER-380 Troubleshooting guide

Sam4s

Sam4s ER-380 Troubleshooting guide

Sam4s ER-260EJ Owner's manual

Sam4s

Sam4s ER-260EJ Owner's manual

Sam4s ER-180T Owner's manual

Sam4s

Sam4s ER-180T Owner's manual

Sam4s ER-5100? SERIES User manual

Sam4s

Sam4s ER-5100? SERIES User manual

Popular Cash Register manuals by other brands

Sharp XE-A407 instruction manual

Sharp

Sharp XE-A407 instruction manual

Sharp XE-A301 instruction manual

Sharp

Sharp XE-A301 instruction manual

Uniwell UN-1360 Operation manual

Uniwell

Uniwell UN-1360 Operation manual

Sharp XE-A202 - Electronic Cash Register Quick setup

Sharp

Sharp XE-A202 - Electronic Cash Register Quick setup

Wincor Nixdorf BA63G product manual

Wincor Nixdorf

Wincor Nixdorf BA63G product manual

Sharp XE-A307 user manual

Sharp

Sharp XE-A307 user manual

Geller PZ-1 Quick setup guide

Geller

Geller PZ-1 Quick setup guide

Sharp XE-A107 Operation/reference guide

Sharp

Sharp XE-A107 Operation/reference guide

Casio PCR-T2100 user manual

Casio

Casio PCR-T2100 user manual

Sharp ER-A570 Programming manual

Sharp

Sharp ER-A570 Programming manual

Sharp XE-A113 instruction manual

Sharp

Sharp XE-A113 instruction manual

Casio SE-S10 user manual

Casio

Casio SE-S10 user manual

Nexa NE-200 manual

Nexa

Nexa NE-200 manual

ELCOM Euro-1000M user manual

ELCOM

ELCOM Euro-1000M user manual

Casio CE-250 Operator's instruction manual

Casio

Casio CE-250 Operator's instruction manual
Datecs MP-5000 user manual

Datecs

Datecs MP-5000 user manual

Vectron POS Vario user manual

Vectron

Vectron POS Vario user manual
Royal 110cx Setup instructions

Royal

Royal 110cx Setup instructions

manuals.online logo
manuals.online logoBrands
  • About & Mission
  • Contact us
  • Privacy Policy
  • Terms and Conditions

Copyright 2025 Manuals.Online. All Rights Reserved.